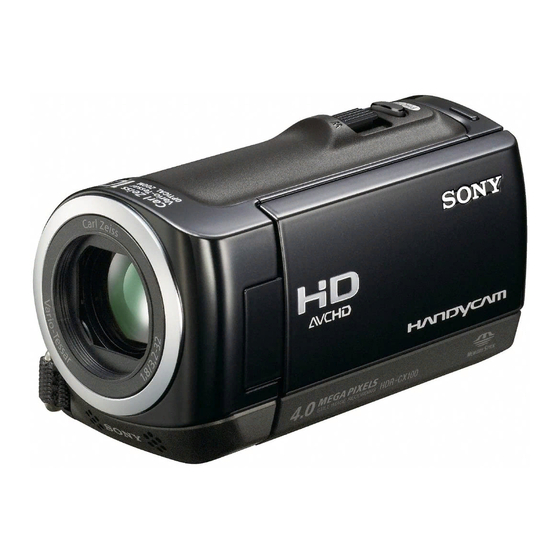
Sony Handycam HDR-CX100 Operating Manual
Digital hd video camera recorder
Hide thumbs
Also See for Handycam HDR-CX100:
- User manual (113 pages) ,
- Operation manual (93 pages) ,
- Service manual (87 pages)

Related Manuals for Sony Handycam HDR-CX100


Summary of Contents for Sony Handycam HDR-CX100
- Page 1 4-129-506-11(1) HDR-CX100 Digital HD Video Camera Recorder Operating Guide Guía de operaciones 2009 Sony Corporation ...
- Page 2 Record the serial number operating and maintenance in the space provided below. Refer to these (servicing) instructions in numbers whenever you call upon your Sony the literature accompanying dealer regarding this product. the appliance. Model No. HDR-CX100 Serial No.
-
Page 3: Important Safety Instructions
IMPORTANT SAFETY INSTRUCTIONS SAVE THESE INSTRUCTIONS. DANGER - TO REDUCE THE RISK OF FIRE OR ELECTRIC SHOCK, CAREFULLY FOLLOW THESE INSTRUCTIONS. Read these instructions. Keep these instructions. Heed all warnings. Follow all instructions. Do not use this apparatus near water. ... - Page 4 Representative plug of power supply cord of countries/regions around the world. A Type B Type BF Type B3 Type C Type SE Type O Type (American (British Type) (British Type) (British Type) (CEE Type) (CEE Type) (Ocean Type) Type) The representative supply voltage and plug type are described in this chart. Depend on an area, Different type of plug and supply voltage are used.
- Page 5 Countries/regions Voltage Frequency (Hz) Plug type Vietnam Oceania Countries/regions Voltage Frequency (Hz) Plug type Australia New Zealand 230/240 North America Countries/regions Voltage Frequency (Hz) Plug type Canada Central America Countries/regions Voltage Frequency (Hz) Plug type Bahamas 120/240 Costa Rica Cuba 110/220 Dominican (rep) El Salvador...
-
Page 6: Read This First
Be sure to charge the battery pack using a Caution: Do not handle genuine Sony battery charger or a device that damaged or leaking Lithium- can charge the battery pack. Ion batteries. Keep the battery pack out of the reach of small ... -
Page 7: Declaration Of Conformity
If you have any questions about this harmful interference to radio or television product, you may call: reception, which can be determined by Sony Customer Information Center 1-800- turning the equipment off and on, the 222-SONY (7669). user is encouraged to try to correct the... -
Page 8: Using The Camcorder
cannot be provided, even if recording or Notes on use playback is not possible due to a malfunction of the camcorder, recording media, etc. Using the camcorder TV color systems differ depending on the The camcorder is not dustproofed, dripproofed ... -
Page 9: About This Manual
About this manual The images of the LCD screen used in this manual for illustration purposes are captured using a digital still camera, and therefore may appear different from the actual images of the LCD screen. In this Operating Guide, the internal memory ... -
Page 10: Operation Flow
Operation flow Recording movies and photos (p. 17) In the default settings, movies and photos are recorded with high definition image quality (HD) on the internal memory. You can change the recording media selected, and the image quality of movies (p. 43, 48). Playing movies and photos (p. -
Page 11: Table Of Contents
Table of contents IMPORTANT SAFETY INSTRUCTIONS............. 3 Read this first. - Page 12 Saving images with a DVD writer, recorder Selecting the method for creating a disc (DVD writer/recorder)......38 Creating a high definition image quality (HD) disc with a DVD writer, etc.
-
Page 13: Getting Started
Getting started Step 1: Charging the battery pack CHG (charge) lamp DC plug DC IN jack AC Adaptor To the wall outlet Battery pack Power cord (wall socket) (Mains lead) You can charge the “InfoLITHIUM” battery pack (H series) after attaching it to your camcorder. -
Page 14: Charging The Battery Pack Abroad
See page 57 on charging, recording and playing time. When your camcorder is on, you can check the approximate amount of remaining battery power with the remaining battery indicator at the upper left on the LCD screen. To remove the battery pack Close the LCD screen. -
Page 15: Step 2: Turning The Power On, And Setting The Date And Time
Step 2: Turning the power on, and setting the date and time Open the LCD screen of your camcorder. Your camcorder is turned on. To turn on your camcorder when the LCD screen is open, press POWER. POWER button (Movie): To record movies (Photo): To record photos Select the desired geographical area with... -
Page 16: Changing The Language Setting
To turn off the power Close the LCD screen. The (Movie) lamp flashes for a few seconds and the power is turned off. POWER button You can turn off your camcorder also by pressing POWER. When [POWER ON BY LCD] is set to [OFF], turn off your camcorder by pressing POWER (p. 49). ... -
Page 17: Recording
Recording Recording Recording movies In the default setting, movies are recorded with high definition image quality (HD) on the internal memory (p. 43, 48). Fasten the grip belt. Open the lens cover. Open the LCD screen of your camcorder. Your camcorder is turned on. - Page 18 Press START/STOP to start recording. Power zoom lever Wide Telephoto [STBY] [REC] To stop recording, press START/STOP again. You can magnify images with the power zoom lever. Move the power zoom lever slightly for a slower zoom. Move it further for a faster zoom. If you close the LCD screen during recording, the camcorder stops recording.
- Page 19 You can increase the zooming level by using the digital zoom. Set the zooming level by touching (HOME) (SETTINGS) [MOVIE SETTINGS] [DIGITAL ZOOM] the desired setting When viewing movies on an x.v.Color-compliant TV, record movies with the x.v.Color function. Touch ...
-
Page 20: Recording And Playing Movies And Photos Easily
Press PHOTO lightly to adjust the focus, then press it fully. Power zoom lever Wide Telephoto Flashes Lights up When disappears, the photo is recorded. Move the power zoom lever slightly for a slower zoom. Move it further for a faster zoom. ... -
Page 21: Playback
Playback Playback .on.the.camcorder In the default setting, movies and photos on the internal memory are played (p. 43, 48). Playing movies Open the LCD screen of your camcorder. Your camcorder is turned on. To turn on your camcorder when the LCD screen is already open, press POWER (p. 15). ... - Page 22 Your camcorder starts playing the selected movie. Previous Next Volume adjustment OPTION MENU To stop To fast-forward To fast-reverse To pause/play When playback from the selected movie reaches the last movie, the screen returns to the VISUAL INDEX screen. Touch during pause to play back movies slowly.
- Page 23 Your camcorder displays the selected photo. Previous To start/stop slide show Next To the VISUAL OPTION MENU INDEX screen You can zoom in the photo by moving the power zoom lever while viewing photos (PB ZOOM). If you touch a point in the PB ZOOM frame, the point comes to the center in the frame. When viewing photos recorded on “Memory Stick PRO Duo”...
-
Page 24: Playing Images On A Tv
Playing images on a TV Connection methods and the image quality (high definition (HD) or standard definition (SD)) viewed on the TV screen differ depending on what type of TV is connected, and the connectors used. You can connect your camcorder to the TV easily following the instructions of [TV CONNECT Guide]. - Page 25 On “Photo TV HD” This camcorder is compatible with the “Photo TV HD” standard. “Photo TV HD” allows for highly-detailed, photo-like depiction of subtle textures and colors. By connecting Sony’s Photo TV HD-compatible devices using an HDMI cable or the component A/V cable , a whole new world of photos can be enjoyed in breathtaking full HD quality.
-
Page 26: Saving Movies And Photos With A Computer
Saving movies and photos with a computer Preparing a computer (Windows) Creating an Blu-ray disc/AVCHD format disc/DVD-video (Intel Pentium 4, 2.8 GHz You can perform following operations using or faster, is required when creating a DVD “PMB (Picture Motion Browser). ” video by converting high definition image Importing images to a computer quality (HD) to standard definition image... -
Page 27: When Using A Macintosh
If the screen does not appear, click computer connected to your camcorder, [Start] [Computer] (in Windows see the following website. XP, [My Computer]), then double-click http://guide.d-imaging.sony.co.jp/mac/ [SONYPICTUTIL (E:)] (CD-ROM). ms/us/ Click [Install]. Step 2 Installing the supplied software “PMB”... - Page 28 To disconnect your camcorder from the computer Click the icon at the bottom right of the desktop of the computer [Safely remove USB Click [Continue] on the computer Mass Storage Device]. screen. Read the terms of the license agreement carefully.
-
Page 29: Selecting The Method For Creating A Disc (Computer)
Creating a Blu-ray disc with high definition image quality (HD) (p. 35) AVCHD format playback devices Creating a disc with one touch (One Touch (a Sony Blu-ray disc player, Disc Burn) (p. 31) PLAYSTATION 3, etc.) Importing movies and photos to a computer (Easy PC Back-up) (p. - Page 30 Discs you can use with “PMB” You can use 12 cm discs of following type with “PMB. ” For Blu-ray disc, see page 35. Disc type Features DVD-R/DVD+R/DVD+R DL Unrewritable DVD-RW/DVD+RW Rewritable Always maintain your PLAYSTATION 3 to use the latest version of the PLAYSTATION ...
-
Page 31: Creating A Disc With One Touch (One Touch Disc Burn)
Creating a disc with one touch (One Touch Disc Burn) Turn on your camcorder, and You can save movies and photos on a disc connect it to the computer using by simply pressing (DISC BURN) the USB cable (supplied). on your camcorder. Movies and photos recorded on your camcorder that have not yet been saved with One Touch Disc Burn can be saved on a disc automatically. -
Page 32: Importing Movies And Photos To A Computer (Easy Pc Back-Up)
Importing movies and photos to a computer (Easy PC Back-up) Movies and photos recorded on your camcorder that have not yet been saved with Easy PC Back-up can be imported to a computer automatically. Turn on the computer beforehand. Connect your camcorder to the wall outlet (wall ... -
Page 33: Starting Pmb (Picture Motion Browser)
If the icon is not displayed on the computer screen, click [Start] [All Programs] [Sony Picture Utility] [PMB] to start “PMB. ” You can view, edit, or create discs of movies and photos using “PMB. ”... -
Page 34: Creating A High Definition Image Quality (Hd) Disc
DVD disc (p. 29) is explained. You can play a high definition image quality (HD) disc on AVCHD format playback devices, such as a Sony Blu-ray disc player and a PLAYSTATION 3. You cannot play the disc on The window used to select movies ordinary DVD players (p. -
Page 35: Creating A Blu-Ray Disc
Creating a Blu-ray disc You can create a Blu-ray disc with a high definition image quality (HD) movie previously imported to a computer (p. 32). To create a Blu-ray disc, the BD Add-on Software for “PMB” must be installed. Click [BD Add-on Software] on the installation screen of “PMB, ”... -
Page 36: Ordinary Dvd Players
Click [Folders] or [Calendar] on movies to standard definition image quality (SD) movies. the left side in the window, and Click [Start] [All Programs] [Sony select the folder or date, then Picture Utility] [Video Disc Copier] select the movies and photos. -
Page 37: Editing Movies
Editing movies You can cut out only necessary parts from a movie and save it as another file. Using “PMB, ” select the movie you want to edit, then click [Manipulate] [Video Trimming] on the menu to display the Video Trimming window. See “PMB Guide”... -
Page 38: Saving Images With A Dvd Writer, Recorder
See page 35 to create a Blu-ray disc. Player Choosing a method and disc type AVCHD format playback devices (a Sony Blu-ray disc player, PLAYSTATION 3, etc.) Creating a high definition image quality (HD) disc with a DVD writer, etc. (USB cable connection) (p. -
Page 39: (Usb Cable Connection)
(HD) movies on a disc by connecting your camcorder to disc creation devices, After the operation is completed, such as a Sony DVD writer, with the USB touch [END] [YES] on the cable. Refer also to the instruction manuals camcorder screen. -
Page 40: Creating A Standard Definition Image Quality (Sd) Disc With A Recorder, Etc
You can dub images played back on your camcorder on a disc or video cassette, by connecting your camcorder to a disc recorder or a Sony DVD writer, etc. with the A/V connecting cable. Connect the device in either way of or . Refer also to the instruction manuals supplied with the devices to be connected. -
Page 41: Your Camcorder
A/V connecting cable to the video input jack, and the white (left channel) or the red (right channel) plug to the audio input jack on the device. Sony DVD writer may not be available in some countries/regions. -
Page 42: Making Good Use Of Your Camcorder
Making good use of your camcorder Deleting movies and photos Formatting the recording media You can free media space by deleting Formatting deletes all the movies and movies and photos from recording media. photos to recover recordable free space. Select the recording medium that contains Connect your camcorder to the wall outlet (wall ... -
Page 43: Changing The Recording Media
Changing the recording media You can select the internal memory or Selecting the recording media for “Memory Stick PRO Duo” media as the photos recording, playback, or editing medium on your camcorder. Select the medium to be (HOME) Touch used for movies and photos separately. -
Page 44: Memory Stick Pro Duo" Media
The [Create a new Image Database Inserting “Memory Stick PRO Duo” File.] screen appears when you insert media new “Memory Stick PRO Duo” media Set the recording medium to [MEMORY while the (Movie) lamp is lit. STICK] to record movies and/or photos on “Memory Stick PRO Duo”... -
Page 45: Customizing Your Camcorder With Menus
Customizing your camcorder with menus Menu items are described in more details with Using the HELP function color photos in the “Handycam Handbook” (p. 51). To see the descriptions on the HOME MENU, touch (HELP) on the HOME Using the HOME MENU MENU screen. - Page 46 You cannot use the OPTION MENU during Easy Handycam operation.
- Page 47 List of the HOME MENU (CAMERA) category MOVIE ......... p. 17 PHOTO ........p. 19 SMTH SLW REC ......Records fast moving subjects in slow-motion. (VIEW IMAGES) category VISUAL INDEX ......p. 21 FILM ROLL ......p. 21 FACE........p. 21 PLAYLIST........
- Page 48 DISC BURN ....... p. 31 TV CONNECT Guide ....p. 24 BATTERY INFO ......Displays the battery information. (MANAGE MEDIA) category MOVIE MEDIA SET ....p. 43 PHOTO MEDIA SET ....p. 43 MEDIA INFO ......Displays information on the recording media, such as free space. MEDIA FORMAT .......
- Page 49 BEEP ........p. 15 LCD BRIGHT ..... Adjusts the brightness of the LCD screen. LCD BL LEVEL ....Adjusts the backlight of the LCD screen. LCD COLOR ...... Adjusts the color intensity of the LCD screen. OUTPUT SETTINGS TV TYPE ......p. 25 DISP OUTPUT ....
- Page 50 List of the OPTION MENU The following items are available on the OPTION MENU only. SPOT MTR/FCS....Adjusts the brightness and focus for the seleted subject simultaneously. SPOT METER ....Adjusts the brightness of images to a subject you touch on the screen. SPOT FOCUS ....
-
Page 51: Getting Detailed Information From The "Handycam Handbook
Getting detailed information from the “Handycam To view the “Handycam Handbook, ” Handbook” double-click the short-cut icon on the computer screen. The “Handycam Handbook” is a user guide designed to be read on a computer screen. The functions of your camcorder are described, some of them with color photos. -
Page 52: Additional Information
The recording media is full. Delete in order to investigate the problem. However, unnecessary images (p. 42). your Sony dealer will neither copy nor retain Total number of movie scenes or photos has your data. exceeded the recordable capacity of your See the “Handycam Handbook”... - Page 53 If the problem persists even after you have tried to fix a couple of times, contact The “Memory Stick PRO Duo” media is your Sony dealer or local authorized Sony damaged. Format the “Memory Stick PRO service facility. Duo” media with your camcorder (p. 42).
-
Page 54: Precautions
When you use the LCD checked by a Sony dealer before operating it Cleaning Kit (sold separately), do not apply the any further. -
Page 55: Rechargeable Battery
Handling the camcorder with above When you transfer the camcorder, it is substances on your hands recommended that you perform [ EMPTY] Leaving the casing in contact with rubber or (See “Getting detailed information from the vinyl objects for a long period of time “Handycam Handbook”... -
Page 56: Specifications
Mass (approx.): 170 g (6.0 oz) excluding the [ON], shutter speed 1/30 second) power cord (mains lead) The unique pixel array of Sony’s ClearVid and the image processing system See the label on the AC Adaptor for other (BIONZ) allow still image resolution specifications. - Page 57 The number in ( ) is the minimum recordable power on/off and zooming. time. A Sony “Memory Stick PRO Duo” media is Expected recording time of movies in used. the internal memory (minute) The recordable time may vary depending on ...
- Page 58 Stick” and “MagicGate Memory Stick Duo” are trademarks or registered trademarks of Sony Corporation. “InfoLITHIUM” is a trademark of Sony Corporation. “x.v.Color” is a trademark of Sony Corporation. “BIONZ” is a trademark of Sony Corporation. “BRAVIA” is a trademark of Sony Corporation. ...
-
Page 59: Screen Indicators
Screen indicators Upper left Center Upper right Indicator Meaning LCD backlight off 60min STBY 0:00:14 30min Approximate number of 9999 9999 recordable photos and WHITE 9999 FADER recording media 10 m ? Playback folder Current playing movie or 100/112 photo/Number of total Bottom recorded movies or photos Upper left... -
Page 60: Parts And Controls
Parts and controls Figures in ( ) are reference pages. (DISC BURN) button (31) POWER button (15) DISP (display) button (22) To turn off the backlight of the LCD screen, Lens (Carl Zeiss lens) press and hold DISP down. To turn it on, press ... - Page 61 Power zoom lever (18, 20, 23) PHOTO button (20) MODE button (19) (Movie)/ (Photo) lamps (15) Battery pack (13) CHG (Charge) lamp (13) Speaker DC IN jack (13) A/V Remote Connector (24, 40) ...
-
Page 62: Index
Index Install ..........27 AVCHD........29, 38 Troubleshooting ......52 A/V connecting cable....40 Turning the power on ....15 Language ........16 TV ..........24 TV CONNECT Guide ....24 Battery ..........13 Macintosh ........27 Blu-ray disc ........35 Maintenance ........54 USB .........26, 39 “Memory Stick” media ....44 Using a wall outlet (wall socket) “Memory Stick PRO-HG Duo”... -
Page 64: Lea Este Apartado En Primer Lugar
No la incinere ni la arroje al fuego. No manipule baterías de iones de litio dañadas o que presenten fugas. Asegúrese de cargar la batería con un cargador de baterías original de Sony o con un dispositivo que pueda cargarla. - Page 65 No utilice la videocámara en lugares muy Elementos suministrados ruidosos. Es posible que la videocámara no pueda grabar o reproducir películas y Los números entre ( ) indican la cantidad fotografías. suministrada. Cuando conecte la videocámara a otro Adaptador de alimentación de ca (1) ...
-
Page 66: Acerca De Este Manual
Para evitar que se pierdan sus datos de imagen, Acerca de este manual guarde periódicamente todas las imágenes Las imágenes de la pantalla de cristal líquido grabadas en soportes externos. Se recomienda que se utilizan en este manual con fines guardar los datos de imagen en un disco ilustrativos se tomaron con una cámara digital como, por ejemplo, un DVD-R mediante la... -
Page 67: Flujo De Funcionamiento
Flujo de funcionamiento Grabación de películas y fotografías (pág. 12) De manera predeterminada, las películas y las fotografías se graban con calidad de imagen de alta definición (HD) en la memoria interna. Es posible cambiar el soporte de grabación seleccionado y la ... - Page 68 Índice Lea este apartado en primer lugar..............2 Flujo de funcionamiento..
- Page 69 Almacenamiento de imágenes con una grabadora de DVD Selección del método de creación de un disco (grabadora de DVD)....35 Creación de un disco con calidad de imagen de alta definición (HD) con una grabadora de DVD, etc.
-
Page 70: Procedimientos Iniciales
Procedimientos iniciales Paso 1: Carga de la batería Indicador CHG (carga) Toma de Clavija de cc entrada de cc Adaptador de alimentación de ca Al tomacorriente Cable de alimentación Batería de pared Puede cargar la batería “InfoLITHIUM” (serie H) después de instalarla en la videocámara. No puede conectar ninguna batería “InfoLITHIUM”... -
Page 71: Carga De La Batería En El Extranjero
Para extraer la batería Cierre la pantalla de cristal líquido. Deslice la palanca BATT (liberación de la batería) () y extraiga la batería (). Para usar un tomacorriente de pared como fuente de alimentación Realice las mismas conexiones que en “Paso 1: Carga de la batería”. Notas acerca de la batería y el adaptador de alimentación de ca Cuando extraiga la batería o desconecte el adaptador de alimentación de ca cierre la pantalla de cristal ... -
Page 72: Paso 2: Encendido Y Ajuste De La Fecha Y La Hora
Paso 2: Encendido y ajuste de la fecha y la hora Abra la pantalla de cristal líquido de la videocámara. Se enciende la videocámara. Para encender la videocámara con la pantalla de cristal líquido abierta, presione POWER. Botón POWER (película): para grabar películas (fotografía): para grabar fotos Seleccione la zona geográfica deseada con... -
Page 73: Cambio Del Ajuste De Idioma
(HOME) (AJUSTES) [AJUS.SON./ Para desactivar los pitidos de funcionamiento, toque PANT.] [PITIDO] [DESACTIV.] Para apagar la videocámara Cierre la pantalla de cristal líquido. El indicador (película) parpadea durante varios segundo y se apaga la videocámara. Botón POWER También puede presionar POWER para apagar la videocámara. -
Page 74: Grabación
Grabación Grabación Grabación de películas En el ajuste predeterminado, las películas se graban con calidad de imagen de alta definición (HD) en la memoria interna (pág. 40, 45). Ajuste la correa de sujeción. Abra la tapa del objetivo. ... - Page 75 Palanca del zoom Presione START/STOP para iniciar la grabación. motorizado Gran Telefoto angular [ESPERA] [GRAB.] Para detener la grabación, presione START/STOP de nuevo. Es posible ampliar las imágenes mediante la palanca del zoom motorizado. Mueva la palanca del ...
- Page 76 Si las películas se visualizan en un televisor compatible con x.v.Color, grábelas con la función x.v.Color. (HOME) (AJUSTES) [AJUSTES PEL.CÁM] [X.V.COLOR] [ACTIVADO] Toque . Es posible que sea necesario realizar algunos ajustes en el televisor para visualizar las películas.
- Page 77 Presione PHOTO levemente para ajustar el enfoque y, a continuación, presiónelo completamente. Palanca del zoom motorizado Gran Telefoto angular Parpadea Se enciende Cuando desaparece, se graba la fotografía. Mueva la palanca del zoom motorizado levemente para obtener un zoom más lento. Muévala más ...
-
Page 78: Grabación Y Reproducción De Películas Y Fotografías Con Facilidad
Grabación y reproducción de películas y fotografías con facilidad (funcionamiento en modo Easy Handycam) Simplemente presione EASY. Para cancelar el funcionamiento en modo Easy Handycam presione EASY de nuevo cuando haya terminado de grabar o utilizar el menú. Durante el funcionamiento en modo Easy Handycam, puede ajustar opciones básicas, como cambiar el tamaño de la imagen o eliminar imágenes, entre los elementos de configuración y ajuste. -
Page 79: Reproducción
Reproducción Reproducción .en.la.videocámara De manera predeterminada, se reproducen las películas y fotografías de la memoria interna (pág. 40, 45). Reproducción de películas Abra la pantalla de cristal líquido de la videocámara. Se enciende la videocámara. Para encender la videocámara con la pantalla de cristal líquido abierta, presione POWER (pág. 10). ... - Page 80 La videocámara comienza a reproducir la película seleccionada. Anterior Siguiente Ajuste del volumen OPTION MENU Detención Avance rápido Rebobinado rápido Pausa/reproducción Cuando la reproducción desde la película seleccionada llega a la última película, vuelve a mostrarse la pantalla VISUAL INDEX. Toque durante el modo de pausa para reproducir películas a cámara lenta.
- Page 81 Se muestra la fotografía seleccionada en la videocámara. Inicio/detención de presentación de diapositivas Anterior Ir a la pantalla Siguiente VISUAL INDEX OPTION MENU Para ampliar fotografías, mueva la palanca del zoom motorizado mientras las visualiza (PB ZOOM). Si toca un punto en el marco PB ZOOM, el punto se colocará en el centro del marco. Durante la visualización de las fotografías grabadas en un “Memory Stick PRO Duo”, aparece ...
-
Page 82: Reproducción De Imágenes En Un Televisor
Reproducción de imágenes en un televisor Los métodos de conexión y la calidad de la imagen (alta definición (HD) o definición estándar (SD)) que se visualiza en un televisor depende del tipo de televisor conectado y de los conectores utilizados. Puede conectar la videocámara al televisor fácilmente si sigue las instrucciones de [GUÍA CONEXIÓN TV]. - Page 83 Al conectar dispositivos Sony compatibles con Photo TV HD mediante un cable HDMI o un cable de A/V de componente , es posible disfrutar de todo un mundo nuevo con fotografías que...
-
Page 84: Almacenamiento De Películas Y Fotografías Con Una Computadora
Almacenamiento de películas y fotografías con una computadora Preparación de la computadora (Windows) Intel Pentium 4 a 2,8 GHz o superior (se recomienda Intel Pentium 4 a 3,6 GHz Es posible realizar las siguientes o superior, Intel Pentium D a 2,8 GHz o superior, Intel Core Duo a 1,66 GHz o operaciones mediante “PMB (Picture superior, o Intel Core 2 Duo a 1,66 GHz o... -
Page 85: Si Se Utiliza Una Computadora Macintosh
Coloque el CD-ROM suministrado conectada a la videocámara, visite la en la unidad de disco de la siguiente página web. computadora. http://guide.d-imaging.sony.co.jp/mac/ ms/es/ Aparece la pantalla de instalación. Si no aparece la pantalla, haga clic en [Inicio] [Equipo] (en Windows XP, [Mi PC]) ... - Page 86 Seleccione el idioma en el que Lea detenidamente las desea instalar la aplicación y, condiciones del acuerdo de a continuación, haga clic en licencia. Si está de acuerdo con [Siguiente]. las condiciones, cambie y, a continuación, haga clic en [Siguiente] ...
- Page 87 Para desconectar la videocámara de la computadora Haga clic en el ícono situado en la parte inferior derecha del escritorio de la computadora [Extracción segura de Dispositivo de almacenamiento masivo USB]. Toque [FIN] [SÍ] en la pantalla de la videocámara.
-
Page 88: Selección Del Método De Creación De Un Disco (Computadora)
(HD) (pág. 32) Dispositivos de reproducción en Creación de un disco con un solo toque formato AVCHD (un reproductor (One Touch Disc Burn) (pág. 28) de discos Blu-ray disc de Sony, PLAYSTATION 3, etc.) Importación de películas y fotografías a una computadora (Easy PC Back-up) (pág. - Page 89 Es posible grabar un película con calidad de imagen de definición estándar (SD) convertida de calidad de imagen de alta definición (HD) en soportes DVD como, por ejemplo, discos DVD-R para obtener un disco con calidad de imagen de calidad estándar (SD). Discos que se pueden utilizar con “PMB”...
-
Page 90: Creación De Un Disco Con Un Solo Toque (One Touch Disc Burn)
Creación de un disco con un solo toque (One Touch Disc Burn) Si algún programa que no sea “PMB” se inicia automáticamente, ciérrelo. Es posible guardar películas y fotografías en un disco con solo presionar el botón Encienda la videocámara y (DISC BURN) de la videocámara. -
Page 91: Importación De Películas Y Fotografías A Una Computadora (Easy Pc Back-Up)
Importación de películas y fotografías a una computadora (Easy PC Back-up) En la pantalla de la computadora, haga clic en [Easy PC Back-up] Las películas y fotografías grabadas en [Importar]. la videocámara que todavía no se hayan guardado con Easy PC Back-up se pueden importar en una computadora de forma automática. -
Page 92: Inicio De Pmb (Picture Motion Browser)
Si el ícono no aparece en la pantalla de la guardarán las imágenes. computadora, haga clic en [Inicio] [Todos los programas] [Sony Picture Utility] [PMB] para iniciar “PMB”. Es posible visualizar, editar o crear discos de películas y fotografías mediante “PMB”. -
Page 93: Creación De Un Disco Con Calidad De Imagen De Alta Definición (Hd)
(HD) en dispositivos disco. de reproducción de formato AVCHD como, por Para seleccionar varias películas, mantenga ejemplo, un reproductor de Blu-ray de Sony y presionada la tecla Ctrl y haga clic en las un sistema PLAYSTATION 3. No es posible imágenes en miniatura. -
Page 94: Una Computadora
Para iniciar “Player for AVCHD” haga Complementario de BD para “PMB”. clic en [Inicio] [Todos los programas] Haga clic en [Software Complementario [Sony Picture Utility] [Player for de BD] en la pantalla de instalación de AVCHD]. “PMB”, e instale este complemento de Para obtener más información sobre el... -
Page 95: Pueda Reproducir En Reproductores De Dvd Normales
Siga las instrucciones en pantalla iniciar “PMB”. para crear un disco. Para iniciar “PMB”, también puede hacer clic en [Inicio] [Todos los programas] La creación de un disco puede tardar [Sony Picture Utility] [PMB]. bastante. -
Page 96: Copia De Un Disco
(SD). fotograma]. Para obtener más Haga clic en [Inicio] [Todos los información sobre el funcionamiento, programas] [Sony Picture Utility] consulte la “Guía de PMB” (pág. 30). [Video Disc Copier] para iniciar el software. Para obtener más información... -
Page 97: Almacenamiento De Imágenes Con Una Grabadora De Dvd
Reproductor Selección del método y el tipo de disco Dispositivos de reproducción en formato AVCHD (un reproductor de discos Blu-ray disc de Sony, Creación de un disco con calidad de PLAYSTATION 3, etc.) imagen de alta definición (HD) con una grabadora de DVD, etc. -
Page 98: Grabadora De Dvd, Etc. (Conexión Del Cable Usb)
Al finalizar la operación, toque grabadora de DVD de Sony con el cable [FIN] [SÍ] en la pantalla de la USB. videocámara. -
Page 99: Grabadora, Etc. (Conexión Del Cable De A/V)
DVD de Sony, etc. mediante el cable de conexión de A/V. Conecte el dispositivo de la manera o . Consulte además el manual... - Page 100 (canal derecho) en la toma de entrada de audio del dispositivo. Inicie la reproducción en la Es posible que la grabadora de DVD de Sony no videocámara y grabe en el esté disponible en algunos países o regiones.
-
Page 101: Utilización Óptima De La Videocámara
Utilización óptima de la videocámara Eliminación de películas y fotografías Formateo del soporte de Puede liberar espacio en el soporte de grabación grabación mediante la eliminación de El formateo borra todas las películas y películas y fotografías almacenadas. fotografías para recuperar espacio libre Seleccione el soporte de grabación que grabable. -
Page 102: Cambio Del Soporte De Grabación
Cambio del soporte de grabación Puede seleccionar la memoria interna o el Selección del soporte de “Memory Stick PRO Duo” como el soporte grabación para las fotos de grabación, reproducción o edición en la videocámara. Seleccione el soporte (HOME) Toque que desea usar para películas y fotos por (GESTIONAR SOPORTE) ... -
Page 103: Pro Duo
Tipos de “Memory Stick” que puede usar con la videocámara Toque [SÍ]. Para grabar películas, se recomienda utilizar Para grabar solamente fotografías en un un “Memory Stick PRO Duo” de 1 GB o mayor “Memory Stick PRO Duo”, toque [NO]. capacidad que presente la marca: (“Memory Stick ... -
Page 104: Personalización De La Videocámara A Través De Los Menús
Personalización de la videocámara a través de los menús No puede seleccionar los elementos o ajustes que aparecen atenuados. Los elementos de menú se describen detalladamente con fotografías en color en la “Guía práctica de Handycam” (pág. 48). Uso de la función HELP Uso del HOME MENU... - Page 105 Cuando finalice el ajuste, toque Si el elemento que desea no se muestra en la pantalla, toque otra ficha. (Es posible que no haya fichas). No se puede utilizar el OPTION MENU durante el funcionamiento en modo Easy Handycam.
- Page 106 Lista del HOME MENU Categoría (TOMA DE IMÁGENES) PELÍCULA ........pág. 12 FOTO ..........pág. 14 GR.LEN.UNIF......Permite grabar motivos que se mueven a gran velocidad a cámara lenta. Categoría (VISUALIZAR IMÁGENES) VISUAL INDEX ......pág. 17 ROLLO PELÍC....... pág. 17 CARA ........
- Page 107 CONEXIÓN USB ..Permite conectar el “Memory Stick PRO Duo” mediante USB. GRABAR EN DISCO ..pág. 28 GUÍA CONEXIÓN TV ....pág. 20 INFORM.BATERÍA..... Permite visualizar la información de la batería. Categoría (GESTIONAR SOPORTE) AJ.SOPORTE PEL...... pág. 40 AJ.SOPORTE FOTO ....
- Page 108 VIS.AJUSTES IMÁG ... Permite establecer la calidad de imagen para la grabación, reproducción o AJUSTE edición de las películas. CÓDIGO DATOS....Permite visualizar los detalles de los datos de grabación durante la reproducción. AJUS.SON./PANT. VOL........pág. 18 PITIDO ....... pág. 11 BRILLO LCD ......
- Page 109 Lista del OPTION MENU Los elementos siguientes únicamente están disponibles en el OPTION MENU. Ficha MED./ENF.PUNTO ..Permite ajustar simultáneamente el brillo y el enfoque del motivo seleccionado. MEDID.PUNTO ....Permite ajustar el brillo de las imágenes de acuerdo con el motivo que toque en la pantalla.
-
Page 110: Obtención De Información Detallada De La "Guía Práctica De Handycam
Obtención de información detallada de la “Guía práctica de Handycam” Haga clic en [Exit] [Exit] y, a continuación, retire el CD-ROM La “Guía práctica de Handycam” es una de la computadora. guía de usuario que se puede consultar en la computadora. -
Page 111: Información Complementaria
Al presionar START/STOP o PHOTO no se la memoria interna con el fin de investigar el graban las imágenes. problema. No obstante, el distribuidor Sony no Presione MODE para encender el indicador copiará ni conservará los datos. ... - Page 112 Sujete la videocámara firmemente con Póngase en contacto con su distribuidor de ambas manos. No obstante, tenga en cuenta que Sony o con un centro de servicio técnico local el indicador de advertencia de vibración de la autorizado de Sony. Indíqueles el código de cámara no desaparecerá.
- Page 113 El soporte de grabación está lleno. Elimine las imágenes innecesarias (pág. 39). No es posible grabar fotos durante el procesamiento. Espere un momento y, a continuación, grabe.
-
Page 114: Precauciones
Si dentro de la videocámara entra algún objeto funcionamiento. sólido o líquido, desconéctela y haga que la revise un distribuidor de Sony antes de volver a utilizarla. Evite manipular, desmontar o modificar la videocámara bruscamente y exponerla a golpes o impactos como martillazos, caídas o... - Page 115 tomacorriente de pared a través del adaptador Para limpiar la pantalla de cristal líquido de alimentación de ca o cuando tiene la batería Si la pantalla de cristal líquido se ensucia de insertada. La batería recargable se descargará huellas dactilares o polvo, se recomienda el uso completamente transcurridos aproximadamente de un paño suave para limpiarla.
-
Page 116: Especificaciones
Especificaciones Sistema La exclusiva matriz de píxeles de ClearVid de Sony y el sistema de Formato de señal: color NTSC, estándares EIA, procesamiento de imágenes (BIONZ) televisor HD, especificación 1080/60i permiten obtener una resolución para Formato de grabación: las fotografías equivalente a los tamaños Video: HD: compatible con los formatos descritos. - Page 117 Los números entre paréntesis ( ) indican el inicio y parada de la grabación, conexión y tiempo mínimo de grabación. desconexión de la alimentación y utilización Se ha utilizado un “Memory Stick PRO Duo” del zoom. de Sony.
-
Page 118: Marcas Comerciales
Sony Corporation. “InfoLITHIUM” es una marca comercial de Sony Corporation. “x.v.Color” es una marca comercial de Sony Corporation. “BIONZ” es una marca comercial de Sony Corporation. “BRAVIA” es una marca comercial de Sony ... -
Page 119: Indicadores De La Pantalla
Indicadores de la pantalla Todos los demás nombres de productos Parte superior Parte central Parte superior mencionados en este manual pueden ser marcas izquierda derecha comerciales o marcas comerciales registradas de sus respectivas compañías. Además, no se incluyen en forma expresa en todos los casos en este manual. - Page 120 Los indicadores y sus posiciones son Indicador Significado aproximados y pueden variar respecto de su Tiempo de grabación [00min] apariencia real. restante previsto DESVANECEDOR Luz de fondo de la pantalla de cristal líquido desactivada Número aproximado de fotografías que se pueden 9999 grabar y soporte de 9999...
-
Page 121: Piezas Y Mandos
Piezas y mandos Los números entre paréntesis ( ) corresponden a las páginas de referencia. Botón (DISC BURN) (28) Botón POWER (10) Botón DISP (pantalla) (18) Para desactivar la luz de fondo de la pantalla Objetivo (Carl Zeiss) de cristal líquido, mantenga presionado DISP. - Page 122 Palanca del zoom motorizado (13, 15, Botón PHOTO (15) Botón MODE (14) Indicadores (película)/ (fotografía) (10) Batería (8) Indicador CHG (carga) (8) Altavoz Toma de entrada de cc (8) Conector remoto de A/V (20, 37) ...
-
Page 123: Índice
Índice Grabadora de discos ....37 Grabadora de DVD ....35, 36 Ajuste de la fecha y la hora ..10 Televisor ........20 GUÍA CONEXIÓN TV .....20 AVCHD........26, 35 Tiempo de grabación y reproducción .......55 Guía de PMB .......30 Guía práctica de Handycam ..48 Batería ..........8 Unidad o carpeta de destino ..30 Blu-ray disc ........32... - Page 124 Additional information on this product and answers to frequently asked questions can be found at our Customer Support Website. http://www.sony.net/ Printed on 70% or more recycled paper using VOC (Volatile Organic Compound)-free vegetable oil based ink. Printed in Japan...
Need help?
Do you have a question about the Handycam HDR-CX100 and is the answer not in the manual?
Questions and answers