Advertisement
Memory Function
You can store up to two separate songs in memory for later playback.
There are two methods you can use to record a song: real-time re-
cording where you record the notes as you play them on the key-
board, and step recording where you input chords and notes one-by-
one.
Tracks
The memory of this keyboard records and plays back notes much
like a standard tape recorder. There are two tracks, each of which can
be recorded separately. Besides notes, each track can be assigned its
own tone number. During playback you can adjust the tempo to
change the speed of playback.
Start
Auto Accompaniment
Track 1
(rhythm, bass, chords), melody
Track 2
Melody
NOTES
• Track 1 is the basic track, which can be used to record Auto Accompa-
niment along with the melody. Track 2 can be used for melody only, and
is for adding to what is recorded in Track 1.
• Note that each track is independent of the other. This means that if you
make a mistake while recording, you need to re-record only the track
where the mistake was made.
Memory Button Operation
Each press of the MEMORY button cycles through the functions
shown below.
Playback
Record
Standby
Standby
GM
MEMORY
STEP
Lit
Flash
Selecting a Track
Press the LEFT/TRACK 1 button to select Track 1 and the RIGHT/
TRACK 2 button to select Track 2. The letter "L" (left) appears on the
display to indicate Track 1 is selected, and the letter "R" (right) ap-
pears to indicate Track 2 is selected.
Playback
Each press of the LEFT/TRACK 1 and RIGHT/TRACK 2 button while
the keyboard is in playback standby (see "Memory Button Opera-
tion" above) toggles playback of the corresponding track on and off.
The letter that identifies a track (L or R) appears on the display when-
ever playback of that track is turned on.
474A-E-027A
START/STOP
TOUCH
ACCOMP
KEY LIGHT
RESPONSE
VOLUME
TOUCH
RESPONSE
KEY LIGHT
METRONOME BEAT
TEMPO
MODE
VOLUME
SYNCHRO/
INTRO
ENDING
POWER
MAX
FULL RANGE
CHORD
FINGERED
START/
CASIO CHORD
STOP
NORMAL
MIN
NORMAL/
VARIATION/
SONG BANK CONTROLLER
FILL-IN
FILL-IN
LEFT/TRACK 1
End
Data recorded in track
Normal
GM
GM
MEMORY
MEMORY
STEP
STEP
Unlit
MEMORY
TRANSPOSE/
GM
TUNE/MIDI
MEMORY
STEP
MEMORY
STEP
SPLIT
LAYER
(TIE)
7
8
9
4
5
6
DEMO
3-STEP LESSON
1
2
3
REST
0
STEP 1
STEP 2
STEP 3
RIGHT/TRACK 2
Track 1
Playback
turned on
• With the above setting, Track 1 will play while Track 2 will not play.
Record
Each press of the LEFT/TRACK 1 and RIGHT/TRACK 2 button while
the keyboard is in record standby (see "Memory Button Operation")
toggles recording to the corresponding track on and off. The letter
that identifies a track (L or R) flashes on the display whenever re-
cording to that track is turned on.
Playback
turned on
• The above indicates that Track 1 will play back while Track 2 is
being recorded to.
Real-time Recording to Track 1
With real-time recording, the notes and chords you play on the key-
board are recorded as you play them.
To record to Track 1 using real-time recording
1.
Use the MEMORY button to enter record standby.
.
R e c No .
Track 2
Playback
turned off
Record
turned on
GM
h
MEMORY
STEP
Flash
E-25
Advertisement
Table of Contents

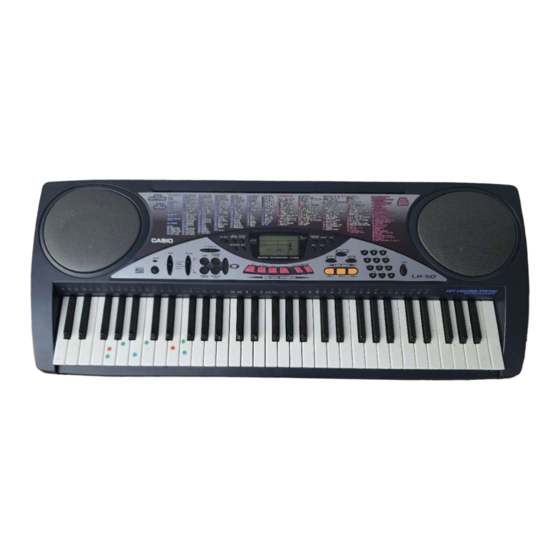
Summary of Contents for Casio LK-50
- Page 1 TEMPO (TIE) MODE VOLUME SYNCHRO/ INTRO ENDING POWER DEMO FULL RANGE CHORD 3-STEP LESSON FINGERED START/ CASIO CHORD STOP NORMAL REST NORMAL/ VARIATION/ STEP 1 STEP 2 STEP 3 SONG BANK CONTROLLER FILL-IN FILL-IN LEFT/TRACK 1 RIGHT/TRACK 2 You can store up to two separate songs in memory for later playback.
-
Page 2: Memory Capacity
SPLIT LAYER TEMPO (TIE) MODE VOLUME SYNCHRO/ INTRO ENDING POWER DEMO FULL RANGE CHORD 3-STEP LESSON FINGERED START/ CASIO CHORD STOP NORMAL REST NORMAL/ VARIATION/ STEP 1 STEP 2 STEP 3 SONG BANK CONTROLLER FILL-IN FILL-IN [+]/[–] MODE START/STOP NORMAL/FILL-IN... -
Page 3: Playing Back From Memory
To record using an intro, ending, or fill-in Real-time Recording to Track 2 During recording, the INTRO, SYNCHRO/ENDING, NORMAL/ After you record Track 1, you can use real-time recording to add a FILL-IN, and VARIATION/FILL-IN buttons (pages E-18 through E- melody in Track 2. -
Page 4: Specifying Chords In The Normal Mode
Flash When the MODE switch is set to NORMAL during step recording, you can specify chords using a method that is different from CASIO Make any of the following settings if you want. Chord and Fingered fingerings. This chord specification method can •... -
Page 5: Specifying The Length Of A Note
To specify a chord, hold down the key on the root input keyboard To insert a fill in that specifies the root, and press the key in the chord type input key- In step 6, press the NORMAL/FILL-IN or VARIATION/FILL-IN but- board to specify the chord type. - Page 6 TEMPO (TIE) Number buttons MODE VOLUME SYNCHRO/ INTRO ENDING POWER DEMO FULL RANGE CHORD 3-STEP LESSON FINGERED START/ CASIO CHORD STOP NORMAL REST STEP 1 STEP 2 STEP 3 NORMAL/ VARIATION/ SONG BANK CONTROLLER FILL-IN FILL-IN [+]/[–] MODE START/STOP STOP MEMORY Use the keyboard keys or the [+] and [–] buttons to...
-
Page 7: Deleting The Contents Of A Specific Track
Press [+] to start the data editing operation or [–] to clear the data editing screen without changing any- thing. • Pressing [+] automatically clears all data to the right of the current input point. Next, the keyboard stands by for input of step recording data.


Need help?
Do you have a question about the LK-50 and is the answer not in the manual?
Questions and answers