
Subscribe to Our Youtube Channel
Related Manuals for Parasound 7100


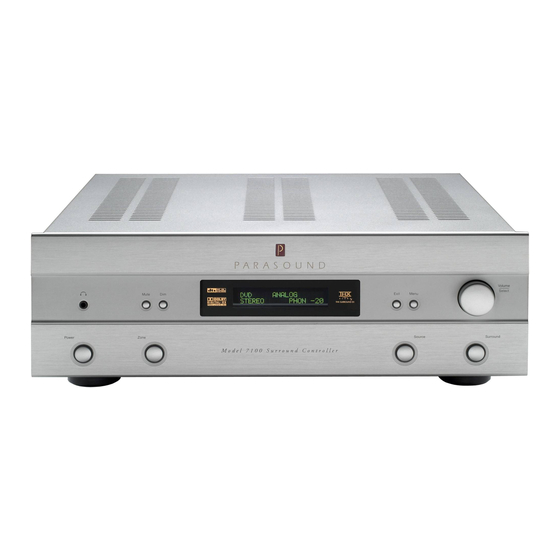
Summary of Contents for Parasound 7100
- Page 1 Volume Select Mute Exit Menu DOLBY D 3/2. PLIIX MOVIE VOL: 50 Power Zone Source Surround M o d e l 7 1 0 0 S u r r o u n d C o n t r o l l e r Model 7100 7.1 Channel Surround Controller OWNER’S GUIDE...
-
Page 2: Important Safety Instructions
19. Wall or Ceiling Mounting — Mount the product to a wall or ceiling only as recommended. 20. Heat — The product should be situated away from heat sources such as radiators, heat registers, stoves, and other products (including amplifiers) that produce heat. www.parasound.com... - Page 3 We appreciate you taking the time to read these instructions and thank you for selecting Parasound. For updates and corrections to this manual, we invite you to check our web site, www.parasound.com. Enjoy.
-
Page 4: Table Of Contents
TABLE OF CONTENTS Unpacking and Placement Guidelines ........Basic Connections 8 –... - Page 5 TABLE OF CONTENTS Advanced Setup 45 – 51 ..........Advanced Connections, Setup &...
-
Page 6: Unpacking And Placement Guidelines
While you are unpacking your Model 7100, inspect it thoroughly for possible shipping damage and tell your Parasound dealer right away if you find any. If possible, save and store both the inner and outer cartons and — most especially — the foam packing inserts, so you can use them to protect the Model 7100 if you have to move it or ship it. -
Page 7: Basic Connections
GETTING STARTED To get the most out of your Model 7100, you’ll need to know how to connect it to your other components, how to set it up for your room and to work with each component, and how to operate it. -
Page 8: Basic Connections
BASIC CONNECTIONS Basic Connections and Basic Settings This section of the manual focuses on helping you get your theater up and running in the shortest possible time. Let’s start with your DVD player, satellite receiver (or cable set-top box) and VCR, the first three sources we think you’re likely to use most often. - Page 9 BASIC CONNECTIONS continued TV Set or Video Monitor Connections You’ll obtain the best quality picture if you connect the trio of Component Video input jacks on your TV to the three Component Video Out jacks on your 7100. Component Video connections require three cables, which are readily available.
- Page 10 BASIC CONNECTIONS continued Video Connections DVD Player Connect the Component Video jacks on your player to the Component Video Input – 1 jacks on your 7100. Use cables that are made for video because audio cables usually compromise picture quality. AUDIO OUTPUTS VIDEO OUTPUTS DVD PLAYER...
- Page 11 BASIC CONNECTIONS continued Unbalanced Analog Composite Audio Video Audio Connections Your DVD player and satellite receiver have two kinds of audio outputs, analog and digital. Expansion Port For Future Technologies DVD Player Made In Finland Most DVD players have two digital outputs, an opti- Source-Digital Audio Output Source-Comp...
- Page 12 BASIC CONNECTIONS continued Power Amplifier and Subwoofer 5.1 Channel Setup If you have a 5.1 channel system, you probably have a five channel power amplifier and a subwoofer with its own built-in amplifier. The power amplifier and subwoofer connect to your 7100 with six audio cables that have RCA plugs on the ends.
-
Page 13: Basic Connections
BASIC CONNECTIONS continued 7.1 Channel Theater If you have a 7.1 channel system, you probably have a five channel power amplifier, a two channel amplifier and a subwoofer with its own built-in amplifier. If your five channel amplifier is of higher quality and higher power than your two channel amplifier, connect it exactly as in the 5.1 channel instructions above. -
Page 14: Basic Operation
BASIC OPERATION To Prevent Electric Shock, Do Not Remove Top Cover. No User-Serviceable Parts Operating the 7100 Inside. Refer Servicing To Qualified Service Personnel. After you’ve connected your TV, a few source components, power amplifiers, speakers and WARNING: To Prevent Fire Or Shock subwoofer, your system is ready for its shake-down cruise. -
Page 15: Basic Operation
Volume/Select knob until DVD is displayed. Press button 1, labeled DVD. The panel display will show DVD. PARASOUND 7100 SURROUND SOUND If your DVD is already playing you should see a picture and hear sound. We suggest using a disc you know has 5.1 channel sound. -
Page 16: Using The Menu For Setup
USING THE MENU FOR SETUP Navigating The Setup Menus 17 – 20 ........Speaker Setup 20 –... -
Page 17: Speaker Setup
USING THE MENU FOR SETUP continued Setup Menu Using the Remote Press the MENU button on the remote handset. MENU Button The main menu will appear. Press the MENU button on the Main Menu remote handset (above). Speaker setup Source setup On your TV it looks like this (left);... -
Page 18: Size Setup
USING THE MENU FOR SETUP continued Main Menu > Speaker setup Source setup Audio setup THX Audio setup Display setup For example, when you select Trigger setup Speaker setup, Exit MAIN MENU SPEAKER SETUP Speaker setup > Size setup Level setup Distance setup You’ll see another page with a list of 7.1 channel in... - Page 19 USING THE MENU FOR SETUP continued Navigating the Menu with the Remote Handset You can find menu pages and make selections with the remote handset’s central left/right and up/down cursor buttons and its Enter button. We call this group of buttons a thumbpad, since you only need to move your thumb a short distance in LEFT RIGHT...
-
Page 20: Basic Setup / Speaker Setup
BASIC SETUP / SPEAKER SETUP Navigating the Menu with the Front Panel Controls The Menu button brings up the menu. It also functions like the down button on the remote control and you can move the cursor only in the down direction. When you press Menu the Volume/Select knob changes from its volume adjust to menu select. - Page 21 BASIC SETUP / SPEAKER SETUP continued Surround speakers may also be set to “Large,” “Small,” or “No.” You would always select large or small in either a 5.1 or 7.1 channel setup. Note: “Surround” channel speakers are placed at the sides of the listening area in a 7.1 channel system, but they are placed behind the listening area in a 5.1 channel system.
- Page 22 BASIC SETUP / SPEAKER SETUP continued Subwoofer freq. sets the subwoofer filter’s cutoff frequency, in 5-Hz increments from 20 to 200 Hz. Note: The factory default setting = Size setup 80Hz-THX. Dolby recommends this and THX “requires” it for systems Main speakers Small Center speaker...
-
Page 23: Level Setup
BASIC SETUP / SPEAKER SETUP continued Level setup SIZE SETUP For proper surround, the sounds reaching you from EXIT the different speakers should have the same relative levels as the movie’s producer and audio mixing engineer intended. Because home systems and home theater environments vary, the simplest way Speaker setup to do that is to send a standard test signal through... -
Page 24: Distance Setup
BASIC SETUP / SPEAKER SETUP continued Hold the remote handset in your other hand; you’ll be able to make level calibration adjustments using just your thumb to press its thumbpad cursor and ENTER buttons. Hold the meter in the same position as you calibrate all channels. It is normal for the analog SPL meter needle or numbers to jump around slightly during the level calibration. -
Page 25: Additional Connections
ADDITIONAL CONNECTIONS Guidelines: When you connect the 7100 to the rest of your system and your second entertainment zone, you’ll find it easier if you start with the Audio Input and Output jacks on the bottom row, work your way up to the Source-Digital Audio Input jacks, then the Source-Video Input and Output jacks. -
Page 26: Basic Operation - Frequently Used Controls
Front Panel Controls Despite its versatility, the Parasound 7100 Surround Controller has only eight pushbuttons, one knob, a headphone jack and a status display on its front panel. That’s in part because we expect users will most often operate it by remote control and in part because many front-panel controls do more than one thing. - Page 27 BASIC OPERATION – FREQUENTLY USED CONTROLS continued The Power button is surrounded by a red glow when the 7100 is turned off to show that it is plugged into a live AC outlet and that its rear panel AC Power switch is in the On position. The Volume/Select knob normally controls listening volume levels, but pressing any of the buttons (see below) temporarily turns it into the selector for sources, surround modes, remote zone operation and the setup menu.
- Page 28 BASIC OPERATION – FREQUENTLY USED CONTROLS continued Power, Volume, Source Selection Power Until the 7100 is turned on, its Power button is surrounded by a soft red glow. (If there’s no glow, it means the 7100 is not plugged into a live AC outlet or that the AC Power switch on its rear panel is turned off.) Turning the 7100 off with the Power button (or the OFF button on the remote) leaves the 7100 standing by to respond to a turn-on command from the remote control or an external system controller.
-
Page 29: Basic Operation – Frequently Used Controls
Source setup page, Title (pages 42 – 44). A separate user manual is supplied with the remote, and can also be downloaded from www.parasound.com. Using Audio Recorders The Record Out jacks carry whatever analog signal you select for the main listening zone. Avoid setting the source selector to an audio or video deck while it’s recording from the Record outputs,... - Page 30 SURROUND MODES For example, modes that generate surround channel effects from stereo sources cannot be selected if the source is actually playing a program with discrete digital 5.1 surround channels. When you select surround modes, those not available for your currently selected input simply won’t show up as options.
- Page 31 SURROUND MODES continued Dolby Pro Logic II Music: This version of Pro Logic II is optimized for music listening; it is • designed to produce surround ambience from stereo sources such as CDs. It has three adjustments not found in Pro Logic II Movie or Pro Logic: Center Width, which adjusts the apparent width of the center-channel signal;...
- Page 32 SURROUND MODES continued DTS Neo:6 Music: Similar to Neo:6 Cinema, but for music. It feeds stereo signals • directly to the front channels, bypassing the decoder, while feeding the center, surround side, and surround back channels with ambient information derived from the recording, to add spaciousness.
-
Page 33: Mode Table
MODE TABLE Mode table The following table was prepared for the 7100 by THX Ltd. It shows you the surround modes and THX modes which are available for each source, whether you have a 5.1 channel, 6.1 channel, or 7.1 channel speaker setup. KEY: FOOTNOTES: Non-THX default (bold text) - Page 34 MODE TABLE continued Input Type 5.1 speakers 6.1 speakers 7.1 speakers Club Club Club Concert Concert Concert AC-3 5.1, No EX Flag Dolby Digital 5.1 Dolby Digital 5.1 Dolby Digital 5.1 (SB = no output) (SB = no output) (EX or non-EX encoded) Dolby Digital 5.1 + Dolby Digital 5.1 + THX Cinema Dolby Digital 5.1 + THX Cinema THX Cinema (SB = no output)
-
Page 35: Mode Table
MODE TABLE continued Input Type 5.1 speakers 6.1 speakers 7.1 speakers DTS 5.1 + DTS 5.1 + PLIIx Music THX Ultra2 Cinema 1,3,4,5 DTS 5.1 + THX MusicMode 3,4,5 DTS 5.1 + THX Games Mode DTS 5.1 + PLIIx Movie + THX Cinema 1,2,3 DTS 5.1 + PLIIx Music... -
Page 36: Remote Zone - Operation & Connection
REMOTE ZONE – OPERATION & CONNECTION Remote-Zone Operation The 7100 controller can provide different audio and video signals to two areas, or “zones,” in your home. Your home theater room is considered the “Main” zone and the secondary room is the remote Zone or “Zone B.”... -
Page 37: Using The Remote Control
USING THE REMOTE CONTROL The Remote Control’s Main “Page” Whenever “MAIN” appears, the remote’s buttons control the 7100 functions for your theater or “main” room. The button functions for main control are one “page.” If another device is displayed, press the MAIN device button to control the 7100. - Page 38 USING THE REMOTE CONTROL continued SHIFT + function buttons Eight of the remote control buttons are also programmed to control Model 7100 functions that you will probably use less frequently. Their secondary functions are identified by labels that are printed in orange ink just above or just below them.
- Page 39 USING THE REMOTE CONTROL continued Controlling The Second, Remote Zone Pressing the ZONE device button, so that “ZONE” appears, programs the remote’s OFF, ON, VOL +, VOL –, MUTE and source input buttons 1-6 to control the 7100 Off, On, Volume, Mute and source input select for your second, remote, Zone B.
-
Page 40: Menu Review & Intermediate Setup
MENU REVIEW & INTERMEDIATE SETUP Setup Menu Review You may also select NTSC or PAL Main Menu video systems and feet or meters for the speaker distance you’ll select in the Speaker setup Speaker setup, Distance setup menu. Source setup Audio setup The factory default settings = NTSC THX Audio setup... - Page 41 INTERMEDIATE SETUP Source Setup The program sources in your home theater system require a wide variety of inputs. Associating or matching each source with the correct video and digital audio input jacks is done through the menu’s Source setup screen. ENTER CURSOR button...
-
Page 42: Input Titling
INTERMEDIATE SETUP continued Source: Source setup Each source will appear on the display and in the menu pages with the same title as the labels by the > Source input jacks and the remote control buttons. Sources Title Digital in Coax 1 with factory-set titles DVD, SAT, VCR correspond Video in... - Page 43 INTERMEDIATE SETUP continued (up) or v (down) cursor buttons First press the > until the ( ) cursor arrow is alongside “Title,” press ENTER to select Title. You will see a temporary vertical ( ^ ) cursor arrow under the first character: ENTER CURSOR...
-
Page 44: Source Setup
INTERMEDIATE SETUP continued When you have changed the first character to the one you want, press the remote’s right cursor button to advance the temporary vertical cursor to the next character. When you have completed the new title, press the ENTER button to end the titling set up. You can also simply press the right cursor button past the seventh character title to end the titling set up. -
Page 45: Input Monitor
ADVANCED SETUP Input monitor is used to visually compare the input levels from each digital audio source and each analog audio source. This enables you to adjust analog levels so they won’t overload the 7100’s analog-to-digital converters, and also to adjust each analog audio source so volume levels will not shift annoyingly when you switch between them or between analog and digital sources. -
Page 46: Audio Setup
ADVANCED SETUP continued Audio Setup Main Menu The settings made in the Audio setup menu page are “global” and they affect all sources and Speaker setup surround modes. Source setup > Audio setup Treble and Bass can be set in 1-dB steps for up to THX Audio setup 12 dB of cut or boost. -
Page 47: Dolby/Dts Parameters
ADVANCED SETUP continued LFE level affects the level of the Low Frequency Audio setup Effects Channel signal, the “.1” channel of a 5.1 channel, 6.1 channel, or 7.1 channel digital sur- Dolby/DTS setup round system. The LFE level adjustment is not the Preset setup same as setting the subwoofer level, because the Treble... -
Page 48: Preset Setup
ADVANCED SETUP continued PL II Center Width spreads the center-channel signal into the left and right front channels to add spaciousness and for a smoother interchannel blend. It has eight possible settings (Min, 1 - 6, and Max). If you like sharp imaging, and the ability to pinpoint where each musician is in the soundfield, you’ll probably want it at Min, but if you prefer spaciousness, you’re likely to want a higher setting. -
Page 49: Treble, Bass, Center, Surround, Sub Levels
ADVANCED SETUP continued Preset setup Treble and Bass settings in the Preset Setup menu affect only the source, or Preset sources, to which the preset number Treble is assigned. They override treble and > Bass Center bass adjustments you made in the Audio Surround Setup menu. -
Page 50: Thx Sub Select
ADVANCED SETUP continued Boundary gain comp. (compensation) tames the excessive, boomy bass you might hear, especially THX AUDIO SETUP if you’re seated near the back wall of your theater. BOUNDARY GAIN: If your subwoofer meets stringent THX Ultra2 stan- dards it has flat anechoic (test chamber) response down to 20 Hz. -
Page 51: Bass Limiter Setup
ADVANCED SETUP continued Bass Limiter Setup Bass limiter setup allows you to cap subwoofer output levels. Bass in today’s film soundtracks is often louder than on music recordings or older films, and this amount of bass can cause distortion or even damage to small or older subwoofers. The Model 7100 will probably be incorporated into systems with large, high-output subwoofers that don’t require this protection, therefore the factory default = “Off.”... -
Page 52: Advanced Connections, Setup & Control
Main Audio Outputs TV sets and video projectors, and even lighting. Note: Other Parasound models use 0.1” (2.5mm) mini jacks for their trigger connections; these are smaller than the 1/8” (3.5mm) mini jacks on the Model 7100. We supply the 7100 with trigger wires with both size plugs, or with an adapter plug to connect them. - Page 53 ADVANCED CONNECTIONS, SETUP & CONTROL continued Trigger setup menu This is where you select the functions of the Program 1 and Program 2 jacks. In the menu these jacks are called “Trigger 1” and “Trigger 2.” Trigger sense selects the event or command that Trigger setup the 7100 will sense in order to turn on the trigger >...
-
Page 54: Connecting A Second Entertainment Zone
Zamp v.3 115V Audio /230V Level Sens 60Hz /50Hz Loop Fuse Zamp V.3 Zone Amplifier Only Parasound Products, Inc. San Francisco, CA USA AC Voltage Selector On Bottom AVIS: RISQUE DE CHOC ELECTRIQUE-NE PAS OUVRIR. ZONE AMPLIFIER REMOTE ZONE REPEATER RECEIVER... - Page 55 The capabili- ties of such connections, and the programming and interfacing needed will depend on the auto- mation system you select; consult your Parasound Dealer or Custom Installer for more informa- tion regarding interfacing an external control system to your 7100.
-
Page 56: Troubleshooting Guide
TROUBLESHOOTING GUIDE TROUBLE PROBABLE CAUSE REMEDY No power Power cord is disconnected Connect power cord Rear-panel AC switch is Turn switch back on turned off AC outlet is dead Check outlet by plugging in another device; if dead, check fuse or circuit-breaker Power on, but no sound Level control set too low Turn up volume... - Page 57 TROUBLESHOOTING GUIDE continued TROUBLE PROBABLE CAUSE REMEDY Bass from sub does not Sub polarity is incorrect Reverse polarity on sub amplifier blend with other channels Hum and/or buzz heard Defective audio interconnect Check all audio interconnect cables in affected through speakers or cable channel or coming from affected source headphones...
- Page 58 Refer to your DVD player manual and configure or DTS not working PCM output your player’s digital output for Dolby Digital and DTS Note: Additional information can be fod by checking the Product FAQs (frequently-asked questions) and tech bulletins on our Web site, www.parasound.com.
-
Page 59: Technically Speaking
“amplified block” of wired infrared repeater sensors or system controllers. The IR Input jacks accept standard 1⁄8” (3.5 mm) two conductor mini-plugs, with the positive wired to the plug’s tip and the negative to its sleeve. Your Authorized Parasound Dealer or custom installer can recommend a compatible infrared repeater system for the 7100. - Page 60 TECHNICALLY SPEAKING continued S-Video, uses separate wires for luminance (picture brightness – in effect, the signal portions that make a black-and-white picture) and chrominance (color information). Keeping these picture elements separate reduces interactions between them and produces a cleaner, more detailed picture than composite video.
- Page 61 Other Parasound owners are Sony Music, Universal Studios, Warner Brothers, Skywalker Ranch and Pixar, to name just a few. Our design brief for the Parasound 7100 was to produce a component that could serve as the centerpiece for any modern, advanced home theater, provide for future technical developments, and meet the needs of the most critical listener and viewer.
- Page 62 TECHNICALLY SPEAKING continued The following are questions and answers about Dolby Pro Logic IIx. This was prepared by Dolby Labs and it is reproduced here with their permission. 1. What is Dolby Pro Logic IIx? ® ® Dolby Pro Logic IIx is an extension of Dolby Pro Logic II technology. This highly sophisticated algorithm processes native stereo- and 5.1 channel material to produce 6.1 or 7.1 output channels.
- Page 63 TECHNICALLY SPEAKING continued 8. Will Dolby Pro Logic IIx process DTS 5.1 content, and is it compatible with DTS-ES discrete and matrix-encoded software? Processing of DTS content is an available option. While Dolby Pro Logic IIx technology is fully compatible with DTS and DTS-ES, whether a product supports them is, of course, dependent upon DSP capability and hardware design.
- Page 64 TECHNICALLY SPEAKING continued 18. Will you develop Dolby Pro Logic IIx matrix encoders for the entertainment industry? Possibly. But it is worth noting that unlike Dolby Pro Logic II, which requires its own encoders to achieve maximum benefit, Dolby Pro Logic IIx can be fully exploited using today’s encoding tools and mixing consoles.
- Page 65 TECHNICALLY SPEAKING continued Would You Like to Know more About THX? Please read the following explanation written by THX Ltd. It will help you understand and appreciate the substantial technical advantages and sonic benefits of THX technology. THX Cinema Processing THX is an exclusive set of standards and technologies established by the world-renowned film production company, Lucasfilm Ltd.
- Page 66 TECHNICALLY SPEAKING continued THX Surround EX THX Surround EX — Dolby Digital Surround EX is a joint development of Dolby Laboratories and the THX Ltd. In a movie theater, film soundtracks that have been encoded with Dolby Digital Surround EX technology are able to reproduce an extra channel which has been added during the mixing of the program.
- Page 67 THX calibrated loudness, just turn down the volume control by 4 dB. However, unlike a movie theater where the playback loudness is preset, you can choose your preferred volume setting for best enjoyment. Online Sources for Further Information: www.parasound.com, www.dolby.com, www.dtsonline.com, www.thx.com.
- Page 68 IF YOU REQUIRE ASSISTANCE Are You Having Difficulty? Call your Parasound dealer first. If your dealer can’t help you with your problem we encourage you to call Parasound’s Technical Service Department, toll-free at 1-866-770-8324, Monday - Friday, 8am - 4pm Pacific time. We can suggest other diagnostic tests you can easily perform. If...
- Page 69 PARASOUND MODEL 7100 SPECIFICATIONS Audio Performance Video Performance Frequency Response Bandwidth 20 Hz – 20 kHz, +/- 0.1 dB Component Video 100 MHz, - 3 dB 20 Hz – 35 kHz, +/- 0.5 dB S-Video 8 MHz, - 3 dB...
-
Page 70: Connection And Setup Notes
CONNECTION AND SETUP NOTES Notes:... -
Page 71: Connection And Setup Notes
CONNECTION AND SETUP NOTES Notes: Helpful Web Addresses The following are the Web addresses for companies mentioned in this manual: Parasound: www.parasound.com • Dolby Laboratories: www.dolby.com • DTS (Digital Theater Systems):www.dtsonline.com • THX: www.thx.com •... - Page 72 We invite you to visit www.parasound.com for the most up-to-date information on your unit and to find out about other Parasound products. Learn why Parasound has been a quality and value favorite of magazine reviewers, sound professionals and listeners like you since we were founded in 1981.
Need help?
Do you have a question about the 7100 and is the answer not in the manual?
Questions and answers