Table of Contents

Subscribe to Our Youtube Channel
Related Manuals for Nakajima AE-740


Summary of Contents for Nakajima AE-740
- Page 1 ^ r l l I .{N\ll IAKAJ'MA \-\.f- r- \\- (O Ffrst in quality and reliability ..---! O - 7 / - - S ^ ! .7,7|t 'o1(/llf ll\\\\-S e O ! t l l l l l \ - ' . 1 - ' J , r r l l l ' OPERATION MANUAL AE-740...
- Page 2 FOR USA ONLY NOTE: This equipment has been tested and found to comply with the limits for a Cl.ss B drgrral de r ice. pursuant to Part l5 of the FCC Rules. These limits are designed to provide reasonable prorectron agarnsr harmful interference in a residential installation.
- Page 3 your new.Electronic Typewriter increases your typing elficiency through use of the most advanced technology. Some of the many outstanding features of your typewriler are: 16,0O0-charactermemory 1 5. 0 i nc h pape r ca p a ci ty . 40-character liquid crystal display o Four modes: normal print/line prinVjustify print/store o Easy-to-change 1O0-character printwheel l0-line correction memory (700 characters max.)
-
Page 4: Table Of Contents
TABLE OF CONTENTS INTRODUCTION Rules For Safe Operation Part Names And Functions Key Functions GETTING STARTED Unpacking Setting Up r u r n i n g o n r y p . * ; i , ; ; : : : . : : .. - Page 5 P r i n t i n g a P h r a s e F i l e ..7 2 Printing a Chain of Files (Chain Recall) P r i n t i n g a B l o c k o f T e x t .
-
Page 6: Rules For Safe Operation
INTRODUCTION Rules For Safe Operation Make sure you are using the proper power as stated on the name plate at the back of the typewriter. Your typewriter is a highly sophisticated mechanism. Never attempt to repair it yourself. If repair becomes necessary, take it to the authorized service center. -
Page 7: Part Names And Functions
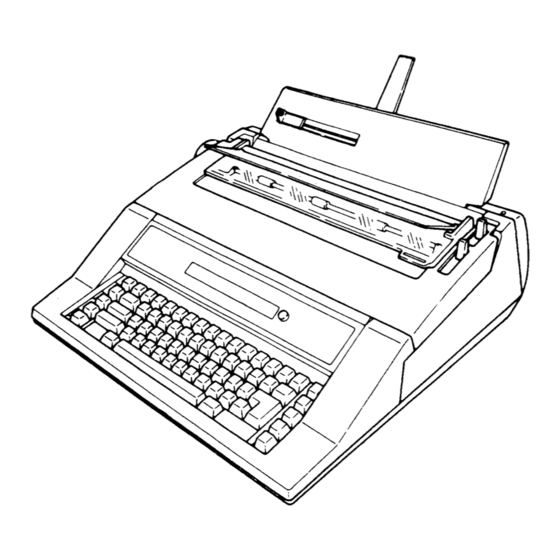
Part Names And Functions... - Page 8 13. POWER SWITCH 1. PLATEN KNOB used to manually rotate the platen' 14. powER coRD 2. PAPER GUIDE 15. PLATEN (ROLLER) Provides consistent placement of paper. Rolls paper in and out. 3. PAPER SUPPORT PANEI, 16. PAPER BAIL & BAIL ROLLERS Supports the paper.
-
Page 9: Key Functions
Key Functions Keyboard with letter-type function keys 2 o 1 s @ D D D D t l D n D D t r D n D @ E - - " , € E J D D D I D D D D D D D D r ] B ' ' w D ! ! D D rn DD D D q-l Et.-* .---@ @ - ' '... - Page 10 12. HALF SPACE KEY MARGIN RELEASE KEY Moves the carrier one half space to the right. Releases the margins to type beyond them or set new ones' 13. RETURN KEY Returns the carrier/cursor to the left margin on 2. LEFT MARGIN KEY the next line.
-
Page 11: Getting Started
GETTING STARTED Unpacking Before using your typewriter, be sure to remove the packing ma t e r ia ls a s d e sc rib ed in the u np a cki n g i n struc tio ns . Setting Up I ) Insert the paper support panel. - Page 12 Turning On Typewriter l) Plug the appropriate end of the power cord into the typewriter. 2) Plug the other end of the power cord into an outlet of the proper voltage/frequency as specified on the name plate on the back of the typewriter.
- Page 13 Inserting/Ej ectin g Paper Inserting paper I ) Adjust the paper guide on the paper support panel to the desired position. The paper guide ensures consistent placement of your paper. 2) Insert a sheet of paper behind the platen aligned with the paper gu i de .
-
Page 14: Setting The Top Of Form (Amount Of Papbr Insert)
Setting The Top of Form (Amount of Paper Insert) This function sets the amount of the paper insertion. when you pull the paper bail lever to automatically insert the paper, the paper will advance the number of lines according this setting. l) Hold down the code key and press the "F"... -
Page 15: T Y P I N G C O N T R O L
Typing Controls Impression control This control determines the printing impact (how hard the printwheel strikes the paper;. Select the proper impact depending on the type of printwheel, ribbon, paper, or the number of multiple copies. The largest dot represents the heaviest impact' Line space selector This selector determines the spacing of the lines' d o u b l e s P ac in g (3 l ine s P er i nch ) -
Page 16: Ty Pi Ngm Odes( Np/ Lplj U St /St Or E)
Typing Modes (NP/LPIJUST/STORE) Your typewriter has four different modes: Normal print (NP), Line print (LP), Justify print (JUST) and Store (STORE) mode. A "y" on the display indicates the current mode. Each time you press the Mode key, the "v" moves to the next mode indication. Normal print mode (NP) When you turn on the typewriter, it is set in the normal print (NP) mode. - Page 17 Store mode (STORE) The Store mode is used to store text in the typewriter's memory. I See the "Memory Functions" chapter. STORE...
-
Page 18: Margi
Margins Preset margins When you first turn on the typewriter, the preset margins are used. These settings provide you with standard one inch left and one inch right margins for each pitch selection. Right margin Left margin l0 pitch (PICA) 12 pitch (ELITE) 15 pitch (MICRO) I 1 3... -
Page 19: Tab
Typing beyond the margins To type beyond the right margin, press the Margin release key when the carrier/cursor stops at the right margin, and continue typing. @ (@) To type beyond the left margin, press the Margin release key at the left margin. - Page 20 Using regular tabs E(E) l) Press the Tab key to move the carrier/cursor to the first tab setting to the right of your current position. 2) Type the text. Tab back-up The current tab settings are maintained in memory by the back-up battery even when you turn off the typewriter.
- Page 21 Corrections on Paper Your typewriter has an automatic conection memory. It remembers the last 700 characters typed within the last l0lines and will correct any or all of those characters. Characters typed outside the correction memory can be easily corrected using the manual correction.
- Page 22 Automatic word correction (correcting words within the correction memory) I ) Use the Index key or Reverse index key to position the print point indicator on the line which contains the word to be conected. The line locator (red line) marked on the card holder position carrier should be line up below the line.
- Page 23 Manual correction (correcting characters outside the correction memory) I ) Use the Index key or Reverse index key to position the print point indicator on the line which contains the error. The line locator (red line) marked on the card holder should be line up below the line.
-
Page 24: Corrections On The Display
Corrections on the Display Overstriking (replacing) a character l) Use the Backspace key or Express key to position the cursor besr typewri ter under the character to be corrected. 2) Type the correct character. The character appears in place of the previous character. - Page 25 Inserting a character (insert mode) l) Use the Backspace key or Express key to position the cursor at the point where you want to insert characters. 2) Hold down the Code key and press the Relocation key. The character above the cursor alternately flashes with a box mark "...
-
Page 26: Typingfunctions
TYPINGFUNCTIONS The letter below shows you some of the sample usage of the typing functions on your typewriter. u T o o . l s f o r E v e r Y o n e " I n c . T o o l C o . - Page 27 Paragraph Indention This function creates a temporary left margin to indent several lines such as a paragraph. @(tr) I ) Set a tab at the position where you want to set paragraph indent. fTGiR-l 2) Press the Return key or Express key to return the carrier/cursor il-@(D to the left margin.
-
Page 28: A U T O M A T I C C E N T E R I N
Automatic Centering This function centers text evenly between the left and right margins, between two tab stops, or at the desired position. Note: Be sure the display has been cleared before activating this function. Centering between margins I ) Press the Return key or Express key to position the carrier/cursor il-@(D at the left margin. - Page 29 Centering between tabs l) Press the Tab key to position the carrier/cursor at the left tab of C(E) the two tabs where text is to be centered. 2) Hold down the Code key and press the key below the "AUTO f NTTI CENTER"...
- Page 30 Centering at any desired position l) P o si ti o n t h e ca r rie r/cu rso r a t th c po in t w h crc tcxt i s to bc centered. 2) Hold down the Code key and press the key below thc "AUTO CENTER"...
-
Page 31: R I G H T M A R G I N F L U S
Right Margin Flush This function aligns text with the right margin. l) Hold down the Code key and press the 'lR" key. A "v" appears abov e " R .M -F LU S H " a nd " R IGH T M A R GIN F LU S H " a p pe ar s on the display. -
Page 32: A U T O M A T I C R E T U R
Automatic Return This function automatically returns the carrier/cursor at the end of each line without pressing the Return key. This function is activated automatically in the STORE mode. l) Hold down the Code key and press the key below the "AUTO RETURN"... -
Page 33: Required Hyphen And Required Space
Required Hyphen and Required Space This function is used to type a hyphen or space in the hot zone that will not trigger an automatic return. It's useful ta type a combination of words that you do not want to separated by automatic return. -
Page 34: Decimal Tabulation
Decimal Tabulation This function aligns numbers by their decimal point at a tab position. It helps you to type statistical text easily. Setting a decimal tab I ) Position the carrier/cursor at the point where you want to set a decimal tab. -
Page 35: C E N T E R T A B U L A T I O
Center Tabulation This function centers text at a tab position. Setting a center tab | ) Position the carrier/cursor at the point where you want to set a center tab. 2) Hold down the Tab set/clear key and press the " l" key. A "t" fni-l appears above "CENTER"... -
Page 36: F L U S H R I G H T T A B U L A T I O
Flush Right Tabulation This function aligns text with the right side affixed to the tab position. Setting a flush right tab I ) Position the carrier/cursor at the point where you want to set a flush right tab. 2) Hold down the Tab seVclear key and press the "2" key. A "y" l-TB-l appears above "FLUSH-R"... -
Page 37: G R O U P T A B U L A T I O
Group Tabulation This f unction temporarily converts all of the current tab settings to the same type of tab. Group decimal tab l) Hold down the Code key and press the Margin release key. A " t " a p p e a r s a b o ve " D E C IMA L" o n th e di sp la y. A ll o f the cu rre nt ta b s b e c o m e d e ci rna l ta bs . - Page 38 Group flush right tab I ) Hold down the Code key and press the "2" key. A "v" appears tTiB-l above "FLUSH-R" on the display. All of the current tabs become I FLUSH-R flush right tabs. 2) Enter text and print it out using flush right tabs. To add a new tab, simply press the Tab set/clear key at the desired position.
-
Page 39: C O L U M N L A Y O U
Column Layout This function is used to create a table consisting of columns, with a balanced appearance between the margins. I-eft margin Right margin s 2 5 , 0 0 0 . 0 0 8 6 / r 0 / 2 0 GERMAN S M o t o r s L t d . - Page 40 5) Type the longest word or number which is to be typed in the first column, and press the Return key. No text is printed at this time. "TAB TYPE FOR COL.02" appears on rhe display. 6) Repeat steps 4) and 5) to enter the tab type and the longesr enrry for the second column.
- Page 41 Creating a table of columns I ) Press the Return key or Express key to return the. carrier/cursor to the left margin. il",@b) Hold down the Code key and press the "V" key to type a vertical line. It will be a left end line of the table. 2) Press the Tab key to advance the print point indicator to the first tab stop.
-
Page 42: A U T O M A T I C U N D E R L I N I N
Automatic Underlining This function underlines individual words (no spaces) or all text automatically. Automatic full underlining l) Hold down the Code key and press the ',3" key. A "v" ?ppeors l - u l above "X X" on the display. 2 ) T y p e t h e t e x t to b e un de rli n ed . -
Page 43: Keyboard Ii (Special Characters)
Keyboard II (Special Characters) Your typewriter provides a second keyboard which con'lins special characters. These special KBII characters appear on the top right side of the numeric/sYmbol keYs. l) Hold down the Code key and press the "5" key' A "v" appears a b o v e "... -
Page 44: C A P S L O C
Caps Lock This function enables numbers and upper case letters to be typed without pressing the Shift key. l) Hold down the Code key and press the key with the "CAPS" label. A "t" appears above "CAPS" on the display. I'cAPS.l - 1 . -
Page 45: Overlay
Overlay This function is used to create characters not found on the keyboard by printing one character on top of another. This function is available in the LP, JUST and STORE modes' I ) Press the desired key. The character appears on the display. 2) Hold down the code key and press the Backspace key. - Page 46 SuperscripUSubscript This function lets you type text that includes suplrscript or subscript characters, such as HzO or E=MC" Superscript @ (tr) 1) Press the Reverse index key at the point where you want to type a superscript character. In the NP mode, the print position moves one half line upward. In the LPIJUST/STORE modes, a symbol mark "...
- Page 47 Micro Up/Nlicro Down/Nlicro Back Space This function aligns the print point indicator to an exact position. Use this function for making corrections on a previousty typed letter or typing on a pre-printed form. This function is available in the NP mode only. Note: Belbre activating this function, make sure the display has been cleared.
- Page 48 Framing (Line Drawirg) This function creates frames by drawing vertical and horizontal lines. Typing a vertical line Hold down the code key and press the "v" key. A short vertical line is printed. The print point indicator does not advance. To extend the vertical line downward, hold down the Repeat key.
-
Page 49: Memory Functions
MEMORY FUNCTION later review, The memory function allows you to store text such as entire letters and repetitive phrases for a series of modifying and printout. you can also store line formats such as margin and tab settings, or carrier positions to line up on pre-printed forms. the files in The memory stores 16,000 characters, dividing into a maximum of 50 files. -
Page 50: C R E A T I N G A T E X T F I L
Creating a Text File There are three ways to create a text file: Display mode You create a texr file line by line using the margin settings, in the same way as you type on the paper. characters appear on the display as you type. - Page 51 Creating a text file in the display mode or print mode l) Press the Mode key until a "v" appears above "STORE" on the display. The message "NAME OF FILE?" appears. Note: You can exit the STORE mode by pressing the Mode key at any ti m e .
- Page 52 Note: correct errors while the line text appears on the display. After the line is stored and disappeared from the display, you cannot scroll back to them. (You can corect them in the edit mode). 7) Press the Mode key to exit the sroRE mode. The typewriter returns to the NP mode.
- Page 53 Creating a text file in the edit mode l) Press the Mode key until a "v" appears above "STORE" on thc d is p la y . T h e m e s sa ge " N AM E OF FIL E ' 1" a pp ea rs. Note: You can exit the STORE mode by pressing the Modc key at any t im e .
- Page 54 Some tips for edit mode a) Move the cursor to scroll to any position in the file. Press the Backspace key to move the cursor one space to the left. @ @ @ Press the Express key to move the cursor ong space to the right. (mtrs) Press the Relocation key to move the cursor to the end of the file.
- Page 55 I e GROUP CENTER TAB I e GROUP FLUSH-R TAB I ++ COLUMN LAYOUT I E PAGE LENGTH = XX HIT J Note: You can not use the functions marked * in phrase files. d) When you set margin or tab before entering any text or at the end of the file, two box marks appear on the display.
-
Page 56: M O D I F Y I N G A T E X T F I L
Modifying a Text File There are two ways to modify the text file stored in the memory. Add mode You add some text at the end of the text file line by line, as you created the file in the display rnode or print mode. Edit mode You edit the text file scrolling to any desired location in the flle. - Page 57 Modifying a text file in the add mode l . ; Pr e s s t h e M od e key un t i l a " t " a ppe a r s a b o ve " S T O R E " on t h e d i s p l a y .
- Page 58 Modifying a text file in the edit mode I ) Press the Mode key until a "t" appears above "STORE" on the display. 2\ Type the name of the text file you want to edit. Then press the Return Key. The message "Edit/Add?" appears on the display. 3) Press the "E"...
-
Page 59: C R E A T I N G A P H R A S E F I L
Creating a Phrase File There are two ways to create a phrase file: D i s p l a y mo d e You create a phrase file on the display as one continuous line of text, regardless of the margin settings. Nothing is printed on paper. Print mode You crate a phrase file on the display line by line. - Page 60 Creating a phrase file in the display mode I ) Press the Mode key until a "v" appears above "STORE" on the display. The message "NAME OF FILE?" appears. Note: You can exit the sroRE mode by pressing the Mode key ar any ti me .
- Page 61 Creating a phrase file in the print mode I ) Press the Mode key until a "v" appears above "sToRE" on the display. The message "NAME OF FILE?" appears. Note: You can exit the STORE mode by pressing the Mode key at any time.
-
Page 62: M O D I F Y I N G A P H R A S E F I L
Although phrase files are entered and printed one line at a time in the print mode, they are stored as one continuous line with no margins. 7) Press the Mode key to exit the STORE mode. The typewriter returns to the NP mode. Modifying a Phrase File l) Press the Mode key until a "v"... -
Page 63: I N S E R T I N G A P H R A S E F I L E W I T H I N A T E X T F I L
Inserting a Phrase File within a Text File This function inserts a phrase file within a text file. when the text file is printed, the phrase file is also printed at the position where ir was entered. l) Position the cursor (or canier) at the point in a text file where you want to insert a Phrase file. -
Page 64: Setting The Page Length Of A Text File
Setting the Page Length of a Text File This function sets the page length of a rext file. when entering the text file, this setting reminds you that you are approaching the bottom end of the page. When printing the text file, the typewriter pauses after it prints the number of lines specified in this setring for a new paper insertion. -
Page 65: S T O P C O D
Stop Code Stop codes cause the printing to pause at the predetermined locations in the file in order for you to type in extra text. After you type in the text, the typewriter resumes printing. You can enter stop codes in a text file or a phrase file. Entering a stop code I ) Position the cursor (or canier) at the point in a text file or a phrase file where you want to enter a stop code. - Page 66 I ) In a text file or a phrase file, first activate the function that you I' AUTo I want to enter a stop code with. ICNIER'l @*n,@.8, To enter a stop code with the auto center function, hold down the Code key and press the key under the "AUTO CENTER"...
-
Page 67: S E A R C H A N D R E P L A C
Search and Replace This function searches for the specified word(s) in a text file or phrase file, and/or replaces it with another. Searching for a word I ) Display the text file or phrase file with the edit mode. Position the cursor at the point in the file where you want to start searching word(s). - Page 68 7) Hold down the Code key and press the Index key to search for the next occurrence toward the end of file' I cooe l+ | rHoex I or Hold down the Code key and press the Reverse index key to @ .
- Page 69 4 ,; Pr e s s t h c " G " ke y. " S =" a p pe ars o n th e di sp l ay . T y p e th e w o r d(s) yo u w a nl to search for.
- Page 70 Manual replacing T h i s fu n c t i o n s e a rc hes fbr and repl ac es indi vi dual oc curr ence s of' t h c w o r d (s ) wi t h a noth er. l ;...
- Page 71 Type the new word(s) you want to replace. You can type a maximum of l8 characters including spaces. 8) Press the Print key. The first occurrence of the word(s) appears on the left side of the display. ortr 9) Press the "Y" key or Return key to replace the word(s). Press the "N"...
-
Page 72: Block Operations (Copy/Tvlove/Delete)
Block Operations (Copy/lVlove/Delete) Copying a block of text This function copies a block of text and inserts it to a specified location in the file. This operation does not change or remove the original text. I ) Display the text file or phrase file with the edit mode. --T- 2) Position the cursor under the first character of the text to be position cursor... - Page 73 Moving a block of text T h i s l' u n c ti o n m ov cs a b krc k o l' tc xt to a sp cc ifi ed l o ca tio n i n th e l' i l e. l ) D is p la y lh c t cx t l' i l c or p hra se l ' il c w i th thc e di t mo de ' display text 2 ) Pgsitign the curstlr under the first character of the text to be...
- Page 74 Deleting a block of text This function deletes a block of text from the file. 1) Display the text file or phrase file with the edit mode. 2) Position the cursor under the first character of the text to be deleted.
-
Page 75: P R I N T I N G A T E X T F I L
Printing a Text File A text file is printed on paper in the same appearance as you created and stored in the memory. The margin settings stored in the file are used for printing. You can print a text file in the NP mode or Just mode. If you select the NP mode, a file is printed normally as you type in the memory. - Page 76 5) The printing will pause when the typewriter prints the last line on the page (specified by page length). The message "PRESS J TO CONTINUE" appears on the display. Insert a new sheet of paper and press the Return key to resume printing. When the printing of the text file has been completed, the message "END OF FILE RECALL"...
-
Page 77: P R I N T I N G A P H R A S E F I L
Printing a Phrase File A phrase file does not contain the margin settings. You can print it at any location under any margin settings. You can print a phrase file in the NP mode or Just mode. If you select the NP mode, a file is printed normally as you type in the memory. -
Page 78: Printing A Chain Of Files (Chain Recall)
Printing a Chain of Files (Chain Recall) This function prints two to forty files continuously. I ) Press the Print key. The message "NAME OF FILE?" appears on the display. NAME OF FILE? 2) Type the names of the files in the order to print. Separate each file name with a comma (,). -
Page 79: P R I N T I N G A B L O C K O F T E X
Printing a Block of Text This function prints a block of the file. I ) Display the text file or phrase file with the edit mode. 2) Position the cursor under the first character of the text to be printed. 3) Hold down the Code key and press the "P"... -
Page 80: Variable File
Variable File A variable file is used to store a series of print positions to line up on pre-printed forms. This file contains no text. Using this file, you can quickly move the carrier to the specified locations on the page and type the variable information on each position. - Page 81 6) Press the "S" key to mark the point as a variable stop positton' Two beeps sound to signal that it has been set' Press "s" key + Margin release key to mark the point as a decimal tab stoP Position. rrb-t l f f i Press "S"...
- Page 82 3) Type the name of the variable file and press the Return key. A "v" appears above "PRINT" on the display, and the carrier moves to the first stop position. one of the following messages appears on the display depending on the type of stop position: VARIABLE STOP VARIABLE STOP...
-
Page 83: F O R M A T F I L
Format File A format file is used to store frequently-used format; setting of margins and tabs. (This file contains no text). This file prevents repetitive format settings you require. Creating a format file I ) Press the Mode key until a "v" appears above "STORE" on the display. - Page 84 Using a format file Note: Before you use a format file, select the typing mode NP or JUST. I ) Press the Print key. The message "NAME OF FILE?" appears on the display. @*il 21 Type the name of the format file and press the Return Ke1,. The margin and tab settings in the format file is ser on rhe typewriter.
-
Page 85: F I L E C O P
File Copy This function copies an existing file and gives it a new name. It is used when you want to make a variation of a letter, invoice or any text stored in a file without changing the original version. Note: This function cannot be used while in the STORE mode. -
Page 86: F I L E D E L E T I O
File Deletion This function deletes any unnecessary files from memory or makes room for new files when memory is full. Note: This function cannot be used while in the sroRE mode. Exit the sroRE mode, and clear the display before using this function. I ) Hold down the Code key and press the "0"... -
Page 87: List Of Files In Memory
List of Files in Memory This function displays or prints a list of the files stored in memory. Note: This function cannot be used while in the STORE mode. Exit the STORE mode, and clear the display before using this function. Display the list of files I ) Hold down the Code key and press the "8"... -
Page 88: M E M O R Y O V E R F L O
Printout of the list of files I usTl I ) Hold down the code key and press the "8" key. The message "Display/Printout?" appears on the display. D i s p ' l a y / P r i n t o u t ? 2) Press the "P"... -
Page 89: A V A I L A B L E M E M O R Y C A P A C I T
Available Memory CapacitY This function shows exactly how much memory is still available. I ) Hold down the Code key and press the "9" key. The amount of FAPAo-ilI memory still available in memory is displayed. 2) Press the Return key to cancel the function: Memory All Clear This function clears all files stored in memory. -
Page 90: How To Change Accessories Ribbon Cassette
HOW TO CHANGE ACCESSORIES Ribbon Cassette Removing ribbon cassette l) Turn off the typewriter and open the top cover. 2) Hold the cassette as shown and pull up the ribbon cassette arms. Note: Check the amount of ribbon remaining through the ribbon cassette window. - Page 91 Ribbon select setting Your typewriter can use either correctable carbon or multi-strike ribbons. Set the ribbon selection in accordance with the ribbon you use. Correctable carbon ribbon is selected for the factory setting. To select the multi-strike ribbon, hold down the Code key and press the key to the left of the Right shift key.
- Page 92 Correction Tape Removing correction taPe I ) Open the top cover and remove the ribbon cassette as explained under "Removing ribbon cassette". 2) Remove the left and right spools from the spindles. Note: Be sure not to pull on the spindle hub when removing the left spool.
-
Page 93: Printwheel
Printwheel Removing printwheel l) Open the top cover and remove the ribbon cassette as explained under "Removing ribbon cassette". 2) Pull the printwheel seVrelease lever toward you. The whole print head shifts toward you and the printwheel is released. 3) Lightly grasp the top of the printwheel and carefully pull it up. Note: Be careful not to bend the top of the ribbon guides. - Page 94 SUPPLIES Ribbon cassette There are two types of ribbons that can be used on your typewriter. Correctable carbon ribbon your typewriter comes *'ith this ribbon. This ribbon provides excellent correction performance with the lift-off corection tape. The carbon surface of the ribbon is transferred to the paper as you type, so it is not reusable.
- Page 95 MAINTENANCE Removing Platen The platen on your typewriter is removable making it easier to clean or remove jammed paper. Removing the platen l ) Turn off the typewriter. Open the top cover and move the carrier all the way to the right. 2) Pull open the paper bail toward you.
- Page 96 Cleaning Do not attempt to disassemble the typewriter to clean it. Dust the typewriter lightly, using only a dry cloth. Never use water or solvents such as thinner, alcohol, etc., to clean your typewriter. Be careful not to drop any items (especially pins, paper clips, nail files, etc.) into the typewriter when the top cover is opened.
- Page 97 Printed in Indonesia 001-02401-01 950401 Yl( AH4O...
Need help?
Do you have a question about the AE-740 and is the answer not in the manual?
Questions and answers
I PRESS A KEY AND S KEY AND IT PRINTS V J WHY?