Table of Contents
Advertisement
Advertisement
Table of Contents

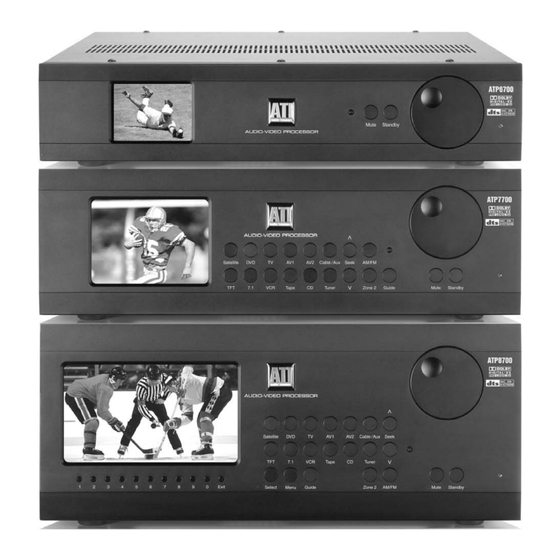
Summary of Contents for Amplifier Tech ATP8700
-
Page 2: Safety Instructions
Please Read First Safety Instructions WARNING: TO REDUCE THE RISK OF FIRE OR ELECTRIC SHOCK, DO NOT EXPOSE THIS UNIT TO RAIN OR MOISTURE. Read all the safety and operating instructions before connecting or using this unit. CAUTION: To reduce the risk of electrical shock, do not remove the cover (or back). -
Page 3: Table Of Contents
Table of Contents Congratulations A/V Processor Features ............Page 4 Thank you for purchasing the ATI A/V PROCESSOR. This A/V Processor Front Panel..........Page 4 A/V PROCESSOR uses the very latest audio processing A/V Processor Rear Panel ........... Page 6 technologies along with crystal clear video reproduction. -
Page 4: A/V Processor Features
A/V Processor Features I Multi-room Capability with Zone 2 Video and audio from a source device connected to the analog audio and video inputs can be routed to a Your new A/V PROCESSOR is built with top-quality second room. components for state-of-the-art audio performance, and offers flexible video processing to meet the needs of any I Three Low-Voltage Triggers home theater system. - Page 5 3 Seek L and M Buttons (ATP8700 and ATP7700) 10 Zone 2 Button (ATP8700 and ATP7700) These buttons are used to seek up and down for AM or FM Press the ZONE 2 button. Quickly, while the Zone 2 LED stations when listening to the tuner.
-
Page 6: A/V Processor Rear Panel
A/V Processor Rear Panel 12 Composite Video Record Outputs Connect these video jacks to the input of a VCR 1 AC Input or DVD recorder, so you can record whatever source is being Connect the supplied AC power cord here. Do not use played in the main room. - Page 7 23 7.1-Channel Audio 27 DVI Video Outputs (ATP8700) Use this input group to connect a device with analog These jacks may be used to connect the ATP8700 to a multi-channel outputs, such as a DVD player, DVD-Audio television with a digital video connection. With an or Super Audio CD player.
-
Page 8: Remote Control
Remote Control The remote control for the A/V PROCESSOR is a preprogrammed universal remote that is the primary control system for the A/V PROCESSOR. This remote also controls as many as seven other devices in your system. It contains an extensive library of IR codes for other devices. -
Page 9: Am-Fm Tuner Operation
10 Source Control Buttons 22 MENU Button Operate DVD players, CD players, DVRs, VCRs or other This activates the A/V PROCESSOR’s on-screen menu. source component features such as play, record, pause, It also serves as enter button for numeric keypad when stop, fast forward, fast reverse. -
Page 10: Surround Format Information
Surround Format Information Dolby Pro Logic IIx Dolby Pro logic IIx is the latest version of Dolby’s Pro Logic The A/V PROCESSOR incorporates today’s most advanced technology. Pro Logic II is a substantial improvement over the surround-sound technologies, including variants of Dolby original Pro Logic process;... -
Page 11: Stereo Listening Modes
Stereo Listening Modes speakers, and to your subwoofer if one is connected. The A/V PROCESSOR also offers advanced technology for 7-Channel Stereo/5-Channel Stereo stereo listening(available In analog only). Not only does it These modes expand the sound from a stereo recording into offer a stereo mode, it also offers additional modes that all channels of your surround-sound system. -
Page 12: Connecting Your A/V Processor
Connecting Your A/V Processor Connecting Audio Components Before proceeding, please observe the following precautions CD PLAYER OR MUSIC SERVER when connecting devices to your new A/V PROCESSOR. Analog Connect the L and R channel outputs on the CD player or music server to the CD jacks on the A/V PROCESSOR. I Do not plug the power cord into your A/V PROCESSOR until all other connections have been made. - Page 13 Connecting Audio Components to Your A/V Processor CD Player ATP8700 Audio Recording Device Page 13...
-
Page 14: Connecting Video Components
Connecting Video Components to Your A/V Processor DVD Player ATP8700 Video Recording Device Page 14... -
Page 15: Connecting Video Components
Connecting Video Components Analog Audio Connect the L and R channel outputs on the DVD player to the DVD analog audio jacks on the rear of the Before making connections to any video devices, it will help to A/V PROCESSOR. understand how the A/V PROCESSOR routes the video portion of the signal. -
Page 16: Video Display Connections
Video Display Connections DVI/HDMI If the recording device has a DVI or HDMI video output, and your TV/monitor has a DVI or HDMI input, A video display device such as a television, a video monitor or connect it to the second DVI input jack on the rear of the a video projector can be connected to the A/V PROCESSOR A/V PROCESSOR (ATP8700). -
Page 17: Antenna Connections
Antenna Connections Other Connections The ATP8700 and ATP7700 A/V PROCESSORs have an inter- Remote Control nal AM/FM tuner with separate external connections for each The IR jacks allow you to extend the remote control sensor radio band. built into the front of the A/V PROCESSOR so that you may control the A/V PROCESSOR even when it is installed behind FM Antenna (ATP8700 and ATP7700) solid or smoked cabinet doors. -
Page 18: Amplifier Connections
Connecting an External Amplifier to Your A/V Processor ATP8700 Amplifier Connections IMPORTANT NOTE: BEFORE ATTEMPTING TO MAKE ANY probably does not matter which of the A/V PROCESSOR’s CONNECTION TO YOUR POWER AMPLIFIER, MAKE SURE output channels is connected to a particular amp channel. THE AMPLIFIER IS TURNED OFF AND/OR DISCONNECTED However, you must be sure that the appropriate speaker is FROM AC POWER. - Page 19 External Amplifier Right Left Rear Rear Speaker Speaker Right Left Surround Surround Speaker Speaker Powered Subwoofer Right Center Left Front Channel Front Speaker Speaker Speaker Page 19...
-
Page 20: Second Zone Connections
Second Zone Connections to which input source may be selected: the dedicated “2nd Zone” input along with all signal connected to analog audio Second Zone Audio and composite video inputs. Use the L and R channel ZONE 2 OUT audio jacks to connect the A/V PROCESSOR to the analog audio inputs of an external Second Zone Video amplifier or other audio component in the second zone. -
Page 21: Connection Record Chart
Connection Record Chart Also, because the A/V PROCESSOR’s on-screen display does not appear on the component outputs, S-Video, or composite Use the chart below to keep a record of what types of video video connections should be used. and audio connections you use for each connected device. If the component you’re connecting has an digital audio Your connections requirements will vary according to your output, connect it to one of the coaxial or optical input jacks... -
Page 22: System Setup
System Setup Due to the complex nature of these variables, it is impossible to recommend any one-size-fits-all placement. You may have to experiment with various placement options to determine IMPORTANT NOTE: YOU MUST PRESS THE AVC BUTTON the best configuration for your specific situation. Please note NEAR THE TOP IN ORDER TO ACTIVATE THE REMOTE that proper configuration and placement of your speaker systems is critical for achieving the best possible surround... -
Page 23: Speaker Size Selection
Speaker Size Selection 1 FRONT LARGE 2 CENTER SMALL For maximum audio performance, you must tell the A/V 3 SURROUND SMALL PROCESSOR what speaker configuration you are using. In the Speaker Size Menu, you will tell the A/V PROCESSOR 4 BACK SMALL whether or not you have a center speaker, side surround 5 SUBWOOFER... -
Page 24: Compression
Compression selector buttons on the remote control, but you can change the way the names appear on the A/V PROCESSOR’s front The A/V PROCESSOR’s Compression option suppresses the panel and on-screen display. loud peaks in movie soundtracks and music videos so that the sound from your system does not disturb others while To Rename an Input: allowing the system to play the system loud enough so you can... -
Page 25: Bass Trim
To Calibrate Channel Levels: 1 USA 1. From the MAIN MENU, press #6 CALIBRATION. 2 EUROPE The CALIBRATION menu appears: 2. Press #s 1-8 to adjust the speaker’s level. 3 TV SETTING NTSC The blinking channel is the one you can adjust. 3. -
Page 26: Operation
Operation Dolby Digital, or DTS) currently being played will be available for you to select. Seven-channel modes such as Dolby Pro POWER Logic IIx Movie cannot be used unless you have seven speakers connected. To Turn the A/V PROCESSOR On: 1. -
Page 27: Remote Control Setup & Operation
You can also use the second-zone video capability to feed a I Cassette Tape Players, DAT, MiniDisc, Switchers, Lighting, second video monitor in the main zone, so, for example, you Home Control Devices and Video Scalers can keep an eye on a sports event or a news crawl while you are watching a movie. -
Page 28: Using Programmed Codes
Using Preprogrammed Codes the procedure is somewhat different than entering codes to control other components. As with other components, you The A/V PROCESSOR remote can be programmed to operate must enter a four-digit code. Codes for many TV/VCR brands other audio or video components in your system. The AVC are provided in the following pages. -
Page 29: Setup Codes
CHECKING THE CODES BACKLIGHTING If you have set up the A/V PROCESSOR remote by searching Pressing any button on the A/V PROCESSOR remote for the codes, for future reference, you may wish to find out illuminates all the buttons on the remote control for about which four-digit code is operating your equipment. - Page 30 CD PLAYERS DVD PLAYERS Manufacturer/Brand Setup Code Number Manufacturer/Brand Setup Code Number Aiwa 0157 Apex 0672 Burmester 0420 Denon 0490 Cal. Audio Labs 0029 Fisher 0670 Carver 0157, 0179 0522 0000 Gradiente 0651 Demon 0003, 0873 Hitachi 0573, 0664 Emerson 0305 Hiteker 0672...
- Page 31 TELEVISIONS Inteq 0017 Manufacturer/Brand Setup Code Number 0054 0019, 0030 0000 Admiral 0093, 0463 0180 Aiko 0092 0180, 0030 Aiwa 0701 Kenwood 0030, 0019 Akai 0030 Konka 0707, 0632, 0628, 0638, 0703 Alaron 0179 0056 America Action 0180 0154, 0047, 0054, 0156, 0178 Anam 0180 Logik...
- Page 32 Sanyo 0154 Magnavox 0081 (for TV use 0054), Scimitsu 0019 0035 (for TV use 0051), 0000 Scotch 0178 Magnin 0240 Scott 0236, 0019, 0178, 0179, 0180 Memorex 0037, 0162 (for TV use 0250) Sears 0154, 0056, 0156, 0047, 0054, 0171, Mitsubishi 0048 (for TV use 0093) 0178, 0179...
- Page 33 Gradiente 0000 Realistic 0000, 0104, 0047, 0048, 0037, 0035 HI-Q 0047 ReplayTV 0614, 0616 Harley Davidson 0000 Runco 0039 Harman/Kardon 0038, 0081 0042 Harwood 0072 Samsung 0045, 0240 Hitachi 0042, 0000 Sansui 0479, 0000, 0067, 0209 Hughes Net. Sys. 0042 Sanyo 0047, 0104, 0240 0067...
-
Page 34: Care And Maintenance
Care and Maintenance Troubleshooting CLEANING Your new A/V PROCESSOR is designed to provide years of When the unit becomes dirty, wipe it with a clean, soft, dry trouble-free operation. However, the complexity of today’s cloth. If necessary, first wipe the surface with a soft cloth sophisticated home theater systems means that you might slightly dampened with mild soapy water, then with a fresh encounter an occasional problem with your system involving... -
Page 35: Specifications
Specifications All Specifications refer to 1 Vrms and 0 dBf digital or 2 Vrms analog input, except when stated. Model ATP8700 ATP7700 ATP6700 Input Level 200mVrms 200mVrms 200mVrms Output Level (Preamp) 3.5 Vrms 3.5 Vrms 3.5 Vrms Input Impedance 15 k Ohms 15 k Ohms 15 k Ohms Total Harmonic Distortion (Stereo Source)
Need help?
Do you have a question about the ATP8700 and is the answer not in the manual?
Questions and answers