Table of Contents
Advertisement
AVM
OPERATING MANUAL
OPERATING MANUAL
SOFTWARE VERSION 1.1x
UPDATES: www.sonicfrontiers.com
SSP
MAIN
ZONE2
TV
VCR
CD
DVD
SAT
AUX
1
2
3
FM/AM PRE-SETS
4
6
5
ON SCREEN
DISPLAY
TONE BYPASS
7
8
9
DYN
EFFECT
0
MUTE
ENTER
LAST
VOL
SLEEP
CH/PRE-SET
INPUT
GUIDE
EXIT
SEEK
TUNE
FRT
CTR
SELECT
SETUP
INFO
MENU
SUB/
SUR
LFE
SOURCE SEEK
BASS
TREBLE
BALANCE
PIP
SWAP
MOVE
SSP
MAIN
REC
DISC1
DISC2
TAPE
FM/AM
SSP INPUT SOURCES
TV
SAT
VCR
AUX
Advertisement
Table of Contents

Related Manuals for Anthem AVM 2


Summary of Contents for Anthem AVM 2
- Page 1 OPERATING MANUAL OPERATING MANUAL SOFTWARE VERSION 1.1x UPDATES: www.sonicfrontiers.com MAIN ZONE2 FM/AM PRE-SETS ON SCREEN DISPLAY TONE BYPASS EFFECT MUTE ENTER LAST SLEEP CH/PRE-SET INPUT GUIDE EXIT SEEK TUNE SELECT SETUP INFO MENU SUB/ SOURCE SEEK BASS TREBLE BALANCE SWAP MOVE MAIN DISC1...
- Page 2 Copyright © 2000, Sonic Frontiers International. The information contained herein may not be reproduced in whole or in part without our express written permission. ANTHEM™ and SONICFRONTIERS™ are trade marks of SONIC FRONTIERS INTERNATIONAL. MOTOROLA™ is a trade mark of Motorola, Inc.
-
Page 3: Table Of Contents
TABLE of CONTENTS SECTION PAGE 1. INTRODUCTION 1.1 About this Manual ..............1 1.2 Receiving and Unpacking the AVM 2 . - Page 4 5. FRONT PANEL OPERATION 5.1 Zone / Path ............... 21 5.2 Power On / Off .
- Page 5 7.4 Anthem AVM 2 Setup Menu ........
-
Page 6: About This Manual
In that time, SFI has built an enviable reputation for products that can recreate the passion music lovers experience when attending a live musical performance. Sonic Frontiers and Anthem products allow audiophiles to almost “be there” each and every time they sit and enjoy their music and surround sound systems in the comfort of their home. -
Page 7: Before Operating Your Avm
1. INTRODUCTION continued … • Neither Anthem, Sonic Frontiers International, our agents, or any related party assume any liability whatsoever for the user’s failure to comply with any or all of these requirements. 1.3.1 BEFORE OPERATING YOUR AVM 2 • Do not connect power to the AVM 2 if there are signs of damage to any part of its exterior surface. -
Page 8: In-Use Notices
1. INTRODUCTION continued … To prevent risk of shock or fire, do not overload wall outlets, extension cords, or convenience receptacles. Please note that the power transformer primary cannot be changed from a North American to a European or Asian standard. 1.3.5 IN-USE NOTICES •... -
Page 9: Quick Start Guide
2. QUICK START While the AVM 2 is certainly a massive component with enough features and connections to make your head spin, setup and operation are also very intuitive! With your AVM 2 in front of you, browse through the illustrations in this section showing several quick system hookups. -
Page 10: Connector Diagrams And Descriptions
2. QUICK START continued … To Watch a DVD: • Press DISC1 Source on the front panel of the AVM 2. • Switch the TV’s Video Input to the one that the AVM 2 Composite-Out is plugged into. • Place a DVD into the DVD Player and press play. You should see the picture on your TV and hear sound from your speakers. -
Page 11: 1-A Cd Player Or Cd Transport To Avm 2 (Digital)
2. QUICK START continued … 2.2.1-a CD Player or CD Transport to AVM 2 (Digital) NOTE: XLR or Toslink Amplifier(s) use is OPTIONAL (see sections 4.2.1 and 7.4.2) 2.2.1-b CD Player to AVM 2 (Analog) Amplifier(s) -
Page 12: Dvd Player And Tv To Avm 2
2. QUICK START continued … 2.2.2 DVD Player and TV to AVM 2 NOTE: S-Video or Component Video use is OPTIONAL Amplifier(s) (see sections 4.3 and 7.4.9) NOTE: S-Video or Component Video use is OPTIONAL (see sections 4.3 and 7.4.9) -
Page 13: Vcr And Tv To Avm 2
2. QUICK START continued … 2.2.3 VCR and TV to AVM 2 NOTE: S-Video use is OPTIONAL (see sections 4.3 and 7.4.9) Amplifier(s) NOTE: S-Video use is OPTIONAL (see sections 4.3 and 7.4.9) NOTE: S-Video use is OPTIONAL NOTE: (see sections Audio/Video 4.3 and 7.4.9) Record Out/In... -
Page 14: 4-A Avm 2 To Amplifier And Powered Subwoofer (Rca)
2. QUICK START continued … 2.2.4-a AVM 2 to Amplifier and Powered Subwoofer (RCA) Follow amplifier manufacturer’s complete hook-up instructions to connect amplifier outputs to matching speakers. -
Page 15: 4-B Avm 2 To Amplifier And Powered Subwoofer (Xlr)
2. QUICK START continued … 2.2.4-b AVM 2 to Amplifier and Powered Subwoofer (XLR) Follow amplifier manufacturer’s complete hook-up instructions to connect amplifier outputs to matching speakers. -
Page 16: Surround System Speaker Placement
2. QUICK START continued … SURROUND SYSTEM SPEAKER PLACEMENT This illustration shows the typical speaker placement for a 6-channel surround system, also known as a 5.1 channel system, the ‘.1’ channel being the LFE (Low Frequency Effect). The Front-Left, Center, and Front-Right speakers are directed toward the listener from the front while the Left and Right Surround speakers are posi- tioned to the sides or behind the listener. -
Page 17: Panels / Displays / Remote Layout
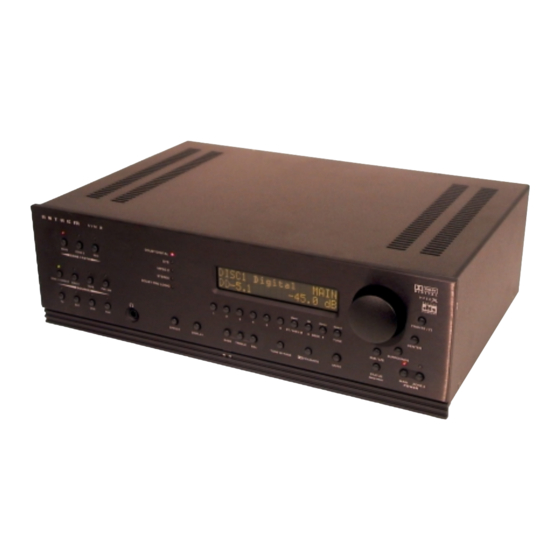
3. PANELS / DISPLAY/ REMOTE LAYOUT 3.1-a FRONT PANEL LAYOUT The front panel of the AVM 2 has the MASTER CONTROL KNOB, selection buttons, an LCD display, status indicator LED’s, and the Headphone jack . 1 – Zone / Path Selection 10 –... -
Page 18: Bfront Panel Lcd Display
3. PANELS / DISPLAY/ REMOTE LAYOUT continued … 3.1-b FRONT PANEL LCD DISPLAY Here are two examples of the Front Panel LCD Display presentations: MAIN Display 1 – Source Selection (see section 5.5). 2 – Audio-In Format (see section 7.4.2) or Sleep Indicator if engaged (see section 6.6). 3 –... -
Page 19: Rear Panel Layout
3. PANELS / DISPLAY/ REMOTE LAYOUT continued … REAR PANEL LAYOUT The Rear Panel of the AVM 2 contains all connections, such as the Audio and Video Inputs and Outputs, the FM/AM Antenna Inputs, AC Power connection and the RS-232 port which allows upgrading of the internal operating Software as well as control of the AVM 2 by external devices. -
Page 20: Remote Control Layout
3. PANELS / DISPLAY/ REMOTE LAYOUT continued … REMOTE CONTROL LAYOUT 1 – IR Transmitter (front face) 2 – Transmission Indicator LED (red) 3 – AVM 2 Power ON when MAIN or ZONE2 is selected Power ON/OFF for other components (see #4) Note: This does not turn the AVM 2 off (see #31) 4 –... -
Page 21: Connecting Power To The Avm 2
4. CONNECTIONS CONNECTING POWER TO THE AVM 2 Connect the power cord to the back of the AVM 2 and then to an AC outlet with a line voltage of between 105 and 130 Volts, 60 Hz. When turned on, the AVM 2 will have all of the same settings it had when it was last turned off, except for Volume, which comes on at the pre-programmed setting (see section 7.4.6). -
Page 22: Left / Right Analog Audio Inputs
4. CONNECTIONS continued … 4.2.3 LEFT / RIGHT ANALOG AUDIO INPUTS Analog audio signals pass through a pair of interconnect cables with RCA connectors – typically White or Black for the Left Channel and Red for the Right Channel. The audio output connectors from Tape Recorders, VCR’s, and CD Players are normally colour coded in this same manner. -
Page 23: Composite Video
4. CONNECTIONS continued … The On-screen Display and Setup Menu are only displayed in MAIN (Zone / Path) and available when Composite Video or S-Video connections are used. Composite Video is the factory default setting (see section 7.4.9 menu 9.b). The AVM 2 does not provide an On-Screen Display or On-Screen Setup Menu Display for the Component Video output. - Page 24 4. CONNECTIONS continued … DVD Player, Satellite Receiver, and TV Connections with AVM 2 as Video Input Selector NOTE: S-Video or Component Video use is OPTIONAL (see sections 4.3 and 7.4.9) Amplifier(s) NOTE: S-Video or Component Video use is OPTIONAL Connect Power Amplifiers (see sections as outlined in fig 2.2.4 (a or b)
-
Page 25: Component Video
4. CONNECTIONS continued … 4.3.3 COMPONENT VIDEO The Component Video signal is split into three parts and transmitted over three coaxial cables with RCA connectors. This format produces the highest video quality. Only some TV Monitors, Projectors, DVD Players, and most HDTV Decoders utilize Component Video. The AVM 2 has two preassigned Component Video inputs, one for DISC1 and one for SAT. -
Page 26: Front Panel Operation
5. FRONT PANEL OPERATION OF THE AVM 2 This section will familiarize you with operating the AVM 2 from the Front Panel keypad buttons. Section 6 outlines how to operate the AVM 2 from the Remote Control. ZONE / PATH The AVM 2 is best understood as a product that contains two components (or ‘personalities’) in one chassis. -
Page 27: Master Control Knob
5. FRONT PANEL OPERATION continued … The AVM 2 automatically re t u rns to MAIN a few seconds after an adjustment is made in either ZO N E2, REC, or HE A D P H O N E* . This is designed to prevent accidents. Say, for example someone enters the MAIN ro o m and turns up the volume –... -
Page 28: Direct Input
5. FRONT PANEL OPERATION continued … Channels are downmixed to L/R 2-channel stereo by the DVD Player. N o t e : If you are doing this, the digital output from your DVD Player must still remain connected to the AVM 2, otherwise MAIN will not receive the digital signal to provide 6-channel (5.1) output. •... -
Page 29: Volume Control
5. FRONT PANEL OPERATION continued … VOLUME CONTROL In MAIN the AVM 2 can control the volume of all speakers simultaneously, and the level of individual speakers or pairs of speakers. ZONE2 and HEADPHONE volumes are also controlled separately. Note: Always make certain you are in the Zone / Path that you want to adjust before making any Volume or Level changes. -
Page 30: Mute
5. FRONT PANEL OPERATION continued … MUTE When MUTE is pressed, the audio output to the Zone / Path shown on the LCD display is silenced. The volume shown is replaced by “Muted”. Press MUTE again, or rotate the Master Control Knob to adjust the volume, and sound will return. Note: MAIN, ZONE2 and HEADPHONE can all be muted independently. - Page 31 5. FRONT PANEL OPERATION continued … To select an Effect, press EFFECT and rotate the Master Control Knob: None (Off): Disables all Effects. Disables Dolby Pro Logic decoding for all analog source material, even if it is Dolby Pro Logic encoded. Dolby Pro Logic: Enables Dolby Pro Logic decoding for all source material, whether it is encoded or not.
-
Page 32: Dolby Digital Dynamics
5. FRONT PANEL OPERATION continued … 5.11 DOLBY DIGITAL DYNAMICS This feature only applies to certain Dolby Digital DVD’s. It allows you to control the difference between the softest and loudest passages. Please note that some Dolby Digital DVD titles do not provide dynamic scaling, and selecting one of the following three settings will have no effect. -
Page 33: Remote Control Operation
6. REMOTE CONTROL OPERATION IR Transmitter Power ON Dr. Jekyll and Mr. Hyde, as you may know, were two Red Indicator LED very different personalities, even though they were the same person. Well, the AVM 2 Remote Control Learn Key is the host to NINE different personalities! (All of them ‘good’, of course.) Zone/Path/Component... -
Page 34: Path Selection
6. REMOTE CONTROL OPERATION continued … PATH SELECTION • MAIN – Press MAIN in Zone/Path/Component, then press • ZONE2 – Press ZONE2 in Zone/Path/Component, then press • REC – P ress M A I N in Zone/Path/Component, press , then press SSP REC. Short Cut: After pressing MAIN or ZONE2 in Zone/Path/Component ‘personality’, pressing any other active key in that selected Path will automatically switch the AVM 2 to that Path. -
Page 35: Controlling Other Components
6. REMOTE CONTROL OPERATION continued … • The first SLEEP keystroke always resets the timer to 30 minutes. Additional keystrokes then cycle as follows: first=30, second=60, third=90, fourth=Disabled. • Once set, the time remaining appears as the number following ‘Zzz’ in the display. CONTROLLING OTHER COMPONENTS The AVM 2 Remote Control can be set up to control your TV, DVD Player, CD Player, VCR, Satellite Receiver, and a second TV. -
Page 36: Learning Function
6. REMOTE CONTROL OPERATION continued … To Engage Volume Lock for MAIN: 1. Press and hold LEARN until the LED flashes twice. 2. Press 9, 9, 3. 3. Press MAIN. At this point, the Volume and Mute buttons now control MAIN, no matter which of the eight Zone/Path/Component selections the Remote Control is in. -
Page 37: Teaching A Key
6. REMOTE CONTROL OPERATION continued … • The placement of the IR transmitter in the Source Remote may make it difficult to correctly align the two Remotes. • Source Remotes that contain a beam-focusing lens may require more than one attempt at successful alignment. -
Page 38: Advanced Set-Up
7. ADVANCED SET-UP The SETUP MENU enables you to access the basic and advanced settings for the AVM 2. In other words, this is where all the user definable operating characteristics / calibrations / customized configurations are entered. You can only gain access to the Setup Menu with the ZONE / PATH set to MAIN. For optimum performance and enjoyment, it is crucial that your AVM 2 be properly set up. -
Page 39: Anthem Avm 2 Setup Menu
With your TV Monitor connected as described at the beginning of this section, enter the Setup Menu as described in section 7.1. Your On-Screen display will show the following information: ANTHEM AVM 2 SETUP MENU RENAME SOURCES AUDIO IN FORMAT–MAIN... - Page 40 7. ADVANCED SET-UP continued … 7.4.1 RENAME SOURCES ThE Rename Sources Setup Menu lets you change the factory assigned name that is displayed when selecting a Source. Those that are renamed will then appear that way throughout all Setup Menus and display screens during normal operation.
- Page 41 7. ADVANCED SET-UP continued … Audio In Format–MAIN Selections apply to the MAIN Path only. If you have selected Digital for a given source and connected the digital output from your source component, you can still use the Analog Inputs for that same source – these will then be available for other Paths (ZONE2, REC). This arrangement allows greater operating flexibility.
- Page 42 7. ADVANCED SET-UP continued … 7.4.3 SPEAKER CONFIGURATION The Speaker Configuration Setup Menu allows you to enter information about how many speakers you have in your system and their relative size. Here you will also set up the Bass Management for your whole system. Note: This is an important setup that you must perform in order to optimally direct all audio information and achieve high quality sound reproduction from your system.
- Page 43 7. ADVANCED SET-UP continued … Dolby Configuration Flowchart: The following Flow Chart summarizes all of the speaker combinations and subwoofer settings the AVM 2 supports for accurate DOLBY signal processing: Dolby Configuration Notes: • If SURROUNDS are set to ‘None’, the L-Surround channel is directed to the L-Front channel, and the R-Surround channel is directed to the R-Front channel (except in Dolby Pro Logic mode).
- Page 44 7. ADVANCED SET-UP continued … (menu 3.g) TV Size For EQ : This is used to determine the magnitude of the Center EQ change. The sizes provided offer an easy-to-use general guideline. Since room/TV/furniture acoustics vary, you may wish to experiment to determine which setting is actually the best for you.
- Page 45 7. ADVANCED SET-UP continued … 7.4.4 LISTENER POSITION The Listener Position Setup Menu lets you enter the distance from each speaker to the listening area. Ideally, speakers should be placed at a similar distance so that their sound arrives at the listening area at the same time.
- Page 46 7. ADVANCED SET-UP continued … Note: The FRONTS, CENTER, SURROUNDS, SUB, and BALANCE buttons on the Remote Control and Fro n t Panel DO NOT affect settings in this menu, but rather allow adjustment of program material as may be re q u i red (section 5.6). Note: The Speaker Configuration (section 7.4.3) must be done before the Speaker Level Calibration since any speaker set to ‘None’...
- Page 47 7. ADVANCED SET-UP continued … (menu 5.a) PROCEDURE FOR ‘AUTO’ TEST SEQUENCE: • Enter the Setup Menu (section 7.1). Go to ‘5. SPEAKER LVL CALIBRATION’ and press SELECT (‘Select’). • Use the 34keys (MASTER CONTROL KNOB) to set TEST SEQUENCE to ‘AUTO’. •...
- Page 48 7. ADVANCED SET-UP continued … • Volume Speed: This sets how quickly the volume changes for each ‘turn-of-the-knob’ or press of the Remote Control Volume keys. Choose either ‘Slow’ or ‘Fast’. VOLUMES Example: Set ZONE2 Maximum Volume to ‘+5.0 dB’. •...
- Page 49 7. ADVANCED SET-UP continued … (menu 7.a-c) MAIN / ZONE2 Timers: • All Timers: This allows you to ‘Enable’ or ‘Disable’ all Timer options for both MAIN and ZONE2, regardless of their settings. • Pressing SELECT on the ‘SET MAIN TIMERS’ and ‘SET ZONE2 TIMERS’ menu items brings up their individual submenus.
- Page 50 7. ADVANCED SET-UP continued … menu 7.b-c/k) Select Source: Allows you to select the source that will play when either Timer1 or Timer2 turns a Zone / Path On. All sources are available (even your favorite FM/AM station). Be sure that your selected source and power amplifier are turned on, or will be at the Timer turn-on time –...
-
Page 51: Triggers /Ir/ Rs-232
7. ADVANCED SET-UP continued … 7.4.8 TRIGGERS / IR / RS-232 Three Trigger Outputs are provided on the back of the AVM 2. These allow you to remotely turn other components on or off, such as Power Amplifier, CD Changer, Video Projector, etc. To have their power On/Off controlled by the AVM 2, simply connect a Trigger output from the AVM 2 to the Trigger input of the other component. - Page 52 7. ADVANCED SET-UP continued … Under each of the three AVM 2 Zones / Paths, MAIN (M), ZONE2 (Z2), and RECORD (R), a variety of Sources are available to choose from to set the Triggers. In the Control Chart, you will notice that there are 27 available Sources (27 dashes), that could be used to activate that particular Trigger.
-
Page 53: Display/ Selection Time
7. ADVANCED SET-UP continued … TRIGGERS / IR / RS232 Example: Activate Trigger1 and 2 when MAIN is turned ON with TV as the Source. • Enter the Setup Menu (section 7.1). Go to ‘8. TRIGGERS/IR/RS-232’ and press SELECT (‘Select’). •... - Page 54 7. ADVANCED SET-UP continued … Note: The On-Screen display is not available for Component Video. Note: If you have connected and selected ‘Composite’ for ON-SCREEN OUT and afterwards change it to ‘S-Video’, the Setup Menu will immediately disappear because doing so has actually ‘disconnected’...
-
Page 55: Save/ Restore Settings
7. ADVANCED SET-UP continued … 7.4.10 SAVE / RESTORE SETTINGS The AVM 2 enables you to save the entire setup configuration, except for the time and day. Two separate save files are provided: SAVE USER SETTINGS and SAVE INSTALLER SETTINGS. If your dealer does the setup, they can SAVE their setup configuration to their own INSTALLER file. -
Page 56: Lockout/ Passwords
7. ADVANCED SET-UP continued … SAVE / RESTORE Example #2: ‘RESTORE INSTALLER SETTINGS’. Note: FM/AM Tuner presets that were saved in INSTALLER SETTINGS will also be restored. • Enter the Setup Menu (section 7.1). Go to ‘10. SAVE/RESTORE SETTINGS’ and press SELECT (‘Select’). •... - Page 57 7. ADVANCED SET-UP continued … (menu 11.b-c) Set User or Installer Password: When setting the USER or INSTALLER Password, you will be asked to enter a four digit number. Pick one that you will be able to easily remember. To enter that number use the 1 – 6 keys on the Remote Control or the 1 –...
-
Page 58: Software Version Identification
SOFTWARE UPDATING VIA YOUR DEALER To do this, you will have to take your AVM 2 to your Authorized Anthem Dealer. To save yourself time and trouble, please remember to call your dealer first to find out if you should get the latest Software Version, and then arrange a time to install the update. - Page 59 8. SOFTWARE UPDATING continued … To Download the Software Update to Your AVM 2: 1. First of all, find out which Software Version you currently have by pressing the Status button on the Front Panel of your AVM 2. 2. Go to the AVM 2 page on the SONIC FRONTIERS web site (www.sonicfrontiers.com) and locate the latest AVM 2 Software Version Update.
- Page 60 If a problem or defect is discovered in your Anthem AVM 2, please contact your Authorized Anthem Dealer. It is the Dealer’s responsibility to determine the nature of the problem and arrange for the appropriate replacement parts, or the return of the AVM 2 to SFI.
- Page 61 The balance of the warranty can be transferred on used product only if the product is traded in at an Authorized Sonic Frontiers / Anthem Dealer, who may resell the product with the remaining warranty if it is cosmetically acceptable, in perfect working condition, and has not been internally or externally altered in any way.
-
Page 62: Appendix A – Universal Remote Control Codes
APPENDIX A - UNIVERSAL REMOTE CONTROL CODES The following is a list is codes at time of printing. For newer models not listed you can get the latest list of codes from our web site at: www.sonicfrontiers.com. Note: Codes can only be used with their respective Zone/Path/Component key. - Page 63 APPENDIX A - REMOTE CONTROL CODES continued … 0072 Videosonic 0240 Paragon 0000 Kenwood 0067, 0041, 0038 Wards 0060, 0035, 0048, 0047, Philips 0153 Kodak 0035, 0037 0081, 0240, 0000, 0042, Pioneer 0144, 0533 0037 0072, 0149 Popular Mechanics 0400 Lloyd’s 0000 White Westinghouse...
- Page 64 APPENDIX A - REMOTE CONTROL CODES continued … Mission 0157 Universal X10 0167 Stereo Tuners or Receivers: 0157 0167 0531 Nikko 0174 Adcom 0616 Onkyo 0101, 0868 DBS Audio Services: Aiwa 0158, 0189, 0121, 0405 Optimus 0000, 0032, 0179, 0305, Akai 0224 Aiwa...
- Page 65 SPECIFICATIONS PREAMPLIFIER SECTION Input Impedance Direct ..............25 k All Others .
- Page 66 SPECIFICATIONS continued … IMD (CCIF) @ 15 kHz & 16 kHz Direct Inputs............. . 0.001% All Other Analog Inputs.
- Page 67 SPECIFICATIONS continued … DIGITAL AUDIO All digital audio inputs and outputs are to S/PDIF electrical (75 , 0.5 Vp-p), S/PDIF optical (Toslink), or AES / EBU (110 , 5 Vp-p) standards as appropriate. Processor ............Motorola 56362 @ 108MHz Audio Converters Analog to Digital.
- Page 70 D E S I G N E D A N D M A N U FA C T U R E D B Y S O N I C F R O N T I E R S I N T E R N A T I O N A L 2 7 9 0 B R I G H T O N R O A D , O A K V I L L E , O N TAR I O , C A N A D A L 6 H 5 T 4 T E L : ( 9 0 5 ) 8 2 9 - 3 8 3 8 F A X : ( 9 0 5 ) 8 2 9 - 3 0 3 3 S o n i c F r o n t i e r s c a n b e r e a c h e d 9 : 0 0 a m t o 5 : 3 0 p m ( E .
Need help?
Do you have a question about the AVM 2 and is the answer not in the manual?
Questions and answers