Table of Contents
Advertisement
Quick Links
Advertisement
Table of Contents

Subscribe to Our Youtube Channel
Related Manuals for Akura APL1921W-HDID


Summary of Contents for Akura APL1921W-HDID
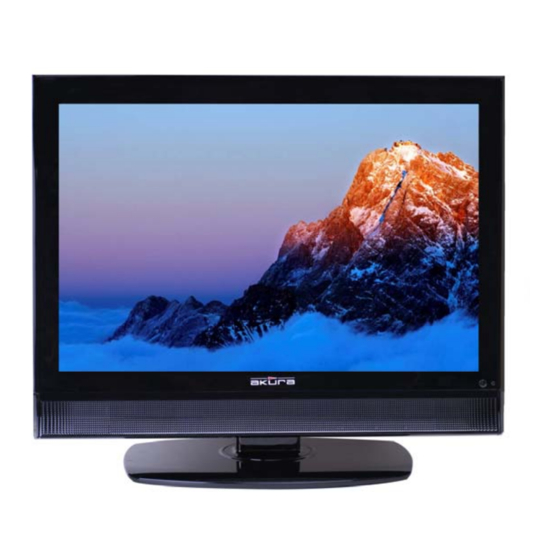
- Page 1 Model : APL1921W - HDID 19” Digital LCD TV with DVBt “Freeview” HDMI...
- Page 2 LCD Screen Although the LCD screen is made with high precision technology and 99.9% or more of the pixels are effective, dots may appear. These can be black or bright dots (red, green or blue) and may appear constantly on the LCD screen. This is a structural property of the LCD panel and is not a malfunction.
-
Page 3: Table Of Contents
Contents LCD SCREEN WARNING Inside cover page Safety Information Safety Instructions Accessories User Controls Remote Control Connections Menu Operation Teletext EPG (Electronic Programme Guide Wall mounting Trouble Shooting Guide Specifications Mains Plug Wiring... -
Page 4: Safety Information
1. Safety Information The lightning flash with arrowhead symbol, within an equilateral triangle, is intended to alert the user to the presence of un-insulated “dangerous voltage” within the products enclosure that may be of sufficient magnitude to constitute a risk of electric shock to the persons. The exclamation point within an equilateral triangle is intend to alert the user to the presence of important operating and maintenance (servicing) instructions in the literature accompanying the appliance. -
Page 5: Safety Instructions
2. Safety Instructions CAUTION. PLEASE READ AND OBSERVE ALL WARNINGS AND INSTRUCTIONS GIVEN IN THIS USER MANUAL AND MARKED ON THE APPLIANCE. RETAIN THIS BOOKLET FOR FUTURE USE. This set has been designed and manufactured to assure your personal safety. Improper use can result in Electric shock or Fire hazard. -
Page 6: Accessories
3. Accessories Please check the contents of the TV before you continue. If any item is missing please contact your point of purchase. User Manual Remote Control AC/DC Adaptor Mains lead 4. User Controls. Top View Front View 1. Vol – Reduces Volume level. In menu mode will shift the selection to the left, or decreases level being adjusted. -
Page 7: Remote Control
5. Remote Control. 2. INFO. Displays TV settings and 1. STANDBY. Switches TV to Standby channel being viewed. and Operation. 4. MUTE. Press to mute sound, press 3. P MODE. Selects picture modes. again to restore sound. 5. S MODE. Selects sound modes. 6. - Page 8 5. Remote Control. Open the battery cover Fit two “AAA” batteries (Not supplied). Ensure the battery polarities are correct i.e + to + and – to -. Replace the battery cover To prevent injury, do NOT break open or throw exhausted batteries in a fire. Do not place in the domestic waste, consult your local waste disposal company.
-
Page 9: Connections
6. Connections. IMPORTANT. When making connections ensure the TV is disconnected from the DC supply input, and that the appliance being connected is also disconnected from the mains supply. DC INPUT. +12V DC 3.3A max. HDMI. Input from HDMI source (High Definition). VGA. - Page 10 6. Connections. PC connections. Disconnect TV from mains adaptor. Connect VGA (15 pin) plug to TV and Connect stereo audio lead. Mains Adaptor. Connect supply to TV and PC. Do not connect mains Use SOURCE button to select VGA. supply until the adaptor is connected to the TV.
-
Page 11: Menu Operation
7. Menu Operation. Connect the TV/DVD to the Mains adaptor and suitable aerial. It is advisable not to connect other apparatus until you have established that the TV is working correctly. If using the TV for DVBt (Freeview) viewing the existing aerial may not be suitable. Indoor aerials (set top) may not be suitable for some of the received stations. - Page 12 7. Menu Operation. OSD Menu. Press the LCD MENU button to display the main menu, Fig 4 will be displayed. To select the other menu’s press the ► button and the menu’s will rotate in the Fig 4 sequence :- Picture, Sound, Time, Setup, Lock, TV Setting. To enter each menu press the ▼...
- Page 13 7. Menu Operation. Sound. (Fig 7) Sound Mode. Select from :- Standard, Music, Movie, Sports and Personal. Standard. Used for general viewing. Fig 7 Music. Selected for enhanced music appreciation. Movie. A more dynamic setting suitable for movie viewing. Sports. Suitable for sports viewing. Personal.
- Page 14 7. Menu Operation. Fig 11 TV Setting. (Fig 11). Auto Tuning. After initial installation it may be necessary to re install all the stations. Select Auto Tuning and press OK. The sub menu (Fig 12) will be shown. If using in the UK select Start with the ▼ button and press OK. If using in another country, select the country using the ►/◄...
- Page 15 7. Menu Operation. Programme Edit. (Analog) (Fig 15). Delete “Red” Should it be necessary to Delete a station, use the cursors to select the station to be deleted. Press the RED button, this will put a RED marker next to the station to be deleted, press RED again and the station will be deleted, to exit delete press the Menu button.
- Page 16 7. Menu Operation. Fig 17 Using a CAM (Conditional Access Module) (CI Slot). This feature allows the user to access digital terrestrial “pay per view” channels. To use this facility a conditional access module (CAM) and viewing card need to be obtained by subscribing to a pay channel company. To insert the module.
-
Page 17: Teletext
8. Teletext. (Analog) TV Teletext is an information system broadcast by certain programme providers. It can provide Subtitles for viewers hard of hearing. Weather, Travel information, games and many other services. Below is a description of the buttons associated with Teletext. TEXT. -
Page 18: Epg
Mount the TV to the wall bracket using 4 x 4mm x 10mm set screws. (Do NOT use longer screws as the internal parts of the TV may be damaged). Akura Ltd accepts no responsibility for damage, caused to or by, incorrect mounting of the wall bracket. -
Page 19: Trouble Shooting Guide
11. Trouble shooting guide. Should you experience difficulties operating this product please consult the guide below before calling the Customer Help Line. SYMPTOM POSSIBLE CAUSE REMEDY Dead. No led lit Power not connected to TV Check power lead and mains adaptor connections Press Power button on TV or Standby button on No Picture. -
Page 20: Specifications
12. Specifications. ITEM DESCRIPTION Power Requirements TV 12V DC @ 3.3 A Max (40W) Standby Power >2W 100-240V AC 50/60 Hz 1.3A Mains Adaptor Output 12V 5A DC Screen Size 19” (48.2cm) diagonal Case dimensions 470mm x 410mm x 190mm inc base Weight 4.9 Kg's Mains adaptor weight... -
Page 21: Mains Plug Wiring
13. Mains Plug Wiring Diagram Fig 24 If it becomes necessary to replace the Mains Plug, it should be wired in accordance with the diagram as in Fig 24. The Brown wire (Live) should be connected to the terminal (L) The Blue wire (Neutral) should be connected to the terminal (N) The Green/Yellow wire (Earth) should be connected to the terminal (E).
Need help?
Do you have a question about the APL1921W-HDID and is the answer not in the manual?
Questions and answers