
Subscribe to Our Youtube Channel
Related Manuals for LG LWHD1009R


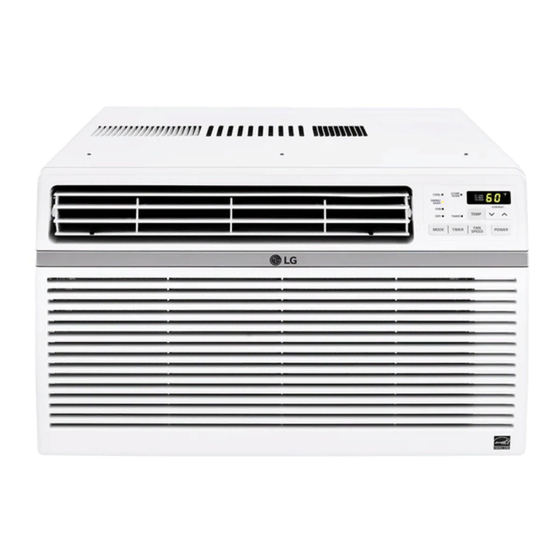
Summary of Contents for LG LWHD1009R
- Page 1 wwwJgservice.com Window-Type Air Conditioner OWNER'S MANUAL MODELS: L WHD8OOOR, L WHD8OOOR Y5, L VVHD I O00R after para el futuro...
-
Page 2: Read This Manual
FOR "{OUR RECORDS Write the mode_ and sedai numbers here: Model # _ria! You can fir_d the humors on a _abel on the side of the product, Dealer's Name Date Purchased [] Stap# your receipt to this pa_ in t_ _ent you need it to prove date of purchase or for warra_ly issues,... - Page 3 To prevent injury to the user or other _ople and property damage, the following instructions must be foIFowed. [] _n_rrect operation due to ignoring instructions wfl] cause harm or damage. The seriousness is classified b,y the foi]]o,wing indications. [] B_ause of the weight of the product, it is recommend_...
-
Page 4: Operation
[] Operation • It willl cause e_ectric shock or • litwiill cause ellectric shock or . ._he_ise, it will cause electric shock or fire fire. fire. , _ will _use electric shock or • It will cause ele_ric sho_ • No grounding may _use fire. -
Page 5: Installation
* The air co, n d_ioner must be operated in a * It may cause explosion, fire, and burn. enclosed area to _ most effective, cause ele_ric sho_ or faillure of * Water may enter the unit and degrade the machine.. - Page 6 m Operation . It may cause iniury • It may cause electric shock , it will waste power and damage consumption in vain and it may cause accident, • It is an air _nditioner, not a , Since the fan rotates at high •...
- Page 7 Before, Operation i ¸? 1. Plug in the power cord properly. 2. Use a dedicated circuit. Ovedoadiing the line could create a fire, Ihazard. 3. Do not use an extension cord. See page 10 for more details. 4. Do not start/stop operation by plugging/unplugging the power cord.
- Page 8 /ntrodu'c#on This symbol alerts you to the risk of electric shock. This symbol alerts you to hazards that could cause harm to the air conditioner. This symbol indicates s_cial notes. WARNING: This appliance should be install_ in accordance with the National El_tric C_e.
-
Page 9: Electrical Safety
Elect'rical Safety, 115V~ 230V,-- Power cord may include a current interrupter d_i_,. A _st and reset button is provided on the plug _se, The device should be tes,t_ on a _riodic basis b_ first, p_,ssing the TEST button and then Me RESET button, If the TEST button does not trip ,oirif the RESET button will not stay engaged, disco,nfinue use d' the air... - Page 10 WARNING: This appliance must be properly grounded. The power cord of this appliance is equipped with a three-prong grounding plug. To miinimize the risk of electric shock, use the plug with a standard three-slot grounding wall power ,outlet. If the power ,outlet does not include a grounding slot, have a qualified eiectrician replace the outlet before you use the room air conditio, ner_ Changing the outlet without making...
- Page 11 We strongly discourage the use of an adapter due to potential :safety h_ards. For temporary connections, use only a UL-fisted adapter, available from most local hardware stores. Ensure that the, large sbt in the adapter is aligned with the large slot in the receptacle for a proper polarity connection. To disconnect the power cord from the adapter, use one hand on each to avoid damaging the ground terminal.
- Page 12 tnstafla#on Type A: 11 EA Type B: 5 EA Ty_ C: 1 _ Type D: 3 EA (Shod Screw) (Wood Scr@a_} (Drain Joint Pipe) (L Bra_et) lype E: 1 EA Type F: 1 EA Tyipe G: 2 EA ../°y_ H: 1 EA (Seai Strip} (Guide Pane_} /Suppo_ Briacket/...
- Page 13 bstdtation Proper clearance enhances the cooling efficiency of the unit and prevents heat radiation of the condenser. 1. If a storm window presents interference, fasten a 2" wide wood strip, to the inner window sill across the full width of the sill. The wood strip should be thick enough to, raise the height of the window sill so that the unit can be installed without interference by"...
- Page 14 installation 1. Insert the guide panels into,the, guide,s of the air conditioner. Fasten the curtains to, the unit with screws (Type A). : Use a long screwdriver installing the screws will be easier, 2 Cut the adhesive-backed seal strip (Type E) to the window width. Remove the backing from the seal (Type strip and attach the seal strip to the...
- Page 15 instalfa#on Caution: During the following step, hold unit firmly until window sash is lowered to top channel behind side panel frames. Personal injury or p.ro_dy diamage may result if unit falls from window. 1. Install the air conditioner in the win,_w 1-1 Carefully Iiiftthe air conditioner .....
- Page 16 installation 3-4. Fasten the support bracket (Type H) using a screw removed from the air conditioner cabinet. Attach the support bracket (Type H) to the inner window sill with a screw (Type B), SupF#_ Brackd (Ty_, H} 4,,Window installation of room air conditioner is=now completed, ELECTRICAL DATA for attaching power cord to electrical outlet.
-
Page 17: Fan Speed Selector
Operating Instructions The controls like this: P_ER Operation starts when this button is press_ stops when you press the button again. FAN SPEED SELECTOR For increas_ power while co,oling, select a higher fan speed, 3 steps: High --Low The timer _n be set to start and stop the unit in hourly increments (up to 12 hours), OPERATION MODE SELECTOR Select cooling mode to o3ol the room. - Page 18 Operating Ins#_uctions CAUTION: Tlhe Remote Controller will not _nction pro_rly if strong light strikes the sensor wind_ of the air conditioner or if there are obs_c|es be_een the Remote Controller and the air conditioner. Operation sta_s when this button is pressed and stops when you press the button again Temperature Control...
-
Page 19: Vent Control
Operating ins#'ucfions Air Direction Airflow _n _ adjusted by chang ing the dir_tiion of the air _nd!itJoner"s Iouve_ This ,can also increase the _,oling e_dency of the air conditioner Adjusting Horizontal Air Flow Direction Adjusting Me ve_ica_ louvers _eft and right will change horizon_l .airTlow. - Page 20 Operating InstnJctions Drain Pipe In humid weather, excess water may cause the Base Pan to overflow. To drain the water, remove the Drain Cap and secure tlhe Drain Pipe to the rear hole of the Base Pan, Press the drain pipe into the hole by pushing down and away _o,m the fins to avoid injury.
- Page 21 Maintenan_ and Service Air Filter Ch,_lk the air filter at least twice a month to see if cleaning is necessary. Trapp_ particles in the filter can build up and block tlhe airflcrw, reducing c_ling capacity and causing an accumulation of frost on the evaporator. To clean the air filter: P'uJli t he inlet grille forwardi Remove the air filter from the front grille by pulling the air filter up, slightly., Wash the filter using lukewarm water below 40 °C (i04...
- Page 22 Maintenance ,and Service How to Remove the Front Grille i. Pulll the inlet grille forward 2. Remove the scr_ securing the Front Grille. 3. Push the grille up from the _tto, m and pull the top of the grille away from the case, as the top tabs lift out of their slots.
- Page 23 Maintenance andSe_ice Before Calling for _rvice L f you have problems with your air conditioner, read the following information try to solve the probliem, If you cannot find a solution, turn off the air conditioner and contact your dealer, Air conditioner not operate 1.
- Page 24 Maintenance andServic_ The air cond#ioner may be o_rating abnormallywhen: nThe air _nditioner Make sure the air conditioner plug is unplugged, pushed completely into the outlet. raThe fuse is blown/circuit ,Check the house fuse/circuit breaker is tripped breaker box and replace the fuse or reset the breaker.
- Page 25 Memo Owner's Manual...
- Page 26 Memo 26 RoomAir Conditioner...
- Page 27 PARA SUS ARCHIVES Precauciones de Segutidad ..28 Escdba aqui e] modelo y nt)mero de serie: Antes de _ner en march_ ..... 3 2 Mode|e n _ : _rie n ° : Int_uccibn ........33 Puede e_ontrar los nBmeros en la etiqueta de la pa_e Simbolos L:_il_zad_ en latera_ del producto Este Manual.........
- Page 28 Pre_uciones de, Seguridad Para prevenir tanto ]esiones al usuar[o u otras personas como daSos matefiales, es preciso segu[r estas instru_[ones... III La in,_rrecta o_ci6n die] apara_o como co,nsecuencia die ignorar las [nstrucciones. provocarA daS_os o lesiones.. m A cause del peso _sado del proiducto, se re_mienda que usted tenga a un ayudante pa_[cipa...
- Page 29 Precauciones de Seguridad [] Funcio, namiento ,,,De otro modo, _usarA . Cau_ra dles_rga ell6ctrii_ o • Causar_ d,es_rga ele,ctrica o incendi& incendio, descarga electrica o incendi& ,, Causara de_arga el_trica , Causar_ eliectrica o • Si no hay coRexion a masa, desca[gia, incendio.
- Page 30 Pr_auciones de, Seguridad • Puede caus.ar explosi6n, [nc.endio., . E] aparato de air.e acondicionado quemaduras. o_rarse en un _reia ce_.ada para set m_s .efec_vo. . Causara descarga electdca o incend[o. • Pu,ed,e entr,ar agua en I,a urfidad y disminu[r la aislaci6n.
- Page 31 Pre_uciones de Seguridad [] Funcionamiento • Puedle causar des_rga • Gastara energia en vano y Hay riesgo, de lesiiones eli_trica y daSo. podria provocar un accidente. piersonales, • Pu_e causar da5o a los Como ei ventilador gira a aila , Este pu_e ca.usar lesiones o ve!ocidad cuando est&...
- Page 32 Previo at Funcionamiento 1..Coloque ell enchufe correctamente. 2_ Use un Onico circuito para este aparato. R.ecargar ,e! c[rcuito p, o dria provocar un r[esgo de incendios. 3. No ut[iice un alargador. Consulte Iia pag[na 33. para mas detalles, 4. No arranque/detenga el func[onamiento enchufandoidesench_ufando el cable...
- Page 33 fntroduccion Este simbolo Io advierte de un peligro de accidente por corriente Este simbolo Io adliverte ,de un peligro que pueda cau_r un da_o del ventliador. Este sim_lo significa condiccioReis especiaies, iADVERTENCIA : Este a_rato de_ria instalarse ,de acue_,o con las normas de! Cbdigo Electrico Nacional, Gui[a Su Deflector Vedical de Aire...
- Page 34 Se,quraida EI6ctrica 2) Ei c_ie de alime_c_ _ede induir ,un lintemupt_ - _ _ente. dis_itlvo carcasa d_ en_e _enta un _ pru_ba y oL,o de reinlcio. El dis_it_,ro _mprobarse _6di_ente pr_ionando i pdmero el botdn TEST y d_p_s RESET Si el _ _ST_ so des_n_...
- Page 35 Seguridad Eiectrica Este equipo debe es.tar puesto a tierra debidamente. E] cable de alimentaciOn esta equipado de una toma de tierra ,con tres pins. Para miiniim[zar el pe]igro de una I!esi6n pot corriiente eli6ctrica, ut[liice una t,oma con enchufe de tierra estandar con tres contactos. Si e] enchufe de pared no, contiene un borne de t[erra, antes ,de usiar el vent[]ador haga cambiar eli enchufe pot un Cambiar la toma sin realizar los, cambios de cableado apropiados...
- Page 36 Seguridad E/_trica Debido a eventuales peligros de seguridad no recomendamos en absoluto uso de un adaptador, $6]o para una conexi6n transitoria se puede usar el adaptador c]asifiicado como UL que estA a disposiciOn en la mayoria de las tiendas de el6ctricos., Atienda que e, orificio grande en el adaptador productos corresponda...
- Page 37 Inst'alacidn Ti_) A: 1i Tipo B: 5 Tipo C:1 Tipo D: 3 (Tubede (E_Piar@ntosis (Tomillo ®_o} (Tornilto Mediano) DreniAj,e) E _i °ripo G: 2 Tipo H: 1 °l°ipo E: 1 Tipo F: 1 (Banda del Marco} (Panei GuA} (Adh_ivo posterie0 (_ adhes_/o posterior) Para la iinsitalaci6n ,deberia tener a dispos.ici6n Ilos instrumentosi siguiientes: * IDestornill]ador (Estrella y...
- Page 38 in,stalacidn Espacio |ibre El suficiente espacio libre aumenta la eficiencia de refrigeraciOn de ]a un[dad e impide la irradiation del calor del condensador. 1. Si la sobre-ventana estorba tira de madera de 2 pulg de ancho col6quesie a Io liargo del descanso de ra ventana por la parte que de internamente cuarto, y ,en toda su extensidn.
- Page 39 !, introduzca los pane.les en !o,s guias del ,aire acondi,cionado, Las cortinas ato,mfllelas con Iios tornillos (Tip,o,A), "f_poA Use un atornilla,dor largo,. Asi lie ser_ m&s f&cili iinsta]ar los to,rnillos. Ti_ A 2. Corte ]a banda adhesiva (T[po E) y Baada col6quela de] ancho de ]a ventana°...
- Page 40 tns,talacidn IPrecautibn: En las siguientes instrucciones, sostenga la unidad fiirmemente hasta que la pa_e corr_iza de la v_tana descans,e sobre la _rte superior de! canal y por .detras del marco de los paneles corredizos, Pu_e haber lesiones o daSos si la unidad se cae ,de ia ventana. !.
- Page 41 tnstalacion 3-4. Amarre la escuadra de soporte (Tipo H) usando un tornillo que puede sacar del cabinete del aparato de aire acondicionado. Aco, p le la e_uadra (Tipo H) a la parte interior de la repisa de la ventana con un tornillo (Tipo B) 4.
- Page 42 instrucciones de funcion,amiento POWER (encer_ido) El funcionamiento se inicia c_ndo, se pu[sa ,_ta teda y se detiiene c_ndo se La presiona nuevamente, SELECTOR DE VELOCIDAD DEL VENTILADOR (FAN SPEED) IPara at,Jm,entar la capacidad mienkas se refresca. se,_eccione una mayor vel_idadl deU ventil!ador, 3 Pasos: High (alta) - [Low (baja) = Med (media)
- Page 43 lnstrucciones de, funcion,am,iento CAUTION: The Remote Controller will not function properly if strong light strikes the _nsor window of the air conditioner or if there are obstacles _tween the Remote Co,ntro|ler and the air conditioner. POWER (encendido) El funcionamiento se inicia cuando se pulsa esta teda y se detiene...
-
Page 44: Control De Ven,Tilaci6N
tns,trucciones funcionamien,to E_flujo de aire puede set ajustadlo _mbiando direcci6n de 1_ reji!las de venfllaci6n de! acondici_ador deaire, Esto puede tambi6n incremen_r la ,dicacia del a_ndicionador de aire, Aju_at la diteccion del flujo de aire horizontal Aiu_ar _as rejill_ verticales hacia la izquierda yderecha cambiara el flujo horizon_L Aju_at la direccion del flujo de aire vertica! - Page 45 O_rating Instrucbbns Tubo de Desag_e En climas h0medos, esi po,sible que la Bandeja Evaporadora se Ilenne de agua. Para quitar eli agua acumulado, preciiso conectar el tubo de desag0e. Quite la Tapa del DesagOe y conecte el Dr_nCap Tubo a la Bandeja Evaporadora. Este aparato de aire acondicionado equipado, con un ventilador de extraccion.
- Page 46 Mante_imiento y servJcio Filtro de Aire Revise por io menos dos veces ,a] rues si no es necesar[o ][mpiar e] fi]tro de aire. Las p, a rticulas detenidiad se pueden a,cumu]ar en el fi]tro impid[endo e] flujo diel aire, limitandio e] rendimiento de enfr[amiento y causando ]a acumulaci6n de hielo en el evaporador.
- Page 47 ,Mantenimie, n,itoy servicio C:omo Remover la P'arilla Frontal 1 Tire de la rejilla de entrada hacia delante agarrando ambas lengQetas y tire del filtro del aire hasta sacado. 2_ Saqiue el tornillo que asegura la Parrilla [Frontal, 3. Suelte el lado izqiuierdo pdmero. Despues cuidadosamente ha!e desde la parte de arnba y empuje...
- Page 48 Mantenimiento y servJcie Antes de Llamar el Servicio de Asistencia T_cnica S[ tiene problemas con su ventilador, lea las informaciones siiguientes y trate de resolver el problem& S[ no puede encontrar Iia so]uci6n, desconecte el ventillador y dirijase a su suministrador. El ventilador no funciona 1.
- Page 49 Mantenimiento y servicio El acondicionador de aire puede estar funcion,ando anoirmalmente cuando: A_3re_ q,uleei aiire a_ndicior_do es_ _nectado _mpletamente a Ila fuen_ de energia. Cheque I_ fusibles/in_uptor de la y mempla_ los fu_Nes o re_ablez_ el interruptor de energ_a. Cuando la ene_ a se mes_ezca, espere 3 minu_ _m en_nder de nuevo el aim acondicion_o.
- Page 50 Nota Aire Acondicionador...
- Page 51 MEDIDA EN QUE CUALQUIER GARANTiA IMPLiCITA ES OBLIGADA POR LA LEY, ESTA LIMITADA EN DURACI6N PERIODO DE GARANTiA YA MENCIONADO. LG NO SERA RESPONSABLE DE NINGUN DAI_IO RESULTANTE, I NDIRECTO, O ACCIDENTAL DE NINGUN TIPO, INCLUYENDO INGRESOSO GANANCIAS PERDIDAS,EN CONEXI6N CON EL PRODUCTO.
- Page 52 WARRANTY OF MERCHANTABILITYOR FITNESSFOR A PARTICULARPURPOSE.TO THE EXTENTANY IMPLIED WARRANTY IS REQUIREDBY LAW, IT IS LIMITED IN DURATION TO THE EXPRESS WARRANTY PERIOD ABOVE. LG WILL NOT BE LIABLEFOR ANY CONSEQUENTIAL, INDIRECT, OR INCIDENTAL DAMAGES OF ANY KIND, INCLUDING LOST REVENUESOR PROFITS,IN CONNECTION WITH THE PRODUCT.
Need help?
Do you have a question about the LWHD1009R and is the answer not in the manual?
Questions and answers