Table of Contents
Advertisement
Advertisement
Table of Contents

Related Manuals for AEG FAVORIT 40260 i


Summary of Contents for AEG FAVORIT 40260 i
- Page 1 FAVORIT 40260 i Dishwasher User Instructions...
-
Page 2: Dear Customer
Dear customer, Please read these user instructions carefully. Please observe the safety instructions on the first few pages ofthese user instructions! Please keep these user instructions for later reference. Pass them on to any subsequent owner of the appliance. The warning triangle and/or specific words (Warning!, Caution!, Important!) are used to highlight instructions that are important for your safety or for the function of the appliance. -
Page 3: Table Of Contents
Switching Off the Dishwasher ........ - Page 4 Connecting the Dishwasher ........
-
Page 5: Operating Instructions
• Keep all packaging away from children. • Keep all detergents in a safe place out of children’s reach. • The water in your dishwasher is not suitable for drinking. If there are still remnants of detergent in the appliance, there is a risk of burns! •... -
Page 6: Correct Use
• Only use detergents specifically designed for use in domestic dish- washers. • Do not put any solvents in the dishwasher. There is a risk of an explo- sion! • The anti-flood system provides dependable protection against dam- age due to leaks. -
Page 7: Disposal
Disposal Disposing of the Packaging Material Dispose of the dishwasher packaging material correctly. All the packag- ing materials used are harmless to the environment and can be recy- cled. • Plastic parts are marked with standard international abbreviations: –... -
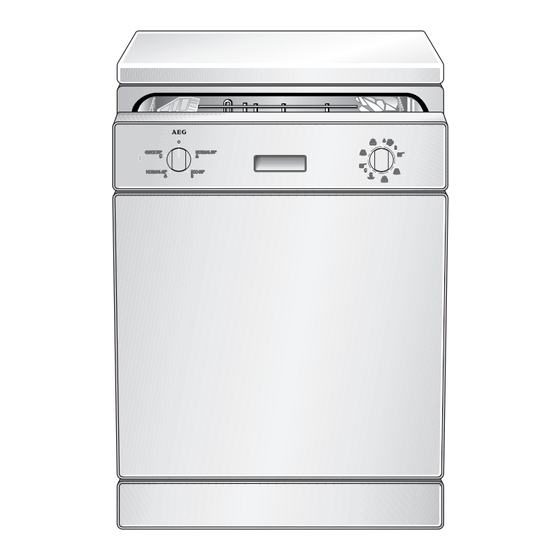
Page 8: Appliance Features And Control Panel
Operating Instructions Appliance Features and Control Panel Rubber Seal for Connecting the Water Feed to the Upper Spray Arm Spray Arms Water Hardness Switch Container for Salt Container for Rinse Aid Container for Detergent Rating Plate Filters... -
Page 9: Control Panel
The programme switch rotates during the wash pro- gramme and indicates the position that has been reached in the programme. Switch on the dishwasher and start a wash programme using the pro- gramme selector. Prior to using for the first time Prior to using for the first time, remove all the clips with which the baskets are secured for transport. -
Page 10: Adjust The Water Softener
Operating Instructions Adjust the Water Softener To prevent the build up of scale on dishes and in the dishwasher, the dishes must be washed with soft, i.e. low lime content water. For this reason the dishwasher is fitted with a water softener in which tap water from a hardness of 4 °d (German degrees) is softened with the... -
Page 11: Filling With Salt For The Water Softener
If the water hardness in your area is less than 4 °d, you do not need to use dishwasher salt. The green mark will then not be visible. The func- tion of the appliance is not impaired. -
Page 12: Filling With Rinse Aid
– When the window indicator has a dark centre surrounded by a light ring. If there is rinse aid in the container, the indicator window is completely dark. The rinse aid compartment is on the inside of the dishwasher door. 1. Open the door. 2. Press the rinse aid compartment release button with your finger. -
Page 13: Adjusting Rinse Aid Dosing
1 to 6. Only change the setting if streaks, milky spots or dried on water marks are visible on glasses or crockery. 1. Open the door of the dishwasher. 2. Press the rinse aid compartment release button with your finger. -
Page 14: In Daily Use
– Dishes and items of cutlery must not lie inside one another, or cover each other are of limited suitability: • Only wash stoneware in the dishwasher if it is specifically marked as being dishwasher- safe by the manufacturer. • Glazed patterns may fade if machine washed frequently. -
Page 15: Loading Cutlery
– To avoid damage to glasses, they must not touch – Do not lay small objects (e.g. lids) in the cutlery rack Loading Cutlery Long bladed knives stored in an upright position are a potential haz- ard. Long and/or sharp items of cutlery such as carving knives must be posi- tioned horizontally in the upper bas- ket. -
Page 16: Loading Pans, Frying Pans And Large Plates
Load large and heavily soiled dishes in the lower basket. Your dishwasher has one of the following four types of lower basket: Type 1: None of the plate inserts in the lower basket can be removed Type 2: The right-hand plate inserts in the lower basket can be... - Page 17 Type 3: The right-hand plate inserts in the lower basket can be folded across one another To ease the loading of large items, the two right-hand plate inserts in the lower basket can be folded across one another. Type 4: The two rear plate inserts in the lower basket can be folded across one another To ease the loading of large items, the two rear plate inserts in the lower...
-
Page 18: Loading Cups, Glasses And Coffee Services
Operating Instructions Loading Cups, Glasses and Coffee Services Load small, delicate items and long pointed cutlery in the upper basket. • Arrange items of crockery on the folding cups racks so that they are offset from each other and water can reach all items. -
Page 19: Filling With Detergent
Please observe the manufacturer's dosing and storage recommenda- tions as stated on the detergent packaging. The detergent compartment is on the inside of the dishwasher door. 1. If the lid is closed: press release button (1). The lid springs open. -
Page 20: Use Of "3 In 1"/ Combi Detergent Tablets
Operating Instructions Use of "3 in 1"/ Combi Detergent Tablets General Advice These products are tablets with combined detergent/rinse-aid and salt functions. 1. Before using these products you should first check that the water hard- ness in your supply is compatible with the use of these products as per the detergent manufacturers instructions (on the product packaging). -
Page 21: Selecting The Wash Programme (Programme Table)
Selecting the Wash Programme (Programme Table) Choose the most suitable wash programme with the aid of this table: Type of Dishes In Addition Type of Soiling • heavily soiled • dried leftovers Suitable Wash Programme: Turn programme switch to Turn programme selector to Pre Wash Programme Sequence... -
Page 22: Starting The Wash Programme
Operating Instructions Starting the Wash Programme 1. Check that when the dishes and cutlery are loaded into the dishwasher the spray arms are free to rotate. 2. Open the tap fully. 3. Close dishwasher door. 4. Turn the programme switch clockwise to A Table“). -
Page 23: Switching Off The Dishwasher
• The dishes should be allowed to cool down before removing them from the appliance, as hot dishes can be sensitive to knocks. • Leave the dishes in the dishwasher for approx. 15 minutes after the end of the programme so that they dry better and can cool down. -
Page 24: Cleaning The Filter
Blocked filters will give poor wash results. 1. Open the door, remove the lower rack. 2. The dishwasher filter system com- prises a coarse/fine filter, microfilter and a flat filter. Unlock the filter sys- tem using the handle on the microfil- ter, and remove. -
Page 25: What To Do, If
What to do, if ... Try to rectify minor faults on the dishwasher with the aid of the instructions given here. If you call an engineer to resolve a of fault listed here, or to repair a fault caused by incorrect use or installation, a charge will be made even if the appliance is in guarantee. -
Page 26: The Wash Result Is Unsatisfactory
Operating Instructions ...the wash result is unsatisfactory. The dishes are still dirty. – The wrong wash programme was selected. – The dishes were arranged in such a manner that water has not reached all parts. The dish racks must not be overloaded. –... -
Page 27: Technical Data
1-10 bar (=10-100 N/cm = 0.1-1.0 MPa) Information on the electrical connection is given on the rating plate on the inner edge of the dishwasher door on the right. 850 x 600 x 600 (H x W x D in mm) 54 Kg 820 –... -
Page 28: Notes For Test Institutes
Operating Instructions Notes for Test Institutes Testing in accordance with EN 60704 must be carried out with the appliance fully loaded and using the test programme (see Programme Table). Tests in accordance with EN 50242 must be carried out when the salt dispenser and rinse aid container have been filled with salt and rinse aid respectively and using the test programme (see Programme Table). -
Page 29: Installation And Connection Instructions
INSTALLATION AND CONNECTION INSTRUCTIONS Installing the Dishwasher • The dishwasher must be installed on a firm floor and adjusted such that it is stable and level. • To compensate for unevenness in the floor and to match the height of the... -
Page 30: Dishwashers That Can Be Integrated
Installation and Connection Instructions Dishwashers That Can Be Integrated (see installation template supplied) The door of the appliance can be fitted with a wooden/facing panel with the following dimensions: Width: 591 – 594 mm Thickness: 16 – 24 mm Height: dependent on (variable) Weight:... -
Page 31: Connecting The Dishwasher
• The dishwasher must be connected to a cold water supply. • The dishwasher must not be connected to open hot water appliances or instantaneous water heaters. Permitted water pressure... -
Page 32: Water Inlet Hose With Safety Valve
If the water inlet hose starts to leak during this operation, the safety valve cuts off the running water and the draining pump in the dishwasher is switched on. Please take care when installing the water inlet hose: –... -
Page 33: Water Drain
If the dishwasher is fitted at a high position If the dishwasher is installed at a high level, and the drainhose connec- tion is less than 30 cm from the bottom of the appliance, adapter kit ET 111099520 must be fitted. -
Page 34: Leak Prevention System
Installation and Connection Instructions Leak Prevention System For protection from damage due to water leaks, the dishwasher is equipped with a leak prevention system. In the event of a fault, the safety valve in the water inlet hose immedi- ately interrupts the supply of water to the appliance and the drain pump is activated. -
Page 35: Electrical Connection
Before switching on make sure the electricity supply voltage is the same as that indicated on the appliance rating plate. To isolate the dishwasher from the mains, remove the mains plug. Important: The plug must still be accessible after the appliance has been installed. -
Page 36: Connections
Installation and Connection Instructions Connections The water inlet and drain hoses, as well as the mains cable must be connected beside the dishwasher as there is insufficient space behind the appliance. The plumbing and electrical installation example given below can only be regarded as a recommendation. -
Page 37: Guarantee Conditions
GUARANTEE CONDITIONS Standard guarantee conditions We, AEG, undertake that if within 12 months of the date of the purchase this AEG appliance or any part thereof is proved to be defective by reason only of faulty work- manship or materials, we will, at our discretion repair or replace the same FREE OF CHARGE for labour, materials or carriage on condition that: •... -
Page 39: Service And Spare Parts
SERVICE AND SPARE PARTS In the event of your appliance requiring service, or if you wish to pur- chase spare parts, please contact Service Force by telephoning: 08705 929 929 Your telephone call will be automatically routed to the Service Force Centre covering your post code area. - Page 40 From the Electrolux Group. The world´s No.1 choice. The Electrolux Group is the world´s largest producer of powered appliances for kitchen, cleaning and outdoor use. More than 55 million Electrolux Group products (such as refrigerators, cookers, washing machines, vacuum cleaners, chain saws and lawn mowers) are sold each year to a value of approx. USD 14 billion in more than 150 countries around the world.
Need help?
Do you have a question about the FAVORIT 40260 i and is the answer not in the manual?
Questions and answers