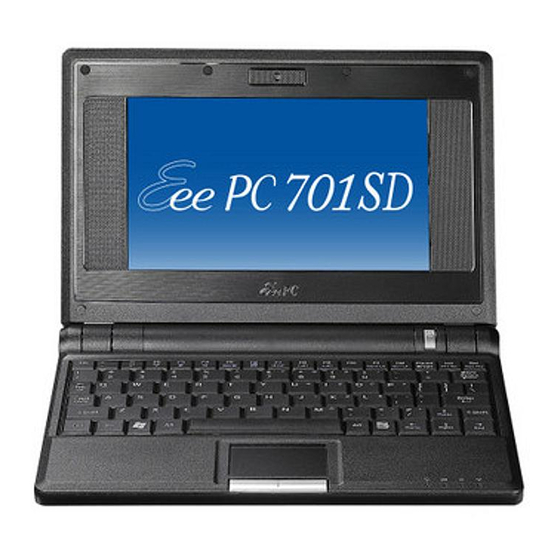
Asus Eee PC 701SD Series Software Manual
User manual
Hide thumbs
Also See for Eee PC 701SD Series:
- User manual (80 pages) ,
- Hardware manual (66 pages) ,
- Manual (62 pages)
Table of Contents
Advertisement
Quick Links
Advertisement
Table of Contents

Related Manuals for Asus Eee PC 701SD Series


Summary of Contents for Asus Eee PC 701SD Series
- Page 1 Eee PC Software Manual Eee PC 701SD Series July 2008...
-
Page 2: Table Of Contents
Table of Contents Chapter 1: Introducing the Eee PC About This User’s Manual ................1-2 Notes for This Manual ................... 1-3 Safety Precautions ..................1-4 Chapter 2: Using the Eee PC Internet ......................2-2 Configuring a wireless network connection ........2-2 Configuring a network connection ............ - Page 3 Chapter 4: Installing Windows ® Preparing to install Windows XP ............. 4-2 ® Installing Windows XP ................. 4-2 Support CD information ................4-4 Running the support CD ................4-4 Drivers menu ....................4-4 Utilities menu ....................4-5 ASUS Eee PC...
- Page 4 Contact ......................4-6 Other information ..................4-6 Appendix Trademark Statements .................A-2 GNU General Public License ...............A-3 Copyright Information ................A-14 Limitation of Liability ................. A-15 Service and Support ................... A-15 Table of Contents...
-
Page 5: Chapter 1: Introducing The Eee Pc
About This User’s Manual Notes for This Manual Safety Precautions Introducing the Eee PC... -
Page 6: About This User's Manual
About This User’s Manual You are reading the Eee PC User’s Manual. This User’s Manual provides information about how to use Eee PC. The following are major sections of this User’s Manual: 1. Using the Eee PC Provides information on using the Eee PC’s utilities. 2. -
Page 7: Notes For This Manual
WARNING! Important information that must be followed for safe operation. IMPORTANT! Vital information that must be followed to prevent damage to data, components, or persons. TIP: Tips for completing tasks. NOTE: Information for special situations. ASUS Eee PC... -
Page 8: Safety Precautions
Safety Precautions The following safety precautions will increase the life of the Eee PC. Follow all precautions and instructions. Except as described in this manual, refer all servicing to qualified personnel. Do not use damaged power cords, accessories, or other peripherals. Do not use strong solvents such as thinners, benzene, or other chemicals on or near the surface. - Page 9 Check local regulations for disposal of electronic products. DO NOT throw the battery in municipal waste. The symbol of the crossed out wheeled bin indicates that the battery should not be placed in municipal waste. ASUS Eee PC...
- Page 10 Chapter 1: Introducing the Eee PC...
-
Page 11: Chapter 2: Using The Eee Pc
Internet Work Learn Play Settings Favorites Using the Eee PC... -
Page 12: Internet
Internet Configuring a wireless network connection Press (<Fn> + <F2>) to activate the wireless LAN function. Click Wireless Networks from Internet tab. Select the wireless access point you want to connect to from the list and click Connect to build the connection. - Page 13 (<Fn> + <F2>). Activate the wireless LAN function before configuring a wireless network connection. Right-click the wireless signal bar in the Notification area to quickly Connect to another network, Create new connection, or browse All Network Connections. ASUS Eee PC...
-
Page 14: Configuring A Network Connection
Configuring a network connection If you want to obtain network access, connect the network cable, with RJ-45 connectors on each end, to the network port on the Eee PC and the other end to a hub or switch. The illustration below is the example of your Eee PC connected to a network hub or switch for use with the built-in Ethernet controller. - Page 15 4. Select the hardware that you want to use to make your connection and click Next. 5. Toggle the first option Dynamic IP address (DHCP) and click Next. 6. Enter a name for this connection and click Next. ASUS Eee PC...
- Page 16 7. Click Finish to apply the settings or click Back to make changes. Click the box before Connect automatically at system startup or before the box Start this connection when finished based on your needs. Using a static IP: 1. Repeat the step 1–4 of Using a dynamic IP to start the static IP network configuration.
- Page 17 Next to proceed directly. 6. Enter a name for this connection and click Next. 7. Click Finish to apply the settings or click Back to make changes. Contact your service provider if you have problem connecting to the internet. ASUS Eee PC...
- Page 18 Point-to-Point Protocol over Ethernet (PPPoE) Repeat the step 1–2 of Using a static IP to start the PPPoE network configuration. Select the type of connection you are using and click Next. Select the hardware that you want to use to make your connection and click Next.
-
Page 19: Wireless Point-To-Point Protocol Over Ethernet
Next. Select the hardware that you want to use to make your connection and click Next. Click the Browse Wireless Networks button to search for the access point you would like to connect. ASUS Eee PC... - Page 20 Enter the wireless channel information from your service provider and click Next. Set the encryption information for the wireless connection and click Next. Enter your user name and password and click Next. Enter a name for this connection and click Next. Click Finish to apply the settings or click Back to make changes.
- Page 21 Only use analog telephone outlets. The built-in modem does not support voltages used in digital phone systems. DO NOT connect the RJ-11 to digital phone systems found in many commercial buildings or else damage will occur! ASUS Eee PC 2-11...
- Page 22 Repeat the step 1–2 of Using a static IP to start the Dial-up network configuration. Select the type of connection you are using and click Next. Select the hardware that you want to use to make your connection and click Next. Enter the phone number required to connect to your internet service provider and...
- Page 23 Enter a name for this connection and click Next. Click Finish to apply the settings or click Back to make changes. ASUS Eee PC 2-13...
-
Page 24: Browsing Web Pages
Launches the Mozilla Firefox web browser Visit our Eee PC homepage (http://eeepc.asus.com) to obtain the latest information and register at http://vip.asus.com for full service of your Eee PC. If you think the browser font size too small to read, go to View >... -
Page 25: Accessing E-Mail
Google Map. Click an item and enjoy a charge-free service through Mozilla Firefox web browser. Connects to Google Connects to iGoogle. Search. Connects to Google Docs. Connects to Wikipedia. Connects to Mediayou. Connects to vTap. Connects to Google Map. ASUS Eee PC 2-15... -
Page 26: Controlling Your Eee Pc Afar
Controlling your Eee PC afar Eee Connect allows you to control one Eee PC with another Eee PC remotely. To start using Eee Connect Ensure that both Eee PCs are connected to the Internet. Click Eee Connect from the Internet tab and enter your e-mail to activate your account. - Page 27 If you click the Ask whenever receives connection request box on the other Eee PC, you would need to wait for the permission. When the connection is successfully built, you can control the other Eee PC from the Localhost Remote Desktop connection screen. ASUS Eee PC 2-17...
-
Page 28: Using Web Storage
Using Web Storage Eee PC users can enjoy free online space. With Internet connection, you can access and share any files whenever you want and wherever you are. The content of the free service provided to you is subject to Eee Eee Storage Storage Web Hard Drive Service Agreement on official website. - Page 29 Group Share. This set of account and password is also indispensable when you use Eee Storage service with other computer. ASUS Eee PC 2-19...
-
Page 30: Using Eee Download
Using Eee Download Eee Download offers various software applications, and multimedia enjoyment online. Visit Eee Download website (http://eeedownload. asus.com) for more details. Connects to Eee Download website. Preview is unavailable. You need to download the software applications or multimedia files before enjoying them. -
Page 31: Chatting With Friends
If you do not have an IM account, apply one from the service providers. If you have multiple IM accounts from different service providers, press Add button again to add and configure more IM accounts. ASUS Eee PC 2-21... -
Page 32: Work
Work Office applications Documents/Spreadsheets/Presentations/PDF Reader The Work tab includes several office software items like Documents, Spreadsheets, Presentations, and PDF Reader. Some applications may require setup before use. Follow the steps as provided by the respective wizard to finish the initialization and get your jobs done more efficiently. - Page 33 Double-click Documents to start OpenOffice.org Writer. On the File menu, click Open, or press <Ctrl> + <O>. At the prompt, click My Home on the left and double-click D: to enter. ASUS Eee PC 2-23...
- Page 34 Double-click the folder to display the files within. Select the desired file, and click OK to open. After the file is opened, you can start editing your document and doing your job. For other office applications, follow the general steps above to access files.
- Page 35 Opens OpenOffice Opens OpenOffice Draw. Math. Free Mind Free Mind is a mind-mapping software which you can use to do the brainstorming, project-tracking, database creating, etc.. Starts Free Mind. ASUS Eee PC 2-25...
-
Page 36: Management Software
Management software Your Eee PC includes two management-related applications. File Manager provides an overview of all your files and enables easy management of data. Starts File Manager. Eee PC supports file compression in a zip and tgz file format only, and file extraction from zip, gz, tar, and rar formats. - Page 37 Notification area and select Safely remove. II. PIM (Personal Information Manager) helps manage personal information like appointments, to-do items and contacts. Click Accessories to start using PIM. Click PIM to initiate KDE Personal Information Manager. ASUS Eee PC 2-27...
-
Page 38: Accessories & Dictionary
Dictionary (in selected territories) Starts the Dictionary. Dictionary is only available in selected territories by default, but users in other areas can still obtain this application from ASUS server through the Add/Remove Software function. 2-28 Chapter 2: Using the Eee PC... -
Page 39: World Clock
Select World Clock to start the KDE world clock software. Major cities and territories are marked on the map in black. When you move the pointer over the map, the screen automatically displays the city name and its local time wherever you leave the pointer. ASUS Eee PC 2-29... -
Page 40: Learn
Learn Science After entering Science, you will find the options of the interactive Periodic Table and Planetarium. Move the pointer over and start your science learning. 1. Periodic Table provides miscellaneous information, including picture, energy information, chemical data, and atom model for all elements. -
Page 41: Language
Function Plotter is a useful tool to plot different function expressions. You can zoom in and out the corresponding graph. Starts Fraction Starts TuxMath. Tutorial. Starts the interactive Starts Function Geometry tool. Plotter. ASUS Eee PC 2-31... -
Page 42: Paint
Paint Paint includes an image editing program (Paint) and a drawing program (Tux Paint). Starts mtPaint. Starts Tux Paint. Web Learn This is a shortcut to Skoool. Double-click the item to link to Skoool interactive learning site (www.skoool.com). Click your own country or the country you would like to visit and enter. -
Page 43: Play
Purchase an optional optical disk drive based on your needs. Move the pointer over the items on the user interface, and the pop out message would show the function of the button or the slider. ASUS Eee PC 2-33... -
Page 44: Music Manager
Music Manager The built-in music manager helps you arrange your multi-media data in a well-organized fashion. Starts Music Manager. Connect your iPod to your Eee PC and click the Media Device tab to show the playlists in your iPod. You can drag and drop the desired files to create your playlist in the right pane. -
Page 45: Photo Manager
BMP, XPM, PPM, PNM, XCT, PCX format. Video Manager Starts Photo Manager. ASUS Eee PC supports video and audio files in the following format: MPEG1, Xvid, mp3, wav, PCM format. The actual supported codecs vary depending on model. ASUS Eee PC... -
Page 46: Webcam
Webcam Click Webcam and start video recording or image capture. Activates Webcam. Picasa Sound Recorder Allows you to manage and upload Allows you to record a sound clip. your photos easily. Initiates Sound Starts Picasa2. Recorder. Games Select an available game and have fun. 2-36 Chapter 2: Using the Eee PC... -
Page 47: Settings
If you have installed Windows XP to your Eee PC, right-click the ASUS Eee PC Utility icon in the Notification area to adjust the display resolution. ASUS Eee PC... -
Page 48: Anti-Virus
Anti-Virus From the Settings tab, select Anti-Virus and perform virus scanning to protect your Eee PC. Click to start the anti-virus application. Volume Click the speakers icon to open the control panel. Adjust the system volume and balance by moving the sliders. Click to adjust the volume. -
Page 49: Instant Shutdown
Printers To setup your printer, double-click Printers and press Add to add a new printer. The installed printers display in the window. Visit our website for the latest qualified vendor for the printers. ASUS Eee PC 2-39... -
Page 50: System Info
System Info This option displays the system information of your Eee PC. The displayed system information differs depending on model. Date & Time Adjusts the system date and time of your Eee PC. 2-40 Chapter 2: Using the Eee PC... -
Page 51: Personalization
Click the tab on the top to switch the category and the screen will display the available software on the server. Locate the software you want to install/update. Click the Install button to install/update the selected software. ASUS Eee PC 2-41... - Page 52 Click OK to confirm the installation. Your Eee PC starts the download and installs/updates the selected software from the server. 2-42 Chapter 2: Using the Eee PC...
-
Page 53: Bios Update
Go to Settings > Add/Remove Software. Click the Settings tab on the top to switch the category. Click the Open button in BIOS Updates Locate the latest BIOS and click the Install button to update the BIOS. ASUS Eee PC 2-43... - Page 54 Click OK to reboot and update the BIOS. Easy Software Updates A software update icon in the Notification area functions as a reminder. It will check for updates, download and install updates depending on your preferences. Check for Updates Right-click the Software Updates icon in the Notification area and select Check for Updates to...
-
Page 55: Touchpad
Click the tabs to switch the displayed disk drive. • Extra Drive may not be available for all Eee PC models. • The disk space varies depending on model. ASUS Eee PC 2-45... -
Page 56: Diagnostic Tools
Diagnostic Tools The Diagnostic Tool helps you with easy trouble-shooting. System Info. Click the System Info. button on the left to display the system information. Click the Details button on the top to switch between system information summary and details The system information varies depending on model. - Page 57 If you can't find a solution to your problem after the system test, you can visit our support website or click Send Feedback with System Log to send the test log to ASUS support team. Our technical personnel would help you with the problems.
-
Page 58: Add/Remove Keyboard
Add/Remove Keyboard To switch to the keyboard you use Click Settings and click Add/Remove Keyboard The keyboard in the right pane is the current keyboard definition in use. Select your preferred keyboard in the left pane and click Add to add. 2-48 Chapter 2: Using the Eee PC... - Page 59 Click OK to complete the configuration. After you have customized the keyboard settings, the keyboard definition is switched to the newly-added language keyboard. Click the flag icon in the Notification area to quickly switch the keyboard if needed. ASUS Eee PC 2-49...
-
Page 60: Task Manager
Task Manager The Task Manager displays the application processes. Tweak your Eee PC up if it is running slow by killing the application with Task Manager. Follow the instructions below to terminate applications: Double click the SOS icon in the Notification area to display the running applications. -
Page 61: Favorites
Favorites Click to link to Click to link to ASUS website for ASUS VIP and give the latest product suggestions. information. Customize Customize your favorites on the Favorites tab. Click Customize and start to add or remove your favorites. From the available favorites list in... - Page 62 2-52 Chapter 2: Using the Eee PC...
-
Page 63: Chapter 3: System Recovery
System Recovery System Recovery... -
Page 64: Using Hidden Partition
System Recovery There are three ways to perform the system recovery. Refer to the following sections for details. The OS image file bundled in the Recovery DVD may be not the latest version. After the system recovery, use the Add/Remove Software in the Settings tab to update your OS. -
Page 65: Using The Recovery Dvd
Ready. Uncompressing Linux... Ok, booting the kernel. Waiting 5 Sec Ready to image Eee PC using build 2008.03.05_21.08. Enter "yes" to continue, anything else to reboot. When the recovery is completed, press <Enter> to reboot the system. ASUS Eee PC... -
Page 66: Using Usb Flash Disk
Connect your USB flash disk (size larger than 2GB) to another PC/NB (bundled with Windows XP or later version) and insert the Support CD to that PC/NB at the same time. Click Utilities on the left and select ASUS Linux USB Flash Utility. Select Copy Eee PC image files to USB flash and make it bootable. - Page 67 Click Yes to continue. The system starts formatting your USB flash disk. A dialog box appears. Follow the instructions to eject the USB disk and replug it to your PC/NB. Click Retry to continue. Click OK to complete the process. ASUS Eee PC...
- Page 68 Select USB:XXXXXX (may be labeled as the USB flash brand name) to boot from the USB flash disk drive. Please select boot device: HDD:SM-ASUS-PHISON SSD USB:XXXXXXXX ↑ and ↓ to move selection ENTER to select boot device 10.
- Page 69 Connect your USB flash disk to another PC/NB and insert the Support CD to that PC/NB at the same time. Click Utilities on the left and select ASUS Linux USB Flash Utility. Select Format the USB flash disk back to Windows format (FAT16) and click Run.
- Page 70 Chapter 3: System Recovery...
-
Page 71: Chapter 4: Installing Windows Xp
Preparing to Install Windows® XP Installing Windows® XP Support CD Information ® Installing Windows... -
Page 72: Preparing To Install Windows Xp
• The official Windows® XP Service Pack 2 disc from Microsoft® • A USB flash disk (size larger than 1GB) or external hard disk drive • ASUS Eee PC support CD • The older version of Windows® OS does not support USB DVD- ROM. - Page 73 Windows® XP OS setup. Follow the on-screen instructions to complete the installation process. After entering Windows, insert the Support CD to the USB DVD/CD-ROM and click InstAll - Drivers Installation Wizard to install all drivers. ASUS Eee PC...
-
Page 74: Support Cd Information
Support CD information The support CD that comes with the Eee PC package contains the drivers, software applications, and utilities that you can install to avail all the features. All the following screens appear only in the Windows® XP SP2 environment. -
Page 75: Utilities Menu
Click to go to the previous page Utilities menu The Utilities menu shows the applications that the Eee PC supports. ASUS Eee PC... -
Page 76: Contact
Contact Click the Contact tab to display the ASUS contact information. Other information The icons on the top right corner of the screen provide additional information on the Eee PC and the contents of the support CD. Click an icon to display the specified information. -
Page 77: Appendix
Trademark Statements GNU General Public License Copyright Information Limitation of Liability Service and Support Appendix... -
Page 78: Trademark Statements
Trademark Statements Google Talk service and its logos are trademarks of Google Inc.. GroupWise service and its logos are trademarks of Novell Inc.. MSN service and its logos are trademarks of Microsoft Corporation. QQ service and its logos are trademarks of Tencent Inc.. Yahoo! service and its logos are trademarks of Yahoo! Inc.. -
Page 79: Gnu General Public License
GPL licensed software, including any scripts to control compilation and installation of the object code. All future firmware updates will also be accompanied with their respective source code. For more information on how you can obtain our open source code, visit our website (http://support.asus.com.tw/download/). ASUS Eee PC... - Page 80 GNU GENERAL PUBLIC LICENSE Version 2, June 1991 Copyright (C) 1989, 1991 Free Software Foundation, Inc., 51 Franklin Street, Fifth Floor, Boston, MA 02110-1301 USA Everyone is permitted to copy and distribute verbatim copies of this license document, but changing it is not allowed. Preamble The licenses for most software are designed to take away your freedom to share and change it.
- Page 81 Program is not restricted, and the output from the Program is covered only if its contents constitute a work based on the Program (independent of having been made by running the Program). Whether that is true depends on what the Program does. ASUS Eee PC...
- Page 82 1. You may copy and distribute verbatim copies of the Program's source code as you receive it, in any medium, provided that you conspicuously and appropriately publish on each copy an appropriate copyright notice and disclaimer of warranty; keep intact all the notices that refer to this License and to the absence of any warranty;...
- Page 83 Sections 1 and 2 above on a medium customarily used for software interchange; or, ASUS Eee PC...
- Page 84 c) Accompany it with the information you received as to the offer to distribute corresponding source code. (This alternative is allowed only for noncommercial distribution and only if you received the program in object code or executable form with such an offer, in accord with Subsection b above.) The source code for a work means the preferred form of the work for making modifications to it.
- Page 85 ASUS Eee PC...
- Page 86 This section is intended to make thoroughly clear what is believed to be a consequence of the rest of this License. 8. If the distribution and/or use of the Program is restricted in certain countries either by patents or by copyrighted interfaces, the original copyright holder who places the Program under this License may add an explicit geographical distribution limitation excluding those countries, so that distribution is permitted only in or among...
- Page 87 RENDERED INACCURATE OR LOSSES SUSTAINED BY YOU OR THIRD PARTIES OR A FAILURE OF THE PROGRAM TO OPERATE WITH ANY OTHER PROGRAMS), EVEN IF SUCH HOLDER OR OTHER PARTY HAS BEEN ADVISED OF THE POSSIBILITY OF SUCH DAMAGES. ASUS Eee PC A-11...
- Page 88 END OF TERMS AND CONDITIONS How to Apply These Terms to Your New Programs If you develop a new program, and you want it to be of the greatest possible use to the public, the best way to achieve this is to make it free software which everyone can redistribute and change under these terms.
- Page 89 If your program is a subroutine library, you may consider it more useful to permit linking proprietary applications with the library. If this is what you want to do, use the GNU Lesser General Public License instead of this License. ASUS Eee PC A-13...
-
Page 90: Copyright Information
KIND, EITHER EXPRESS OR IMPLIED, INCLUDING BUT NOT LIMITED TO THE IMPLIED WARRANTIES OR CONDITIONS OF MERCHANTABILITY OR FITNESS FOR A PARTICULAR PURPOSE. IN NO EVENT SHALL ASUS, ITS DIRECTORS, OFFICERS, EMPLOYEES OR AGENTS BE LIABLE FOR ANY INDIRECT, SPECIAL, INCIDENTAL, OR CONSEQUENTIAL DAMAGES... -
Page 91: Limitation Of Liability
ASUS will only be responsible for or indemnify you for loss, damages or claims based in contract, tort or infringement under this Warranty Statement. This limit also applies to ASUS’ suppliers and its reseller. It is the maximum for which ASUS, its suppliers, and your reseller are collectively responsible. - Page 92 A-16 Appendix...
Need help?
Do you have a question about the Eee PC 701SD Series and is the answer not in the manual?
Questions and answers