Table of Contents
Advertisement
USER'S GUIDE
52C2, 61C5 SERIES
Thank You
2
Safety Instructions
3
Product View
4
Assembly
5-7
Operations
7-9
Maintenance and Care
10-15
Troubleshooting
16
Replacement Parts
17
Accessories
18
Warranty
18-19
20
Product Registration
Consumer Care
20
®
Earn BISSELL Rewards!
R
egister your
product today!
See details on
back page
Advertisement
Table of Contents

Subscribe to Our Youtube Channel
Related Manuals for Bissell Total Floors Pet


Summary of Contents for Bissell Total Floors Pet
- Page 1 Earn BISSELL Rewards! egister your product today! See details on back page ® USER'S GUIDE 52C2, 61C5 SERIES Thank You Safety Instructions Product View Assembly Operations Maintenance and Care 10-15 Troubleshooting Replacement Parts Accessories Warranty 18-19 Product Registration Consumer Care...
- Page 2 Your BISSELL Total Floors® vacuum is well made, and we back it with a limited warranty. We also stand behind it with a knowledgeable, dedicated Consumer Care department, so, should you ever have a problem, you’ll...
-
Page 3: Important Safety Instructions
MPORTANT SAFETY INSTRUCTIONS When using an electrical appliance, basic do not pick up flammable materials (lighter ■ precautions should be observed, including fluid, gasoline, kerosene, etc.) or use in the the following: presence of explosive liquids or vapors. do not pick up toxic material (chlorine bleach, ■... -
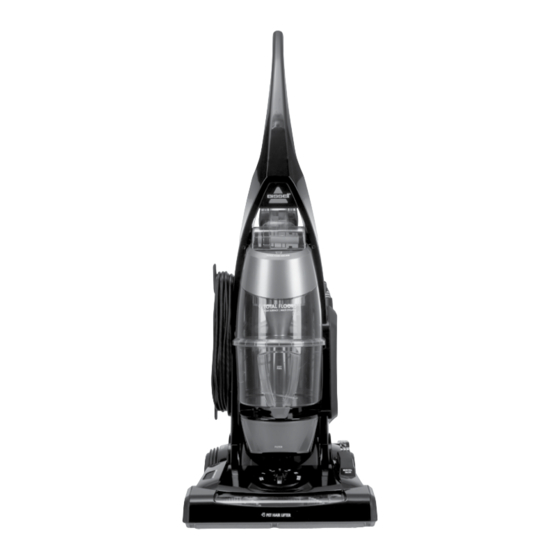
Page 4: Product View
The Procter & Gamble Company, Cincinnati, Ohio operating procedures. and used under license by BISSELL, Inc. w w w . b i s s e l l . c o m 8 0 0 . 2 3 7 . 7 6 9 1... -
Page 5: Attach Handle To Vacuum
ssembly WARNING: The only tool you’ll need to assemble your plastic film can be dangerous. vacuum cleaner is a Phillips screwdriver. to avoid danger or suffocation, keep away from babies Attach handle to vacuum and children. Important: before assembling and using your vacuum place Filter into vacuum as shown to the right (A). -
Page 6: Power Cord
ssembly Attach the vacuum hose & tools continued 3. place the turbobrush® tool or pet turboeraser™ tool into its holder from the front of the vacuum. Power cord CAUTION: To store the power cord, wrap cord around the upper and lower cord wrap Before using your vacuum, make on the side of the vacuum. -
Page 7: Handle Positions
ssembly Handle Positions Using your foot, press the handle release pedal, located on the lower left side of the vacuum to recline to a cleaning position. 1. Upright – for storage and above floor cleaning with tools. 2. Normal Cleaning – press handle release pedal once. -
Page 8: On-Board Tools
perations Clean filter indicator The clean filter indicator tells you when the air flow in your vacuum is reduced due to dirty filters or a clog in the hose. The clean filter indicator will remain green until the airflow is reduced. At that time, it begins to change to red. -
Page 9: Emptying The Dirt Container
perations Pet Hair Fabric Tool (select models): Use this tool on fabrics such as drapes, beds or anywhere else pet hair may collect. Long Reach Dusting Tool (select models): Use this tool for dusting large surfaces. TurboBrush® Tool (select models): Use rotating brush action for small flat areas such as stair and cushions. -
Page 10: Maintenance And Care
aintenance and Care To maximize your cleaning performance and extend the life of your vacuum, it is very important that you empty WARNING: your dirt container and check and clean your filters frequently. Follow to reduce the risk of electric the instructions on the following shock, turn power switch off pages, and perform these simple... - Page 11 aintenance and Care Cleaning the dirt container continued 5. if desired, the lower dirt cup may be washed in warm water. Make sure it is NOTICE: completely dry before reassembling. NOTE: Do not put in the dishwasher. Select models feature a Febreze® post-motor filter.
-
Page 12: Clearing Clogs
aintenance and Care Clearing Clogs 1. turn the power switch off and unplug the vacuum from the electrical outlet. 2. check the upper tank for build up or clogs. 3. if you notice dirt build up in the inner cyclone, follow instruction on how to clean the inner cyclone in page 10. - Page 13 aintenance and Care Maintaining the Pet TurboEraser™ Tool and TurboBrush® Tool The Pet TurboEraser Tool should be ™ checked regularly for clogs and debris wrapping around the paddles. Select models include a TurboBrush® Tool that follows the same maintenance instructions. 1.
-
Page 14: Check Rotating Floor Brush And Drive Belt
aintenance and Care Check rotating floor brush and drive belt CAUTION: You should check your vacuum cleaner's rotating floor brush and drive belt regularly for wear or To reduce the risk of injury damage. You should also clean the from moving parts, turn brush and the brush ends of strings, off vacuum and disconnect hair and carpet fibers. -
Page 15: Replace Drive Belt
NOTE: It is important that you use only genuine BISSELL replacement belts. Generic belts many not meet the exact specifications required to keep your vacuum operating at its peak performance. -
Page 16: Please Do Not Return This Product To The Store
Thank you for selecting a BISSELL product. Please do not return this product to the store. For any questions or concerns, BISSELL is happy to be of service. Contact us directly at 1-800-237-7691. w w w . b i s s e l l . c o m... - Page 17 eplacement parts - Total Floors ® Below please find a list of common replacement parts. While not all of these parts may have come with your specific machine, all are available to you for purchase, if desired. Item Part No. Part Name 203-1730 drive belt...
- Page 18 15, upon receipt of the product bissell will repair or replace (with new or remanufactured components or products), at bissell’s option, free of charge from the date of purchase by the original purchaser, for three years any defective or malfunctioning part.
- Page 19 below.
- Page 20 Grand Rapids MI 49501 ATTN: Consumer Care Or visit the BISSELL website - www.bissell.com When contacting BISSELL, have model number of cleaner available. Please record your Model Number: ___________________ Please record your Purchase Date: ___________________ NOTE: Please keep your original sales receipt.
Need help?
Do you have a question about the Total Floors Pet and is the answer not in the manual?
Questions and answers