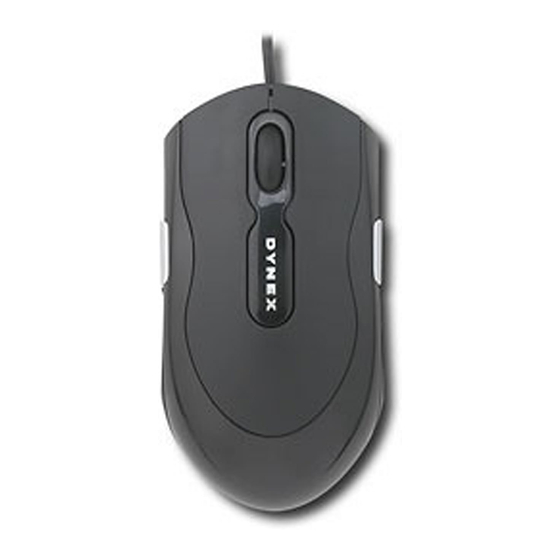
Dynex DX-WLMSE User Manual
Wireless optical mouse
Hide thumbs
Also See for DX-WLMSE:
- User manual (46 pages) ,
- Manual de l'utilisateur (21 pages) ,
- Guía del usuario (19 pages)
Advertisement
Quick Links
Advertisement

Summary of Contents for Dynex DX-WLMSE
- Page 1 Dynex Wireless Optical Mouse DX-WLMSE USE R GUI DE...
-
Page 2: Table Of Contents
DX-WLMSE Dynex DX-WLMSE Wireless Optical Mouse Contents Important safety instructions..............2 System requirements ................2 Package contents ..................3 Features ....................3 Setting up the mouse................4 Using Mouse Suite..................4 Legal notices ...................15 One-year limited warranty..............17 Important safety instructions • Batteries may explode or leak if they are improperly recharged, inserted, disposed of in fire, or mixed with used batteries or different battery types. -
Page 3: Package Contents
Package contents This package contains the following: • Wireless optical mouse • USB wireless receiver • Mouse driver CD • AAA batteries (2) • Extension cable • Quick Setup Guide Features Your Tilt Scroll Wheel is designed for four-way navigation. You can view whole documents by turning the scroll wheel up, down, left, and right. -
Page 4: Setting Up The Mouse
DX-WLMSE Setting up the mouse To set up the mouse: • Insert the enclosed CD into your computer's disk drive and follow the on-screen instructions to install your driver. Installing the batteries To install the batteries: 1 Open the battery cover. - Page 5 Adjust Mouse Properties. Or, If the mouse icon is not in your system tray, click Start, then Settings, then Control Panel, then Dynex Mouse. About the Mouse Suite dialog The main dialog is divided into six tabs. Click each tab to view related settings.
- Page 6 DX-WLMSE Configuring your mouse buttons Click the Buttons tab to view an image of your mouse and a description of button functions. To assign function to buttons: 1 Open the menu next to the button you want to customize in the button overview screen.
- Page 7 Setting the HyperGrid The HyperGrid function, when assigned to one of the buttons on your mouse, opens a menu with easy access to nine of the most commonly used functions. To set the Hypergrid 1 Click and hold the button to open the menu. 2 Move the pointer to the function you need and release the button to select.
- Page 8 DX-WLMSE Assigning Hyperlink The Hyperlink function, when assigned to one of the buttons on your mouse, opens up a specified program. To assign Hyperlink 1 Click Settings. 2 Enter or browse for the program you want to open. Add a description if you want.
- Page 9 Slowing down the double-click speed Many items in Windows require that you click the left mouse button twice in quick succession to be activated. This is called a 'double- click'. If you experience difficulty double-clicking on items, the time between clicks may be too short. To slow down the double-click 1 Click the Double-Click tab to set the delay between clicks.
- Page 10 DX-WLMSE Setting up Orientation You can set the desired angle to hold your mouse. To set up the orientation: 1 Hold the mouse at the angle you want to use. 2 On the Orientation tab, click Set Orientation. Move the mouse to your right and make the animated dog run across the screen.
- Page 11 Setting up your tilt scroll wheel To set up your tilt scroll wheel: 1 Click the Wheel tab to configure how the scroll and tilt wheel on your mouse is used in Windows. 2 Click Enable Universal Scrolling or Use Microsoft Office 97 Scrolling Emulation only.
- Page 12 DX-WLMSE To configure Exceptions: 1 Click Exception in the Wheel tab to display a list of applications that use Microsoft Office 97 Scrolling Emulation regardless of whether universal scrolling is enabled. 2 Click an item in the list, then click Remove to delete that item. Or, Click Add, then...
- Page 13 Assigning wheel functions You can assign a separate function to the wheel button itself, apart from the scroll function. To assign wheel function: 1 Select Quick/Auto Scroll Control to set the button control scroll speed when pressed. Or, select Button Function from the drop down menu to assign to the wheel button.
- Page 14 DX-WLMSE Activating Mouse Suite settings Click the Mouse Suite tab to add the Mouse Suite icon to the system tray or uninstall the Mouse Suite software. To add the Mouse Suite icon to system tray: 1 Check Show mouse icon in system tray to display the icon in the system tray.
-
Page 15: Legal Notices
This Class B Digital apparatus complies with Canadian ICES-00 Copyright © 2009 Dynex. DYNEX and the DYNEX logo are trademarks of Best Buy Enterprise Services, Inc. Other brands and product names are trademarks or registered trademarks of their respective holders. Specifications and features are subject to change without notice or obligation. - Page 16 DX-WLMSE...
-
Page 17: One-Year Limited Warranty
If service of products and parts are required after the Warranty Period expires, you must pay all labor and parts charges. This warranty lasts as long as you own your Dynex Product during the Warranty Period. - Page 18 7601 Penn Avenue South, Richfield, Minnesota, U.S.A. 55423-3645 © 2009 Best Buy Enterprise Services, Inc. All rights reserved. DYNEX is a trademark of Best Buy Enterprise Services, Inc. Registered in some countries. All other products and brand names are trademarks of their respective owners.
- Page 19 (800) 305-2204 © 2009 Best Buy Enterprise Services, Inc. All rights reserved. DYNEX is a trademark of Best Buy Enterprise Services, Inc. Registered in some countries. All other products and brand names are trademarks of their respective owners. 09-0742 Distributed by Best Buy Purchasing, LLC 7601 Penn Ave.


Need help?
Do you have a question about the DX-WLMSE and is the answer not in the manual?
Questions and answers