Panasonic WJNT304 - NETWORK INTERFACE UNIT Network Operating Instructions
Network interface unit
Hide thumbs
Also See for WJNT304 - NETWORK INTERFACE UNIT:
- Operating instructions manual (20 pages) ,
- Specification sheet (2 pages) ,
- Product catalog (125 pages)
Table of Contents
Advertisement
Quick Links
Advertisement
Table of Contents

Related Manuals for Panasonic WJNT304 - NETWORK INTERFACE UNIT


Summary of Contents for Panasonic WJNT304 - NETWORK INTERFACE UNIT
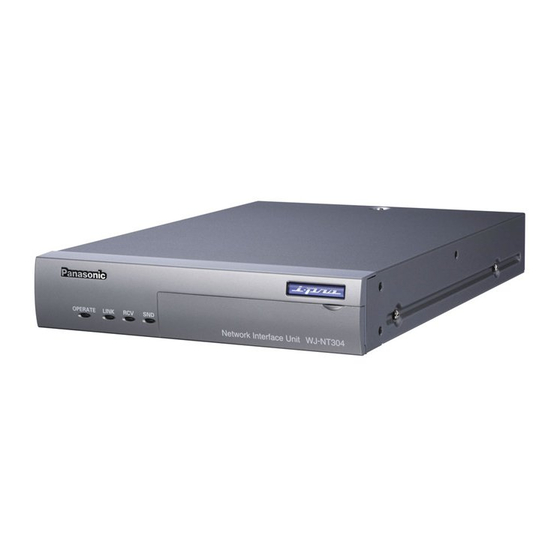
- Page 1 Network Interface Unit Network Operating Instructions WJ-NT304 Model No. O P E R A T E L IN K R C V S N N e t w o r k I n t e r f a c e U n it W J - N T 3 Before attempting to connect or operate this product, please read these instructions carefully and save this manual for future use.
-
Page 2: Table Of Contents
CONTENTS Preface ............................. 3 About these operating instructions ..................3 Trademarks and registered trademarks ................3 Viewer Software ........................3 Monitor Images on a PC ......................4 Monitor images from a single camera .................. 4 Monitor images from multiple cameras ................8 Action at an Alarm Occurrence .................... -
Page 3: Preface
Preface About these operating instructions There are 2 sets of operating instructions for the WJ-NT304 as follows. • Installation Guide (book, these operating instructions) • Network operating instructions (PDF) These operating instructions contain descriptions of how to operate this product using a PC via a network and of how to configure the settings. -
Page 4: Monitor Images On A Pc
User name: admin Step 2 Password: 12345 When accessing the unit without changing the Enter the IP address designated using the Panasonic IP setup software in the address box of the browser. default password, the pop-up window saying that it (Example: http://192.168.0.10/) is recommended to change the password will be dis- played. - Page 5 About the "Live" page !6 Mic input button !5 Alarm occurrence indication button !7 Audio output button !4 Unit title !8 One shot button q [Setup] button !9 Time and date w [Live] button e [1] to [4] buttons r Multi-screen buttons t Image type buttons @0 Main area y AUX buttons...
- Page 6 u [B/W] button (*2) Patrol: Operates the camera in accordance with patrol function settings. Click the desired button to switch color (colour) of the displayed images between color (colour) and Note: B/W. To activate auto pan, sort, sequence, or patrol, it is : Images will be displayed in B/W (black and required to perform the settings on the SETUP white).
- Page 7 One shot button Alarm occurrence indication Click this button to take a picture (a still picture). The button (*2) picture will be displayed on a newly opened window. This button will be displayed at an alarm occurrence, The picture will be displayed on a newly opened win- and the channel of alarm occurrence (one of [1] to dow.
-
Page 8: Monitor Images From Multiple Cameras
Monitor images from multiple cameras Images from multiple cameras can be displayed on a multi-screen. Images from 4 cameras can be displayed simul- taneously. To display images on a multi-screen, it is necessary to register cameras in advance. 4 cameras can be registered as a group and up to 4 groups (16 cameras) can be registered. -
Page 9: Action At An Alarm Occurrence
When "ON" is selected for "Panasonic alarm protocol", the connected Panasonic device will be notified that the unit is in the alarm state. The settings for Panasonic alarm protocol can be configured on the [Notification] tab of the "Alarm setup" page. ( page 36) -
Page 10: Transmit Images Onto An Ftp Server
Transmit Images onto an FTP Server Images can be transmitted to an FTP server. By configuring the following settings, transmission of images captured at an alarm occurrence or captured at a designated interval to an FTP server will become available. Important: When using this function, set the user name and the password to access the FTP server to restrict users who can log into the FTP server. -
Page 11: Save Images On The Sd Memory Card When Failed To Transmit Images By The Ftp Periodic Transmission Function
Images that have failed to transmit using the FTP periodic transmission can be saved automatically on the SD mem- ory card. When using the "SD memory REC" function of a Panasonic’s network disk recorder, select "OFF" for the "FTP peri- odic transmission" function. ( page 46) Refer to the operating instructions of network disk recorder for further infor- mation. - Page 12 Step 3 Move the current directory to "sd_data" and obtain images. Note: • When logging in the unit, each directory will be displayed. Images on the SD memory card can be found in the "sd_data" directory. Move to the "sd_data" directory and obtain images. <Directory structure of "sd_data">...
-
Page 13: About The Network Security Of This Unit
About the Network Security of This Unit Equipped security functions The following security functions are featured in this unit. q Access restrictions by the host authentication and the user authentication It is possible to restrict users from accessing the unit by setting the host authentication and/or the user authenti- cation to on. -
Page 14: Display The Setup Menu And Configure The Settings Of The Unit Using A Pc
Display the Setup Menu and Configure the Settings of the Unit using a PC The settings of the unit can be configured on the setup menu. The setup menu is only operable by users whose access level is "1. Administrator". How to display the setup menu Step 1 Display the "Live"... -
Page 15: How To Operate The Setup Menu
How to operate the setup menu Important: When there are two [SET] buttons (or [REG] but- tons) or more on the page, click the respective but- ton to the edited setting item. <Example> Menu button Setup page Step 1 Click the desired button in the frame on the left of the window to display the respective setup menu. - Page 16 About the operation window !1 Status display area q [Live] button w [Basic Setup] button e [Camera setup] button r [Multi-screen setup] button !2 Setup page t [Alarm setup] button y [Authentication setup] button u [Server setup] button i [Network setup] button o [Maintenance] button !0 [Help] button [Alarm setup] button...
- Page 17 [Network setup] button Click this button to display the "Network setup" page. The network settings and the settings relating to DDNS (Dynamic DNS), SNMP (Simple Network management Protocol) and FTP (File Transfer Protocol) can be configured on the "Network setup" page.
-
Page 18: Configure The Basic Settings Of The Unit [Basic Setup]
Configure the basic settings of the unit [Basic setup] The basic settings such as time and date and unit name, and the settings relating to the NTP server and the SD memory card can be configured on the "Basic setup" page. The "Basic setup"... - Page 19 [Alarm status update mode] Select an interval to notify the unit status (alarm status, audio status, etc.) from the following. When the status of the unit changes, the alarm occur- rence indication button, the mic input button, or the audio output button will be displayed to notify of the unit status.
- Page 20 Configure the settings relating to the NTP server [NTP] Click the [NTP] tab on the "Basic setup" page. ( page 18) The settings relating to the NTP server such as the NTP server address, port number, etc. can be configured on this page.
- Page 21 SD memory card becomes full. ( page 36) [Notification of remaining] [Format] When the "Panasonic alarm protocol" function is used to To format the SD memory card, click the [Execute] but- provide notification of the remaining space of the SD ton.
- Page 22 • Save/obtain images when failed to transmit to • Compatible SD memory card is as follows. the FTP server using the FTP periodic transmis- SD memory card manufactured by Panasonic sion function (64 MB, 128 MB, 256 MB, 512 MB, 1 GB, 2GB) •...
- Page 23 Image capture size: QVGA Size of SD Image quality memory card 0 (Super fine) 1 (Fine) 2 GB Approx. 24 000 pics Approx. 26 000 pics Approx. 27 000 pics Approx. 28 000 pics Approx. 30 000 pics 1 GB Approx.
-
Page 24: Configure The Settings Relating To Images And Audio [Camera Setup]
Configure the settings relating to images and audio [Camera setup] The settings relating to JPEG/MPEG-4 images and camera operation can be configured on the "Camera setup" page. The "Camera setup" page has 4 tabs of the [JPEG/MPEG-4] tab, the [Camera] tab, [Audio] tab and the [Coaxial setup] tab. - Page 25 NTSC model: 0.1 fps/0.2 fps/0.33 fps/0.5 fps/1 fps/2 Note: fps/3 fps/5 fps */6 fps */10 fps */15 fps */30 fps * When "ON" is selected for "MPEG-4" transmission, Default setting: 3 fps displaying rather of MPEG-4 image or JPEG image PAL model: 0.08 fps/0.17 fps/0.28 fps/0.42 fps/0.83 will be available.
- Page 26 When it is unnecessary to fix the port number for CH2: 32006 MPEG-4 image transmission such as when using in CH3: 32008 a particular LAN environment, it is recommended to CH4: 32010 select "Unicast port (AUTO)". Unicast port (MANUAL): Up to 8 users can access a [Unicast port2 (Audio)] single camera concurrently.
- Page 27 [Refresh interval of JPEG monitoring clients] [Refresh interval of JPEG receiving devices] The set value for refresh interval when monitoring JPEG The set value for refresh interval that can be secured images on the browser is displayed. when transmitting JPEG images to each connected device.
- Page 28 Configure the settings relating to camera [Camera] Click the [Camera] tab on the "Camera setup" page. ( page 24) The following are descriptions of how to display the setup menu and configure the settings relating to camera opera- tion using the operation panel. Refer to the provided operating instructions for further information about emergency recording.
- Page 29 Configure the settings relating to audio [Audio] Click the [Audio] tab on the "Camera setup" page. ( page 24) The following are descriptions for when the settings relating to audio from CH1 is configured on this page. [Audio bit rate] Select "16 kbps"...
- Page 30 [Audio output port (PC to Unit )] [Authentication] Enter the transmission port number (the port number on Select an access level for audio transmission/reception the unit used to receive audio data transmitted from the from the following. Refer to page 37 for further informa- PC).
-
Page 31: Configures The Multi-Screen Settings [Multi-Screen Setup]
Configures the multi-screen settings [Multi-screen setup] The cameras to be used for the multi-screen display can be registered on this page. Refer to page 15 for descriptions of how to display images on a multi-screen. The following cameras are available for the multi-screen display. (As of December, 2006) Cameras connected to WJ-NT304, cameras connected to the network, WV-NP240 series, WV-NP1000 series, WV-NW470S series, WV-NP472, WV-NS320 series, WV-NS202, WV-NF284 [CH No.]... -
Page 32: Configure The Alarm Settings [Alarm Setup]
The command alarm is the function that receives When "ON" is selected, the camera connected to the Panasonic alarm protocol from other Panasonic’s net- video input connector of CH1 to 4 will move to the work devices. Using this function, alarm actions will be selected preset position when Terminal alarm 1 to 4 is performed between multiple network devices. - Page 33 [Originating port number] Select a port number to be used to receive the com- mand alarm. Available value: 1 - 65535 Default setting: 8181 Configure the settings relating to the alarm image [Alarm image setup] Click the [Alarm] tab on the "Alarm setup" page. ( page 32) The settings relating to the alarm image to be transmitted to the FTP server can be configured on this page.
- Page 34 [Recording duration] Approximate time to be taken to save the set "number of images" with the set "transmission interval" will be dis- played. Configure the settings relating to the alarm out connector [Alarm output setup] Click the [Alarm] tab on the "Alarm setup" page. ( page 32) The settings relating to the alarm out connector can be configured on this page.
- Page 35 Configure the settings relating to the mail notification [Notification] Click the [Notification] tab on the "Alarm setup" page. ( page 32) The settings relating to the alarm mail can be configured on this page. To notify of an alarm occurrence by e-mail, it is necessary to configure the settings of the mail server.
- Page 36 Configure the settings relating to Panasonic alarm protocol [Panasonic alarm protocol] Click the [Notification] tab on the "Alarm setup" page. ( page 32) The settings relating to Panasonic alarm protocol can be configured on this page. I Panasonic alarm protocol [IP address 1] to [IP address 8] Enter the destination IP address of the Panasonic alarm protocol from the following.
-
Page 37: Configure The Settings Relating To The Authentication [Authentication Setup]
Configure the settings relating to the authentication [Authentication setup] The settings relating to the authentication such as users and PCs restrictions for accessing the unit can be config- ured on this page. The "Authentication setup" page has 2 tabs of the [User] tab and the [Host] tab. Configure the settings relating to the user authentication [User] Click the [User] tab on the "Authentication setup"... - Page 38 Configure the settings relating to the host authentication [Host] Click the [Host] tab on the "Authentication setup" page. ( page 37) The settings to restrict PCs (IP address) to access the unit can be configured on this page. [Access level] Select the access level of the host from the following.
-
Page 39: Configure The Settings Of The Servers [Server Setup]
Configure the settings of the servers [Server setup] The settings relating to the mail server and the FTP server can be configured on this page. The "Server setup" page has 2 tabs of the [Mail] tab and the [FTP] tab. Configure the settings relating to the mail server [Mail] Click the [Mail] tab on the "Server setup"... - Page 40 Configure the settings relating to the FTP server [FTP] Click the [FTP] tab on the "Server setup" page. ( page 39) The settings relating to the FTP server used to transmit the alarm images can be configured on this page. [FTP mode] Select "Passive"...
-
Page 41: Configuring The Network Settings [Network Setup]
Configuring the network settings [Network setup] The network settings and the settings relating to DDNS (Dynamic DNS) and SNMP (Simple Network management Protocol) can be configured on this page. The "Network setup" page has 4 tabs of the [Network] tab, the [DDNS] tab, the [SNMP] tab and the [FTP] tab. Configure the network settings [Network] Click the [Network] tab on the "Network setup"... - Page 42 [Default gateway] [Line speed] When not using the DHCP function, enter the default Select the line speed for data transmission from the fol- gateway of the unit. lowings. It is recommended to use the default setting Default setting: 192.168.0.1 "AUTO". AUTO: Line speed will be applied automatically.
- Page 43 Notes: • The port forwarding function changes a global IP address to a private IP address, and "Static IP masquerade" and "Network Address Translation (NAT)" have this function. This function is to be set in a router. • To access the unit via the Internet by connecting the unit to a broadband router, it is necessary to assign a respective port number for each device and address translation by using the port forwarding function.
- Page 44 Configure the settings relating to DDNS [DDNS] Click the [DDNS] tab on the "Network setup" page. ( page 41) The settings relating to DDNS can be configured on this page. When accessing the unit via the Internet from the network environment of which the global IP address is obtained using DHCP, the DDNS function is necessary.
- Page 45 Configure the settings relating to SNMP [SNMP] Click the [SNMP] tab on the "Network setup" page. ( page 41) The settings relating to SNMP can be configured on this page. It is possible to check the status of the unit by con- necting to the SNMP manager.
- Page 46 Configure the settings relating to the FTP periodic transmission [FTP periodic transmission] Click the [FTP] tab on the "Network setup" page. ( page 41) The settings relating to the periodic transmission of images to an FTP server can be configured on this page. To transmit images to an FTP server periodically, it is necessary to configure the settings of the FTP server in advance.
- Page 47 Configure the schedule settings of the FTP periodic transmission [Schedule setup] Click the [FTP] tab on the "Network setup" page. ( page 41) The schedule settings of the FTP periodic transmission can be configured on this page. Refer to page 46 for further information about the settings relating to the FTP periodic transmission.
-
Page 48: Maintenance Of The Unit [Maintenance]
In this case, format the SD memory card. Or make the remaining space on the SD memory card, select "Not use" for "SD memory card" on the [SD memory card] tab ( page 21), and select "Use" again. (To notify that the SD memory card becomes full, perform the Panasonic alarm protocol setup. ( page 36) [Time & date] Time and date at the error occurrence will be displayed. - Page 49 Upgrade the firmware [Upgrade] Click the [Upgrade] tab of the "Maintenance" page. ( page 48) The current firmware can be checked and upgraded to the latest version on this page. Contact the dealer for further information about the firmware upgrade. Step 4 Click the [Upgrade] button.
- Page 50 Initialize/restart the unit [Initialization] Click the [Initialization] tab of the "Maintenance" page. ( page 48) Initialization of the setup data and HTML files of the unit and restarting of the unit can be performed on this page. [Unit restart] Click the [Unit restart] button to restart the unit. The unit will be inoperable for around 3 minutes after the restart just as when the power is turned on.
-
Page 51: About The Displayed System Log
About the Displayed System Log Error indications relating to SMTP Category Content Description POP3 server error Authentication error Entered user name or password may be incorrect. Check if the mail settings are con- figured correctly. Failed to find POP3 server •... - Page 52 Category Content Description Internal error Other error An error occurred in the FTP function. Check if the FTP settings are configured cor- rectly. Error indications relating to DDNS Category Content Description Connection error Cannot connect to DDNS server. • The designated IP address of the DNS server may be incorrect.
-
Page 53: Troubleshooting
If not, proceed either of the following. • Restart the unit and change the IP address by using the Panasonic IP setup software within 20 minutes after the restart. • Restart the unit by setting the Dip Switch 2 on the front of this unit to ON. - Page 54 Reference Symptom Cause/solution pages • Is the same IP address provided to other devices? Are there contradictions between the address and the network subnet to be accessed? <When the unit and the PC are connected in the same subnet> Are the IP addresses of the unit and the PC set in a common subnet? Or is "Use Proxy Server"...
- Page 55 Reference Symptom Cause/solution pages • Depending on the version of your browser, there might be difficulties refreshing the picture and operat- ing the unit. Operating ® It is recommended to use Internet Explorer 6.0 SP2. Instructions ® When using Windows 2000, it is recommended to ®...
- Page 56 SD memory card. "SD-MEMORY NOT DETECTED" is notified in the • Isn’t the write protect switch set to "LOCK"? message of Panasonic alarm When the write protect switch is set to "LOCK", avail- – protocol. able size/total size indication of the SD memory card will be "**********KB/**********KB".
- Page 57 Reference Symptom Cause/solution pages • Are the microphone and the speaker connected cor- Operating rectly and firmly? Instructions Confirm that they are connected correctly and firmly. • Is the viewer software installed on a PC? Operating Confirm that the viewer software "Network Camera Instructions View3"...
- Page 58 Reference Symptom Cause/solution pages • This may occur due to the display adapter and driver combination. When this occurred, update the driver of the display adapter to the latest version first. If updating the driver does not solve the problem, adjust the hardware acceleration as follows.
- Page 59 ® When using a PC on which Windows XP Service Pack2 (SP2) is installed ® The following may occur during operation when using a PC on which Windows XP Service Pack2 (SP2) is installed. Follow the instructions below when the following occurred. By performing the following solutions, other applications and the security level may not be affected.
- Page 60 Security Systems www.panasonic.com/security http://panasonic.net For customer support, call 1.877.733.3689 Executive Office: Three Panasonic Way 2H-2, Secaucus, New Jersey 07094 Zone Office Eastern: Three Panasonic Way, Secaucus, New Jersey 07094 Central: 1707 N. Randal Road, Elgin, IL 60123 Southern: 1225 Northbrook Parkway, Suwanee, GA 30024 Western: 6550 Katella Ave., Cypress, CA 90630...
Need help?
Do you have a question about the WJNT304 - NETWORK INTERFACE UNIT and is the answer not in the manual?
Questions and answers