Table of Contents
Advertisement
Quick Links
Download this manual
See also:
User Manual
Advertisement
Table of Contents

Related Manuals for Samsung DVD-L300W


Summary of Contents for Samsung DVD-L300W
-
Page 1: Portable Dvd Player
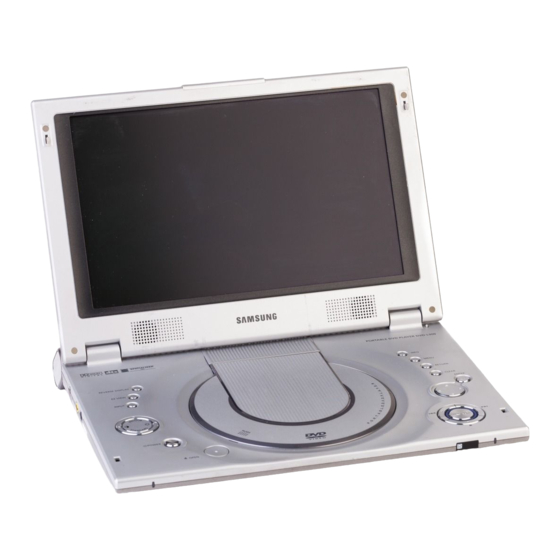
Portable DVD Player DVD-L300W... -
Page 2: Notices And Safety Instructions
ENGLISH Notices and Safety Instructions Safety Instructions Be sure to read the safety and operating instructions before using this product. Keep this manual in a safe place for future reference. Be sure to adhere to all warnings on the product. Unplug the power cord from the AC outlet before cleaning the unit. - Page 3 ENGLISH Notices and Safety Instructions 11. Do not attempt to service the unit yourself by 17. Do not apply excessive force on the display. opening or removing the covers. - The outer surface of the screen is made of glass. The glass may You may be exposed to high voltage and other break if a strong force is applied.
- Page 4 ENGLISH Notices and Safety Instructions Copy Protection • Many DVD discs are encoded with copy protection. Because of this, you should only connect your DVD player directly to your TV, not to a VCR. Connecting to a VCR results in a distorted picture from copy-protected DVD discs.
-
Page 5: Safety Information
ENGLISH Safety Information Assuring the Finest Performance This product is designed with the latest technology to provide trouble-free operation. If the pick-up lens or disk drive gets dirty, the video quality will decrease. Moisture Condensation Condensation may form inside this player under following conditions: •... -
Page 6: Table Of Contents
ENGLISH Table of Contents Setup Features ................. . . 8 Accessories . - Page 7 ENGLISH Table of Contents Advanced Functions Slow Repeat Play ................35 Adjusting the Aspect Ratio (EZ View) .
-
Page 8: Features
ENGLISH Features Plays DVD discs and audio CDs • You can connect a VCR or camcorder to your DVD player • CD-R/RW discs containing MP3/WMA files can be played. using the AV input/output jacks or you can connect to a TV for a larger screen. -
Page 9: Accessories
ENGLISH Accessories Remocon AC Cord AC power Adapter Battery pack Lithium battery Video cable User’s Manual Audio cable If disc features differ from the explanation in the manual • Some functions or operations are disc-dependent and may not work in all cases. Follow the instructions shown on the screen. -
Page 10: Disc Type And Characteristics
ENGLISH Disc Type and Characteristics This DVD player is capable of playing the following types of discs with the corresponding logos: Disc Types Recording Disc Max. * Caution 1 Characteristics (Logos) Types Playing Time Size Single-sided • DVD contains excellent 240 min. - Page 11 ENGLISH Disc Type and Characteristics * Caution 2 • Some playback functions of a DVD vary by manufacturer. This DVD player reproduces the disc data according to guidelines provided by the disc manufacturer. If appears during disc operations, the disc manufacturer has placed a limit on that function. * Caution 3 •...
-
Page 12: Description-Front Panel
ENGLISH Description-Front Panel Front View 1. REVERSE DISPLAY 2. EZ VIEW 3. INPUT 4. AIC (Adaptive Image Control) • Standard : The basic mode for ordinary viewing. • Indoor : The best mode for partial lighting environment. Displays a more vivid, detailed picture under artificial lighting conditions, with enhancement of signal components. - Page 13 ENGLISH Description-Front Panel Right View 1. HEADPHONES A, B 2. VOLUME 3. CHARGING INDICATOR 4. REMOTE SENSOR 5. OPEN 6. STANDBY INDICATOR Left View 1. AUDIO IN/OUT / DIGITAL OUT 2. VIDEO IN/OUT / S-VIDEO OUT 3. DC IN 8.4V 4.
- Page 14 ENGLISH Description-Front Panel Bottom View 1. BATTERY PACK 2. RELEASE (Battery pack separation switch) 3. OPEN Battery pack separation method Press in the direction of the arrow. Slide battery pack to the left, then out.
-
Page 15: Tour Of The Remote Control
ENGLISH Tour of the Remote Control 1. DVD POWER OFF Button 12. ZOOM Button • If you power off the unit with the remote, 13. BOOKMARK Button it remains in low power consumption mode. To turn the unit on, you must press 14. -
Page 16: Using The Remote Control Unit
ENGLISH Using the Remote Control Unit Installing the Battery in the Remote 1. Remove the battery compartment in the direction of the arrow. 2. Place the lithium battery in the battery compartment and put the battery compartment cover back on the remote. •... -
Page 17: Connecting Headphones To The Dvd
ENGLISH Connecting Headphones to the DVD You can attach headphones with a stereo mini-jack plug to the PHONES jack for private listening. There are two jacks available. How to use headphones 1. Insert headphones into the A or B PHONES jack. •... -
Page 18: Connecting To An External Component (Input Select)
ENGLISH Connecting to an External Component (Input Select) You can enjoy video from your VCR or Camcorder on your DVD player. When connecting to an external component Jack/Plug Color Video: Yellow Audio (left): White Audio (right): Red Video Cable Audio Cable To AUDIO OUT To VIDEO OUT VCR or other component equipped with external output connectors... -
Page 19: Viewing A Video From An External Component
ENGLISH Viewing a Video from an External Component Use the procedure below to view a video from a VCR or Camcorder on your DVD player. To view video from an external component 1. Connect the external component according to the procedure outlined on page 18. INPUT 2. -
Page 20: Connecting To A Tv
ENGLISH Connecting to a TV You can enjoy high-resolution video using a S-VIDEO cable when connecting your DVD player to a TV equipped with an S-VIDEO input jack. • Always turn off the DVD Player and TV before you connect any cables. To view video with a TV 1. -
Page 21: Connecting To A Stereo Component
ENGLISH Connecting to a Stereo Component When you connect the DVD player to an audio system, you can listen to higher quality sound. 2-CH Audio Playback Analog Connection Jack/Plug Color Audio (left): White Audio (right): Red Audio Amplifier Connect to input jacks Audio Cable ANALOG INPUT (White) - Page 22 ENGLISH ENGLISH Connecting to a Stereo Component Digital Audio Output (optical) Optical Digital Cable (Not supplied) DIGITAL OUT Audio component DIGITAL equipped with optical Connect to optical digital input jack digital input jack COAXIAL OPTICAL After the completion of above connections; Set the “Dolby Digital Out”...
- Page 23 ENGLISH Connecting to a Stereo Component Playing Dolby Digital (5.1-CH) and DTS Audio • You can enjoy full and dynamic surround sound by connecting a Dolby Digital/DTS digital surround processor or amplifier to the optical digital jack on the DVD player. •...
-
Page 24: Using The Ac Adapter
ENGLISH Using the AC adapter AC adapter (included) DC output cable Power outlet DC output plug Important! • Always turn off the DVD player before connecting or disconnecting the AC cord. • Be sure to use the supplied AC adapter. Using a different type of adapter may cause To home power outlet malfunction or damage to the product. - Page 25 ENGLISH Using the AC adapter Important! • Always turn off the DVD player when inserting or removing the AC adapter. • Before storing the battery pack, make sure it is completely drained. • Be sure to recharge the battery at least once every six months to ensure proper battery life. Caution •...
-
Page 26: Using The Battery Pack
ENGLISH ENGLISH Using the battery pack Important! • When inserting the battery pack, make sure that it is inserted correctly. Otherwise, your DVD player may malfunction. Charging the battery pack Use the AC adapter (included) to charge the battery pack. •... -
Page 27: Battery Level Display
ENGLISH Battery level display • The battery level display indicates the amount of power remaining in the battery pack......a a. Fully charged b. 20~40% used ......b c. 40~80% used d. Completely used (flickers) ......c (If the battery mark flickers the DVD will turn off soon. Change the battery as soon as possible) ......d ✽... -
Page 28: Playing A Disc
ENGLISH ENGLISH Playing a Disc Before Play After plugging in the player, the first time you press the POWER button, this screen comes up: Press the UP/DOWN buttons to select the language, and then press the ENTER button. (This screen will only appear when you plug in the player for the first time.) If you don’t select language, at first time, setting value of Setup menu will be lost. - Page 29 ENGLISH ENGLISH Playing a Disc 6. Step Motion Play (Except CD) Press the PAUSE ( )/STEP button on the remote during play. - Each time the button is pressed, a new frame will appear. - No sound is heard during STEP mode. - Press PLAY ( ) to resume normal play.
-
Page 30: Using The Search & Skip Functions
ENGLISH Using the Search & Skip Functions During play, you can search quickly through a chapter or track or use the skip function to jump to the next selection. Searching through a Chapter or Track During play, press the SEARCH ( ) button on the remote. -
Page 31: Using The Display Function
ENGLISH Using the Display Function When Playing a DVD/VCD/CD 1. Press the INFO button during playback. 2. Use the UP/DOWN buttons to select the desired item. Title 3. Use the LEFT/RIGHT buttons to make the desired setup, then press ENTER. Chapter 0: 00: 13 Time... -
Page 32: Using The Disc And Title Menu
ENGLISH Using the Disc and Title Menu Using the Disc Menu 1. Press the MENU button during playback. 2. Select Disc Menu using the UP/DOWN buttons, then press the RIGHT or ENTER button. Using the Title Menu 1. Press the MENU button during playback. 2. -
Page 33: Using The Function Menu
ENGLISH Using the Function Menu Using the Function Menu 1. Press the MENU button during playback. 2. Use the UP/DOWN buttons to highlight Function, then press the RIGHT or ENTER button. 3. Function selection screen appears, Info, Zoom, Bookmark, Repeat and EZ View. - Info (See Page 31) - Zoom (See Page 42) - Bookmark (See Page 41) -
Page 34: Repeat Play
ENGLISH Repeat Play Repeat the current track, chapter, title, a chosen section (A-B), or all of the disc. When playing a DVD/VCD/CD 1. Press the REPEAT button on the remote. Repeat screen appears. 2. Select Chapter, Title or A-B using the LEFT/RIGHT buttons. 01 A - B REPEAT ENTER •... -
Page 35: Slow Repeat Play
ENGLISH Slow Repeat play This feature allows you slowly to repeat scenes containing sports, dancing, musical instruments being played etc. so you can study them more closely. When playing a DVD/VCD 1. During play, press the PAUSE ( )/STEP button on the remote. 2. -
Page 36: Adjusting The Aspect Ratio (Ez View)
ENGLISH Adjusting the Aspect Ratio (EZ View) To play back using aspect ratio (DVD) Press the EZ VIEW button. • The screen size changes when the button is pressed repeatedly. • The screen zoom mode operates differently depending on the screen setting in the initial setup menu. •... - Page 37 ENGLISH Adjusting the Aspect Ratio (EZ View) If you are using a 4:3 TV For 16:9 aspect ratio discs • 4:3 Letter Box Displays the content of the DVD title in 16:9 aspect ratio. The black bars will appear at the top and bottom of the screen. •...
-
Page 38: Selecting The Audio Language
ENGLISH Selecting the Audio Language You can select a desired language quickly and easily with the AUDIO button. Using the AUDIO button 1. Press the AUDIO button. 2. The Audio changes when the button is pressed repeatedly. ENG DOLBY DIGITAL 5.1CH AUDIO - The audio languages are represented by abbreviations. -
Page 39: Selecting The Subtitle Language
ENGLISH Selecting the Subtitle Language You can select a desired subtitle quickly and easily with the SUBTITLE button. Using the SUBTITLE button 1. Press the SUBTITLE button. SUBTITLE 2. The subtitle changes when the button is pressed repeatedly. 3. To turn off the display, press the CLEAR or RETURN button. - Initially, the subtitle will not appear on screen. -
Page 40: Changing The Camera Angle
ENGLISH Changing the Camera Angle When a DVD contains multiple angles of a particular scene, you can select the Angle function. Using the ANGLE button If the disc contains multiple angles, the ANGLE mark appears on the screen. ANGLE 1. Press the ANGLE button, then ANGLE icon will appear with the current angle number and the number of angles available. -
Page 41: Using The Bookmark Function
ENGLISH Using the Bookmark Function The Bookmark function lets you select parts of a DVD or VCD so that you can quickly find the section at a later time. Using the Bookmark Function (DVD/VCD) 1. During play, press the BOOKMARK button on the remote. The Bookmark icons will be displayed. -
Page 42: Using The Zoom & 3D Sound Functions
ENGLISH Using the Zoom & 3D Sound Functions Using the Zoom Function (DVD/VCD) 1. During play or pause mode, press the ZOOM button on the remote. A Zoom mark will be displayed on screen. 2. Use the UP/DOWN or LEFT/RIGHT button to select the part of the screen you want to zoom in on. -
Page 43: Clips Menu For Mp3/Wma/Jpeg
ENGLISH Clips Menu for MP3/WMA/JPEG Discs with MP3/WMA/JPEG contain individual songs or pictures that can be organized into folders as shown below. They are similar to how you use your computer to put files into different folders. 1. Open the disc cover. 2. -
Page 44: Folder Selection
ENGLISH Folder Selection The folder can only be selected in the Stop mode. R o o t • To select the Parent Folder Press the RETURN button to go to Parent folder, or use W MA the UP/DOWN buttons to select “..” and press ENTER to go to the parent folder. -
Page 45: Mp3/Wma Playback
ENGLISH MP3/WMA Playback 1. Open the disc cover. 2. Place the disc in the player. - Place the disc with the labeled side up. 3. Close the cover. - The cover is closed and you should get a screen that looks like the one below. MP3/WMA Play Function 1. - Page 46 ENGLISH MP3/WMA Playback CD-R MP3/WMA discs When you record MP3/WMA files on CD-R, please refer to the following. • Your MP3 or WMA files should be ISO 9660 or JOLIET format. ISO 9660 format and Joliet MP3 or WMA files are compatible with Microsoft's DOS and Windows, and with Apple's Mac. This format is the most widely used.
-
Page 47: Picture Cd Playback
ENGLISH Picture CD Playback 1. Select the desired folder. (See page 44 to select the folder) 2. Use the UP/DOWN buttons to select a Picture file in clip menu and then press ENTER. • Select JPEG in the menu to view a Photo CD. •... - Page 48 ENGLISH Picture CD Playback CD-R JPEG Discs • Only files with the ".jpg" and ".JPG" extensions can be played. • If the disc is not closed, it will take longer to start playing and not all of the recorded files may be played. •...
-
Page 49: Using The Setup Menu
ENGLISH Using the Setup Menu The Setup menu lets you customize your DVD player by allowing you to select various language preferences, set up a parental level, even adjust the player to the type of television screen you have. Disc Menu 1. -
Page 50: Setting Up The Language Features
ENGLISH Setting Up the Language Features If you set the player menu, disc menu, audio and subtitle language in advance, they will come up automatically every time you watch a movie. Using the Player Menu Language 1. With the unit in Stop mode, press the MENU button. 2. - Page 51 ENGLISH Setting Up the Language Features Using the Audio Language 1. With the unit in Stop mode, press the MENU button. 2. Select Setup using UP/DOWN buttons, then press the RIGHT or ENTER button. 3. Select Language Setup using UP/DOWN buttons, then press the RIGHT or ENTER button. 4.
-
Page 52: Setting Up The Audio Options
ENGLISH Setting Up the Audio Options 1. With the unit in Stop mode, press the MENU button. 2. Select Setup using UP/DOWN buttons, then press the RIGHT or ENTER button. 3. Select Audio Setup using UP/DOWN buttons, then press the RIGHT or ENTER button. 4. -
Page 53: Setting Up The Display Options
ENGLISH Setting Up the Display Options 1. With the unit in Stop mode, press the MENU button. 2. Select Setup using UP/DOWN buttons, then press the RIGHT or ENTER button. 3. Select Display Setup using UP/DOWN buttons, then press the RIGHT or ENTER button. 4. -
Page 54: Setting Up The Parental Control
ENGLISH Setting Up the Parental Control The Parental Control function works in conjunction with DVDs that have been assigned a rating level which helps you control the types of DVDs that your family watches. There are up to 8 rating levels on a disc. 1. -
Page 55: Cautionary Notes
ENGLISH Cautionary Notes Cautions on Using the Player • Avoid magnetic environments. Using the player under strong fluorescent lighting, in a car, near a TV or magnetic object may deteriorate recorded images. • Be sure to remove the disc, turn off the player, and remove the battery pack after use. •... - Page 56 ENGLISH Cautionary Notes When Moving the Player • Be sure to remove the disc from the player before packing for moving. It is recommended that you also remove the disc from the player and turn off the power when not using the player. Saving Power •...
- Page 57 ENGLISH Cautionary Notes Cautions on Using Battery pack Danger! Always follow the safety information below when using the battery pack. Otherwise, a short circuit, overheating, smoke, fire, or damage to the product may result. 1. Never disassemble or modify the battery pack in any way. Do not touch the terminal of the battery pack with a metal object. 2.
- Page 58 ENGLISH Cautionary Notes After a Recharge, store the Battery pack separately. • This battery pack is a lithium ion battery. Even when not in use, power will drain slowly. So use a fully charged battery pack. • Recharge until the charge lamp stays on green. A partial charging of the battery pack decreases the overall lifetime of the battery. Cautions on Charging Battery pack •...
- Page 59 ENGLISH Cautionary Notes Cautions on Storing Battery pack • Even when not in use, power is consumed continuously. To reduce the power consumption, follow the procedure below. 1. Remove the battery pack from the DVD player after every use. 2. When not using the DVD player, turn off the power. If the player is left in the standby mode, power will be slowly drained from the battery pack and the charging capacity will decrease.
-
Page 60: Troubleshooting
ENGLISH Troubleshooting If your DVD player does not seem to be functioning properly, check the items below before you contact a Samsung authorized service center. Symptom Check Power does not turn on or • Make sure the AC power cord is securely plugged into an AC outlet. - Page 61 ENGLISH Troubleshooting Symptom Check • Check that the LCD display is turned on. No picture No sound • Check that the display panel is open. If it is closed, audio will not be output to the speakers. • Check the volume setting. If set to zero, turn up volume level. •...
- Page 62 ENGLISH Troubleshooting Symptom Check Video does not appear with a • Check that the TV is set to VIDEO or AV. external component connected to the DVD player • Check that the video or audio cable is securely connected. Dolby Digital audio volume is •...
-
Page 63: Specifications
96 kHz Sampling : 4 Hz to 44 kHz Output 110 dB *S/N Ratio 75 dB *Dynamic Range 0.01 % *Total Harmonic Distortion * : Nominal specification • Samsung Electronics Co., Ltd reserves the right to change the specifications without notice. • Weight and dimensions are approximate. - Page 64 AK68-00432D...
Need help?
Do you have a question about the DVD-L300W and is the answer not in the manual?
Questions and answers