Table of Contents
Advertisement
Advertisement
Table of Contents

Related Manuals for MSI GE70


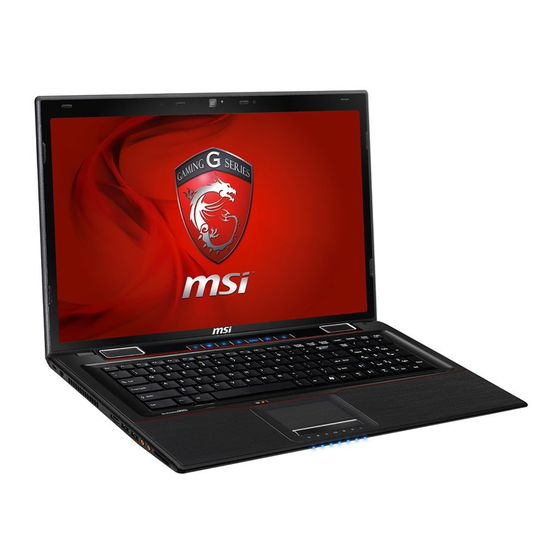
Summary of Contents for MSI GE70
- Page 1 Preface Notebook User’s Manual...
-
Page 2: Table Of Contents
Preface Contents Chapter 1: Preface Content ................1-2 Regulations and Statements ......... 1-4 FCC-B Radio Frequency Interference Statement ..1-4 FCC Conditions ............1-4 CE Conformity ............. 1-4 Battery Regulations ............. 1-5 WEEE Statement ............1-5 Safety Instructions ............1-6 Optical Device Drive Notice .......... - Page 3 Energy Saving Tips ............. 3-8 Basic Operations ............3-9 Safety and Comfort Tips ..........3-9 Knowing the Keyboard ..........3-11 Knowing the Touchpad ..........3-14 About Hard Disk Drive ..........3-16 Using the Optical Storage Device ......3-16 Connecting the External Devices ....... 3-18 Peripheral Devices ............
-
Page 4: Chapter 1: Preface
Preface Regulations and Statements FCC-B Radio Frequency Interference Statement This equipment has been tested and found to comply with the limits for a Class B digital device, pursuant to part 15 of the FCC rules. These limits are designed to provide reasonable protection against harmful interference in a residential installation. -
Page 5: Battery Regulations
Battery Regulations European Union: Batteries, battery packs, and accumulators should not be disposed of as unsorted household waste. Please use the public collection system to return, recycle, or treat them in compliance with the local regulations. Taiwan: For better environmental protection, waste batteries should be collected separately for recycling or special disposal. -
Page 6: Safety Instructions
Preface Safety Instructions Read the safety instructions carefully and thoroughly. All cautions and warnings on the equipment or user’s manual should be noted. Keep this equipment away from humidity and high temperature. Lay this equipment on a stable surface before setting it up. The openings on the enclosure are used for air convection and to prevent the equipment from overheating. - Page 7 Always keep the strong magnetic or electrical objects away from the equipment. When installing the coaxial cable to the TV Tuner, it is necessary to ensure that the metal shield is reliable connected to protective earthing system of the building. Cable distribution system should be grounded (earthed) in accordance with ANSI/NFPA 70, the National Electrical Code (NEC), in particular Section 820.93, Grounding of Outer Conductive Shield of a Coaxial...
-
Page 8: Optical Device Drive Notice
Preface Optical Device Drive Notice CAUTION: This appliance contains a laser system and is classified as a “CLASS 1 LASER PRODUCT.” To use this model properly, read the instruction manual carefully and keep this manual for your future reference. In case of any trouble with this model, please contact your nearest “AUTHORIZED service station.”... -
Page 9: Chapter 2: Introductions
Introductions... -
Page 10: Manual Map
Introductions Congratulations on becoming an user of this notebook, the finely designed notebook. This brand-new exquisite notebook will give you a delightful and professional experience in using notebook. We are proud to tell our users that this notebook is thoroughly tested and certified by our reputation for unsurpassed dependability and customer satisfaction. -
Page 11: Product Overview
Product Overview This section provides the description of basic aspects of the notebook. It will help you to know more about the appearance of this notebook before using it. Please be aware that the notebook shown in this section may vary from the actual one that users purchased. Top-open View The figure of top-open view and description shown below will lead you to browse the main operating area of your notebook. - Page 12 Introductions Webcam This built-in Webcam can be used for picture taking, video recoding or conferencing, and any other interactive applications. Internal Microphone This is the built-in microphone and its function is the same with microphone. Stereo Speakers Give high quality sound blaster with stereo system and Hi-Fi function supported. Power Button / Power LED Power Button Press the power button to turn the notebook power ON and...
- Page 13 Press this button to increase the fan speed to cool down the overall temperature of the notebook. Press this button repeatedly to turn this function on or off Cooler Boost recurrently. Turbo LED glows blue when the NVIDIA GPU mode is activated, and the system is now under heavy load.
- Page 14 Introductions Press and hold the Fn button, and then press the F6 button to turn the Webcam function on. Press again to turn it off. Webcam Press and hold the Fn button, and then press the F8 button repeatedly to turn the Wireless LAN (WiFi) WLAN function on or off recurrently.
-
Page 15: Front Side View
Front Side View 1. Status LED Hard Disk/ Optical Drive Device In-use Blinking blue when the system is accessing the hard disk drive or the optical drive device. Bluetooth Bluetooth LED indicator glows blue when Bluetooth function is enabled. Warning: For flight safety consideration, make sure this LED indicator goes out when you are in flight. - Page 16 Introductions Battery Status Glowing blue when the battery is being charged. Glowing amber when the battery is in low battery status. Blinking amber if the battery fails and it is recommended to replace a new battery. Consult the local dealer for purchasing an equivalent type of battery recommended by the manufacturer.
-
Page 17: Right Side View
Right Side View 1. Optical Drive Device This notebook is equipped with an optical drive device. The actual device preinstalled in the notebook depends on the model you purchased. 2. VGA Port The 15-pin-D-sub VGA port allows you to connect an external monitor or other standard VGA-compatible device (such as a projector) for a great view of the computer display. -
Page 18: Left Side View
Introductions Left Side View 1. Kensington Lock This notebook provides a Kensington Lock hole, which allows users to secure the notebook in place with a key or some mechanical PIN device and attached through a rubberised metal cable. The end of the cable has a small loop which allows the whole cable to be looped around a permanent object, such as a heavy table or other similar equipment, thus securing the notebook in place. - Page 19 4. Power Connector To connect the AC/DC adapter and supply power for the notebook. 5. HDMI Connector HDMI (High Definition Multimedia Interface) is a new interface standard for PCs, displays and consumer electronics devices that supports standard, enhanced and high-definition video, plus multi-channel digital audio on a single cable.
-
Page 20: Rear Side View
Introductions Rear Side View Battery Pack This notebook will be powered by the battery pack when the AC adapter is disconnected. 2-12... -
Page 21: Bottom Side View
Bottom Side View Battery Release Button It is a bounce-back device as a preparation for releasing the battery pack. Slide it with one hand and pull the battery pack carefully with the other. Battery Lock/Unlock Button Battery cannot be moved when the button is positioned on lock status. Once the button is slid to unlock position, the battery is removable. -
Page 22: Specification
Introductions Specification The Specification may change without notice. The actual products sold are different from areas. Please check the detailed Specification with your local dealers. Physical Characteristic Dimension 417.8 (W) x 269.3 (D) x 39 (H) mm Weight <3.0 kg (with 6-cell battery) Socket 988 pins, rPGA ®... -
Page 23: Communication Port
I/O Port 15 pin D-Sub x 1 Monitor (VGA) x 2 (version 3.0) x 2 (version 2.0) Mic-in (Line-in) Headphone-out x 1 (SPDIF-Out supported) RJ45 HDMI Card Reader (SD/ SDXC/ XD/ MSPRO/ MS/ MMC) The supported memory cards may vary without notice. - Page 24 Introductions Audio Internal Speaker 4 speakers Sound Volume Adjust by K/B hot-key & SW Software & BIOS USB Flash Boot Yes, USB floppy boot up DOS only BIOS Fast Boot Support --- Yes Others Compliance WHQL Kensington Lock Hole 2-16...
-
Page 25: Chapter 3: Getting Started
Getting Started... -
Page 26: Begin To Use The Notebook
Getting Started Begin to Use the Notebook For a new user of this notebook, we would like to suggest you follow the illustrations below to begin to use the notebook. -
Page 27: Power Management
Power Management AC Power It is strongly recommended to connect the AC/DC adapter to the notebook and use the AC power while using this notebook for the first time. When the AC power is connected, recharging the battery will start immediately. Note that the AC/DC adapter included in the package is approved for your notebook;... -
Page 28: Getting Started
Getting Started Installing the Battery Pack 1. To install the battery, first, locate the steady gutter of the battery pack, and the battery bolt on the battery tray as shown right. 2. Align the steady gutter and battery bolt with correct orientation and make sure they are joined properly. - Page 29 Releasing the Battery Pack 1. Before releasing the battery, make sure the notebook is turned off, and the AC power is disconnected. 2. Press the lock/unlock button to the unlocked position. 3. Locate the battery release button on the bottom side. 4.
- Page 30 Getting Started Battery Safety Tips Replacing or handling the battery incorrectly may present a risk of fire or explosion, which could cause serious injury. Only replace the main battery pack with the same or equivalent type of battery. Do not disassemble, short-circuit or incinerate batteries or store them to temperatures above +60°...
-
Page 31: Power Management In Windows Os
Power Management in Windows OS Power management of personal computers (PCs) and monitors has the potential to save significant amounts of electricity as well as deliver environmental benefits. To be energy efficient, turn off your display or set your PC to standby/hibernate mode after a period of user inactivity. Follow the instructions below to adjust the power management settings in Windows OS: Power Options in Windows OS allow you to control the power management features of your display, hard drive, and battery. -
Page 32: Energy Saving Tips
Getting Started The Shut Down Computer menu will present the options to Sleep (S3/S4), Shut Down (S5), or Restart your computer. The computer should be able to wake up from power saving mode in response to a command from the power button. Energy Saving Tips Activate the ECO power saving function to manage the computer’s energy consumption. -
Page 33: Basic Operations
Basic Operations If you are a beginner to the notebook, please read the following instructions to assure your own safety, and make yourself comfortable during the operations. Safety and Comfort Tips The notebook is a portable platform that allows you to work anywhere. However, choosing a good workspace is important if you have to work with your notebook for a long period of time. - Page 34 Getting Started Your work area should have enough illumination. Choose the proper desk and chair and adjust their height to fit your posture when operating. When sitting on the chair, adjust the chair’s back (if available) to support your back comfortably.
-
Page 35: Knowing The Keyboard
Knowing the Keyboard This notebook provides a full-functioned keyboard. This keyboard can be divided into four categories: Typewriter keys, Cursor keys, Numeric keys and Function keys. Typewriter keys Numeric keys Cursor keys / Function keys 3-11... - Page 36 Getting Started Typewriter Keys In addition to providing the major function of the keyboard, these typewrite keys also provide several keys for special purposes, such as [Ctrl,] [Alt,] and [Esc] key. When the lock keys are pressed, the corresponding LEDs will light up to indicate their status: Num Lock: Press this key to toggle the Num Lock on and off.
- Page 37 Increase the LCD brightness. Decrease the built-in speaker’s volume. Increase the built-in speaker’s volume. Disable the computer’s audio function. Force the computer into sleep state (depending on the system configuration). Quick Launch [Fn] Keys Use the [Fn] buttons on the keyboard to activate the specific applications or tools. With the help of these quick launch buttons, users will be able to do work more efficiently.
-
Page 38: Knowing The Touchpad
Getting Started Knowing the Touchpad The touchpad integrated in your notebook is a pointing device that is compatible with standard mouse, allowing you to control the notebook by pointing the location of the cursor on the screen and making selection with its two buttons. Cursor Movement Area This pressure-sensitive area of the touchpad, allows you to place your... - Page 39 Point and Click When you have moved and placed the cursor over an icon, a menu item or a command that you want to execute, simply tap slightly on the touchpad or press the left button to select. This procedure, called as point and click is the basics of operating your notebook. Unlike the traditional pointing device such as the mouse, the whole touchpad can act as a left button, so that your each tap on the touchpad is equivalent to pressing the left button.
-
Page 40: About Hard Disk Drive
Getting Started About Hard Disk Drive Your notebook is equipped with a 2.5-inch hard disk drive. The hard disk drive is a storage device with much higher speed and larger capacity than other storage devices, such as the floppy disk drive and optical storage device. Therefore, it is usually used to install the operating system and software applications. - Page 41 Inserting the Disk Confirm that the notebook is turned on. Touch the EJECT quick launch button nearby the keyboard or press the EJECT button on the optical storage device panel and the disk tray will slide out partially. Note that the ODD EJECT button is functional under pure DOS system.
-
Page 42: Connecting The External Devices
Getting Started Connecting the External Devices The I/O (input/output) ports on the notebook allow you to connect peripheral devices and communication devices. All functions and devices listed here are for reference only. Peripheral Devices The functions listed here are supported optionally, depending on the model users purchased. -
Page 43: Communication Devices
Communication Devices The functions listed here are supported optionally, depending on the model users purchased. Contact the local dealer for detailed information. 3-19... -
Page 44: Components Replacement And Upgrade
Getting Started Components Replacement and Upgrade Please be noticed that the memory, hard disk drive, wireless LAN / Bluetooth module and battery pack preinstalled in the product users purchased may be upgradable or replaceable by user’s request depending on the models users purchased. This notebook is equipped with a high-capacity Li-ion battery pack, and the battery pack is replaceable by users. - Page 45 This notebook is equipped with a hard disk drive, and this storage device may be upgradable and replaceable by the authorized dealer or service center. Additional memory module may be installed, by the authorized dealer or service center, to increase the performance this notebook,...
-
Page 46: Faq
3) Re-connect the AC/DC adapter and the battery. 4) Leave the notebook powered off at least for 30 minutes while charging the battery. 5) If the problem remains, please contact with your local dealers or local MSI service center for further support. - Page 47 My Internet connection has problems. 1) Have your phone company check that your phone line is free from any line noise. 2) If you are having a problem connecting with your Internet Service Provider (ISP), check that the ISP is not experiencing technical problems. 3) Check the ADSL settings and connection and make sure your notebook is properly configured for Internet access.
Need help?
Do you have a question about the GE70 and is the answer not in the manual?
Questions and answers