Table of Contents
Advertisement
Advertisement
Table of Contents

Related Manuals for MSI CX620


Summary of Contents for MSI CX620
- Page 1 CHAPTER 1 Preface...
-
Page 2: Table Of Contents
Table of Content Preface Table of Content ..........................1-2 Regulations Information....................... 1-5 FCC-B Radio Frequency Interference Statement ..............1-5 FCC Conditions ........................1-6 CE Conformity .......................... 1-6 Safety Instructions........................1-7 Safety Guideline for Using Lithium Battery ................1-11 WEEE Statement ......................... 1-15 Optical Device Drive Notice ....................... - Page 3 Right Side View ........................2-16 Left Side View......................... 2-17 Rear Side View........................2-19 Bottom Side View ........................2-21 Getting Started Power Management ........................3-2 Connecting the AC Power ......................3-2 Using the Battery Power......................3-4 ECO Engine -- Power Saving Function .................. 3-10 GPU Boost Function.......................
- Page 4 ExpressCard Installation......................3-39 Removing the ExpressCard ....................3-39 Installing the ExpressCard ..................... 3-39 Components Replacement and Upgrade ................. 3-41 BIOS Setup About BIOS Setup......................... 4-2 When to Use BIOS Setup......................4-2 How to Run BIOS Setup......................4-2 Control Keys ..........................4-3 BIOS Setup Menu..........................
-
Page 5: Regulations Information
Regulations Information FCC-B Radio Frequency Interference Statement This equipment has been tested and found to comply with the limits for a Class B digital device, pursuant to part 15 of the FCC rules. These limits are designed to provide reasonable protection against harmful interference in a residential installation. -
Page 6: Fcc Conditions
Shield interface cables and AC power cord, if any, must be used in order to comply with the emission limits. FCC Conditions This device complies with part 15 of the FCC Rules. Operation is subject to the following two conditions: This device may not cause harmful interference. -
Page 7: Safety Instructions
Safety Instructions Read the safety instructions carefully and thoroughly. All cautions and warnings on the equipment or user’s manual should be noted. Keep the User’s Guide that comes with the package for future reference. Keep this equipment away from humidity and high temperature. Lay this equipment on a stable surface before setting it up. - Page 8 Make sure the power voltage is within safety range and has been adjusted properly to the value of 100~240V before connecting the equipment to the power outlet. Always unplug the AC power cord before installing any add-on card or module to the equipment.
- Page 9 When installing the coaxial cable to the TV Tuner, it is necessary to ensure that the metal shield is reliable connected to protective earthing system of the building. Cable distribution system should be grounded (earthed) in accordance with ANSI/NFPA 70, the National Electrical Code (NEC), in particular Section 820.93, Grounding of Outer Conductive Shield of a Coaxial Cable.
- Page 10 1-10 Green Product Features Reduced energy consumption during use and stand-by Limited use of substances harmful to the environment and health Easily dismantled and recycled Reduced use of natural resources by encouraging recycling Extended product lifetime through easy upgrades Reduced solid waste production through take-back policy Environmental Policy The product has been designed to enable proper reuse of parts and recycling and should not be thrown away...
-
Page 11: Safety Guideline For Using Lithium Battery
1-11 Safety Guideline for Using Lithium Battery (English) CAUTION: Danger of explosion if battery is incorrectly replaced. Replace only with the same or equivalent type recommended by the equipment manufacturer. Discard used batteries according to manufacturer’s instructions. (French) (Français) ATTENTION: II y a danger d’explosion s’il y a remplacement incorrect de la batterie. Remplacer uniquement avec une batterie du meme type ou d’un type équivalent recommandé... - Page 12 1-12 üreticinin talimatlarına göre degerlendiriniz. (Greek) (Ελληνικά) ΠΡΟΣΟΧΗ: Κίνδυνος έκρηξης εάν η μπαταρία τοποθετηθεί λανθασμένα. Να αντικαθιστάτε μόνο με τον ίδιο ή αντίστοιχο τύπο με αυτό που συνιστά ο κατασκευαστής του εξοπλισμού. Να απορρίπτετε τις χρησιμοποιημένες μπαταρίες ως απορρίμματα σύμφωνα με τις οδηγίες του κατασκευαστή. (Polish) (Polski) OSTRZEŻENIE: Nieprawidłowa wymiana może spowodować...
- Page 13 1-13 권장하는 것과 동일하거나 동등한 배터리로만 교체하십시오. 사용한 배터리는 제조업체의 지침에 따라 폐기하십시오. (Vietnamese) (Tieng Viet) LƯU Ý: Thay thế pin không tương thích có thể dẫn đến nguy cơ bị nổ. Chỉ thay thế bằng pin cùng loại hoặc loại tương ứng khuyên dùng bởi nhà sản xuất thiết bị. Vứt bỏ pin đã sử dụng theo hướng dẫn của nhà sản xuất.
- Page 14 1-14 utilizadas de acordo com as instruções do fabricante. (Swedish) (Svenska) VARNING: Explosionsfara vid felaktigt batteribyte. Använd samma batterityp eller en ekvivalent typ som rekommenderas av apparattillverkaren. Kassera använt batteri enligt fabrikantens instruction. (Finnish) (Suomi) VAROITUS: Paristo voi räjähtää, jos se on virheellisesti asennettu. Vaihda paristo ainoastaan valmistajan suosittelemaan tyyppiin.
-
Page 15: Weee Statement
1-15 proizvođača. (Estonian) (Eesti) ETTEVAATUST! Plahvatusoht, kui aku on valesti paigaldatud. Asendage ainult sama või tootja poolt soovitatud võrdväärse akuga. Hävitage kasutatud aku vastavalt tootja juhistele. ()ﻓﺎرﺳ ﻲ (Persian) ا در ﺻﻮرت ﺗﻌﻮﻳﺾ ﺑﺎﺗﺮﯼ، ﺗﻨﻬﺎ از ﺑﺎﺗﺮﻳﻬﺎﯼ ﭘﻴﺸﻨﻬﺎدﯼ ﺷﺮﮐﺖ ﺗﻮﻟﻴﺪ ﮐﻨﻨﺪﻩ ﺎﺗﺮﯼ... - Page 16 1-16 seront obligés de récupérer certains produits en fin de vie. (German) (Deutsch) Gemäß der Richtlinie 2002/96/EG über Elektro- und Elektronik-Altgeräte dürfen Elektro- und Elektronik-Altgeräte nicht mehr als kommunale Abfälle entsorgt werden, die sich auf 13.August, 2005 wirken. Und der Hersteller von bedeckt Elektronik-Altgeräte gesetzlich zur gebrachten Produkte am Ende seines Baruchbarkeitsdauer zurückzunehmen.
- Page 17 1-17 yükümlü olacaktır. (Greek) (Ελληνικά) Σύμφωνα με την Οδηγία 2002/96/ΕΚ της Ευρωπαϊκής Ένωσης («ΕΕ») περί Απόρριψης Ηλεκτρικού και Ηλεκτρονικού Εξοπλισμού (WEEE), η οποία λαμβάνει ισχύ στις 13 Αυγούστου 2005, τα προϊόντα «ηλεκτρικού και ηλεκτρονικού εξοπλισμού» δεν είναι δυνατόν να απορριφθούν πλέον ως κοινά απορρίμματα και οι κατασκευαστές κεκαλυμμένου...
- Page 18 1-18 (Simplified Chinese ) (简体中文) 欧盟已制订有关废电机电子设备法令,亦即自 2005 年 8 月 13 日生效的 2002/96/EC,明 文规定「电机电子设备产品」不可再以都市废弃物处理,且所有相关电子设备制造商,均须在产品使用寿命结束后进行回 收。 (Japanese) (日本語) 2005 年 8 月 13 日以降に EU 加盟国を流通する電気・電子製品には WEEE 指令によりゴミ箱に×印のリサ イクルマークの表示が義務づけられており、廃棄物として捨てることの禁止とリサイクルが義務づけられています。 (Korean) (한국어) 2005 년 8 월 13 일자로 시행된 폐전기전자제품에 대한 유럽연합("EU") 지침, 지침 2002/96/EC 에 의거하여, "전기전자제품"은...
- Page 19 1-19 (Serbian) (Srpski) Po Direktivi Evropske unije ("EU") o odbačenoj ekektronskoj i električnoj opremi, Direktiva 2002/96/EC, koja stupa na snagu od 13. Avgusta 2005, proizvodi koji spadaju pod "elektronsku i električnu opremu" ne mogu više biti odbačeni kao običan otpad i proizvođači ove opreme biće prinuđeni da uzmu natrag ove proizvode na kraju njihovog uobičajenog veka trajanja.
- Page 20 1-20 direktiivin 2002/96/EY mukaisesti ”sähkö- ja elektroniikkalaitteita” ei saa enää hävittää talousjätteiden mukana. Direktiivin alaisen sähkö- tai elektroniikkalaitteen valmistajan on otettava laitteet takaisin niiden käyttöiän päättyessä. (Slovak) (Slovenčina) Na základe smernice Európskej únie („EU“) o elektrických a elektronických zariadeniach číslo 2002/96/ES, ktorá...
- Page 21 1-21 задължени да приемат обратно съответните продукти в края на експлоатационния им период. (Croatian) (Hrvatski) U okviru Direktive Europske Unije ("EU") o Otpadnim električnim i elektroničkim uređajima, Direktiva 2002/96/EC, koja je na snazi od 13. kolovoza 2005., "električni i elektronički uređaji" se ne smiju više bacati zajedno s kućnim otpadom i proizvođači su obvezni zbrinuti takve proizvode na kraju njihovog životnog vijeka.
-
Page 22: Optical Device Drive Notice
1-22 Optical Device Drive Notice CAUTION: This appliance contains a laser system and is classified as a “CLASS 1 LASER PRODUCT.” To use this model properly, read the instruction manual carefully and keep this manual for your future reference. In case of any trouble with this model, please contact your nearest “AUTHORIZED service station.”... -
Page 23: Introductions
CHAPTER 2 Introductions... -
Page 24: Manual Map
Congratulations on becoming a user of this notebook, the finely designed notebook. This brand-new exquisite notebook will give you a delightful and professional experience in using notebook. We are proud to tell our users that this notebook is thoroughly tested and certified by our reputation for unsurpassed dependability and customer satisfaction Manual Map This User’s Manual provides instructions and illustrations on how to operate this notebook. -
Page 25: Unpacking
Chapter 4, BIOS Setup, provides information on BIOS Setup program and allows you to configure the system for optimum use. Unpacking First, unpack the shipping carton and check all items carefully. If any item contained is damaged or missing, please contact your local dealer immediately. Also, keep the box and packing materials in case you need to ship the unit in the future. -
Page 26: Specification
Specification Physical Characteristic Dimension 247.5 (W) x 374 (D) x 35 (H) mm Weight 2.5KG Processor Type Intel Micro FCPGA Support Processor Intel Calpella (32nm) L2 Cache 3MB/ 6MB FSB Speed 1066MHz Special Notification The actual processor preinstalled in the notebook depends on the model you purchased. - Page 27 Memory Technology DDR3 800/ 1066 MHz Memory DDR3 SO-DIMM X 2 slot Maximum up to 4GB Power AC/DC Adapter(1) (optional) 65W, 19V Input: 100~240V 50~60Hz Output: 19V 3.42A AC/DC Adapter(2) (optional) 90W, 19V Input: 100~240V 50~60Hz Output: 19V 4.74A Battery Type 6 cells/ 9 cells (optional) RTC Battery Special Notification...
-
Page 28: Express Card
RJ45 HDMI x 1 (optional) Card Reader x 1 (XD / SD/ MMC / MS) The supported memory cards may vary without notice. Express Card Slot Express Card Slot x 1 (optional) Storage (Items listed here may vary depending on the model users purchased) HDD form factor 2.5”... - Page 29 Video Discrete Graphics Controller ATi GPU UMA Graphics Controller Internal Graphics VRAM 1GB/ 512MB DDR3 (optional) Dual View Function External display devices will be auto detected when connected. External Display Output Supported Display LCD Type 15.6” / 16” (optional) 1366x768 WXGA (16:9) LCD TFT/ LED Panel Brightness Brightness controlled by K/B hot-keys...
- Page 30 Software & BIOS USB Flash Boot Yes, USB floppy boot up DOS only BIOS Fast Boot Support --- Yes Others Kensington Lock Hole Compliance WHQL...
-
Page 31: Product Overview
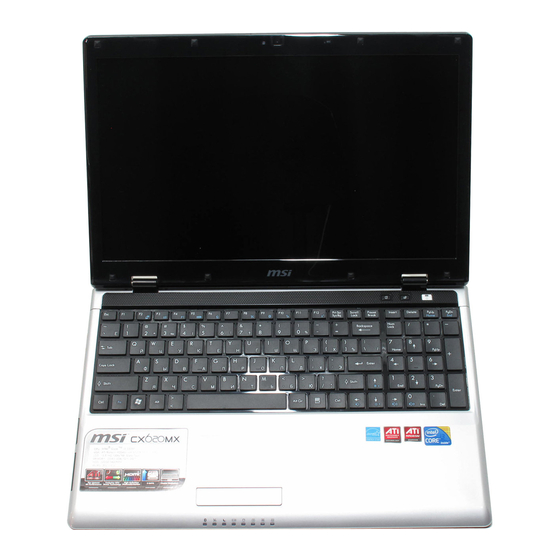
Product Overview This section provides the description of basic aspects of the notebook. It will help you to know more about the appearance of this notebook before using it. Please be aware that the notebook shown in this section may vary from the actual one that users purchased. Top-open View The figure of top-open view and description shown below will lead you to browse the main operating area of your notebook. - Page 32 2-10 1. Power Button / Power LED Power Button Press the power button to turn the notebook power ON and OFF. Power/ Power Saving function LED: Glowing blue when the notebook power is turned on. LED goes off when this function is turned off. 2.
- Page 33 2-11 3. Status LED Bluetooth and Wireless LAN (optional): Wireless LAN LED indicator glows green when Wireless LAN function is enabled. Bluetooth LED indicator glows blue when Bluetooth function is enabled. Both LED indicators glow green and blue at the same time when both Bluetooth functions are enabled.
- Page 34 2-12 Hard Disk/ Optical Drive Device In-use: Blinking blue when the system is accessing the hard disk drive or the optical drive device. Num Lock: Glowing blue when the Num Lock function is activated. Caps Lock: Glowing blue when the Caps Lock function is activated. Scroll Lock: Glowing blue when the Scroll Lock function is activated.
- Page 35 2-13 Press and hold the Fn button, and then press the F5 button repeatedly to switch among various power saving modes provided by ECO Engine, or to turn this function off recurrently. Refer to the Power Management section in chapter 3 of this ECO Engine manual for the detailed information of this ECO Engine, Power (Power Saving)
- Page 36 2-14 Press and hold the Fn button, and then press the F10 button to turn the 3G function on. Press again to turn it off. This 3G function is optional supported depending on the model users purchased. This function button will not be available when (optional) the 3G function is not supported.
-
Page 37: Front Side View
2-15 Front Side View Stereo Speakers 1. Stereo Speakers Give high quality sound blaster with stereo system and Hi-Fi function supported. -
Page 38: Right Side View
2-16 Right Side View USB Port Optical Drive Device 1. USB Port The USB 2.0 port allows you to connect USB-interface peripheral devices, such as the mouse, keyboard, modem, portable hard disk module, printer and more. 2. Optical Drive Device This notebook is equipped with an optical drive device. -
Page 39: Left Side View
2-17 Left Side View RJ-45 Connector Audio Port Connectors Ventilator Card Reader Express Card Slot 1. RJ-45 Connector The 10/100/1000 Ethernet connector is used to connect a LAN cable for network connection. 2. Audio Port Connectors Make high quality sound blaster with stereo system and Hi-Fi function supported. Headphone: A connector for speakers or headphones. - Page 40 2-18 3. Ventilator The ventilator is designed to cool the system. DO NOT block the ventilator for air circulation. 4. Card Reader The built-in card reader may support various types of memory card, such as MMC (Multi-Media Card), XD (eXtreme Digital), SD (Secure Digital), SDHC (SD High Capacity), MS (Memory Stick) or MS Pro (Memory Stick Pro) cards, and so on.
-
Page 41: Rear Side View
2-19 Rear Side View Kensington Lock Power Connector E-SATA / USB Combo Port VGA Port HDMI Connector USB Port 1. Kensington Lock This notebook provides a Kensington Lock hole, which allows users to secure the notebook in place with a key or some mechanical PIN device and attached through a rubberised metal cable. The end of the cable has a small loop which allows the whole cable to be looped around a permanent object, such as a heavy table or other similar equipment, thus securing the notebook in place. - Page 42 2-20 3. E-SATA (External Serial ATA) / USB Combo Port (optional) The E-SATA Connector allows you to connect an external Serial ATA hard disk device. Users can now utilize shielded cable outside the notebook to take advantage of the benefits the SATA interface brings to storage.
-
Page 43: Bottom Side View
2-21 Bottom Side View Battery Lock/Unlock Button Battery Release Button Battery Pack 1. Battery Lock/Unlock Button Battery cannot be moved when the button is positioned on lock status. Once the button is slid to unlock position, the battery is removable. 2. -
Page 44: Getting Started
CHAPTER 3 Getting Started... -
Page 45: Power Management
Power Management Connecting the AC power It is strongly recommended to connect the AC/DC adapter to the notebook and use the AC power while using this notebook for the first time. When the AC power is connected, recharging the battery will start immediately. Note that the AC/DC adapter included in the package is approved for your notebook;... -
Page 46: Disconnecting The Ac Power
Connecting the AC Power 1. Unpack the package to find the AC/DC adapter and power cord. 2. Attach the power cord to the connector of the AC/DC adapter. 3. Plug the DC end of the adapter to the notebook, and the male end of the power cord to the electrical outlet. -
Page 47: Using The Battery Power
Using the Battery Power This notebook is equipped with a high-capacity Li-ion battery pack. The rechargeable Li-ion battery pack is an internal power source of the notebook. Be aware of that this battery pack may be damaged if users try to disassemble the battery pack on their own. -
Page 48: Installing The Battery Pack
Installing the Battery Pack To insert the battery pack, following the steps below: 1. Align and place the battery to the battery tray with correct orientation. 2. Press down the battery pack to fasten the battery pack in the battery tray. 3. - Page 49 Releasing the Battery Pack It is always recommended to have another battery pack in reserve for enough power supply. Please contact your local dealer to purchase a battery pack that is compliant to your notebook. To remove the battery pack, following the steps below: 1.
-
Page 51: Battery Safety Tips
Battery Safety Tips Replacing or handling the battery incorrectly may present a risk of fire or explosion, which could cause serious injury. Only replace the main battery pack with the same or equivalent type of battery. Do not disassemble, short-circuit or incinerate batteries or store them to temperatures above +60°... -
Page 52: Charging The Battery Pack
Charging the Battery Pack The battery pack can be recharged while it is installed in the notebook. Please pay attention to the following tips before recharging the battery: If a charged battery pack is not available, save your work and close all running programs and shut down the system or Save-to-Disk. -
Page 53: Eco Engine -- Power Saving Function
3-10 ECO Engine -- Power Saving Function (Optional) ECO Engine, the outstanding and unique power saving function, provides various power saving modes – Gaming mode, Movie mode, Presentation mode, Office mode, and Turbo Battery mode, to extend the battery running time while performing different tasks with this notebook. Read the instructions bellow to activate the ECO Engine power saving function: 1. - Page 54 3-11 Presentation Mode Select this mode while performing presentation applications. Office Mode Select this mode while dealing with office documentation tasks. Turbo Battery Mode Select this mode to maximize the battery running time. ECO Off Selected to disable ECO Engine.
-
Page 55: Gpu Boost Function
3-12 GPU Boost Function (Optionally Supported) GPU Boost Function allows users to choose between using the discrete and the internal graphic card depending on the tasks users are currently performing. With this function, users can easily and quickly select either to maximizing the graphic performance or extending the battery running time. - Page 56 3-13 2. Bringing up the Switchable Graphics dialogue, by right clicking the mouse on the desktop, and select [Configure Switchable Graphics.] 3. In the Switchable Graphics dialogue, users can read the status of graphics mode and also be able to choose a proper graphics processing unit here. 4.
-
Page 57: Power Management In Windows Os
3-14 Power Management in Windows OS Power management of personal computers (PCs) and monitors has the potential to save significant amounts of electricity as well as deliver environmental benefits. To be energy efficient, turn off your display or set your PC to standby/hibernate mode after a period of user inactivity. Follow the instructions below to adjust the power management settings in Windows OS: 1. - Page 58 3-15...
-
Page 59: Energy Saving Tips
3-16 Energy Saving Tips Activate the ECO power saving function to manage the computer’s energy consumption. Turn off the monitor after a period of user inactivity. Utilize the Fn and F12 sleep mode keys to turn into power saving mode. Tune the settings in Power Options under Windows OS to optimize the computer’s power management. -
Page 60: Basic Operations
3-17 Basic Operations If you are a beginner to the notebook, please read the following instructions to assure your own safety, and make yourself comfortable during the operations. Safety and Comfort Tips The notebook is a portable platform that allows you to work anywhere. However, choosing a good workspace is important if you have to work with your notebook for a long period of time. -
Page 61: Having A Good Work Habit
3-18 1. Keep your hands and feet with optimal comfort. 2. Adjust the angle and position of LCD panel. 3. Adjust the desk’s height. 4. Sit straight and keep a good posture. 5. Adjust the chair’s height. Having a Good Work Habit Have a good work habit is important if you have to work with your notebook for long periods of time;... -
Page 62: Knowing The Keyboard
3-19 Knowing the Keyboard This notebook provides a full-functioned keyboard. This keyboard can be divided into four categories: Typewriter keys, Cursor keys, Numeric keys and Function keys. Typewriter keys Numeric keys Cursor keys / Function keys The keyboard shown here may vary from the actual one, depending on which county users purchase the... -
Page 63: Typewriter Keys
3-20 Typewriter Keys In addition to providing the major function of the keyboard, these typewrite keys also provide several keys for special purposes, such as [Ctrl,] [Alt,] and [Esc] key. When the lock keys are pressed, the corresponding LEDs will light up to indicate their status: Num Lock: Press and hold the [Fn] key and press this key to toggle the Num Lock on and off. -
Page 64: Cursor Keys
3-21 Cursor Keys The four cursor (arrow) keys and [Home], [PgUp], [PgDn], [End] keys are used to control the cursor movement. Move the cursor left for one space. Move the cursor right for one space. Move the cursor up for one line. Move the cursor down for one line. -
Page 65: Function Keys
3-22 The Backspace key, [Ins] and [Del] keys at upper right corner are use for editing purpose. This key is used to switch the typing mode between “insert” and “overtype” modes. Press this key to delete one character to the right of the cursor and move the following text left for one space. - Page 66 3-23 Enable or disable the touchpad function. Decrease the LCD brightness. Increase the LCD brightness. Decrease the built-in speaker’s volume. Increase the built-in speaker’s volume. Disable the computer’s audio function. Force the computer into sleep state (depending on the system configuration).
- Page 67 3-24 Quick Launch [Fn] Buttons Use the [Fn] buttons on the keyboard to activate the specific applications or tools. With the help of these quick launch buttons, users will be able to do work more efficiently. Press and hold the Fn button, and then press the F4 button to launch the Windows Search function.
- Page 68 3-25 Press and hold the Fn button, and then press the F9 button to turn the Bluetooth function on. Press again to turn it off. Bluetooth (optional) Press and hold the Fn button, and then press the F10 button to turn the 3G function on.
-
Page 69: Knowing The Touchpad
3-26 Knowing the Touchpad The touchpad integrated in your notebook is a pointing device that is compatible with standard mouse, allowing you to control the notebook by pointing the location of the cursor on the screen and making selection with its two buttons. 1. -
Page 70: Using The Touchpad
3-27 Using the Touchpad Read the following description to learn how to use the touchpad: Configuring the Touchpad You can customize the pointing device to meet your personal needs. For example, if you are a left-handed user, you may want to swap the functions of the two buttons. In addition, you can change the size, shape, moving speed and other advanced features of the cursor on the screen. - Page 71 3-28 that your each tap on the touchpad is equivalent to pressing the left button. Tapping twice more rapidly on the touchpad is to execute a double-click. 1. Move the cursor by sliding your fingertip. 2. Put your wrist on the desk comfortably.
-
Page 72: About Hard Disk Drive
3-29 About Hard Disk Drive Your notebook is equipped with a 2.5-inch hard disk drive. The hard disk drive is a storage device with much higher speed and larger capacity than other storage devices, such as the floppy disk drive and optical storage device. -
Page 73: Using The Optical Drive Device
3-30 Using the Optical Drive Device Your notebook is equipped with an optical drive device. The actual device preinstalled in your notebook depends on the model you purchased. Super Multi: Works as a multi-functional DVD Dual Drive and a DVD RAM Drive. Blu-ray: It is a high-capacity optical disc that holds the high-definition video (HD) on a single-sided disk. - Page 74 3-31 Inserting the Disk The following instructions describe the general procedure when operating the optical storage device: 1. Confirm that the notebook is turned on. 2. Press the eject button on the panel and the disk tray will slide out partially. 3.
- Page 75 3-32 Removing the Disk Follow the instructions below to remove the disk that is placed in the optical storage device: 6. Press the eject button on the drive’s panel and the disk tray will slide out partially. 7. Gently pull the tray out until fully extended.
-
Page 76: Connecting The External Devices
3-33 Connecting the External Devices The I/O (input/output) ports on the notebook allow you to connect peripheral devices. All devices listed here are for reference only. Connecting the Peripheral Devices Connecting the USB devices This notebook provides USB ports for connecting various USB devices, such as mouse, keyboard, digital camera, webcam, printer, and external optical storage device, ete.. - Page 77 3-34 Connecting the External Display Devices This notebook provides a VGA port for connecting a larger display with higher resolution. The 15-pin-D-sub VGA port allows users to connect an external monitor or other standard VGA-compatible device (such as a projector) for a great view of the notebook display.
- Page 78 3-35 This notebook provides a HDMI port for connecting a larger display with higher resolution. HDMI (High Definition Multimedia Interface Support) is a new interface standard for PCs, displays and consumer electronics devices that supports standard, enhanced and high-definition video, plus multi-channel digital audio on a single cable.
-
Page 79: Connecting The Communication Devices
3-36 Connecting the Communication Devices Using the LAN The RJ-45 connector of the notebook allows you to connect the LAN (local area network) devices, such as a hub, switch and gateway, to build a network connection. For more instructions or detailed steps on connecting to the LAN, please ask your MIS staff or network manager for help. - Page 80 3-37 Using Wireless LAN Connection (optional supported) This notebook is equipped with wireless LAN module which allows to users to perform fast data transmission with the standard IEEE 802.11 for wireless LAN. This gives users the mobility to move around within a broad coverage area and still be connected to the network. By using the 64-bit/128-bit Wired Equivalent Privacy (WEP) encryption technology and Wi-Fi Protected Access feature, the optional built-in wirelesses LAN is capable to achieve a more efficient and a more secure solution to the wireless communication.
- Page 81 3-38 Using Bluetooth Connection (optional supported) This notebook is equipped with Bluetooth module which allows to users to connect various Bluetooth-enabled devices to the notebook. Bluetooth provides a way to connect and exchange information between devices such as mobile phones, personal computers, printers, GPS receivers, PDAs, digital cameras, and video game consoles through a secure, globally unlicensed Industrial, Scientific and Medical (ISM) 2.4 GHz short-range radio frequency bandwidth.
-
Page 82: Expresscard Installation
3-39 ExpressCard Installation This computer provides an ExpressCard slot. The new ExpressCard interface is smaller and faster than PC Card interface. The ExpressCard technology takes advantage of the scalable, high-bandwidth serial PCI Express and USB 2.0 interfaces. The following instruction provides you with a basic installation for the ExpressCard, including how to install and remove it. - Page 83 3-40 Removing the ExpressCard Installing the Card Express...
-
Page 84: Components Replacement And Upgrade
3-41 Components Replacement and Upgrade Please be noticed that the memory, hard disk drive, wireless LAN / Bluetooth module and battery pack preinstalled in the product users purchased may be upgradable or replaceable by user’s request depending on the models users purchased. - Page 85 3-42 This notebook is equipped with a high-capacity Li-ion battery pack, and the battery pack is replaceable by users. To replace the battery pack, please refer to the section of Using Battery power for details. This notebook is equipped with a wireless LAN/ Bluetooth module, and the module may be upgradable and replaceable by authorized dealer or service center.
- Page 86 3-43 To learn more about upgrade limitation, please refer to the specification in the User’s Manual provided. For any further information about the product users purchased, please contact the local dealer. Do not attempt to upgrade or replace any component of the product, if you are not an authorized dealer or service center, since it may cause the warranty void.
-
Page 87: Bios Setup
CHAPTER 4 BIOS Setup... -
Page 88: About Bios Setup
About BIOS Setup When to Use BIOS Setup? You may need to run the BIOS Setup when: An error message appears on the screen during the system booting up and is requested to run SETUP. You want to change the default settings for customized features. You want to reload the default BIOS settings. -
Page 89: Control Keys
Control Keys You can use only the keyboard to control the cursor in the BIOS Setup Utility. Press left arrow to select one Press right arrow to select one menu title. menu title. Press up arrow to select one item Press down arrow to select one under the menu title. -
Page 90: Bios Setup Menu
BIOS Setup Menu Once you enter the BIOS Setup Utility, the Main Menu will appear on the screen. Select the tags to enter the other menus. Main Menu Show system overview information about BIOS version, CPU features, memory size and setting of system time and date. Advanced Menu Adjust the advanced settings, such as power consumption, USB/ PCI devices, of the notebook in order to achieve a better performance. -
Page 91: Main Menu
Main Menu System Date This item allows you to set the system date. The date format is [day:month:date:year]. Day of the week, from Sun to Sat, which is determined by BIOS (read-only). The month from 01 (January) to 12 (December). Month Date The date from 01 to 31. - Page 92 System Information This item provides the information about the firmware, processor, and system memory.
-
Page 93: Advanced Menu
Advanced Menu Intel(R) SpeedStep(tm) tech. This item allows you to enable or disable Intel SpeedStep technology. When set to Disabled, the system always operates in a conserve power mode (the processor works at FSB400-600MHz or FSB533-800MHz). If you want optimize the processor, set this item to Enabled, so that the BISO SETUP UTILITY processor’s speed will be controlled by the use of your operating system Main... -
Page 94: Security Menu
Security menu Change Supervisor Password When this item is selected, a message box shall appear on the screen as below: Enter New Password Type a maximum of eight-digit password and press [Enter]. password typed now will replace any previously set password from CMOS memory. - Page 95 The Password Check item is used to specify the type of BIOS password protection that is implemented. Settings are described below: The password is required only when users try to access to Setup BIOS SETUP UTILITY. The password is required every time when the Notebook is Always powered on or when users try to access to BIOS SETUP UTILITY.
-
Page 96: Boot Menu
4-10 Boot menu Boot Settings Configuration Configure settings during system boot. Boot Device Priority These items showing the sequence of boot devices where BIOS attempts to load the disk operating system. -
Page 97: Exit Menu
4-11 Exit menu Exit & Save Changes Save the changes you have made and exit the utility. Exit & Discard Changes Exit the utility without saving the changes you have made. Discard Changes Abandon your changes and reload the previous configuration before running the utility.
Need help?
Do you have a question about the CX620 and is the answer not in the manual?
Questions and answers