Table of Contents
Advertisement
Advertisement
Table of Contents
Troubleshooting

Related Manuals for Sonic Blue HT2030

Summary of Contents for Sonic Blue HT2030
- Page 1 HT2030 User's Guide...
-
Page 2: Safety Precautions
Safety Precautions CAUTION RISK OF ELECTRIC SHOCK DO NOT OPEN CAUTION: TO REDUCE THE RISK OF ELECTRIC SHOCK DO NOT REMOVE COVER (OR BACK). NO USER-SERVICEABLE PARTS INSIDE. REFER SERVICING TO QUALIFIED SERVICE PERSONNEL. This lightning flash with arrowhead symbol within an equilateral triangle is intended to alert the user to the presence of uninsulated dangerous voltage within the product’s enclosure that may be of... -
Page 3: Important Safety Instructions
IMPORTANT SAFETY INSTRUCTIONS CAUTION: PLEASE READ AND OBSERVE ALL WARNINGS AND INSTRUCTIONS IN THIS OWNER’S MANUAL. AND THOSE MARKED ON THE PRODUCT. RETAIN THIS BOOKLET FOR FUTURE REFERENCE. This product has been designed and manufactured to assure personal safety. Improper use can result in electric shock or fire hazard. -
Page 4: Table Of Contents
Table of Contents Introduction Getting Started ......5-6 Playable Discs ......5 Precautions . -
Page 5: Getting Started
Getting Started Playable Discs (8 cm/12 cm disc) Audio CD (8 cm/12 cm disc) In addition, this unit can play a CD-R or CD-RW that contains audio titles or MP3 files. otes – Depending on the conditions of the recording equip- ment or the CD-R/RW disc itself, some CD-R/RW discs cannot be played on this unit. -
Page 6: Getting Started
Getting Started (Continued) Precautions Handling the Unit When shipping the unit The original shipping carton and packing materials come in handy. For maximum protection, re-pack the unit as it was originally packaged at the factory. When setting up the unit The picture and sound of a nearby TV, VCR, or radio may be distorted during playback. -
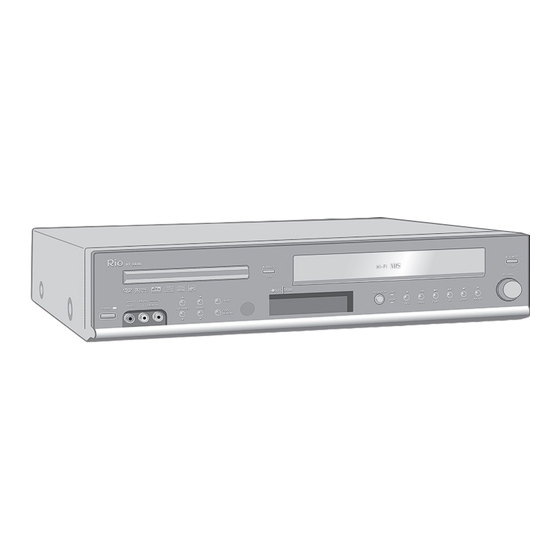
Page 7: Front Panel
Front Panel POWER Switches the DVD+VCR ON and OFF. LINE2 (AUDIO/VIDEO) Connects to the audio/video output of an external source (audio system, TV/monitor, another VCR, etc.). Disc Tray (DVD deck) Insert a disc here. TUNING (v v /V V ) Scans for available radio sta- tions in your area. -
Page 8: Front Panel Display
Front Panel Display RAND Indicates RANDOM playback is active. Indicates current repeat mode. Indicates ANGLE feature is active. PROG. Indicates Programmed playback is active. Indicates clock, total playing time, elapsed time, remaining time, title number, chapter/track number, channel, radio frequency, level, volume, channel or cur- rent deck status (Playback, Pause, etc). -
Page 9: Remote Control
Remote Control EJECT (Z Z ) - Opens and closes the disc tray. - Ejects the tape in the VCR deck. MODE (AUX/DVD/VCR/RADIO) Sets the output source (AUX, DVD, VCR or RADIO) to view on the TV screen. LEVEL Sets the sound level of each speaker. DELAY Sets the delay time of each speaker. -
Page 10: Rear Panel
Rear Panel VCR IN LINE 1 (AUDIO/VIDEO) Connect to the audio/video output of an external source (audio system, TV/monitor, another VCR, etc.). RF OUT (DVD/VCR OUT) Connect to a TV with an RF coaxial input. ANT.IN Connect the VHF/UHF/CATV antenna to this terminal. -
Page 11: Connections
Connections Tips Depending on the capabilities of your TV and other equip- ment, there are a variety of ways to connect the DVD+VCR. Choose from the connections described on pages 11-14. Please refer to the manuals of your TV, VCR, Stereo System or other devices as necessary to make the best connections for your specific equipment. -
Page 12: Basic Tv Connections
Connections (Continued) Basic TV Connections Use one of the following connections, depending on the capabilities of your TV. RF coaxial connection Connect the RF.OUT jack on the DVD+VCR to the antenna in jack on your TV using the supplied 75-ohm Coaxial Cable (R). -
Page 13: Speaker System Connections
Connections (Continued) Speaker System Connections Connect the speakers using the supplied speaker cables by matching the colors of the terminals to those of the cables. To obtain the best possible surround sound, fine tune your system by adjusting the various speaker settings (levels, delays, etc.). -
Page 14: Radio Antenna Connections
Connections (Continued) Radio Antenna Connections Connect the supplied FM/AM antennas for listening to the radio. Connect the AM loop antenna to the AM antenna connectors. Connector the FM wire antenna to the FM antenna connectors. To prevent noise pickup, keep the AM loop antenna away from the DVD+VCR and other components. -
Page 15: Setting The Output Source
Setting the Output Source INPUT OUTPUT Follow these guidelines to select and switch among the RADIO various DVD+VCR input and output sources: • DVD To view output from the DVD deck: Press DVD on the remote or DVD/VCR on the front panel until the DVD indicator on the front panel lights and output from the DVD deck is viewed on the TV screen. -
Page 16: Amplifier Setup
Movie mode may give the best surround effect. Virtual mode is designed to be used with the virtual process developed by Dolby Laboratories. The Pro Logic II mode should be called only “Pro Logic II” so the Virtual name can be reserved to describe the speaker virtualization process itself. -
Page 17: Sound Mode
Amplifier Setup (Continued) Sound Mode You can enjoy surround sound simply by selecting one of the pre-programmed sound fields according to the program you want to listen to. Each time you press the SOUND EFFECT button, the sound mode is changed in the following order: PROLOGIC →... -
Page 18: Setting Delays
Amplifier Setup (Continued) Setting Delays In Dolby Digital and Dolby Pro Logic mode, it is assumed that the distance from the listener to each of the five speakers is equal. If your center and rear speakers are closer than the front speakers, you can set delays so that sound from these speakers will be heard simultaneously at your primary listening position. -
Page 19: Vcr Setup
VCR Setup On-Screen Display (OSD) Some of these functions will be displayed every time the VCR is operated. PLAY HI-FI CH 4 STEREO JUL 5 , FRI 2:15 PM TAPE SPEED DISPLAY Shows the current tape speed. FUNCTION DISPLAY Indicates the function in progress. HI-FI DISPLAY Indicates when the unit is playing back tape recorded in Hi-Fi stereo sound. -
Page 20: The Vcr Setup Menu
VCR Setup (Continued) The VCR Setup Menu Press MENU to display the MAIN menu. Press v v /V V to display the VCR SETUP menu, then press SELECT/ENTER. The VCR SETUP menu will appear. SET CLOCK SCREEN DISPLAY: TIMER RECORD LANGUAGE: AUDIO MODE: CHANNEL SETUP... -
Page 21: Setting The Clock
VCR Setup (Continued) Setting the Clock The DVD+VCR gives you two ways to set the time and date: Auto Clock Set or Manual Clock Set. Auto Clock Set enables the DVD+VCR to set the clock when the DVD+VCR is turned off. Things to know before starting The clock uses the 12-hour system. -
Page 22: Dvd Setup
DVD Setup Caution: Before attempting DVD setup, press DVD to set the unit to DVD mode. General Explanation This section gives basic instructions for setting up DVD features and preferences. Some DVDs require special operations or allow only limited operation during play- back. -
Page 23: Initial Settings
DVD Setup (Continued) Initial Settings Follow these guidelines to set your personal prefer- ences for DVD operation. Initial Settings Overview Press SETUP. The Setup menu appears. Press 3 3 /4 4 to select the desired item. The screen will show the current setting for the selected item, as well as alternate setting(s). -
Page 24: Dvd Setup
DVD Setup (Continued) Parental Control Rating Movies on DVDs may contain scenes not suitable for children. Therefore, discs may contain Parental Control information that applies to the complete disc or to certain scenes on the disc. These scenes are rated from 1 to 8, and alternatively, more suitable scenes are available for selection on some discs. -
Page 25: Vcr Operation
VCR Operation Normal Playback Before you begin: Turn on the TV. Tune the TV to the DVD+VCR output channel (CH 3 or 4) or set the TV’s source selector to VIDEO. If a direct AUDIO/VIDEO connection is made between the DVD+VCR and your TV, set the TV’s source selector to VIDEO. -
Page 26: Normal Recording
VCR Operation (Continued) Normal Recording Before you begin: Power on the DVD+VCR and TV. Tune the TV to the DVD+VCR output channel (CH 3 or 4) or set the TV’s source selector to VIDEO. If a direct AUDIO/VIDEO connection is made between the DVD+VCR and the TV, set the TV’s source selector to VIDEO. -
Page 27: Program Priority
VCR Operation (Continued) 1 1 0 0 Use V V to choose the SPEED option. Use b b /B B to choose the desired recording speed (AUTO, SP or EP). AUTO mode determines how much tape is left and switches the recording speed from SP to EP, if nec- essary, to complete recording the program. -
Page 28: One-Touch Recording
VCR Operation (Continued) One-Touch Recording One-Touch Recording allows you to quickly make a recording of a preset length without using the program timer. Before you begin: Power on the DVD+VCR and the TV. Be sure the TV is tuned to the DVD+VCR output channel (3 or 4). If a direct AUDIO/VIDEO connection is made between the DVD+VCR and the TV, set the TV’s source selector to VIDEO. -
Page 29: Vhs Hi-Fi Stereo System/Mts Broadcast
VCR Operation (Continued) VHS Hi-Fi Stereo System/ MTS Broadcast The DVD+VCR is equipped with the VHS Hi-Fi audio sound system for recording and playback. The informa- tion below gives a brief description of Hi-Fi audio and how to record and play a tape in Hi-Fi audio mode. Playback with Hi-Fi Stereo Audio Sound A stereo TV with AUDIO/VIDEO input jacks or a stereo audio system is required for true stereo playback. -
Page 30: Tape Counter Memory Feature
VCR Operation (Continued) Tape Counter Memory Feature Real-Time Counter Press CLK/CTR to select the real-time counter display, which shows the length of the tape in hours, minutes, and seconds. Every press of CLK/CTR changes the TV screen as illustrated below. 2:15 AM M 0:05:25 CLOCK... -
Page 31: Dvd Operation
DVD Operation Playing a DVD Playback Setup Turn on the TV and select the video input source con- nected to the DVD player. Audio system: Turn on the audio system and select the input source connected to the DVD player. Press DVD to set the Output Source to DVD as shown in “Setting the Output Source”... -
Page 32: Still Picture And Frame-By-Frame Playback
DVD Operation (Continued) General Features (continued) Still Picture and Frame-by-Frame Playback 1 Press PAUSE/STEP (X) during playback. The player will go into pause mode. 2 You can advance the picture frame-by-frame by pressing PAUSE/STEP (X) repeatedly on the remote control. Search 1 Press and hold PREV (.) or NEXT (>) for about two seconds during playback. -
Page 33: Zoom
DVD Operation (Continued) General DVD Features (cont.) Zoom The Zoom function allows you to enlarge the video image and move around the enlarged image. 1 Press ZOOM during playback or still playback to acti- vate the Zoom function. Press ZOOM repeatedly to increase the magnification level up to six times. -
Page 34: Audio Cd And Mp3 Operation
Audio CD and MP3 Operation Playing Audio CD and MP3 discs The DVD+VCR can play MP3 files on CD-ROM, CD-R, or CD-RW discs. Before playing MP3 files, please read “Notes on MP3 Discs” on page 36. Insert the CD or MP3 disc and close the tray. The CD or MP3 menu is displayed on the TV screen. -
Page 35: Programmed Playback
Programmed Playback Programmed Playback with Audio CD and MP3 Discs The program playback feature allows you to store your favorite tracks for a particular disc in the player’s memo- ry. Each custom program can contain up to 32 tracks (Audio CD) or 60 tracks (MP3 disc). Insert the CD or MP3 disc and close the tray. -
Page 36: Additional Dvd Information
Additional DVD Information Screen Saver A screen saver appears when you leave the DVD+VCR in stop mode for about five minutes. After the screen saver has been active for about five minutes, the DVD+VCR will power off automatically. Video Mode Setting With certain discs, the picture may flicker or you may see “dot crawl”... -
Page 37: Radio Operation
Radio Operation Presetting Radio Stations You can preset up to 30 FM and AM stations. Before tuning, make sure you have turned down the volume to the minimum level. Press RADIO. FM or AM appears on the front panel display and radio information appears on the TV screen. -
Page 38: Troubleshooting
Troubleshooting Please refer to the following troubleshooting tips before contacting service. Symptom The power cord is disconnected. No power. The power is on, but No disc is inserted. No tape is inserted. the DVD+VCR does not work. No picture. The TV is not set to receive DVD+VCR signal output. - Page 39 Troubleshooting (Continued) Symptom The skipped channels were deleted with Some channels are skipped over when the ADD/DEL CH. option. using CH/TRK (v/V) Antenna or cables are loose. Picture and sound of broadcasting channel are weak or missing. Wrong CHANNEL SOURCE option is being used (e.g., TV or CATV).
-
Page 40: Troubleshooting
Troubleshooting (Continued) Symptom The plugs and jacks are dirty. Severe hum or noise is heard. The disc is dirty. The speakers and components are not securely connected. The DVD+VCR is located too close to the TV. The antennas are poorly positioned or Radio stations cannot not securely connected. -
Page 41: Language Code List
Language Code List Enter the appropriate code number for the desired “Disc Audio”, “Disc Subtitle” and/or “Disc Menu” language (see page 23). Code Language Code 6566 Abkhazian 7074 6565 Afar 7073 6570 Afrikaans 7082 8381 Albanian 7089 6577 Amharic 7176 6582 Arabic 7565... -
Page 42: Country Code List
Country Code List Enter the appropriate code number for the “Country Code” setting (see page 24). Code Country Code Country Andorra Eritrea United Arab Emirates Spain Afghanistan Ethiopia Antigua and Barbuda Finland Anguilla Fiji Albania Falkland Islands Armenia Micronesia Netherlands Antilles Faroe Islands Angola France... -
Page 43: Specifications
Specifications General Power requirements Power consumption Dimensions (approx.) Mass (approx.) Operating temperature Operating humidity Signal system Inputs ANTENNA IN VCR VIDEO IN VCR AUDIO IN FM ANTENNA IN AM ANTENNA IN DIGITAL AUDIO IN Outputs VIDEO OUT S-VIDEO OUT COMPONENT VIDEO OUT (PROGRESSIVE SCAN) Audio output (analog audio) RF OUT... -
Page 44: Specifications
Batteries ........2 Design and specifications are subject to change without notice. Manufactured under license from Dolby Laboratories. Dolby, Pro Logic, and the double-D symbol are trademarks of Dolby Laboratories. Confidential unpublished works. Copyright 1992-1997 Dolby Laboratories. All rights reserved. -
Page 45: Warranty
Warranty DVD+VCR Limited Warranty Who Provides the Limited Warranty During the warranty period, the Rio Warranty Administrator will honor DVD+VCR serv- ice for 90 days labor, 1 year parts from the original date of consumer purchase. See year parts below for Commercial, Industrial or Educational use coverage. The DVD+VCR remote control is warranted for 90 days from the date of purchase.
Need help?
Do you have a question about the HT2030 and is the answer not in the manual?
Questions and answers