Table of Contents
Advertisement
Available languages
Available languages
Quick Links
Features
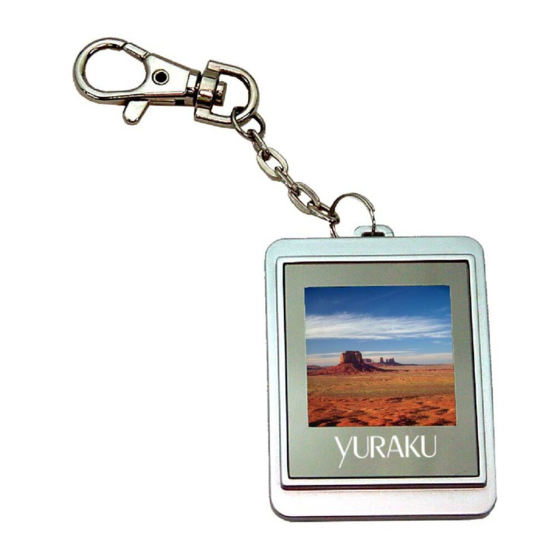
1.5" CSTN LCD display
Auto slide show when power on
Built-in 3.7V rechargeable lithium battery
Storage space for 143 pictures
Picture format supporting JPG and BMP
Button Descriptions
△ △ △ △ PREVIOUS: For previous picture or menu selection upwards
▽ ▽ ▽ ▽ NEXT: For next picture or menu selection downwards
◎ ◎ ◎ ◎ MENU: For power ON/OFF or enter into menu
⊙ ⊙ ⊙ ⊙ RESET: For resetting default value of the unit in case of program error
Accessories
* USB cable
* User manual
Operation
Putting your own photos into the 1.5" Digital Photo Frame
To put your own photos into the unit, please follow the steps below:
STEP 1
Connect the 1.5" Digital Photo Frame to your PC with the USB cable provided with the unit. Please
ensure the drive is set to AUTO-RUN for the software to auto launch.
STEP 2
Press "MENU" button to access the main menu, and select "USB CONNECT". Next select "YES"
and Press "MENU" button to confirm.
STEP 3
Select and transfer your photos from your PC. Locate your photo library on the left window and
select the photos to transfer.
All specification and information are subject to changes without further notice
1 piece
1 piece
YURAKU Yur.Photo 15KS2
Instruction manual ver1.00
Advertisement
Table of Contents

Summary of Contents for YURAKU YUR.PHOTO 15KS2
- Page 1 YURAKU Yur.Photo 15KS2 Instruction manual ver1.00 Features 1.5” CSTN LCD display Auto slide show when power on Built-in 3.7V rechargeable lithium battery Storage space for 143 pictures Picture format supporting JPG and BMP Button Descriptions △ △ △ △ PREVIOUS: For previous picture or menu selection upwards ▽...
- Page 2 YURAKU Yur.Photo 15KS2 Instruction manual ver1.00 STEP 4 Press “Add” to move the picture to the column on the right. Repeat the same steps to input more photos. STEP 5 Press “Download” to copy all the selected pictures into the 1.5” Digital Photo Frame.
-
Page 3: Beschreibung Der Tasten
YURAKU Yur.Photo 15KS2 Bedienungsanleitung Version 1.00 Funktionen 1.5” CSTN-LCD Automatische Diashow bei eingeschaltetem Display Integrierte aufladbare Lithium-Batterie (3.7 V) Speicherplatz für 143 Bilder Unterstützte Bildformate: JPG und BMP Beschreibung der Tasten △ △ △ △ PREVIOUS [ZURÜCK]: Rückkehr zum vorhergehenden Bild oder Menüauswahl nach oben ▽... - Page 4 YURAKU Yur.Photo 15KS2 Bedienungsanleitung Version 1.00 SCHRITT 3 Die vom PC hochzuladenden Fotos auswählen. Hierzu das Verzeichnis öffnen, in dem die Fotos gespeichert sind, und die zu übertragenden Fotos auswählen. SCHRITT 4 Auf „Add“ [Hinzufügen] klicken, um ein Bild in die rechte Spalte zu kopieren. Den Vorgang wiederholen, um weitere Fotos hochzuladen.
-
Page 5: Description Des Boutons
YURAKU Yur.Photo 15KS2 Manuel d’instruction ver1.00 Propriétés Ecran LCD CSTN 1.5” Diaporama automatique en état allumé Batterie lithium 3,7 V rechargeable intégrée Espace d’archivage pour 143 photos Formats de photos supportés JPG et BMP Description des boutons △ △ △ △ PREVIOUS : pour la photo précédente ou sélection vers le haut dans le menu ▽... - Page 6 YURAKU Yur.Photo 15KS2 Manuel d’instruction ver1.00 ETAPE 4 Appuyer sur « Add » pour déplacer la photo vers la colonne sur la gauche. Répétez les mêmes étapes pour entrer d’autres photos. ETAPE Appuyer sur « Download » pour s’assurer que toutes les photos seront enregistrées dans l'unité.
-
Page 7: Descripción De Los Botones
YURAKU Yur.Photo 15KS2 Manual de instrucciones ver1,00 Características Pantalla de cristal líquido CSTN de 1,5 pulgadas Presentación automática de diapositivas al encender Batería recargable de litio integrada de 3,7 V Espacio de almacenamiento para 143 imágenes Compatible con formatos de imagen JPG y BMP Descripción de los botones... - Page 8 YURAKU Yur.Photo 15KS2 Manual de instrucciones ver1,00 PASO 3 Seleccione e introduzca su fotografía desde su ordenador. Ubique su librería fotográfica en la ventana izquierda y seleccione las fotografías a transferir. PASO 4 Pulse “Add” (añadir) para mover la imagen hacia la columna a la derecha. Repita los mismos pasos para introducir más fotografías.
-
Page 9: Descrizione Tasti
YURAKU Yur.Photo 15KS2 Manuale di istruzioni ver1.00 Caratteristiche Display LCD CSTN da 1,5” Slideshow automatico all'accensione Batteria al litio ricaricabile integrata da 3,7 V Spazio di archiviazione per 143 foto Supporto formato foto JPG e BMP Descrizione tasti △ △ △ △ PREVIOUS (PRECEDENTE): per passare alla foto o alla selezione menu precedente ▽... - Page 10 YURAKU Yur.Photo 15KS2 Manuale di istruzioni ver1.00 PASSO 4 Premere “Add” (Aggiungi) per spostare la foto sulla colonna a destra. Ripetere le stesse operazioni per trasferire altre foto. PASSO 5 Premere “Download” per garantire il salvataggio delle foto nell'unità. PASSO 6 Uscire dall'applicazione e fare doppio clic su “Safely Remove Hardware”...
- Page 11 YURAKU Yur.Photo 15KS2 Használati utasítás az 1.00 verzióhoz Tulajdonságok 1,5” CSTN folyadékkristályos kijelzı Automatikus diavetítés bekapcsoláskor 3,7 V beépített újratölthetı lítium elem Tárhely 143 kép számára A JPG és a BMP kiterjesztést támogató képformátum A nyomógombok ismertetése △ △ △ △ PREVIOUS (ELİZİ): Ugrás az elızı képhez vagy eggyel följebbi menüponthoz ▽...
- Page 12 YURAKU Yur.Photo 15KS2 Használati utasítás az 1.00 verzióhoz 3. LÉPÉS Válassza ki és vigye be a fényképet a számítógéprıl. Fénykép-könyvtárát helyezze el a bal oldali ablakba, majd válassza ki az áthelyezendı fényképeket. 4. LÉPÉS Nyomja le az „Add” (hozzáad) gombot, hogy áthelyezze a képet a jobb oldali oszlopba. Ismételje meg ugyanezeket a lépéseket több fénykép beviteléhez.


Need help?
Do you have a question about the YUR.PHOTO 15KS2 and is the answer not in the manual?
Questions and answers