D-Link DIR-651 User Manual
Wireless n 300 gigabit router
Hide thumbs
Also See for DIR-651:
- User manual (120 pages) ,
- Quick installation manual (34 pages) ,
- Quick installation manual (13 pages)
Table of Contents
Advertisement
Advertisement
Table of Contents

Related Manuals for D-Link DIR-651


Summary of Contents for D-Link DIR-651
-
Page 2: Preface
Preface D-Link reserves the right to revise this publication and to make changes in the content hereof without obligation to notify any person or organization of such revisions or changes. Manual Revisions Revision Date Description January 25, 2011 • Initial Release... -
Page 3: Table Of Contents
Wireless Settings ............11 UPnP ...................42 Manual Configuration ............15 Internet Ping Block ............42 Dynamic (Cable) .............16 Internet Port Speed ............42 Internet Setup ..............17 Multicast Streams ............42 PPPoE (DSL) ..............17 Guest Zone ................43 PPTP ..................18 Administrator Settings ............44 D-Link DIR-651 User Manual... - Page 4 What is WPA? ................59 Wireless Security Setup Wizard ..........60 Configure WPA-Personal (PSK) ..........62 Configure WPA-Enterprise (RADIUS) ........63 Connect.to.a.Wireless.Network........65 Windows® 7 ...................65 Windows Vista® ................68 Configure Wireless Security ..........69 Windows® XP ................71 Configure WPA-PSK ............72 D-Link DIR-651 User Manual...
-
Page 5: Product.overview
If any of the above items are missing, please contact your reseller. Note: Using a power supply with a different voltage rating than the one included with the DIR-651 will cause damage and void the warranty. D-Link DIR-651 User Manual... -
Page 6: System Requirements
Windows®. Users: Make sure you have the latest version of Java installed. Visit www.java.com to download the latest version. Computer.with.the.following: CD.Installation.Wizard. • Windows® 7, Vista®, or XP (Service Pack 2 or higher) Requirements • An installed Ethernet adapter • CD-ROM drive D-Link DIR-651 User Manual... -
Page 7: Introduction
ULTIMATE.PERFORMANCE The D-Link Wireless N 300 Gigabit Router is an 802.11n compliant device that delivers real world performance of up to 650% faster than an 802.11g wireless connection (also faster than a 100Mbps wired Ethernet connection). Create a secure wireless network to share photos, files, music, video, printers, and network storage throughout your home. -
Page 8: Features
The performance of this 802.11n wireless router gives you the freedom of wireless networking at speeds 650% faster than 802.11g. •.Compatible.with.802.11g.Devices - The DIR-651 is still fully compatible with the IEEE 802.11g standard, so it can connect with existing 802.11g PCI, USB and Cardbus adapters. -
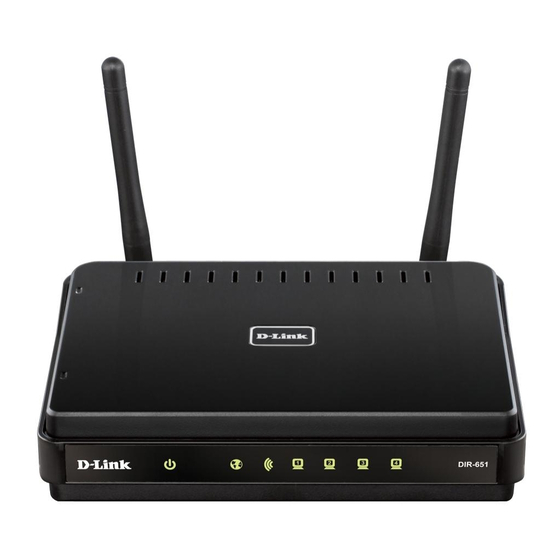
Page 9: Hardware Overview
The auto MDI/MDIX Internet port is the connection for the Ethernet cable to the cable or DSL Internet Port modem. Power Receptor Receptor for the supplied power adapter. Reset Press and hold the Reset button to restore the router to its original factory default settings. D-Link DIR-651 User Manual... -
Page 10: Leds
A solid light indicates that the wireless segment is ready. This LED blinks during wireless data transmission. Local Network’s A solid light indicates a connection to an Ethernet-enabled computer on ports 1-4. This LED blinks during data transmission. D-Link DIR-651 User Manual... -
Page 11: Installation
If you have DSL and are connecting via PPPoE, make sure you disable or uninstall any PPPoE software such as WinPoet, Broadjump, or Enternet 300 from your computer or you will not be able to connect to the Internet. D-Link DIR-651 User Manual... -
Page 12: Wireless Installation Considerations
1. Keep the number of walls and ceilings between the D-Link router and other network devices to a minimum - each wall or ceiling can reduce your adapter’s range from 3-90 feet (1-30 meters.) Position your devices so that the number of walls or ceilings is minimized. -
Page 13: Getting Started
Section 2 - Installation Getting Started The DIR-651 includes a Quick Router Setup Wizard CD. Follow the simple steps below to run the Setup Wizard to guide you quickly through the installation process. Insert the Quick.Router.Setup.Wizard.CD in the CD-ROM drive. The step-by-step instructions that follow are shown in Windows®... -
Page 14: Configuration
Section 3 - Configuration Configuration This section will show you how to configure your new D-Link wireless router using the web-based configuration utility. Web-based Configuration Utility To access the configuration utility, open a web-browser such as Internet Explorer and enter the IP address of the router (192.168.0.1). -
Page 15: Setup Wizard
Wireless Settings Click Launch.Internet.Connection.Setup.Wizard to begin. If you want to configure your wireless settings, click Launch.Wireless. Security.Setup.Wizard and skip to page 60. To manually configure your wireless settings, click Manual.Wireless. Network.Setup and skip to page 21. D-Link DIR-651 User Manual... - Page 16 Create a new password and then click Next to continue. Select your time zone from the drop-down menu and then click Next to continue. Select the type of Internet connection you use and then click Next to continue. D-Link DIR-651 User Manual...
- Page 17 Note: Make sure to remove your PPPoE software from your computer. The software is no longer needed and will not work through a router. If you selected PPTP, enter your PPTP username and password. Click Next to continue. D-Link DIR-651 User Manual...
- Page 18 Click Connect to save your settings. Once the router is finished rebooting, click Continue. Please allow 1-2 minutes to connect. Close your browser window and reopen it to test your Internet connection. It may take a few tries to initially connect to the Internet. D-Link DIR-651 User Manual...
-
Page 19: Manual Configuration
Select Dynamic.IP.(DHCP), PPPoE, PPTP, L2TP, or Static. Refer to the next few pages for more information. Enable When this option is enabled, the router will speed Hardware NAT: up NAT performance by hardware acceleration mechanism. Note:.SPI.and.the.QoS.engine.will.be.disabled. automatically.when.hardware.NAT.is.enabled. D-Link DIR-651 User Manual... -
Page 20: Dynamic (Cable)
The default MAC Address is set to the Internet port’s physical interface MAC address on the Broadband Router. It is not recommended that you change the default MAC address unless required by your ISP. You can use the Clone.Your.PC’s.MAC.Address button to replace the Internet port’s MAC address with the MAC address of your Ethernet card. D-Link DIR-651 User Manual... -
Page 21: Internet Setup
The default MAC Address is set to the Internet port’s physical interface MAC address on the Broadband Router. It is not recommended that you change the default MAC address unless required by your ISP. You can use the Clone.Your.PC’s.MAC.Address button to replace the Internet port’s MAC address with the MAC address of your Ethernet card. D-Link DIR-651 User Manual... -
Page 22: Pptp
The default MAC Address is set to the Internet port’s physical interface MAC address on the Broadband Router. It is not recommended that you change the default MAC address unless required by your ISP. You can use the Clone.Your.PC’s.MAC.Address button to replace the Internet port’s MAC address with the MAC address of your Ethernet card. D-Link DIR-651 User Manual... -
Page 23: L2Tp
The default MAC Address is set to the Internet port’s physical interface MAC address on the Broadband Router. It is not recommended Address: that you change the default MAC address unless required by your ISP. You can use the Copy.Your.PC’s.MAC.Address button to replace the Internet port’s MAC address with the MAC address of your Ethernet card. D-Link DIR-651 User Manual... -
Page 24: Static (Assigned By Isp)
MAC address on the Broadband Router. It is not recommended that you change the default MAC address unless required by your ISP. You can use the Clone.Your.PC’s.MAC.Address button to replace the Internet port’s MAC address with the MAC address of your Ethernet card. D-Link DIR-651 User Manual... -
Page 25: Wireless Settings
Select Invisible if you do not want the SSID of your wireless network to be broadcasted by the DIR-651. If Invisible is selected, the SSID of the DIR-651 will not be seen by Site Survey utilities so your wireless clients will have to know the SSID of your DIR-651... -
Page 26: Network Settings
Local Domain: Enter the Domain name (Optional). Enable DNS Relay: Uncheck the box to transfer the DNS server information from your ISP to your computers. If checked, your computers will use the router for a DNS server. D-Link DIR-651 User Manual... -
Page 27: Dhcp Server Settings
DHCP Server Settings DHCP stands for Dynamic Host Control Protocol. The DIR-651 has a built-in DHCP server. The DHCP Server will automatically assign an IP address to the computers on the LAN/private network. Be sure to set your computers to be DHCP clients by setting their TCP/IP settings to “Obtain an IP Address Automatically. -
Page 28: Dhcp Reservation
“DHCP IP Address Range” to address the issue which is located in the DHCP Server section. Reserve: The Reserve option converts this dynamic IP allocation into a DHCP Reservation and adds the corresponding entry to the DHCP Reservations List. D-Link DIR-651 User Manual... -
Page 29: Virtual Server
Section 3 - Configuration Virtual Server The DIR-651 can be configured as a virtual server so that remote users accessing Web or FTP services via the public IP address can be automatically redirected to local servers in the LAN (Local Area Network). - Page 30 The schedule of time when the Virtual Server Rule will be enabled. The schedule may be set to Always, which will allow the particular service to always be enabled. You can create your own times in the Tools > Schedules section. D-Link DIR-651 User Manual...
-
Page 31: Port Forwarding
The schedule of time when the Virtual Server Rule will be enabled. The schedule may be set to Always, which will allow the particular service to always be enabled. You can create your own times in the Tools > Schedules section. D-Link DIR-651 User Manual... -
Page 32: Application Rules
TCP or UDP, then enter the firewall (public) ports associated with the trigger port to open them for inbound traffic. The DIR-651 provides some predefined applications in the table on the bottom of the web page. Select the application you want to use and enable it. -
Page 33: Qos Engine
Dynamic This option should be enabled when you have a slow Internet uplink. It helps to reduce the impact that large low priority network Fragmentation: packets can have on more urgent ones. D-Link DIR-651 User Manual... - Page 34 The rule applies to a flow of messages whose WAN-side IP address falls within the range set here. Remote Port Range: The rule applies to a flow of messages whose WAN-side port number is within the range set here. D-Link DIR-651 User Manual...
-
Page 35: Network Filters
To find the MAC address on a computer, please refer to the Networking Basics section in this manual. DHCP Client: Select a DHCP client from the drop-down menu and click << to copy that MAC Address. Clear: Click to remove the MAC address. D-Link DIR-651 User Manual... -
Page 36: Access Control
P2P utilities or games. Add Policy: Click the Add. Policy button to start the Access Control Wizard. Access Control Wizard Click Next to continue with the wizard. D-Link DIR-651 User Manual... - Page 37 Enter the following information and then click Next to continue. • Address.Type - Select IP address, MAC address, or Other Machines. • IP.Address - Enter the IP address of the computer you want to apply the rule to. D-Link DIR-651 User Manual...
- Page 38 Dest.IP.End - Enter the ending IP address. Protocol - Select the protocol. Dest.Port.Start - Enter the starting port number. Dest.Port.End - Enter the ending port number. To enable web logging, click Enable. Click Save to save the access control rule. D-Link DIR-651 User Manual...
-
Page 39: Website Filter
To use this feature, enter the text string to be blocked and click Save.Settings. The text to be blocked will appear in the list. To delete the text, click.Clear.the.List.Below. Configure Website Select Allow or Deny. Filter Below: Website URL/Domain: Enter the keywords or URLs that you want to allow or deny. Click Save.Settings. D-Link DIR-651 User Manual... -
Page 40: Inbound Filter
Inbound Filter This section will list any rules that are created. You Rules List: may click the Edit icon to change the settings or enable/disable the rule, or click the Delete icon to remove the rule. D-Link DIR-651 User Manual... -
Page 41: Firewall Settings
Firewall Settings A firewall protects your network from the outside world. The D-Link DIR-651 offers a firewall type functionality. The SPI feature helps prevent cyber attacks. Sometimes you may want a computer exposed to the outside world for certain types of applications. If you choose to expose a computer, you cam enable DMZ. -
Page 42: Application Level Gateway Configuration
Allows devices and applications using VoIP (Voice over IP) to communicate across NAT. Some VoIP applications and devices have the ability to discover NAT devices and work around them. This ALG may interfere with the operation of such devices. If you are having trouble making VoIP calls, try turning this ALG off. D-Link DIR-651 User Manual... -
Page 43: Routing
A value 1 is the lowest cost and 15 is the highest cost. Interface: Select the interface that the IP packet must use to transit out of the router when this route is used. D-Link DIR-651 User Manual... -
Page 44: Advanced Wireless Settings
WMM is QoS for your wireless network. This will improve the quality of video and voice applications for your wireless clients. Short GI: Check this box to reduce the guard interval time therefore increasing the data capacity. However, it’s less reliable and may create higher data loss. D-Link DIR-651 User Manual... -
Page 45: Wi-Fi Protected Setup (Wps)
PIN, or pressed a special Wi-Fi Protected Setup button on the device. The router acts as a registrar for the network, although other devices may act as a registrar as well. Start the wizard. D-Link DIR-651 User Manual... -
Page 46: Advanced Network Settings
Enabled. UPNP provides compatibility with networking equipment, software and peripherals. Enable WAN Ping Unchecking the box will not allow the DIR-651 to Respond: respond to pings. Blocking the Ping may provide some extra security from hackers. Check the box to allow the Internet port to be “pinged”. -
Page 47: Guest Zone
You can create your own times by clicking Add.New. Wireless Network Enter a wireless network name (SSID) that is Name: different from your main wireless network. Enable Routing Check to allow network connectivity between Between Zones: the different zones created. D-Link DIR-651 User Manual... -
Page 48: Administrator Settings
Port: Example: http://x.x.x.x:8080 whereas x.x.x.x is the Internet IP address of the DIR-651 and 8080 is the port used for the Web Management interface. If you have enabled HTTPS.Server and checked Use.HTTPS, you must enter https:// as part of the URL to access the router remotely. -
Page 49: Time Settings
To manually input the time, enter the values in Time: these fields for the Year, Month, Day, Hour, Minute, and Second and then click Save.Settings at the top. You can also click Copy.Your.Computer’s.Time. Settings to use the time from your computer. D-Link DIR-651 User Manual... -
Page 50: Syslog
The address of the SysLog server that will be Address: used to send the logs. You may also select your computer from the drop-down menu (only if receiving an IP address from the router via DHCP). D-Link DIR-651 User Manual... -
Page 51: Email Settings
Selecting this option will send the logs via email according to schedule. Schedule: This option is enabled when On Schedule is selected. You can select a schedule from the list of defined schedules. To create a schedule, go to Tools.>.Schedules. D-Link DIR-651 User Manual... -
Page 52: System Settings
Any settings that have not been saved will be lost, including any rules that you have created. If you want to save the current router configuration settings, use the Save button above. Reboot Device: Click to reboot the router. D-Link DIR-651 User Manual... -
Page 53: Update Firmware
You can upgrade the firmware of the Router here. Make sure the firmware you want to use is on the local hard drive of the computer. Click on Browse to locate the firmware file to be used for the update. Please check the D-Link support site for firmware updates at http://support.dlink.com. You can download firmware upgrades to your hard drive from the D-Link support site. -
Page 54: Ddns
Username or Key: Enter the Username for your DDNS account. Password or Key: Enter the Password for your DDNS account. Verify Password Re-enter the Password for your DDNS account. or Key: Timeout: Enter a time (in hours). D-Link DIR-651 User Manual... -
Page 55: System Check
The Ping Test is used to send Ping packets to test if a computer is on the Internet. Enter the IP Address or host name that you wish to Ping and click Ping. Ping Results: The results of your ping attempts will be displayed here. D-Link DIR-651 User Manual... -
Page 56: Schedules
The list of schedules will be listed here. Click the List: Edit icon to make changes or click the Delete icon to remove the schedule. Save Settings: You must click Save.Settings at the top for your schedules to go into effect. D-Link DIR-651 User Manual... -
Page 57: Device Information
Device Information This page displays the current information for the DIR-651. It will display the LAN, WAN (Internet), and Wireless information. If your Internet connection is set up for a Dynamic IP address then a Release button and a Renew button will be displayed. Use Release to disconnect from your ISP and use Renew to connect to your ISP. -
Page 58: Log
This option will send a copy of the router log to your email address configured in the Tools > Email Settings screen. Save Log: This option will save the router log to a file on your computer. D-Link DIR-651 User Manual... -
Page 59: Stats
Section 3 - Configuration Stats The screen below displays the Traffic Statistics. Here you can view the amount of packets that pass through the DIR-651 on both the Internet and the LAN ports. The traffic counter will reset if the device is rebooted. -
Page 60: Internet Sessions
Section 3 - Configuration Internet Sessions D-Link DIR-651 User Manual... -
Page 61: Wireless
Section 3 - Configuration Wireless The wireless client table displays a list of current connected wireless clients. This table also displays the connection time and MAC address of the connected wireless clients. D-Link DIR-651 User Manual... -
Page 62: Support
Section 3 - Configuration Support D-Link DIR-651 User Manual... -
Page 63: Wireless.security
Section 4 - Security Wireless Security This section will show you the different levels of security you can use to protect your data from intruders. The DIR-651 offers the following types of security: • WPA2 (Wi-Fi Protected Access 2) • WPA2-PSK (Pre-Shared Key) ™... -
Page 64: Wireless Security Setup Wizard
Section 4 - Security Wireless Security Setup Wizard To run the security wizard, click on Setup at the top and then click Launch. Wireless.Security.Setup.Wizard. Click Next to continue. D-Link DIR-651 User Manual... - Page 65 The following screen will show you your Pre-Shared Key to enter on your wireless clients. Click Save to finish the Security Wizard. If you selected WPA-Enterprise, the RADIUS information will be displayed. Click Save to finish the Security Wizard. D-Link DIR-651 User Manual...
-
Page 66: Configure Wpa-Personal (Psk)
Click Save.Settings to save your settings. If you are configuring the router with a wireless adapter, you will lose connectivity until you enable WPA-PSK on your adapter and enter the same passphrase as you did on the router. D-Link DIR-651 User Manual... -
Page 67: Configure Wpa-Enterprise (Radius)
Next to RADIUS Server IP Address enter the IP Address of your RADIUS server. Next to RADIUS Server Port, enter the port you are using with your RADIUS server. 1812 is the default port. Next to RADIUS Server Shared Secret, enter the security key. D-Link DIR-651 User Manual... - Page 68 If the MAC Address Authentication box is selected then the user will need to connect from the same computer whenever logging into the wireless network. 10. Click Advanced to enter settings for a secondary RADIUS Server. 11. Click Apply.Settings to save your settings. D-Link DIR-651 User Manual...
-
Page 69: Connect.to.a.wireless.network
1. Click on the wireless icon in your system tray (lower-right corner). 2. The utility will display any available wireless networks in your area. D-Link DIR-651 User Manual... - Page 70 If you get a good signal but cannot access the Internet, check your TCP/IP settings for your wireless adapter. Refer to the Networking Basics section in this manual for more information. 4. The following window appears while your computer tries to connect to the router. D-Link DIR-651 User Manual...
- Page 71 It may take 20-30 seconds to connect to the wireless network. If the connection fails, please verify that the security settings are correct. The key or passphrase must match exactly as on the wireless router or access point. D-Link DIR-651 User Manual...
-
Page 72: Windows Vista
(displayed using the SSID) and click the Connect button. If you get a good signal but cannot access the Internet, check you TCP/IP settings for your wireless adapter. Refer to the Networking.Basics section in this manual for more information. D-Link DIR-651 User Manual... -
Page 73: Configure Wireless Security
Wireless Utility by right-clicking on the wireless ® computer icon in your system tray (lower right corner of screen). Select Connect.to.a.network. 2.. Highlight the wireless network (SSID) you would like to connect to and click Connect. D-Link DIR-651 User Manual... - Page 74 It may take 20-30 seconds to connect to the wireless network. If the connection fails, please verify that the security settings are correct. The key or passphrase must be exactly the same as on the wireless router. D-Link DIR-651 User Manual...
-
Page 75: Windows® Xp
(displayed using the SSID) and click the Connect button. If you get a good signal but cannot access the Internet, check you TCP/IP settings for your wireless adapter. Refer to the Networking.Basics section in this manual for more information. D-Link DIR-651 User Manual... -
Page 76: Configure Wpa-Psk
XP Wireless Utility by right-clicking on the wireless ® computer icon in your system tray (lower-right corner of screen). Select View.Available.Wireless.Networks. 2.. Highlight the wireless network (SSID) you would like to connect to and click Connect. D-Link DIR-651 User Manual... - Page 77 It may take 20-30 seconds to connect to the wireless network. If the connection fails, please verify that the WPA-PSK settings are correct. The WPA-PSK passphrase must be exactly the same as on the wireless router. D-Link DIR-651 User Manual...
-
Page 78: Troubleshooting
1..Why.can’t.I.access.the.web-based.configuration.utility? When entering the IP address of the D-Link router (192.168.0.1 for example), you are not connecting to a website on the Internet or have to be connected to the Internet. The device has the utility built-in to a ROM chip in the device itself. Your computer must be on the same IP subnet to connect to the web-based utility. - Page 79 • Close your web browser (if open) and open it. • Access the web management. Open your web browser and enter the IP address of your D-Link router in the address bar. This should open the login page for your the web management.
- Page 80 95, 98, and Me users type in command (Windows NT, 2000, XP, Vista and 7 users type in cmd) and press Enter.(or click • Windows ® ® OK). • Once the window opens, you’ll need to do a special ping. Use the following syntax: . ping.[url].[-f].[-l].[MTU.value] Example: ping.yahoo.com.-f.-l.1472 D-Link DIR-651 User Manual...
- Page 81 • To change the MTU enter the number in the MTU field and click Save.Settings to save your settings. • Test your email. If changing the MTU does not resolve the problem, continue changing the MTU in increments of ten. D-Link DIR-651 User Manual...
-
Page 82: Wireless.basics
D-Link wireless products are based on industry standards to provide easy-to-use and compatible high-speed wireless connectivity within your home, business or public access wireless networks. Strictly adhering to the IEEE standard, the D-Link wireless family of products will allow you to securely access the data you want, when and where you want it. - Page 83 PDAs, headphones, laptops, speakers, and other devices that operate on batteries. Who.uses.wireless?. Wireless technology as become so popular in recent years that almost everyone is using it, whether it’s for home, office, business, D-Link has a wireless solution for it.
-
Page 84: Tips
The wireless connection in public places is usually called “hotspots”. Using a D-Link Cardbus Adapter with your laptop, you can access the hotspot to connect to Internet from remote locations like: airports, hotels, coffee shops, libraries, restaurants, and convention centers. -
Page 85: Wireless Modes
• Ad-Hoc – Directly connecting to another computer, for peer-to-peer communication, using wireless network adapters on each computer, such as two or more DIR-651 wireless network Cardbus adapters. An Infrastructure network contains an Access Point or wireless router. All the wireless devices, or clients, will connect to the wireless router or access point. -
Page 86: Networking.basics
Check your IP address After you install your new D-Link adapter, by default, the TCP/IP settings should be set to obtain an IP address from a DHCP server (i.e. wireless router) automatically. To verify your IP address, please follow the steps below. - Page 87 Windows XP - Click on Start > Control.Panel > Network.Connections. Windows 2000 - From the desktop, right-click My.Network.Places > Properties. Step.2 Right-click on the Local.Area.Connection which represents your D-Link network adapter and select Properties. Step.3 Highlight Internet.Protocol.(TCP/IP) or Internet.Protocol.Version.4.(TCP/IPv4) and then click Properties.
-
Page 88: Technical.specifications
* Maximum wireless signal rate derived from IEEE Standard 802.11g and 802.11n specifications. Actual data throughput will vary. Network conditions and environmental factors, including volume of network traffic, building materials and construction, and network overhead, lower actual data throughput rate. Environmental factors will adversely affect wireless signal range. D-Link DIR-651 User Manual... -
Page 89: Contacting.technical.support
• Hardware Revision (located on the label on the bottom of the router (e.g. rev A1)) • Serial Number (s/n number located on the label on the bottom of the router). You can find software updates and user documentation on the D-Link website as well as frequently asked questions and answers to technical issues. -
Page 90: Warranty
Any repair or replacement will be rendered by D-Link at an Authorized D-Link Service Office. The replacement hardware need not be new or have an identical make, model or part. D-Link may, at its option, replace the defective Hardware or any part thereof with any reconditioned product that D-Link reasonably determines is substantially equivalent (or superior) in all material respects to the defective Hardware. - Page 91 D-Link further warrants that, during the Software Warranty Period, the magnetic media on which D-Link delivers the Software will be free of physical defects. The customer’s sole and exclusive remedy and the entire liability of D-Link and its suppliers under this Limited Warranty will be, at D-Link’s option, to replace the non-conforming Software (or defective media) with software that substantially conforms to D-Link’s...
- Page 92 D-Link Systems, Inc., 17595 Mt. Herrmann, Fountain Valley, CA 92708. D-Link will not be held responsible for any packages that are lost in transit to D-Link. The repaired or replaced packages will be shipped to the customer via UPS Ground or any common carrier selected by D-Link.
- Page 93 FOR WARRANTY SERVICE) RESULTING FROM THE USE OF THE PRODUCT, RELATING TO WARRANTY SERVICE, OR ARISING OUT OF ANY BREACH OF THIS LIMITED WARRANTY, EVEN IF D-LINK HAS BEEN ADVISED OF THE POSSIBILITY OF SUCH DAMAGES. THE SOLE REMEDY FOR A BREACH OF THE FOREGOING LIMITED WARRANTY IS REPAIR, REPLACEMENT OR REFUND OF THE DEFECTIVE OR NONCONFORMING PRODUCT.
- Page 94 The availability of some specific channels and/or operational frequency bands are country dependent and are firmware programmed at the factory to match the intended destination. The firmware setting is not accessible by the end user. D-Link DIR-651 User Manual...
- Page 95 Appendix E - Warranty For detailed warranty information applicable to products purchased outside the United States, please contact the corresponding local D-Link office. Industry.Canada.Statement: This device complies with RSS-210 of the Industry Canada Rules. Operation is subject to the following two conditions: (1) This device may not cause harmful interference, and (2) this device must accept any interference received, including interference that may cause undesired operation.
-
Page 96: Registration
Appendix F - Registration Registration Product registration is entirely voluntary and failure to complete or return this form will not diminish your warranty rights. Version 1.0 January 25, 2011 D-Link DIR-651 User Manual...
Need help?
Do you have a question about the DIR-651 and is the answer not in the manual?
Questions and answers