Table of Contents
Advertisement
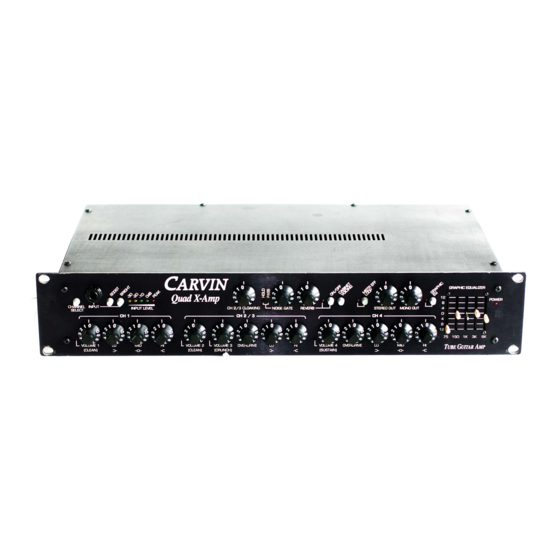
CHANNEL
INPUT
INPUT LEVEL
SELECT
CH 1
0
0
0
0
VOLUME 1
LO
MID
HI
(CLEAN)
Quad X - Amp
T
G
UBE
UITAR
User's Guide
0
Quad X-Amp
CHANNEL 2/3 CLOAKING
CH 2 / 3
0
0
0
VOLUME 2
VOLUME 3
OVERDRIVE
(CLEAN)
(CRUNCH)
P
REAMP
0
0
NOISE GATE
REVERB
0
0
0
0
LO
HI
VOLUME 4
OVERDRIVE
(SUSTAIN)
0
0
GRAPHIC EQUALIZER
12
8
STEREO OUT
MONO OUT
4
0
CH 4
4
8
0
0
0
12
75
150
1K
T
G
LO
MID
HI
UBE
UITAR
POWER
3K
6K
A
MP
Manual No. 76-00101D
Advertisement
Table of Contents

Related Manuals for CARVIN QUADX


Summary of Contents for CARVIN QUADX
- Page 1 Quad X - Amp UITAR REAMP User's Guide GRAPHIC EQUALIZER Quad X-Amp POWER CHANNEL INPUT INPUT LEVEL CHANNEL 2/3 CLOAKING NOISE GATE REVERB STEREO OUT MONO OUT SELECT CH 1 CH 2 / 3 CH 4 VOLUME 1 VOLUME 2 VOLUME 3 OVERDRIVE VOLUME 4...
- Page 2 Quad X - Amp UITAR REAMP User's Guide GRAPHIC EQUALIZER Quad X-Amp POWER CHANNEL INPUT INPUT LEVEL CHANNEL 2/3 CLOAKING NOISE GATE REVERB STEREO OUT MONO OUT SELECT CH 1 CH 2 / 3 CH 4 VOLUME 1 VOLUME 2 VOLUME 3 OVERDRIVE VOLUME 4...
- Page 3 The Quad X-Amp User's Guide © 1993 by Carvin Corp. All Rights Reserved No part of this manual may be reproduced without explicit written permission from Carvin. Carvin, Quad X-Amp, QuikGate, Cabinet Voicing, and Tube Cascade are trademarks of Carvin Corp.
-
Page 4: Table Of Contents
1.5 Long Tailed Reverb ................ 1-3 1.6 From Rip City to Dead Silence ............1-3 1.7 Cloak Your Bottom ................. 1-3 1.8 Construction by Carvin ..............1-3 1.9 EQ Lives in the Quad X-Amp ............1-4 1.10 There's Even More! ..............1-4 Front Panel Control Descriptions 2.0 The Control Layout ................ -
Page 5: Section Description Page
Quad X-Amp Contents Section Description Page Quad X-Amp Using the 4.0 Power Amp Selection ..............4-1 4.1 Speaker Selection ................4-1 4.2 Interconnecting the System ............4-2 4.3 Balancing the System Level Controls ..........4-2 4.4 Effects Suggestions ............... 4-3 4.5 Recommended Settings .............. -
Page 6: Quick Start Sheet
Quad X-Amp Quick Start Quick Start Sheet If you're like most new owners, you're probably in a hurry to plug in your preamp and get started using it. read at least this page. Before you plug it in, make sure the power switch is turned off and 1. -
Page 7: Receiving Inspection
SAVE THE CARTON & ALL PACKING MATERIALS. In the event you have to reship your amp, always use the original carton and packing material. This will provide the best possible protection for your unit during shipment. CARVIN and the shipping company are not liable for any damage caused by improper packing. -
Page 8: For The New Owner
So, with this manual in hand, you hold the key to proper operation of your new Quad X-Amp, and to achieving truly professional results. May you have many years of enjoyment, success, and fun with your new Carvin preamp! Carvin’s national toll free number: 800-854-2235... -
Page 9: Introducing The Quad X-Amp
1.0 Rip like a Hurricane . . . with the Carvin’s new Quad X-Amp is not only the hottest guitar preamp ever designed, it’s also incredibly easy to use. Four channels are only the beginning . . . This outrageous new preamp beats anything you’ve ever heard before. -
Page 10: Your Amp Had An Accident
Ever heard of the Tube Cascade™? Not yet maybe, but you will . . . Carvin’s newly designed Tube Cascade™ circuit milks all the tone possible out of those little glass goodies called tubes. Imagine a zillion lightning bolts shredding the night sky and powering you through your next gig. -
Page 11: Long Tailed Reverb
The Cloaking filter prevents mid-bass buildup in the mix. Use it to shut up the keyboard player when he says you’re stomping on him. 1.8 Construction by Carvin It’s built first class. Anodized aluminum front panel, steel chassis, high quality double sided... -
Page 12: Eq Lives In The Quad X-Amp
0 and you can barely hear any difference. That’s passive EQ for you; it’s very simple, very cheap, and very dead. Who needs it! Carvin’s classic X-Amp first showed how a powerful active EQ can shape guitar tone. Now the Quad X-Amp gives you not one, but three sets of active EQ tone controls. -
Page 13: The Control Layout
Quad X-Amp Front Panel Control Descriptions Section 2 Section Control Descriptions 2.0 The Control Layout The Quad X-Amp is a four channel amplifier where only one channel is active at any given time. There is nothing mysterious about its operation. The top row of controls are master controls that affect the overall operation (all channels) of the amp. -
Page 14: The Channel 1 Control Group
Quad X-Amp Front Panel Control Descriptions Section 2 2.2 The Channel 1 Control Group The Channel 1 LED and Volume Control The Ch 1 LED lights whenever Ch 1 is active. Use the CH 1 VOLUME 1 control to set the level of channel 1 relative to the other channels. -
Page 15: The Channel 4 Control Group
Quad X-Amp Front Panel Control Descriptions Section 2 Channel 3 Overdrive Control The Channel 3 Overdrive control sets the drive level for the "crunch" channel. Although you can use it for overdrive, channel 3 is designed with less drive and a brighter voice than channel 4 specifically to allow you to get a sound in between clean and distortion. -
Page 16: The Noise Gate
Quad X-Amp Front Panel Control Descriptions Section 2 2.5 The Noise Gate The QuikGate™ noise gate circuit built into the Quad X-Amp is unlike any other noise reduction device you could add to your guitar rack because it is integrated into the preamp rather than just "tacked on". Even when you have the overdrive channel selected QuikGate still sees the full KING NOISE GATE... -
Page 17: Reverb, Cabinet Voicing And Master Effects Loop
Quad X-Amp Front Panel Control Descriptions Section 2 2.6 Reverb, Cabinet Voicing, and Master Effects Loop Reverb On/Off Switch, LED, and Level Control The Quad X-Amp has a built in spring reverb with a uniquely flexible control system. The front panel pushbutton switch can be used to toggle the reverb on and off as indicated by the red LED located between the switch and the reverb level control. -
Page 18: Master Level Controls
Section 2 The Cabinet Voicing Switch This switch inserts Carvin's Cabinet Voicing™ circuit to add the frequency response coloration of a 4x12 guitar speaker stack. This effect is intended to be used whenever you are not playing through "guitar speakers". Use it when recording direct to the mixer, practicing with headphones, or playing over full range speakers (such as studio monitors). -
Page 19: Rear Panel Connections
Quad X-Amp Rear Panel Connections Section 3 Section Rear Panel Connections 3.0 The Rear Panel Layout The rear panel is organized with power switch and line cord connector at the far left. The connections from left to right are: footswitch, MIDI control, channel effects loops, master effects loops, preamp outputs, and input. -
Page 20: Midi Interface Connections
Quad X-Amp Rear Panel Connections Section 3 3.3 MIDI Interface Connections Use the MIDI interface to control the Quad X-Amp remotely with a MIDI MIDI CHANNEL MIDI footswitch or other MIDI control device. The unit is equipped with both a MIDI IN and a MIDI THRU to allow you to chain POWERED MIDI IN FOOTSWITCH THRU... -
Page 21: The Ground Lift Switch
Quad X-Amp Rear Panel Connections Section 3 3.9 The Ground Lift Switch Set this switch for the lowest noise when using either the stereo or LIFT mono balanced outputs. When the switch is in the lift position it breaks the connection to pin 1 which is normally grounded. This breaks any ground loops between the preamp and the gear it's feeding. -
Page 22: Using The Quad X-Amp
Using the Quad X-Amp 4.0 Power Amp Selection We highly recommend a stereo power amplifier (such as Carvin's FET 450 or FET 1000) for use with the Quad X-Amp. The power rating will depend on the speakers you use but a reasonable minimum rating would be 100 Watts continuous per channel into 8Ω. -
Page 23: Interconnecting The System
Quad X-Amp Quad X-Amp Using the Section 4 4.2 Interconnecting the System Once you have selected your power amp and speakers interconnect is straightforward. Start with all the gear turned off. Connect the outputs of the Quad X-Amp to the inputs of the power amp. -
Page 24: Effects Suggestions
Quad X-Amp Quad X-Amp Using the Section 4 4.4 Effects Suggestions Now that you have your basic Preamp/Power Amp/Speaker setup let's start evaluating effects configurations. Digital Multi-Effects Unit You probably want to patch your most versatile multi-effects unit into the master effects loop so that you will have it available for use with any channel. -
Page 25: The Fs-77 Footswitch
Quad X-Amp Using the FS-77 Footswitch Section 5 Section The FS-77 Footswitch 5.0 About the FS-77 Footswitch The FS-77 footswitch is available as an optional accessory for the Quad X-Amp guitar preamp. With the footswitch you can easily control the most important functions of the amp from the stage while you are performing. -
Page 26: Using The Fs-77 Footswitch
Quad X-Amp Using the FS-77 Footswitch Section 5 5.2 Using the FS-77 Footswitch The footswitch allows you to directly access each of the four channels by depressing the footswitch button corresponding to the channel you want to use. As you change channels the system instantly configures the reverb, effects loop, and graphic EQ for that channel. -
Page 27: About Tubes
Quad X-Amp About Tubes Section 6 Section About Tubes 6.0 A Brief History of Tubes The history of vacuum tubes began in 1883 when Thomas Edison discovered that the hot filament in his light bulb was boiling off electrons. This Edison effect (known today as thermionic emission) was to become the basis of the operation of the vacuum tubes that would lead to radio, television, radar, computers, and, oh yes . -
Page 28: The Tube Cascade
Quad X-Amp About Tubes Section 6 when overdriven was simply an accident. This meant that the only way to get distortion effects was to play at a very loud volume. Soon technicians discovered that they could add a master volume control between the preamp and the power amp stages of guitar amps in order to provide a volume control for the distortion effects. -
Page 29: Tube Maintenance And Troubleshooting
You could return the unit to Carvin for repair but in most cases, with just a little effort, you will be able to locate the defective tube or tubes and replace them yourself. Following is a procedure for identifying a bad tube and replacing it. -
Page 30: Using The Midi Interface
Quad X-Amp Quad X-Amp MIDI Using the Section 7 Section Using the MIDI Interface Quad X-Amp 7.0 About the MIDI Interface The Quad X-Amp MIDI interface allows you to select the four Quad X-Amp channels through MIDI control. The unit has been equipped with a MIDI IN and a MIDI THRU to allow you to patch your MIDI signal to external MIDI gear. -
Page 31: Midi Patch Configuration
Quad X-Amp Quad X-Amp MIDI Using the Section 7 7.2 MIDI Patch Configuration The Quad X-Amp is setup with a pre-defined MIDI Patch configuration that defines which Quad X-Amp channel will be selected for each of the 1-128 MIDI Patch calls. This configuration has been setup to offer you the maximum flexibility in your system. -
Page 32: Making Midi Connections
Quad X-Amp MIDI IN is equipped with a 7 pin din connector which allows your unit to power a Carvin MIDI footswitch with a single connection. The configuration on the powered MIDI IN is PIN 6=GND and PIN 7=+15VDC. In order to use the powered MIDI IN you must use a special 7 PIN MIDI cable which is available through Carvin. -
Page 33: Technical Specifications
Quad X-Amp Technical Specifications Appendix A Technical Specifications of the Quad X-Amp Preamp Frequency Response 20 to 20kHz ±3 dB (fixed EQ defeated) Total Harmonic Distortion less than .05% Sound Quality Totally Outrageous! EQ Centers Three Band (Ch 1 &4) 80, 500, 3kHz Two Band (Ch 2 &3) 80, 3kHz Graphic EQ 75, 150, 1K, 3k, 6kHz Nominal Line Output 0 dBV (.775 Vrms) - Page 34 @ ? @ ? @ @ @ @ @ ? @ Carvin assumes no responsibility for any horn driver or speaker damaged by this unit. This warranty is in lieu of all other @ ? @ ? @ @ @ @ @ ? @...
- Page 35 Manual No.: 76-00101D Revision Date: 17APR96 1. The Covers are to be printed on Carvin's standard weight, beige colored, card stock. 2. The front cover is to be printed on the front side only. (master sheet 1) 3. The inside cover is to be printed on both sides (unnumbered page i, and page ii) (master sheets 2 and 3) 4.
Need help?
Do you have a question about the QUADX and is the answer not in the manual?
Questions and answers