Advertisement
Introduction
Explanation of symbols and signal words used in these operating instructions and/or the device:

Refer to operator's manual
![]()
Risk of bodily or fatal injury to children!

Attention - Danger! Follow safety instructions and warnings!
![]()
Dispose of equipment and packaging in an environmentally friendly manner!

This equipment complies with Eu directives
 Note:
Note:
These instructions also refer to the safety jumper leads as leads.
Normal use
The jumper leads are used to start a vehicle with drained battery by bridging with a good battery (jumper battery).
This device is not intended for use by children or persons with limited mental capacity or lacking experience and/or lacking expertise. Children should be supervised to ensure they do not play with the device.
This device is not intended for commercial use. any other use or modification of the device is considered improper and involves significant risks.
The manufacturer assumes no liability for damages due to improper use.
Contents
Be sure to verify contents immediately upon opening the product. Check the product and all parts for damage. Do not use a defective product or parts.
- Jumper leads
- Bag
- Instructions for use
Please include all relevant documentation to other users!
Technical specifications
The jumper leads meet the requirements of DIN 72553 and are suitable for wiring system voltages from of 12 V. The leads consist of insulated, copper-clad aluminium wires with fully insulated terminal clamps.
| Typ | DIN 25 |
| Item No. | 10648 |
| Cross-section* Length | 25 mm2 / 2 x 3.5 m |
| For engine displacement up to | Petrol: 5500 cm3 Diesel: 3000 cm3 |
| Batteries | 8 x LR 1130 (LR 54) (2 per clamp) |
* The electric conductance corresponds to a copper lead of this cross-section.
Safety
General Safety Guidelines
Read all safety guidelines and instructions. Failing to follow the directions and safety instructions listed below can result in property damage, injury or death. Keep all safety guidelines and instructions for future reference.
Also pass on documentation to other users and subsequent owners of the device!


Life-threatening danger to infants and children! Risk of suffocation or strangulation! Keep the machine out of the reach of children. Children are unable to assess the risks associated with use of this product! Never leave children unsupervised with the packing material as this can cause suffocation. Do not allow children to play with the components or fasteners, as they could be swallowed and result in suffocation.

Damaged leads may cause fatal electric shock. Discontinue use if leads are damaged.
- Improper handling of jumper leads may result in severe injuries and damage.
- Repairs must be performed by a qualified professional
The manufacturer is not responsible for damages caused by:
- Improper use.
- Exterior force, damage to the device and / or damage to parts of the device caused by mechanical impact or overload.
- any type of modification to the device.
- use of the device for purposes that are not described in this instruction manual.
- Consequential damages caused by non-intended and / or improper use, and / or defective batteries.
- Moisture and/or inadequate ventilation.
- The unauthorised opening of the device.
This will void the guarantee.
 Explosion and fire hazard
- Keep sources of ignition (e.g. lit cigarettes) away from battery.
- The working battery must have the same voltage (V) citance (Ah) as the drained battery (see specification on the battery).
- Never use the jumper leads in explosion-prone surroundings.
- Thaw frozen batteries before starting.
- The vehicle's engine displacement must be within the approved range of the jumper leads.
- The drained battery must be connected to the onboard power supply.
 Risk of chemical burns!
- Risk of injury to the eye. Wear protective eyewear and do not lean over the battery. The electrolyte inside the drained starter battery remains liquid even at low temperatures.
 Risk of electrical shock!
- Do not allow the clamps involved to touch.
- Never allow the contacts of the lead connected to the battery's positive terminal to come into contact with electrically conductive vehicle parts.
- The vehicle bodies must not come into contact.
Risk of injury!
- Do not modify or manipulate the product as this will increase the risk of injury.
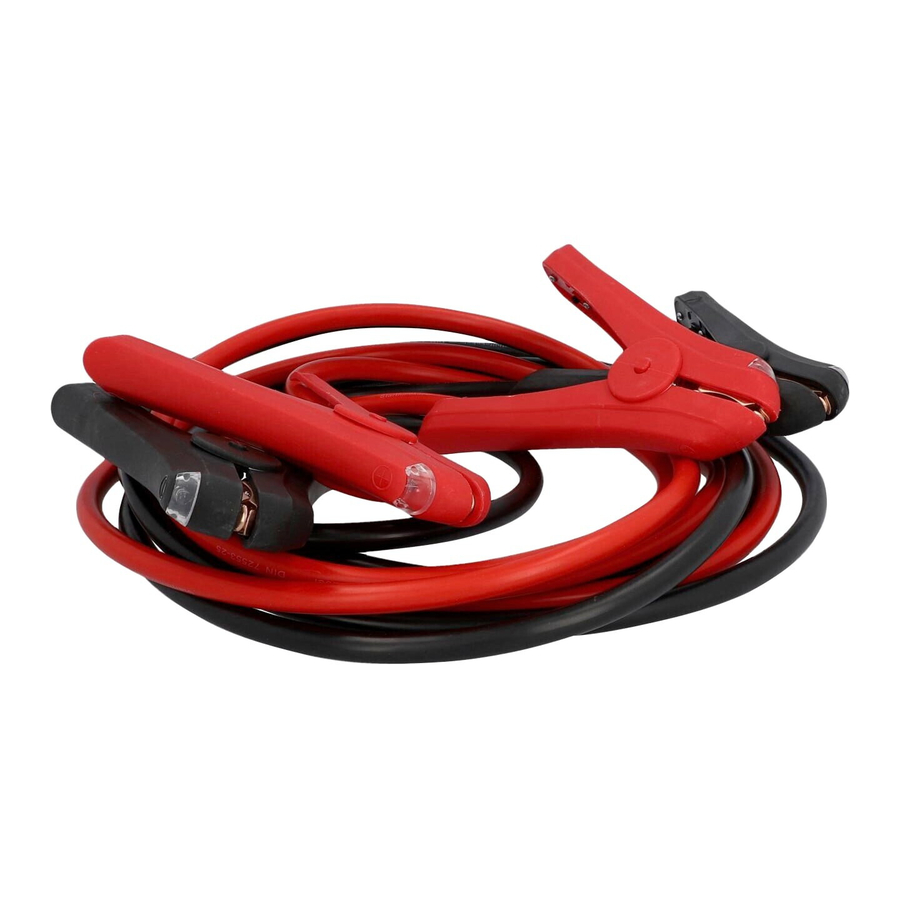
Product overview

- Jumper leads
- Clamps
- LED light
- Switch
Jumpstarting
Preparations
- Be sure to follow the indications on jumpstarting inside the vehicles' operator's manuals.
- Set the parking brake on both vehicles.
- Set gearstick to neutral, for automatic transmissions to P.
- Switch off ignition on both vehicles and all devices.
- Do not disconnect the drained battery from the vehicle's electrical system.
Connecting

Place the jumper leads so they will not be tangled in moving parts inside the engine compartment.
Connect the terminal clamps of the leads in the following order:
- Positive lead (red) to positive terminal of drained battery.
- Plus lead (red) to positive terminal of good battery.
- Negative lead (black) to negative terminal of good battery.
- Negative lead (black) to the negative pole on the drained battery, or to a suitable mass (e.g. engine block) on the vehicle.

Connect this earthing point to the vehicle earth as far away from the battery as possible to avoid igniting explosive gas which may be present.
Starting
- Start the engine of the good vehicle and run at a medium engine speed.
- Start the engine of the vehicle with the drained battery (starting attempt max. 15 seconds - wait at least one minute between additional attempts to start).
- After successfully starting the vehicle engine with the drained battery wait 2 to 3 minutes until it runs smoothly.
Disconnecting
Note:
before disconnecting the jumper leads the rear and front defrost should be switched on in the vehicle with the drained battery (do not switch on vehicle lights). This will reduce possible voltage spikes whilst disconnecting and prevent damaging electrical parts.
Disconnect the terminal clamps in the following order:
When disconnecting the jumper cables, be careful they do not come into contact with the moving parts of the engine.

- Negative lead (black) from earth point of vehicle with drained battery.
- Negative lead (black) from negative terminal of good battery.
- Positive leads (red) in any order
After jumpstarting drive the broken-down vehicle for a longer distance to charge the battery. You may also recharge the battery with a charger.
Using the LED light
Set the switch (4) to the "I" position to switch on the LED light on the clamps. Set the switch (4) to the "0" position to switch off the LED light.
CLEANING, CARE AND MAINTENANCE
always maintain clean leads and check jumper leads for damage prior to each use. Do not use damaged jumper leads (e.g. frayed lead, broken or welded terminal clamps). Please contact your retailer or a qualified professional for damages, repairs or other product issues.
Replacing the batteries of the LED light

- Unscrew the screws (1) from the cover (2) using a suitable cross-tip screw driver.
- Remove the cover (2).
- Replace the batteries (3). Note the correct polarity when inserting the batteries.
- Reattach the cover (2).
- If necessary, replace the batteries inside the other clamp. The clamps are now ready to use again.
Service
Should you have any questions regarding commissioning or operating in spite of studying these operating instructions, or if a problem should occur against all expectations, please get in contact with your specialist supplier.
Illustrations may vary slightly from the product itself. We reserve the right to modify the product in accordance with technical advances. Decoration not included.
Documents / Resources
References
Download manual
Here you can download full pdf version of manual, it may contain additional safety instructions, warranty information, FCC rules, etc.
Advertisement


Need help?
Do you have a question about the 10648 and is the answer not in the manual?
Questions and answers