
Related Manuals for THERMATEC PLUS S TH-R290-S10-3P


Summary of Contents for THERMATEC PLUS S TH-R290-S10-3P
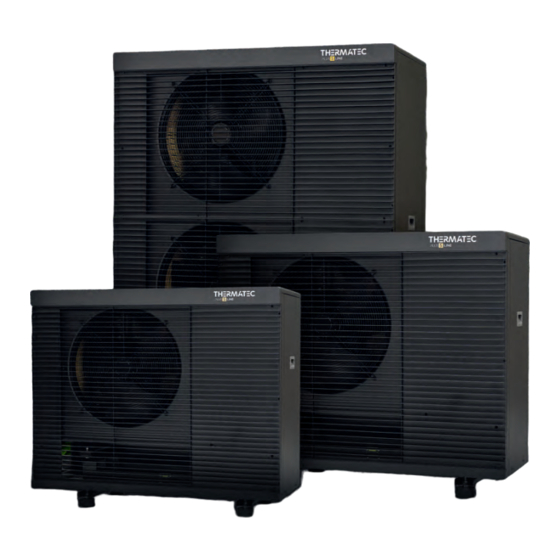
- Page 1 S MA RT SO L U T IO N S TH-R290-S06-1P | 6 kW TH-R290-S10-3P | 10 kW TH-R290-S16-3P | 16 kW HEAT PUMPS PLUS S LINE AIR-TO-WATER (MONOBLOCK) TH-R290-S06-1P, TH-R290-S10-3P, TH-R290-S16-3P INSTALLATION AND USER MANUAL...
- Page 2 inverter super quality SG READY ultra-environ- energy stable operation efficiency at -25°C mentally friendly technology silent guarantee function refrigerant R290...
-
Page 3: Table Of Contents
10. KINSPECTION AND MAINTENANCE ............expectations, our devices present 11. ERROR CODES ..................themselves exceptionally well against 12. TROUBLESHOOTING ................the backdrop of our customers' dream homes and offices. 13. ELECTRICAL SCHEMATIC ............... 14. INSTRUCTIONS FOR THE WIRED TOUCH CONTROLLER ..... We attach great importance to the utility, quality of workmanship, and 15. THERMATEC CASCADE INSTRUCTIONS ..........durability of our products, ensuring 16. SG READY ....................that we deliver devices prepared for 17. WI-FI CONNECTION ................years of trouble-free and efficient operation. 18. DTU SYSTEM ................... 19. DISPOSAL ....................20. SERVICE .................... -
Page 4: Safety Symbols
IMPORTANT! This Installation and User Manual contains essential information regarding the safe use, proper installation, and operation of the THERMATEC heat pump. Before using the product, you must read this manual carefully and thoroughly understand its contents. The Installation and User Manual should be kept for future reference. You must provide this manual to any subsequent owner or user of the THERMATEC heat pump. During the use of the THERMATEC heat pump, you must adhere to applicable regulations and safety guidelines. Due to the rapid development of our products, the content of this manual may change without prior notice. 1. SAFETY SYMBOLS The safety symbols and warning signs below are used to emphasize particularly important information regarding safety issues and proper use of the THERMATEC heat pump: SYMBOL MEANING Immediate danger! Failure to comply may result in death or serious bodily injury. DANGER Possible danger! Failure to comply may result in death or serious bodily injury. WARNING Hazardous situation! Non-compliance may result in minor or moderate bodily injury or property damage. - Page 5 2. RULES FOR SAFE INSTALLATION AND USE The heat pump is designed for heating buildings with high heat demand. The device can only be used for the purpose for which it has been explicitly intended; any other use should be considered inappropriate and consequently dangerous. The installation of the device must be carried out in accordance with current standards and regulations, following the manufacturer's instructions and by qualified personnel. Improper installation of the device may result in injuries to people and animals and other property damage for which the manufacturer is not liable. Do not entrust the use of the device to children or people with limited physical, sensory, or mental abilities, or someone without the required experience and knowledge, unless they are supervised or have been instructed about the use of this device by a person responsible for their safety. The device should be stored out of reach of children. ATTENTION Before starting work, carefully read this manual with understanding and follow the rules contained therein. 2.1. PRECAUTIONS Incorrect operations can lead to serious consequences, such as serious injuries, severe accidents, or even death. Improper operation can damage the device or affect its functioning. Please carefully read the labels on the device. If you notice any abnormalities during use such as unusual noise, smell, smoke, temperature increase, refrigerant leaks, fire, etc., immediately disconnect the power and contact ATTENTION...
- Page 6 WARNING! Do not insert hands or other objects into the device's exhaust vent. Otherwise, the high-speed fan may cause bodily harm or damage. Do not remove the fan cover. Otherwise, the high-speed fan may cause injuries to you or others. Lightning and other sources of electromagnetic radiation can have a significant impact on the device. Ensure that the system is filled with water or glycol at the appropriate pressure. Otherwise, the machine may be damaged. The device's operating parameters and set values of protective settings have been selected by the manufacturer. Users should not arbitrarily change the set values or bypass protective settings. Otherwise, the machine may be damaged due to inadequate protection. Please perform regular maintenance of the device as per the instructions to ensure optimal working conditions. In case of unusual symptoms (burning smell), immediately disconnect the power using the switch, stop the device's operation, and contact an Authorized Service Partner or the manufacturer's service. If the abnormal operation continues, it may result in electric shock or fire. Transfer and reinstallation of the unit should be entrusted to an authorized installer. Never make independent modifications, as this can lead to electric shock or fire. 10. If repairs are necessary, please entrust them to an Authorized Service Partner or the manufacturer's service. 11. Do not install the unit in an area where the leakage of easily flammable gases is possible. In the event of a flammable gas leak, a fire may occur around the device. 12. Check if a 30 mA residual current circuit breaker is installed. The absence of such a circuit breaker can lead to electric shock or fire. 13. When cleaning the unit, turn off the power and disconnect the power switch. 2.2. PRECAUTIONS REGARDING REFRIGERANT Do not use methods other than those recommended by the manufacturer to expedite the defrosting or cleaning process. The device should be stored in a room without active potential sources of ignition (such as open flames, operating gas appliances, operating electric heaters). Using open flames near a device filled with refrigerant is prohibited. Keep in mind that refrigerants may not emit an odor. The device should be installed and operated outside the building. In the case of indoor installation, it should be noted that a propane heat pump should be stored in a room that meets safety requirements and is well-ventilated. Rooms containing refrigerant must comply with national gas regulations. Servicing the device should be carried out in accordance with the manufacturer's recommendations. All safety-affecting work procedures should only be carried out by an Authorized Service Partner or the manufacturer's service. 2.3. REQUIREMENTS FOR FLAMMABLE REFRIGERANT Transport of devices containing flammable refrigerants: Compliance with transport regulations.
- Page 7 Service Information: Area inspection. Before starting work on systems containing flammable refrigerants, safety checks are necessary to minimize the risk of ignition. When repairing a cooling system, the following safety guidelines should be observed before working on the system. Work procedure. Work should be carried out following a controlled procedure to minimize the risk of the presence of flammable gas or vapor during work. General work area. All service personnel and others working in the local area should be informed of the nature of the work being performed. Avoid working in confined spaces. The area around the work location should be secured. Ensure that the conditions in the area have been secured by controlling flammable materials. Checking for refrigerant presence. The area should be checked with the appropriate refrigerant detector before and during work so that the person performing the operation is aware of potentially flammable atmospheres. Ensure that the leak detection equipment used is suitable for use with flammable refrigerants, i.e., does not spark, is adequately sealed, or is intrinsically safe. Fire extinguisher. If any „hot work” is foreseen on refrigeration equipment or any associated part, appropriate firefighting equipment should be on hand. In the area where the heating agent is replenished, there should be a powder or CO2 fire extinguisher. No ignition sources. Any person carrying out work on the cooling system that involves exposing any pipe containing or having contained a flammable refrigerant in the past should not use any ignition sources in a way that could lead to a fire or explosion. All possible ignition sources, including smoking, should be kept at a sufficient distance from the installation, repair, disassembly, and disposal during which a flammable refrigerant may be released into the surrounding space. „No Smoking” signs should be posted before starting work. Ventilated area. Ensure that the location is outdoors or adequately ventilated before opening the system or starting any „hot work.” Ventilation should be maintained throughout the period when work is being carried out. The ventilation should safely disperse any released refrigerant and, preferably, exhaust it into the atmosphere. Inspection of cooling equipment. During the exchange of electrical components, they must be appropriate for the purpose and meet the relevant specifications. At all times, manufacturer guidelines for maintenance and service should be followed.
- Page 8 Cables. Check that cables are not exposed to wear, corrosion, excessive load, vibrations, sharp edges, or other adverse environmental factors. When checking, also consider the effects of aging or continuous vibrations from sources such as compressors or fans. 10. Detection of flammable refrigerants. Under no circumstances should potential ignition sources be used to search for or detect refrigerant leaks. Do not use a halogen torch or another detector using an open flame. 11. Leak detection methods. The following leak detection methods are considered acceptable for systems containing flammable refrigerants. a) Electronic leak detectors should be used to detect flammable refrigerants, but their sensitivity may be insufficient or may require recalibration. b) Leak detection equipment should be calibrated in an area free of refrigerants. c) Make sure the detector is not a potential ignition source and is suitable for the refrigerant used. d) Leak detection equipment should be set to the percentage of the Lower Flammable Limit (LFL) of the refrigerant and should be calibrated to the refrigerant used, and an appropriate percentage of gas (up to 25%) should be confirmed. e) Leak detection fluids are suitable for use with most refrigerants, but detergents containing chlorine should be avoided as chlorine can react with the refrigerant and corrode copper pipes. . 12. Removal and evacuation. When dismantling a cooling system for repair or any other purpose, standard safety procedures should be followed, and the following procedure should be observed: a) Removal of the refrigerant; b) Circuit cleaning using inert gas; c) Evacuation; d) Recleaning the circuit with inert gas; e) Opening the circuit by cutting or soldering. The refrigerant charge should be recovered into appropriate recovery tanks. The system should be „flushed” with clean nitrogen (OFN) to ensure unit safety. This process may require repetition several times. Do not use compressed air or oxygen for this task. Flushing should involve breaking the vacuum in the system using clean nitrogen (OFN) and continuing filling to reach working pressure, then venting to the atmosphere, and finally re-evacuating to vacuum. This process should be repeated until no refrigerant is inside the system. After using the last OFN charge, the system should be vented to atmospheric pressure to allow work to be carried out. This operation is absolutely necessary if soldering work is to be carried out on the pipeline. Make sure the vacuum pump outlet is not near any ignition sources and ventilation is available. 13. Refilling the Heating Agent Procedures. In addition to conventional filling procedures, the following requirements must be adhered to: Ensure that there is no contamination by different refrigerants during the use of the filling equipment. Hoses should be as short as possible to minimize the amount of refrigerant contained in them. Cylinders should be kept in an upright position. Before filling the cooling system with refrigerant, make sure that the cooling system is grounded.
- Page 9 g) Do not overfill the tank (no more than 80% volume of the liquid refrigerant). h) Do not exceed the tank’s maximum working pressure, even temporarily. i) Once the tank has been filled correctly and the process is complete, ensure the tank and equipment are promptly removed from the worksite, and all isolation valves on the devices are closed. j) Recovered refrigerant cannot be filled into another cooling system unless it has been purified and tested. 15. Labeling. Devices should be marked, indicating they have been taken out of use and emptied of the refrigerant. The label should be dated and signed. Make sure the device is labeled to indicate that it contains a flammable refrigerant. 16. Recovery. When recovering a refrigerant from a system, both for servicing and disposal, it’s recommended to safely remove all refrigerants. When transferring refrigerants to tanks, ensure the correct recovery tanks are used. Ensure an adequate number of tanks to store the total refrigerant quantity in the system. All used tanks should be designated for refrigerant recovery and marked as such (e.g., special refrigerant recovery tanks). Tanks should be equipped with safety valves and suitable closures that are operational. Empty recovery tanks should be cleared of air and, if possible, cooled before starting recovery. The refrigerant recovery equipment should be functional, with a full set of user instructions tailored to that equipment and suitable for recovering flammable refrigerants. Additionally, a calibrated working scale should be available. Hoses should be equipped with leak-tight quick couplings and be in good condition. Before using the recovery device, check its technical condition, ensure it has been maintained properly, and all its electrical components are tightly closed to prevent ignition in case of a refrigerant leak. If in doubt, consult the manufacturer. Recovered refrigerant should be returned to the refrigerant supplier in a suitable recovery tank along with the appropriate waste transfer document. Refrigerants should not be mixed in recovery units, especially in tanks. If compressors or compressor oils are to be removed, ensure they have been adequately cleaned of refrigerant to an acceptable level, ensuring that the flammable refrigerant does not remain in the lubricating oil. A dehydration process should be conducted before sending the compressor back to the supplier. Only electric heating of the compressor body should be used to accelerate this process. Safety precautions should be observed when draining oil from the system. 2.4. OTHER SAFETY ASPECTS As a heat source, the pump uses external air, generating energy to heat your home. This manual is an integral part of the product and must be passed on to the user. Carefully read the warnings and recommendations contained in the manual, as they contain important information regarding safety, use, and maintenance of the installation. This heat pump must be installed exclusively by qualified personnel, in accordance with applicable law and in accordance with the manufacturer’s instructions. The startup of this heat pump and any servicing work must be carried out only by an Authorized Service Partner or the manufacturer’s service. Incorrect installation of this heat pump can lead to harm to people, animals, or property, and in such cases, the manufacturer will not be held responsible. Always observe the following precautions: Before installing the device, be sure to read the following WARNING.
-
Page 10: Description And Application
3. DESCRIPTION AND APPLICATION The THERMATEC PLUS S LINE heat pumps with capacities of 6 kW, 10 kW, and 16 kW are heat pumps that use the refrigerant R290. The ability to connect cascading systems up to eight devices allows for the construction of a system with the appropriate power, also for servicing buildings of larger volumes. THERMATEC heat pumps are based on full inverter technology. The primary benefits gained from such a solution are stable and efficient operation, and when combined with the R290 agent, we achieve exceptionally favorable working parameters of the heat pumps. 4. ADDITIONAL ACCESSORIES Each unit requires the user to purchase at least the following optional items for normal use. - Page 11 5. PRINCIPLE OF OPERATION 5.1. PRINCIPLE OF OPERATION OF THE HEAT PUMP Low-pressure heated refrigerant vapors from the evaporator are sucked in and compressed to form high-temperature, high-pressure vapors by the compressor. The heated vapor is directed to the condenser to exchange heat with water. The refrigerant condenses (an exothermic process) into a saturated or subcooled cooling liquid with high temperature and high pressure. The hot water assembly absorbs the heat released during the refrigerant's condensation in the water, raising the water's temperature. The cooling liquid is throttled and expanded through the expansion valve, becoming a low-temperature, low-pressure cooling liquid. The liquid refrigerant flows into the...
- Page 12 5.2. HEATING POWER TH-R290-S06-1P | 6 kW 25°C 35°C 45°C 55°C 60°C 65°C 70°C 75°C Outdoor temperature (°C) TH-R290-S10-3P | 10 kW 25°C 35°C 45°C 55°C 60°C 65°C 70°C 75°C Outdoor temperature (°C) TH-R290-S16-3P | 16 kW 25°C 35°C 45°C 55°C 60°C 65°C...
-
Page 13: Heat Pump Installation
6. HEAT PUMP INSTALLATION 6.1. INSTALLATION PRECAUTIONS Avoid installing the heat pump in places: with mineral oil; where the air contains more corrosive gases, such as salt and sulfur; where there are significant voltage fluctuations; with an unstable base or foundation; near flammable and explosive materials; with strong electromagnetic waves; under other adverse environmental conditions. 6.2. INSTALLATION CHECK confirm the model, number, name, etc., to avoid incorrect installation; check if there is enough space for installation and maintenance; ensure the air intake and exhaust are not obstructed; check if the weight on the bearing surface meets the requirements; verify if the power supply and wire diameter have been chosen in accordance with the electrical installation requirements given the capacity of the heat pump; the electrical installation must comply with the relevant technical standards for electrical equipment; for extrapolation actions and adjustments, the unit must be connected to the power supply for at least 8 hours. 6.3. INSTALLATION SPACE During installation, leave the maintenance space shown in the diagram below before installing the device. There should be no obstacles within 200 mm above the unit, and on the water installation connection side, the minimum distance should be 500 mm. The following illustration shows the obstacle distance in both horizontal and vertical directions (mm). 6.4. TRANSPORTING THE HEAT PUMP AND PLACEMENT ON THE FOUNDATION Transporting the device to the planned work location should be conducted with utmost care and attention to safety measures. For offloading over longer distances, the use of appropriate equipment like a forklift is necessary. During the transport, it's crucial to ensure the heat pump doesn't sustain any damages. The unit should always be transported in an upright position. - Page 14 Heat pump dimensional specification Heat pump dimensional specification Heat pump dimensional specification TH-R290-S06-1P | 6 kW TH-R290-S10-3P | 10 kW TH-R290-S16-3P | 16 kW 1287 1387 1287 MODEL / SIZE (MM) LENGTH (L) WIDTH (W) HEIGHT (H) TH-R290-S06-1P 1287 1054 TH-R290-S10-3P 1387 1154 TH-R290-S16-3P 1287 1704 6.5. WATER PIPING INSTALLATION Installation notes: Make an effort to prevent dust and other contaminants from entering the piping system. The device should be secured before installing water pipes. Inlet and outlet pipes should be insulated with thermal insulation materials. The piping system ensures a specified water flow rate, try to avoid elements that choke the flow. Do not hook transport straps onto the inlet and outlet pipes during unit transportation. You can only hook them onto the mounting holes of the base beam. When connecting inlet and outlet pipes, use two pipe wrenches to tighten both parts of the pipe.
- Page 15 6.7. SAMPLE HYDRAULIC INSTALLATION SCHEME THERMATEC monoblock heat pumps can provide heating/cooling as well as domestic hot water for households and smaller commercial premises. For space heating, underfloor heating loops, radiators, or fan-coil units are used. Fan-coil units are used for room cooling. Domestic hot water is supplied from a hot water tank connected to the heat pump. Thermatec offers a monoblock heat pump with a built-in primary circulating pump for the heating medium (e.g., water, glycol). When installing the device, the installer should connect the heat pump to other components, including a buffer tank (for heating/cooling spaces), a water tank (for domestic hot water), and water pumps (for circulating water for space heating/cooling and domestic hot water). External equipment, including a safety valve, water inlet valve, and three-way valve, is also essential. The water tank should be equipped with a temperature sensor. The domestic hot water tank can be fitted with an additional electric heater, which will receive a control signal from the heat pump. Domestic hot water circulation system Heat pump Heating zone temperature sensor Domestic hot water tank temperature Wall controller Domestic hot water expansion vessel...
- Page 16 7. TECHNICAL PARAMETERS OF HEAT PUMPS 7.1. HEAT PUMP TH-R290-S06-1P Energy label according to testing methods in line with the latest guide- lines of the European Union directive from 11/2022: SECOND PN-EN 14511: 2022 GENERATION PN-EN 14825: 2022 MODEL TH-R290-S06-1P Power supply 220-240V / 1N~ / 50Hz Input power...
- Page 17 7.2. HEAT PUMP TH-R290-S10-3P Energy label according to testing methods in line with the latest guide- lines of the European Union directive from 11/2022: SECOND PN-EN 14511: 2022 GENERATION PN-EN 14825: 2022 MODEL TH-R290-S10-3P Power supply 380-415V / 3N~ / 50Hz Input power heating capacity range 4.32 –...
- Page 18 7.3. HEAT PUMP TH-R290-S16-3P Energy label according to testing methods in line with the latest guide- lines of the European Union directive from 11/2022: SECOND PN-EN 14511: 2022 GENERATION PN-EN 14825: 2022 MODEL TH-R290-S16-3P Power supply 380-415V / 3N~ / 50Hz Input power heating capacity range 7.25 –...
-
Page 19: Electrical Connection
8. ELECTRICAL CONNECTION The heat pump should be connected through an electrical distribution board that allows for the safe disconnection of the pump's power supply. The electrical distribution board for powering a single heat pump should be equipped with an overcurrent breaker with the appropriate load value and a 30 mA residual current protective switch. All electrical installation connection tasks should be entrusted to a qualified electrician with the appropriate qualifications and permissions. For powering a 1-phase heat pump with a power of 6 kW, a cable of at least 3 x 2.5 mm2 should be used, and for powering a 3-phase heat pump with a power of 10 kW or 16 kW, a cable of at least 5 x 2.5 mm2 should be used. If the heat pump is located more than 20 m from the main distribution board of the building or additional devices (e.g., electric heaters) are connected, the cross-section of the power cable should be appropriately increased. When connecting a 400 V supply, attention should be paid to maintaining the appropriate phase compatibility with the heat pump. In the event of incorrect connection, after the system starts, an error may occur or the heat pump may get damaged. It is recommended that the cables be run using electrical installation channels and protective sheaths. The 230V~/400V~ power... - Page 20 8.1.2. ELECTRICAL CONNECTION SCHEMATIC FOR THE 6 kW HEAT PUMP 220-240V/1N~/50Hz Electric water heater for DHW (the electric heater should be connected through an external relay/electromagnetic contactor 230V AC) Circulation pump between buffer tank and room (direct circulation) Additional assisting circulation pump for DHW coil Electric heater for heating circuit (connect the electric heater through an external relay/electromagnetic contactor 230V AC) DHW circulation pump Circulation pump for an additional heat source in DHW circuit (circulation pump for solar system) Three-way valve OFF (switching between heating and DHW) Three-way valve ON (switching between heating and DHW) Three-way valve OFF (switching between heating and cooling) 10. Three-way valve ON (switching between heating and cooling) 11. Mixing valve OFF (second heating circuit) 12. Mixing valve ON (second heating circuit) 13. Circulation pump for the second heating circuit 14. Additional heating cable (max. power 500 W) 15. 16. 17. 18. 19. 20. 21. Potential-free signal SG 22. COM 23.
- Page 21 The outputs on the control panel terminal strip - terminal 1 and terminal 4 - are 230V AC voltage outputs with low current load capacity. Electric heaters or control systems for other heating devices should not be directly connected to them. ATTENTION If an additional electric heater needs to be used in the hydraulic system, it can only be powered through the current contacts of an external 230V AC relay/contactor. The current contacts of the relay/contactor should be chosen according to the power of the electric heater. The coil of the relay/contactor should be connected to the outputs on the control panel of the heat pump, terminal 1 - "Domestic hot water tank heater" and terminal 2 - "Heating circuit electric heater" (example connection shown in the diagram below). THERMATEC Heat Pump Control Panel Terminal Terminal No. 1 No. 4 S301B20A S301B20A...
- Page 22 8.1.5. CONTROL OF THE HONEYWELL THREE-WAY VALVE According to the diagram below, C is the input terminal, and the output terminals are A and B. When applying phase voltage (230V AC) to the "ON" terminal, the valve will maintain its initial position of C-B, meaning that the fluid flow will occur from position C to B. When applying phase voltage (230V AC) to the "OFF" terminal, the valve will switch to position C-A, indicating that the fluid flow will occur from C to A. 8.1.6. CONTROL OF THE AFRISO THREE-WAY VALVE According to the diagram below, C is the input terminal, and the output terminals are A and B. When phase voltage (230V AC) appears at the "L" terminal, the valve maintains its initial position of C-B, meaning that the fluid flow occurs from C to B. When applying phase voltage (230V) to the "L1" terminal, the valve switches to position C-A, indicating that the fluid flow will occur from C to A. When phase voltage (230V AC) is disconnected from the L1 terminal, the valve will return to the C-B position.
- Page 23 8.2. PREPARATION OF THE SYSTEM FOR STARTUP The initial startup and heating phase must be carried out by a qualified and authorized specialist, such as an Authorized Service Partner. Before the system is started for the first time, it should be filled with treated heating water (according to requirements). The following points should be checked before starting up: Before commencing work, the power supply to the heat pump should be disconnected at the circuit breaker. All hydraulic connections must be installed and leak-free. All valves in the heating circuit must be open. Partially closed valves could adversely affect the proper flow of heating water. All settings of the heat pump controller should be adjusted to the heating installation as per the instructions. The heating water circuit and buffer tank must be fully filled and purged of air. Purging of the heating installation - ensure that all heating circuits are open, purge the system at the highest point, and if needed, top up the water (maintain minimal static pressure). Check the insulation condition and correctness of electrical connections. It's important that they are properly protected and routed to prevent contact with liquid during filling and system operation. After completing the heating process, the set temperature value and actual temperature should show approximate values. If the water in the buffer tank is being heated, there will be a change in the tank's volume. 9. USAGE The installer should inform the user about the functions of the heat pump and provide necessary information for its safe usage. Before starting operation, it is important to read and understand this manual thoroughly, as well as the instructions of other applied devices, and adhere to the guidelines provided. The use of the heat pump should not be entrusted to children or individuals with limited physical, sensory, or intellectual abilities, or to individuals without the required experience and knowledge, unless they are supervised or instructed on how to use the device by a person responsible for their safety. The device should be stored out of the reach of children. ATTENTION Before starting to use the heat pump, it is necessary to inspect the overall technical condition of the unit. Please check if: All pipe connections are tight and not leaking.
-
Page 24: Kinspection And Maintenance
10. INSPECTION AND MAINTENANCE External parts can be cleaned using a damp cloth and commonly available cleaning agents. Do not use any caustic cleaners or thinners to clean the device. In hospitals and other public utility buildings, adhere to the applicable regulations regarding cleaning and disinfection. If there is a risk of freezing during the shutdown of the heat pump, it is also important to consider that the risk of freezing extends not only to the water in the buffer tank but also to the water in all pipes leading to the radiators. Therefore, it is recommended to drain all fittings and pipes supplying water in the heating circuits. 10.1. MAINTENANCE During the inspection of control and protective devices, adjustments to the setpoint should not be made without justification. Pay special attention to whether various operational parameters of the system are within normal range during operation. Regularly check if the terminals of the electrical wiring are loose; if they are, tighten the terminal screws. Regularly inspect the condition of electrical components and promptly replace any damaged elements. After prolonged operation, calcium oxide or other minerals may deposit on the surface of the copper tubing in the heat exchanger. Deposits on the heat exchange surface will affect the efficiency of heat exchange and lead to increased energy consumption and higher refrigerant pressure. As the pressure drops, the amount of hot water to the unit decreases. The heat exchanger can be cleaned with organic acids such as formic acid, citric acid, and acetic acid. Dust from the fins of the evaporator should be blown off regularly (usually once a month) using compressed air with a pressure greater than 0.6 MPa, brushed with a specially designed metal comb, or flushed with pressurized water. If there is excessive dirt, use a brush with a strong detergent to clean it. After a longer period of inactivity, when starting the device, perform the following preparatory actions: thoroughly inspect and clean the device, clean the water installation, check the water pump, and tighten all pipe connections. Use original manufacturer's parts for repairs, and avoid using similar parts from other companies. 10.2. LEAK DETECTION AND PRESSURE TESTING During leak detection and pressure testing, never fill the cooling system with oxygen, acetylene, or other flammable and toxic gases. Only compressed air, nitrogen, or refrigerants should be used for such tests. 10.3. DISMANTLING THE COMPRESSOR Perform the following steps: Turn off the electrical power at the main device switch. -
Page 25: Error Codes
11. ERROR CODES ERROR CODE ERROR DESCRIPTION POSSIBLE CAUSES OF FAILURE AND THEIR DIAGNOSTIC METHODS E 01 Incorrect power connection Phase sequence error Fault, loss of one or two phases E 02 Lack of power supply, missing phase of power supply Check if the circulation water pump is functioning normally and if the water system is not blocked Verify if the flow sensor model is operational and if the installation direction is correct Flow sensor malfunction or low E 03 Ensure that the wiring of the flow sensor port is correct water flow protection Confirm if the water pump meets the actual requirements (generates appropriate flow) Check if the water pump operates in the same direction as the installation Communication error between Check the communication connection between the main control board and E 04 main control board and wall the wall controller controller Check if the pressure sensor is damaged or if the wiring is incorrect Too much refrigerant in the system High pressure sensor... - Page 26 ERROR CODE POSSIBLE CAUSES OF FAILURE AND THEIR DIAGNOSTIC METHODS ERROR DESCRIPTION Compressor recharging sensor Sensor cable is disconnected or short-circuited E 18 failure Sensor is damaged Temperature sensor wire is disconnected or short-circuited E 20 Room temperature sensor failure Sensor is damaged Main board port is damaged Temperature sensor wire is disconnected or short-circuited E 21 External sensor failure Sensor is damaged Main board port is damaged Temperature sensor wire is disconnected or short-circuited Outlet temperature sensor E 22 Sensor is damaged T8 – T13 failure Main board port is damaged Check if water flow is too low or absent Water system overcooling E 23 Check if water outlet probe is damaged protection Check if heating/cooling system is operating correctly Refrigeration system tempera- Temperature sensor wire is disconnected or short-circuited E 24 ture sensor error, evaporator...
- Page 27 ERROR CODE POSSIBLE CAUSES OF FAILURE AND THEIR DIAGNOSTIC METHODS ERROR DESCRIPTION Failure of the water-side outlet Disconnected or short-circuited sensor cable E 42 temperature sensor T4 on the Damaged sensor plate heat exchanger Damaged main board port Protection against low ambient E 44 Standard protection (not a device error) temperature E 47 Economizer sensor error Model board error Contact service E 48 Economizer sensor error Model board error Contact service Economizer outlet sensor is E 49 Same as E 47 damaged E 51 High pressure protection Same as E 05 Low pressure overload E 52 Same as E 06 protection Weak contact or broken signal lines Incorrect communication on the E 55...
-
Page 28: Troubleshooting
12. TROUBLESHOOTING FAILURE POSSIBLE CAUSES METHODS OF DETECTION AND EXCLUSION High exhaust Air or other non-condensable gas in the water Remove air from the water-side heat exchanger pressure system Clean the water-side heat exchanger to remove Possible scaling or fouling of the water-side scaling or fouling heat exchanger Inspect water pipelines and pumps to ensure Insufficient water flow proper water flow Excessive refrigerant charge. Replace and weigh the appropriate amount of refrigerant Low exhaust Insufficient refrigerant charge Replace and weigh the appropriate amount of pressure Low suction pressure refrigerant Liquid refrigerant entering the compressor Check and address low suction pressure issues directly from the evaporator. Examine the evaporator for signs of refrigerant liquid entering directly High suction Excessive refrigerant charge Release a portion of the refrigerant pressure Malfunctioning four-way valve Replace the four-way valve Weak compressor compression... -
Page 29: Electrical Schematic
13. ELECTRICAL SCHEMATIC 13.1. HEAT PUMP TH-R290-S06-1P High Pressure Sensor Low Pressure Sensor Refrigeration anti-freeze Temp Outlet Water Temp Inlet Water Temp Ambient Temp 1 Inner Coil Temp Gas Exhaust Temp Gas Suction Temp Coil Temp 220-240V/1N~/50Hz... - Page 30 13.2. HEAT PUMP TH-R290-S10-3P High Pressure Sensor Low Pressure Sensor Refrigeration anti-freeze Temp Outlet Water Temp Inlet Water Temp Ambient Temp 1 Inner Coil Temp Gas Exhaust Temp Gas Suction Temp Coil Temp 380-415V/3N~/50Hz...
- Page 31 13.3. HEAT PUMP TH-R290-S16-3P High Pressure Sensor Low Pressure Sensor Refrigeration anti-freeze Temp Outlet Water Temp Inlet Water Temp Ambient Temp 1 Inner Coil Temp Gas Exhaust Temp Gas Suction Temp Coil Temp 380-415V/3N~/50Hz...
- Page 32 14. TOUCH SCREEN WIRING CONTROLLER MANUAL 14.1. CONNECTING THE WIRED CONTROLLER WITH LCD DISPLAY After connecting the controller's power supply, select the appropriate language option and click the checkmark to enter the system. If you do not select a language within 2 minutes, the system will automatically enter the system in the current language.
- Page 33 Error Display: When a unit malfunction occurs, the icon will blink. You can click on the icon to view current errors or error records. Displaying defrosting: When the unit enters defrosting mode, the icon is always illuminated. Blinking display when refrigerant recovery is in progress. Cascade mode display: When the unit network is enabled, the icon is always illuminated. Quiet mode display: When the unit enters quiet operation mode, the icon is always illuminated. Displaying timer mode: When the timer mode function is enabled, the icon is always illuminated. Displaying water pump operation: When the water pump is running, the icon is always illuminated. Displaying return water: When the return water valve is activated, the icon is always illuminated. When the return valve is not activated, set the return water time. Displaying electric heating operation: When the electric heater is turned on, the icon is always illuminated. If the electric heater is not turned on, and the quick heating function is enabled, the icon will flash more frequently If the electric heater is not turned on and the sterilization function is enabled, the icon will flash less frequently Displaying compressor operation: When the compressor is running, the icon is always illuminated. Displaying fan motor operation: When the fan is running, the icon is always illuminated. Displaying Wi-Fi connection: When the unit successfully connects to the Wi-Fi network, the icon is always illuminated. 14.3.
- Page 34 HEATING COOLING UNDERFLOOR HEATING HOT WATER HOT WATER + COOLING HOT WATER + HEATING HOT WATER + UNDERFLOOR HEATING 14.3.3. SETTING THE TEMPERATURE 14.3.4. SINGLE MODE (HEATING, COOLING, UNDERFLOOR HEATING, HOT WATER) You can click the "+" or "-" button to adjust the set temperature for the current mode. You can also slide the slider to set the desired temperature for the current mode. You can also click "Set Temperature Value," enter the desired temperature on the displayed keyboard, and then press "Enter" to make the modification.
- Page 35 14.4. QUICK HEATING, QUIET MODE, FORCED DEFROST, SYSTEM BLEEDING, HIGH-TEMPERATURE DOMESTIC HOT WATER STERILIZATION On the illuminated screen in the main interface, click the upward arrow to go to the function selection page. Then click to enter user operation. From top to bottom, there are modes: quiet mode, strong mode, high-temperature sterilization, forced defrost, manual quick heating, system bleeding. Click the appropriate button to activate/close the respective function. 14.5. FACTORY MODE On the illuminated screen, click the upward arrow to go to the function selection page, then click Type "1122" on the keyboard that appears, press "Enter" to enter the factory mode, and then click (Inverter Test) to confirm. In factory mode, you will be able to perform various operations related to device configuration and diagnostics. However, be cautious and aware that changes made in factory mode can affect the device's operation.
- Page 36 14.6. REFRIGERANT RECOVERY FUNCTION On the illuminated screen, click the upward arrow to go to the function selection page, then click to enter the refrigerant recovery function. A keyboard will appear, where you should enter "1122," and then press "Enter" to enter factory mode. Next, press and hold the (Refrigerant Recovery) button for at least 3 seconds to initiate the refrigerant recovery process. 14.7. QUERYING DEVICE'S CURRENT OPERATION PARAMETERS On the illuminated screen, click , to go to the query page, then click to access the Temperature Status overview. When the network is enabled, press to select a number. Click the relevant online unit number to query the temperature status for the respective unit. Units with a gray background (not illuminated) are offline. 14.8. PARAMETER SETTINGS On the illuminated screen, click , to access the settings page, then click to enter the parameter settings page. When the network is active, press to select a group number. Click the relevant online unit number to access the parameter settings for the respective unit. Units with a gray background (not illuminated) are offline.
- Page 37 At this point, you can press to check the value of each parameter. Click the parameter you want to modify. A page for modifying parameters will appear. On this page, you can see the parameter number, the current parameter value, the set value, and the range of settings. Click the parameter value on the keyboard that appears to enter the set value, then press "Enter." Click again on the "Enter" on the following page to save the parameters. Click on this page to move to the next parameter. 14.9. ERROR DISPLAY In case of a device malfunction, the icon will flash on the display. After the fault is resolved, the icon will disappear. Click the icon to access the error query page. It is possible to display a maximum of 20 current errors and 50 historical errors. The error code 00E03 indicates that 00 is the main unit, and 02, 03, etc., represent the subunits. E03 signifies the error code. Click "Check historical errors" to view previous errors. Click "Check current error" to view the current error. Click "Clear historical errors" to remove errors from the history. On the illuminated screen, press "Enter the query page" and click "Enter the error query."...
- Page 38 14.10. SETTING THE CLOCK On the illuminated screen, press and click . Click the appropriate year, month, and day to enter the value on the keyboard, then press "Enter" to save the time. 14.11. SETTING TIME-BASED ON/OFF CONTROL On the illuminated screen, press and click . If you want to enable weekly timers, click any button from Monday to Sunday to start setting the weekly timers. Click the time period to enter the time settings for that period. Use the keyboard to enter the appropriate time. Click the button to enable or disable this time segment. Press "OK" to save the settings.
- Page 39 14.12. SETTING THE RETURN WATER TEMPERATURE On the illuminated screen, press , and then enter the return water temperature settings page by clicking the appropriate button. to enter the time settings page for return water. 14.13. WI-FI SETTINGS On the illuminated screen, press to go to the function selection page. Then click to enter the Wi-Fi operation interface. Press to enter the appropriate Wi-Fi network distribution mode. The Wi-Fi mode operates for 3 minutes and will automatically turn off afterward. 14.14. SETTING SCENARIOS (WEEKLY WORK SCHEDULE) On the illuminated screen, press to enter the function selection page. Then click to enter the scenario settings screen. You can set up to 6 scenarios for each day. You can set them for daily or weekly time cycles. Click to enable or disable this scenario setting. Click the selected scenario segment to modify it. By clicking on the pattern area , you can change the mode. Click the appropriate value to modify it using the keyboard. Click to enable or disable this scenario setting.
- Page 40 14.15. SEARCHING FOR POWER MODULE PARAMETERS (OPTIONAL) If the unit is equipped with a battery module, on the illuminated screen, press , to enter the query page, and then click to enter the power supply unit information search page. You can check total energy consumption, current power, voltage, and current parameters. 14.16. CURRENT WORK CHARTS On the illuminated screen, press , to enter the query page, and then click to enter the curve query page. It records the input water curves, output water curves, compressor frequency, and ambient temperature within 24 hours.
- Page 41 14.17. CURVE SETTINGS On the illuminated screen, press , to enter the query page, and then click to enter the curve setting page. Click , to switch to the curve difference setting mode, and then click to select different curve control. The parameters of the current curve are displayed in the curve area. 14.18. BRIGHTNESS SETTINGS On the illuminated screen, press , to enter the settings page, and then click to enter the brightness settings page. Move the slider to set different brightness levels. Click , to switch between different languages: Polish, English.
- Page 42 14.19. RESTORE FACTORY SETTINGS On the illuminated screen, press , to enter the settings page. Click to enter the factory settings restoration page, and then click "YES" to restore factory settings. 14.20. CHECK PROGRAM VERSION On the illuminated screen, press , to enter the settings page. Click to view the program version numbers for the display and mainboard. 15. CASCADE THERMATEC INSTRUCTIONS 15.1. HARDWARE CONNECTION OF CASCADE UNITS AND SETTING OF DIALING CODE 1. You should wire it according to the diagram below using the appropriate COM1 communication ports. This represents the correct cascade connection between the main unit and the subordinate unit. Indicates the number Indicates the address of subordinate units of the subordinate unit...
- Page 43 2. The DIP switch is set to the appropriate device address - 00 represents the host; 01, 02, 03, 04, etc. represent subordinate devices. TABLE OF CODES FOR CASCADE DEVICES SERIAL SET 1 SET 2 SET 3 SET 4 MEANING REMARKS NUMBER Host Slave 1 Slave 2 Slave 3 Slave 4 Slave 5 Slave 6 Slave 7 3. The device requires a power cycle. When the screen is on, press , to enter the query page. Click to switch to the temperature status = working view. During cascade network operation, press , enter the unit number, and click the appropriate online unit number to enter the temperature status query for the respective unit. Units with gray backgrounds (not illuminated) are not online.
-
Page 44: Sg Ready
16. SG READY 16.1. CONNECTION SCHEME The smart network consists of two signals (SG, EVU) sharing the COM port. They are marked in red on the output diagram. 16.2. WIRE CONNECTION H: Network signal SGM: Photovoltaic signal EVU C3: Common GND terminal for EVU and SG 16.3. ENABLING THE SMART NETWORK P255 P256 Smart network selection: 0/1 Operating time for 0: Enable the highest energy 1: Disable demand: 5 to 999 minutes. - Page 45 16.4. DESCRIPTION OF INTELLIGENT NETWORK FUNCTION Signal Selection Using Two Inputs: FUNCTION DESCRIPTION The same logic is common for both states: the heat pump can operate in both room heating, underfloor heating, and cooling mode, as well as in domestic hot water heating mode. The heat pump will be actively engaged in the domestic hot water heating mode. If the heat pump is in room heating mode, the device will be forced to switch to heating + domestic hot water (DHW) mode, where priority is given to the current domestic hot water (DHW) mode. The heat pump and electric water heating in the DHW tank are turned on, and the compressor operates at a high frequency. When the DHW tank temperature >60°C, the compressor stops working, but the electric water heating in the DHW tank remains on. Then, when the DHW tank temperature >70°C, the electric water heating in the DHW tank will be turned off, and the heat pump switches to room heating mode. When the inlet water temperature >60°C, the compressor and additional electric heating will be turned off. If the heat pump is in underfloor heating mode, the device will be forced to switch to underfloor heating + domestic hot water (DHW) mode. In this mode, priority is given to the domestic hot water (DHW) mode in the DHW tank. The heat pump and electric water heating in the DHW tank are turned on, and the compressor operates at a high frequency. When the DHW tank temperature >60°C, the compressor stops working, but the electric water heating in the DHW tank remains on. When the DHW tank temperature >70°C, the electric water heating in the DHW tank will be turned off, and then it switches to room heating mode. When the buffer water temperature exceeds 60°C, the compressor and additional electric heating for the buffer will be turned off. If the heat pump is in cooling mode, the device will be forced to switch to cooling + domestic hot water (DHW) mode. In this mode, priority is given to the domestic hot water (DHW) mode in the DHW tank. The compressor operates at a high frequency, and electric water heating in the DHW tank is turned on. When the DHW tank temperature >60°C, the compressor stops working, but electric water heating in the DHW tank continues to operate. When the DHW tank temperature >70°C, the electric water heating in the DHW tank is turned off. When the water temperature at the heat pump outlet drops below 10°C, it switches to cooling mode. When the water temperature...
-
Page 46: Wi-Fi Connection
17. WI-FI CONNECTION 1. Download and install the Smart Life - 2. Accept the privacy policy. 3. Register or log in if you already Smart Living software. have an active account. 4. During registration, provide the 5. Enter the verification code sent to you. 6. After completing the registration, necessary information and give the open the application. required consents. - Page 47 7. Your phone must be connected to 8. After logging in, users can add devices. 9. The device linking process can be a Wi-Fi network. This connection pertains Device linking: Click on „+” or „Add Device” automatic or manual. to an internet-accessible Wi-Fi network, to initiate the device linking process. not directly to the device’s module. 10. Once devices are successfully linked, 11. You can choose the operating mode 12. You can also adjust temperature you can proceed to control the heat pump and control device power on and off. settings and device operating times. settings.
-
Page 48: Dtu System
18. DTU SYSTEM The DTU (Data Transmission Unit) system provides remote management for the Thermatec heat pump. It allows for monitoring of hardware data by APS service units, analysis of operation, parameter adjustments, and online software updates. It enables the assignment of the device to the servicing company, as well as the classification of devices distributed in the Polish and European markets. FUNCTIONALITY DESCRIPTION OF THE SYSTEM: DTU System Homepage - IoT Platform The platform displays the number of devices, fault alarms, and user statistics depending on the equipment's status in the system. It provides real-time monitoring of the operation status of all devices with location mapping, as well as online device status and alarm statistics. Product Management You can create and edit the required product, define product functional points, and select the data to be displayed for a given product. Device Management • Equipment List: Displays all equipment and related properties in real-time in a list format, allowing detailed equipment information to be viewed. • Stores all equipment purchased by the installer: Importing equipment into the system. Incident Management • Alarm List: Displays records of alarms generated by equipment in the system in a list format, allowing the viewing of alarm details. • Device Log: Displays historical data reported by the device in the form of a file. It shows the original data reported by the device and provides the ability to analyze this data. Distributor Management Allows for quick identification of who and when sold a particular device. - Page 49 NOTES...
- Page 50 NOTES...
- Page 51 NOTES...
- Page 52 MANUFACTURER’S STAMP TH-R290-S06-1P THERMATEC | Home Star sp. z o.o. Office: (+48) 32 722 02 03 TH-R290-S10-3P Misjonarzy Oblatów MN 20A Mobile Phone: (+48) 533 222 223 TH-R290-S16-3P 40-129 Katowice, Polska [Poland] biuro@thermatec.pl www.thermatec.eu | www.thermatec.pl | www.thermatec.cz | www.thermatec.fi | www.thermatec.nl...
Need help?
Do you have a question about the PLUS S TH-R290-S10-3P and is the answer not in the manual?
Questions and answers