
Related Manuals for Kalora 500C Series


Summary of Contents for Kalora 500C Series
- Page 1 HEATER RANGE USER MANUAL SERIES Kalora 425R Kalora 500C Kalora 500BX Woodstack Kalora 600C Kalora 600BX Woodstack Kalora Pty Ltd Head Office 58 Access Way Carrum Downs VIC 3201 Australia +61 3 8579 5900 info@kalora.com.au www.kalora.com.au Version: v1.0...
- Page 3 This instruction manual has been developed to ensure optimum performance from your Kalora wood heater. It’s very important that you thoroughly read and understand all instructions before using your new wood heater.
- Page 4 WOOD HEATER SAFETY When properly maintained and operated your wood heater should give you many years of service, however there are important safety aspects of these products that you need to be aware of when operating a wood heater. This appliance is not intended for use by persons (including children) with reduced physical, sensory or mental capabilities, or lack of experience and knowledge, unless they have been given supervision or instruction concerning use of the appliance by a person responsible for their safety.
- Page 5 BEFORE INSTALLING YOUR WOOD HEATER You need to consider the following to ensure the safe operation of your wood heater: - Provision of adequate air to support efficient combustion of the fuel. - A well sealed flue/chimney system, hereinafter referred to as the “flue system”. - The protection of combustible materials in proximity of the wood heater.
- Page 6 950mm All measurements are in ‘mm’ The above clearances are applicable when using the Kalora Decorative mesh flue kit. (Decorative flue is fitted with an additional heat shield.) Manufacturers recommendation: Keep all combustible materials at least 1.22 metres (4 feet) away from the appliance.
- Page 7 INSTALLATION ..continued FOR CONNECTING INTO A STANDARD INSTALLATION. The following drawing is meant as a guide only. Your wood heater must be installed by a qualified person whose work conforms with local council regulations, Australian/New Zealand standards (AS/NZS 2918:2018) & manufacturers recommendations.
- Page 8 INSTALLATION ..continued Position the drop box between the angle brackets, keeping a 25mm clearance to combustibles. The located end of the drop box must protrude no less than 150mm down from the ceiling or any combustible material. Fix the drop box to the angle brackets. Add the remaining casings to the required height.
- Page 9 MINIMUM INSTALLATION CLEARANCES FIGURE 1 Min. 6m Increase flue length as necessary until nothing within 6m of flue top ANY NEARBY STRUCTURE FIGURE 2 MINIMUM INSTALLATION CLEARANCES...
- Page 10 INSTALLATION ..continued FIREBOX ASSEMBLY: Remove all loose items from the fire box. First install the top baffle. Place the baffle in the firebox with the bent edges facing the same direction as in the below drawings. Lift the front edge of the baffle up and rest it on the top of the front baffle support lugs, continue to lift the rear of the baffle over the rear lugs, you will need to slide the baffle forward to clear the rear lugs.
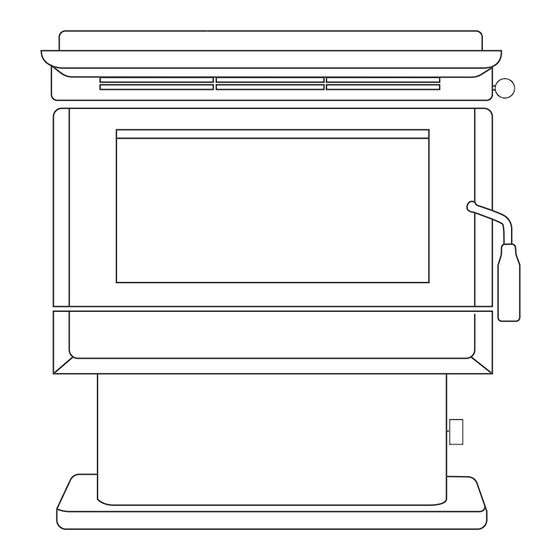
- Page 11 OPERATING YOUR WOOD HEATER FAN OPERATION Step 1 Plug heater into a power outlet Step 2 Locate fan switch on pedestal Step 3 Adjust 3 speed fan as desired Excludes KA425R CONTROLS AND THEIR USE Power cable for fan operation 3 Speed Fan switch Air Slide to control primary air intake OPEN...
- Page 12 During overnight burning, the wood heater glass may blacken, but when a hot fire is established again this should burn off. Please note: Kalora 425R S2 does not support overnight burning due to the size of the firebox.
- Page 13 WOOD HEATER MAINTENANCE CHECK YOUR WOOD HEATER REGULARLY Initially, we recommend you check your flue system at least once per month. After the first few months you will notice a pattern of soot and creosote build up and you can then determine an inspection interval for checking soot and creosote build up that is suitable for your wood heater installation.
- Page 14 WOOD HEATER MAINTENANCE ..continued ASH REMOVAL When the stove is out and completely cold you may remove the ash using an ash vacuum or a steel bucket with a lid and shovel. Place a cover over the bucket so that when removing the bucket the ash does not blow about your house.
- Page 15 TROUBLE SHOOTING Many people under estimate the importance of using a professional installer with experience in wood heating who adheres to Australian Standards to install their wood fire. If you are having issues with your wood fire not working the way you think it should, we implore you to speak to your installer first;...
- Page 16 WARRANTY KALORA LIMITED WARRANTY This limited warranty is given by KALORA Pty Ltd (ACN 005 868 093) (Kalora or we) to the original retail purchaser (you) of the wood heater to which this Warranty applies. Our goods come with guarantees that cannot be excluded under the Australian Consumer Law. You are entitled to a replacement or refund for a major failure and for compensation for any other reasonably foreseeable loss or damage.
- Page 17 To obtain replacement or repair under this Warranty, the wood heater must be returned to the original place of purchase (and collected from there once the replacement or repair is complete) at your cost. Kalora will not be responsible for any associated freight, disconnection or re-installation costs (including labour costs). Kalora will only be responsible for transport of the wood heater from the original place of purchase to Kalora’s premises (and...
- Page 20 Kalora Pty Ltd 58 Access Way, Carrum Downs Victoria 3201 Australia...
Need help?
Do you have a question about the 500C Series and is the answer not in the manual?
Questions and answers