
Related Manuals for Bose LIFESTYLE AV 48


Summary of Contents for Bose LIFESTYLE AV 48
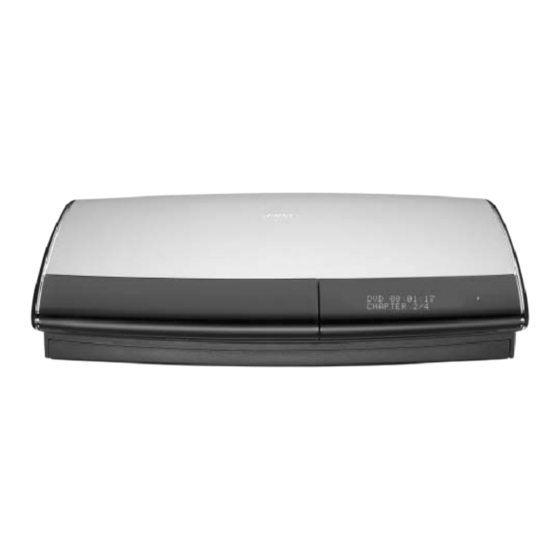
- Page 1 ® Lifestyle AV38/48 Media Center Service Manual © 2009 Bose Corporation 271000AV38-SM REV08 Electronic copy only...
-
Page 2: Table Of Contents
THIS DOCUMENT CONTAINS PROPRIETARY INFORMATION OF BOSE CORPORATION WHICH IS BEING FURNISHED ONLY FOR THE PURPOSE OF SERVICING THE IDENTIFIED BOSE PRODUCT BY AN AUTHORIZED SERVICE CENTER OR OWNER OF THE BOSE PRODUCT, AND SHALL NOT BE REPRODUCED OR USED FOR ANY OTHER PURPOSE. -
Page 3: Safety Information
SAFETY INFORMATION 1. Parts that have special safety characteristics are identified by the symbol on schematics or by special notes on the parts list. Use only replacement parts that have critical characteristics recom- mended by the manufacturer. 2. Make leakage current or resistance measurements to determine that exposed parts are acceptably insulated from the supply circuit before returning the unit to the customer. -
Page 4: Product Description
The software in the AV38 and AV48 Media Center can be updated using a software update CD avail- able from Bose service or downloaded at http://serviceops.bose.com. Refer to page 50, Console Key Special Functions, to determine the software version of the unit. Refer to the Bose service extranet ®... -
Page 5: Specifications
AM antenna: 12uH TV Sensor: Scan frequency sensing ® Outputs: Speaker Main and Bose link: Variable audio, user selectable Audio out: Left and Right: Fixed audio, 2 Vrms maximum Digital audio out: SPDIF Optical output: SPDIF, -15 to -21 dbm Composite video: NTSC or PAL 1Vp-p with sync 75 ohm S-Video: Luminance 1 Vp-p chrominance 0.3Vp-p... -
Page 6: Part List Notes
18, 35, 38, or 48 system, refer to the instructions located on page 53 for setting the equalizer using TAP com- mands. In place of using TAP commands to set the EQ, the customer may use the Bose ® AdaptIQ ®... -
Page 7: Commonly Requested Parts
Commonly Requested Parts Remote REMOTE, RF, AV38, MAIN ROOM, USA 270606-011 REMOTE, RF, AV38, MAIN ROOM, EURO 270606-012 EURO BATTERY, AAA SIZE 179223-01 Dongles IR BLASTER 260335 IR BLASTER, DAISY-CHAIN 277896 SERVICE PART RC ANTENNA, REMOTE RANGE EXT, 10FT 277892-002 SERVICE PART DONGLE, TV POWER 258359... -
Page 8: Lifestyle ® 38 Home Entertainment System Packaging
Lifestyle ® 38 Home Entertainment System Packaging Item Description Part Number Note Number AV38 CONSOLE, US TUNER, RC1 318987-111F AV38 CONSOLE, EURO TUNER, RC2 318987-2123 SAT ASSY, 5 PACK, LS28, BLACK 277098-119 SAT ASSY, 5 PACK, LS28, WHITE 277098-129 SAT ASSY, 5 PACK, LS28, SILVER 277098-139 BASS MODULE, 120V, LS28, BLACK 278799-119... -
Page 9: Lifestyle ® 48 Home Entertainment System Packaging
® Lifestyle 48 Home Entertainment System Packaging Item Description Part Number Note Number CONSOLE, AV48, US TUNER, RC1, MX 318987-121F CONSOLE, AV48, EURO TUNER, RC2 318987-2223 SAT ASSY, 5PK, LS-48, BLACK, MEX 277099-119 SAT ASSY, 5PK, LS-48, WHITE, MEX 277099-129 SAT ASSY, 5PK, LS-48, SILVER, MEX 277099-139 BASSMODULE, 120V, LS28, BLACK... -
Page 10: Lifestyle ® 38 Satellite Packaging
® Lifestyle 38 Satellite Packaging Item Description Part Number Note Number DOUBLE SATELLITE, BLACK 192420-119 DOUBLE SATELLITE, WHITE 192420-129 DOUBLE SATELLITE, GLOSS SILVER 192420-139 or -169 (EURO ROHS) DOUBLE SATELLITE, MATTE SILVER 194420-269 CABLES, SPKR, 18 AWG, L/C/R, BLACK 180643-4 CABLES, SPKR, 18 AWG, L/C/R, WHITE 176201-4 CABLES, SPKR, 18 AWG, L/C/R, GRAY... -
Page 11: Lifestyle ® 48 Satellite Packaging
® Lifestyle 48 Satellite Packaging Item Description Part Number Note Number JEWEL CUBE ASSEMBLY, BLACK 289523-019 JEWEL CUBE ASSEMBLY, WHITE 289523-029 JEWEL CUBE ASSEMBLY, GLOSS SILVER 289523-039 JEWEL CUBE ASSEMBLY, MATTE SILVER 289523-069 CABLE SET, 3PK, L/C/R, BLACK 193145-04 CABLE SET, 3PK, L/C/R, WHITE 193145-14 CABLE SET, 3PK, L/C/R, SLIVER 193145-24... -
Page 12: Av38/48 Media Center Packaging
AV38/48 Media Center Packaging Item Description Part Number Note Number PACKING, TOP, EPS 258467 PACKING, PAD, EPS 269144-001 REMOTE, RF, AV38, MAIN ROOM, USA 289138-011 REMOTE, RF, AV38, MAIN ROOM, EURO 289138-012 EURO REMOTE, IR, AV38, MAIN ROOM, JAPAN 270618-013 JAPAN BATTERY, AAA SIZE 179223-01... -
Page 13: Lifestyle 38/48 Home Entertainment System
® Lifestyle 38/48 Home Entertainment System Essentials Kit Packaging Item Description Part Number Variant Packaging Note Number 294295-001 120V POWER PACK, 35W, 120V, DCS-91 294295-007 230V POWER PACK, 35W, 230V, DCS-92 294295-004 DUAL POWER PACK, 35W, DUAL-V, DCS-94 LINE CORD, 120V, AV18/28/38/48 279101-0310 US, CAN, DUAL-V LINE CORD, 220V, AV18/28/38/48... -
Page 14: Lifestyle 38/48 Home Entertainment System
Lifestyle 38/48 Home Entertainment System Literature Kit Packaging Description Part Number Variant Packaging SHEET SLIP COMPONENT AUDIO 255805 ADDRESS PAGE, BOSE 289347-001 GUIDE, OPER, LS38/48 3-LANG 289328-001 (English, Spanish, French) GUIDE, INSTALL, LS38/48, 3-LANG 289316-001 289329-001 GUIDE, OPER, LS38/48 5-LANG... -
Page 15: Av38/48 Media Center Main Part List
AV38/48 Media Center Main Part List Refer to figure 5. Item Description Part Number Note Number 301728-005 or 301728-006 DVD-ROM, ALL VARIANTS Refer to service bulletin 271000-B7 HARD DRIVE, PROGRAMMED 282960-020S MAIN PCB, US, EU 323602-012S MAIN PCB JAPAN 309206-513 or 323766-03 1, 2 TUNER PCB USA 307432-101... - Page 16 Tuner PCB IR Blaster PCB Part of Main PCB Main PCB Headphone PCB Part of Main PCB Figure 7. AV38 Media Center Exploded View...
-
Page 17: Main Pcb Electrical Part List
Main PCB Electrical Part List Resistors Reference Description Part Number Note Designator 9.09K OHMS, 0603, .1W, 1% 191465-9091 1K, 0603, .1W, 1% 191465-1001 33.2K, 0603, .1W, 1% 191465-3322 33.2K, 0603, .1W, 1% 191465-3322 1K, 0603, .1W, 1% 191465-1001 1K, 0603, .1W, 1% 191465-1001 6.04K, 0603, .1W, 1% 191465-6041... - Page 18 Main PCB Electrical Part List Resistors (continued) Reference Description Part Number Note Designator R4015 100K, 0603, .1W, 1% 191465-1003 R4016 100K, 0603, .1W, 1% 191465-1003 R4018 150 OHMS, 0603, .1W, 1% 191465-1500 R4019 150 OHMS, 0603, .1W, 1% 191465-1500 R4020 49.9 OHM, 0603, .1W, 1% 191465-49R9 R4021...
- Page 19 Main PCB Electrical Part List Resistors (continued) Reference Description Part Number Note Designator R5000 75 OHMS, 0603, .1W, 5% 199403-750 R5001 75 OHMS, 0603, .1W, 5% 199403-750 R5002 75 OHMS, 0603, .1W, 5% 199403-750 R6200 10K, 0603, .1W, 5% 199403-103 R6201 1K, 0603, .1W, 5% 199403-102...
- Page 20 Main PCB Electrical Part List Resistors (continued) Reference Description Part Number Note Designator R6721 2.21K, 0603, .1W, 1% 191465-2211 R6723 10 OHM, 0603, .1W, 5% 199403-100 R6724 2.21K, 0603, .1W, 1% 191465-2211 R6751 4.75K, 0603, .1W, 1% 191465-4751 R6752 1K, 0603, .1W, 1% 199403-102 R6753 1K, 0603, .1W, 5%...
- Page 21 Main PCB Electrical Part List Resistors (continued) Reference Description Part Number Note Designator R7753 100 OHM, 0603, .1W, 5% 199403-101 R7754 100 OHM, 0603, .1W, 5% 199403-101 R7755 100 OHM, 0603, .1W, 5% 199403-101 R7756 100 OHM, 0603, .1W, 5% 199403-101 R7757 22 OHMS, 0603, .1W, 5%...
- Page 22 Main PCB Electrical Part List Resistors (continued) Reference Description Part Number Note Designator R8420 14K, 0603, .1W, 1% 191465-1402 R8421 14K, 0603, .1W, 1% 191465-1402 R8422 14K, 0603, .1W, 1% 191465-1402 R8423 14K, 0603, .1W, 1% 191465-1402 R8424 14K, 0603, .1W, 1% 191465-1402 R8425 3.24K, 0603, .1W, 1%...
- Page 23 Main PCB Electrical Part List Capacitors Reference Description Part Number Note Designator .047uF, 0805, X7R, 50V, 10% 133623-473 .047uF, 0805, X7R, 50V, 10% 133623-473 .047uF, 0805, X7R, 50V, 10% 133623-473 .047uF, 0805, X7R, 50V, 10% 133623-473 .047uF, 0805, X7R, 50V, 10% 133623-473 .047uF, 0805, X7R, 50V, 10% 133623-473...
- Page 24 Main PCB Electrical Part List Capacitors (continued) Reference Description Part Number Note Designator C4010 47uF, EL, 85, 16V, 20% 177902-4R7V C4011 47uF, EL, 85, 16V, 20% 177902-4R7V C4012 47uF, EL, 85, 16V, 20% 177902-4R7V C4013 47uF, EL, 85, 16V, 20% 177902-4R7V C4014 47uF, EL, 85, 16V, 20%...
- Page 25 Main PCB Electrical Part List Capacitors (continued) Reference Description Part Number Note Designator C4209 .01uF, 0603, X7R, 50V 191470-103 C4210 470pF, 0603, X7R, 50V 191470-471 C4211 470pF, 0603, X7R, 50V 191470-471 C5000 150pF, 0603, COG, 50V, 5% 188454-151 C5002 270pF, 0603, COG, 50V 188454-271 C5004 150pF, 0603, COG, 50V, 5%...
- Page 26 Main PCB Electrical Part List Capacitors (continued) Reference Description Part Number Note Designator C6700 330pF, 0603, COG, 50V, 5% 188454-331 C6701 330pF, 0603, COG, 50V, 5% 188454-331 C6702 330pF, 0603, COG, 50V, 5% 188454-331 C6703 330pF, 0603, COG, 50V, 5% 188454-331 C6704 330pF, 0603, COG, 50V, 5%...
- Page 27 Main PCB Electrical Part List Capacitors (continued) Reference Description Part Number Note Designator C7253 47uF, EL, 85, 16V, 20% 177902-470C C7254 .047uF, 0603, X7R, 5%, 25V 196999-473 C7255 .047uF, 0603, X7R, 5%, 25V 196999-473 C7256 .047uF, 0603, X7R, 5%, 25V 196999-473 C7257 .047uF, 0603, X7R, 5%, 25V...
- Page 28 Main PCB Electrical Part List Capacitors (continued) Reference Description Part Number Note Designator C8409 .047uF, 0603, X7R, 5%, 25V 196999-473 C8410 1000pF, 0603, X7R, 50V 191470-102 C8411 .047uF, 0603, X7R, 5%, 25V 196999-473 C8425 .047uF, 0603, X7R, 5%, 25V 196999-473 C8426 220pF, 0603, COG, 50V, 5% 188454-221...
- Page 29 Main PCB Electrical Part List Diodes (continued) Reference Description Part Number Note Designator D5002 BAV99, SOT-23 147239 D5003 BAV99, SOT-23 147239 D6201 SHOTTKY, BAT42W, SOD-123 196984-002 D6500 BAV99, SOT-23 147239 D6700 BAV99, SOT-23 147239 D6701 BAV99, SOT-23 147239 D6702 BAV99, SOT-23 147239 D6703 BAV99, SOT-23...
- Page 30 Main PCB Electrical Part List Transistors Reference Description Part Number Note Designator Q4211 BPLR, N, 40V, 200mA, SOT23 146819 Q5000 BPLR, N, 4.7K, SOT23 192603 Q6400 BPLR, N, 40V, 200mA, SOT23 146819 Q6503 SOT-23 260354-001 Q6504 BPLR, N, 4.7K, SOT23 192603 Q6700 SOT-23...
- Page 31 Main PCB Electrical Part List Inductors Reference Description Part Number Note Designator 300uH 180504 100uH 131297 L3200 22uH, COMMON MODE 187598-220 or 309310-220K L4300 SMT, 100uH 178370-101 L4301 SMT, 100uH 178370-101 L5000 CERAMIC, 1812, 5%, 1.0UH 263452-1R0J L5001 CERAMIC, 1812, 5%, 1.0UH 263452-1R0J L5002 CERAMIC, 1812, 5%, 1.0UH...
-
Page 32: Tuner Pcb Electrical Part List
Tuner PCB Electrical Part List Resistors Reference Description Part Number Note Designator 845 OHM, 603, .1W, 1% 191465-8450 121 OHMS, 0603, .1W, 1% 191465-1210 33.2K, 0603, .1W, 1% 191465-3322 13K, 0603, .1W, 1% 191465-1302 10K, 0603, .1W, 1% 191465-1002 3.74K, 0603, .1W, 1% 191465-3741 1 OHM, 2010, 1/2W, 5% 187608-1R05... - Page 33 Tuner PCB Electrical Part List Resistors (continued) Reference Description Part Number Note Designator R2083 51 OHM, 0603, 100mW, 5% 199403-510 R2084 1K, 0603, .1W, 1% 191465-1001 R2085 3.32K, 0603, .1W, 1% 191465-3321 R2090 100K, 0603, .1W, 5% 199403-104 R2200 2.0K, 0603, .1W, 5% 199403-202 R2201 2.0K, 0603, .1W, 5%...
- Page 34 Tuner PCB Electrical Part List Resistors (continued) Reference Description Part Number Note Designator R7001 1K, 0603, .1W, 5% 199403-102 R7002 1.0 OHM, 0603, .1W, 1% 191465-01R0 R7003 100 OHM, 0603, .1W, 5% 199403-101 R7004 100 OHM, 0603, .1W, 5% 199403-101 R7005 100 OHM, 0603, .1W, 5% 199403-101...
- Page 35 Tuner PCB Electrical Part List Capacitors (continued) Reference Description Part Number Note Designator .01uF, 0603, X7R, 50V 191470-103 C2000 , 0805, COG, 50V, 5%, 15pF 133622-150 C2001 .047uF, 0603, X7R, 5%, 25V 196999-473 C2002 .047uF, 0603, X7R, 5%, 25V 196999-473 C2003 9.1pF, 0603, COG, 50V 188454-9R1...
- Page 36 Tuner PCB Electrical Part List Capacitors (continued) Reference Description Part Number Note Designator C6750 22pF, 0603, COG, 50V, 5% 188454-220 C6751 .01uF, 0603, X7R, 50V 191470-103 C6752 1000pF, 0603, X7R, 50V 191470-102 220pF, 0603, COG, 50V, 5% 188454-221 EURO C6753 22pF, 0603, COG, 50V, 5% 188454-220 C6754...
- Page 37 Tuner PCB Electrical Part List Transistors (continued) Reference Description Part Number Note Designator Q6750 2SA1341, P, 50V 146818 Q6751 BPLR, N, 30V, 30mA, SOT-23 148781-4 Q6752 BPLR, N, 50V, 100mA, SOT23 146817 Q6753 BPLR, P, 40V, 200mA, SOT23 148596 Q6754 NPN, 1.3W, SOT-223 258416-001 Q6755...
- Page 38 Tuner PCB Electrical Part List Miscellaneous (continued) Reference Description Part Number Note Designator L6751 100nH, 0603, 5% 191488-101J 68nH, 0603, 5% 191488-680J EURO L6752 220 nH, 0805, 5% 191469-471J 220nH, 0805, 5% 191469-221J EURO L7000 220 nH, 0805, 5%, 191469-471J RR6700 27.145MHZ, RXVR, RF REMOTE 268883-001...
-
Page 39: Disassembly Procedure
Disassembly Procedure 1. Top Cover Removal Remove the six screws indicated. Lift up on rear of the cover. Rotate it slightly forward and pull it off. Note: Rotating the cover too far forward will break the tabs on the VFD Lens. - Page 40 Disassembly Procedures ESD Sensitive - Refer to page 2 2. Tuner PCB Removal Lift up the front corners of the tuner PCB. Disconnect the ribbon cable by grasping and gently pulling it off. Lift out the tuner PCB.
- Page 41 Disassembly Procedures ESD Sensitive - Refer to page 2 3. Main PCB Removal Lift up the tuner bracket and remove it While lifting on the front of the Main PCB, release the four catches indicated. Disconnect the wire connectors from the Main PCB.
- Page 42 Disassembly Procedures ESD Sensitive - Refer to page 2 4. VFD Removal Grasp the top edge of the VFD lens and rotate it forward. Grasp and pull the VFD PCB ribbon cable from connector J6500 on the main PCB. Gently press on the right tab, indicated above, and lift upward on the right side of the VFD PCB. Repeat for the left side.
- Page 43 Disassembly Procedures ESD Sensitive - Refer to page 2 5. Keypad Bezel Removal Lift upward on the keypad bezel. The DVD/CD door will detach from the DVD/CD mechanism. Remove the cable from the keypad PCB. 6. DVD/CD Mechanism Removal Press outward on the tabs indicated to release the DVD mech from the chassis. Lift out the DVD mech and disconnect the cables.
- Page 44 Disassembly Procedures ESD Sensitive - Refer to page 2 7. IR PCB Removal While lifting the edge of the IR PCB, release the clip on the left. Slide out the IR PCB to the left. 8. IR Lens Removal Press on the tabs indicated to release the IR lens. This procedure does not enable the IR PCB to be removed.
- Page 45 Disassembly Procedures ESD Sensitive - Refer to page 2 9. Hard Drive Removal Grasp the hard drive as shown and pull it out. Important! - Use caution when handling the hard drive. Only handle the hard drive by the sides. Do not grasp the hard drive from the label side and PCB side.
-
Page 46: Setting-Up A Computer To Issue Tap Commands - Av38/48
Setting-up a Computer to Issue TAP Commands - AV38/48 1. Open a terminal window. Click: Start/Program/ 4. In the “COM1 Properties” window, make the Accessories/Hyper terminal/Hyperterminal selections in the various fields as shown. 2. In the “Connection Description” window, type the name “AV38/48 media center”... -
Page 47: Issuing Tap Commands To The Av38/48 Media Center
Issuing TAP Commands to the AV38/48 media center 1. TAP Test Cable Connection - Connecting the Media Center to a Computer 1.1 Connect the test cable’s, part number 264565, DB-9 connector to the RS-232 COM port on your computer. Connect the test cable’s 3.5mm plug to the serial data jack on the AV38/48 media center. 1.2 With a Hyperterminal window open and set up as shown on page 45, apply power to the AV38/48 media center. -
Page 48: General Tap Commands
General TAP Commands SVM - Main PCB Software - response similar to P2_CON:01.01.01 SVT - Tuner PCB Software - response similar to 01.00.BB SNM - Main PCB serial number SNT - Tuner PCB serial number QD - Drive variant - response similar to 1B10, TOSHIBADVD-ROMSD-M1712 (software rev, TOSHIBADVD-ROMSD-drive type) QHI - Query Hard Disk Drive Identity Response:... -
Page 49: General Test Procedure Notes
Setting the Region Code Only 1. Set up a Hyperterminal window (reference page 45) and connect the media center to a computer to issue TAP commands (reference page 46). 2. With power applied to the media center, insert a DVD disc into the media center. The DVD disc must be of the same region code as the region code you want to change the media center to. -
Page 50: Functional/Performance Verification Tests
Functional/Performance Verification Tests AM General Test Setup 3. FM Sensitivity Performance Verification Refer to the figure below. The equivalent field intensity is 20 dB less than the generator output 3.1 Set the RF generator to 98.1 MHz, 1 kHz level or 1/20th of the output voltage. The signal mono modulation, pilot off, 75 kHz deviation, levels given do not include this factor. - Page 51 Note: The remote control is needed to turn on the Zone 2 output and should be used to verify the unit’s ability to respond to remote commands. Refer to the Bose ® Link Room Settings on page 56.
- Page 52 Functional/Performance Verification Tests 9. Hard Drive Self Test 9.1 Issue the TAP command HS (Hard Disk Self Test). You will receive an “OK” response. The test will run for 2 minutes. 9.2 To retrieve the test results, issue the TAP command QHC (Query Hard Drive Self Test Results). Refer to the table below for a list of responses.
-
Page 53: Adjustment/Performance Verification Procedures
Adjustment/Performance Verification Procedures AM Tuner General Test Setup 2. AM Tuner Adjustment Refer to the figure below. The equivalent field 2.1 Set an RF generator output for a intensity is 26 dB less than the generator output 69 dBuV/m field intensity at the unit’s antenna, level or 1/20th of the output voltage. - Page 54 Adjustment/Performance Verification Procedures FM Tuner General Test Setup 7. FM Sensitivity Verification Connect the signal generator to the FM antenna 7.1 Set the RF generator to 98.1 MHz, 1 kHz jack J2001 using a 50 to 75 Ohm matching mono modulation, pilot off, 75 kHz deviation, 26 network.
- Page 55 Adjustment/Performance Verification Procedures 10. FM Stereo Threshold Adjustment, TAP 11. TV ON Detector Verification 10.1 Issue the TAP command TF. 11.1 Apply a signal to the TV Sensor input J6300 pin 2 at the level and frequency listed in 10.2 Set the RF generator to 98.1 MHz, 1 kHz the following table.
- Page 56 Console Key Special Functions Press and hold the Enter button. The house code will be displayed. Press the Store key to cycle through the various displays. Use the Volume Up and Down buttons to change the settings. Press Store VFD Display Pressing the Volume Up or Down X Times Button Changes...
- Page 57 Bose Link Remote Setting: Switches 5-9 are for setting Bose Link (multiple room installations). If switch 5 is down, the Bose Link room will always play what is playing in the Main room. If switch 5 is up, the user can select the source for the Bose Link room.
-
Page 58: Bass Module
Bass Module Setting up a Computer to Issue TAP Commands 1. Open a terminal window. Click: Start/Pro- 4. In the “COM1 Properties” window, make the gram/Accessories/Hyperterminal/Hyperterminal. selections in the various fields as shown. 2. In the “Connection Description” window, type the name “LS bass module”... -
Page 59: Placing The Bass Module Into Tap Mode
Placing the Bass Module into TAP Mode Place all four DIP switches to the down position before returning the unit to the customer 2. Verify the bass module communicates in 1. Place the bass module into TAP mode TAP mode. 1.1 Set all four DIP switches into the “up”... -
Page 60: Setting The Bass Module Equalizer
Setting the Bass Module Equalizer Set up a Hyperterminal window (reference page 57) and connect the bass module to a computer to issue TAP commands (reference page 58). Type the equalization TAP command as listed in the table below. Example: To set the bass module to LS18 series II equalization, type the TAP command SE A,ON,OFF,ON,P,2. - Page 61 PCBS, DVD mech, HDD REV05 - REV06 43202 New floor warts 1/21/10 - updated line cord part numbers. Specifications and Features Subject to Change Without Notice Bose Corporation The Mountain Framingham Massachusetts USA 01701 P/N 271000AV38-SM REV. 08 09/09 (H) http://serviceops.bose.com...
Need help?
Do you have a question about the LIFESTYLE AV 48 and is the answer not in the manual?
Questions and answers