
Related Manuals for Palsonic TFTV201

Summary of Contents for Palsonic TFTV201
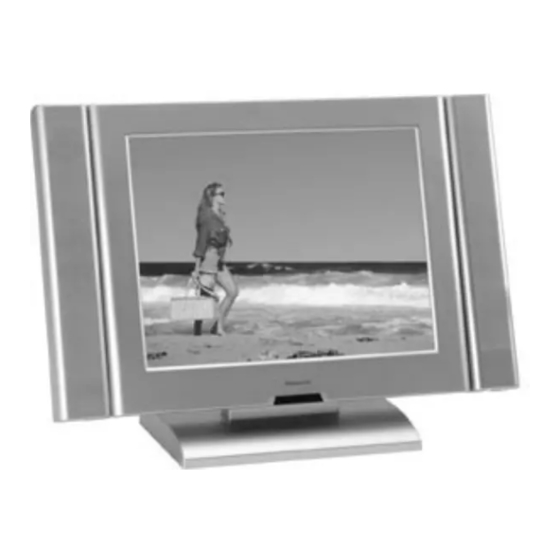
- Page 1 OWNER'S MANUAL TFTV-201 20.1" TFT LCD Monitor TV Palsonic Corporation Pty Ltd 1 Joynton Avenue WATERLOO NSW 201 7 AUSTRALIA Tel 61 2 93137111 Fax 61 293137555 www.palsonic.com.au Customer Service - 1300 657 888...
-
Page 2: Table Of Contents
29~30 Specification ..............Display Modes ..............Congratulations on your purchase of this Palsonic Product. We recommend that you thoroughly read this manual before use to fully enjoy the many functions and excellent features of this set. Retain this manual in an easily accessible location for future reference. -
Page 3: Safety Instructions
Safety Instructions Before connecting the AC power cord to the DC adapter outlet, make sure the voltage designation of the DC adapter corresponds to the local electrical supply. Never insert anything metallic into the cabinet openings of the Liquid Crystal Display (LCD) monitor: doing so may create the danger of electric shock. -
Page 4: General Safety Precautions
General safety precautions This Monitor has been engineered and manufactured to assure your safety. You can prevent serious electrical shock and other hazards by keeping in mind the following: Do not place anything heavy, wet or magnetic on the monitor or the power cord. -
Page 5: Parts Description
Parts Description Front Panel 1. SPEAKER 2. POWER switches the set off (stand-by mode) and on. 3. MENU display the main on-screen menu. Exit from sub-menu. 4. SELECT select input signal or select submenu of the on-screen menus. 5. Volume UP, Volume DOWN adjust the volume. -
Page 6: Rear Panel
Parts Description Rear Panel 1. VIDEO OUTPUT 2. AUDIO OUTPUT connects to the audio input port of an additional device. 3. COMPONENT VIDEO INPUT Y, Cb, Cr (480i) video signals from DVD. 4. VIDEO 2 INPUT video signal from VCR or similar devices. 5. -
Page 7: Remote Control Unit
Remote Control Unit... - Page 8 Inserting the Batteries in the Remote Controller You must insert or replace the batteries in the remote controller when you: Purchase the set. Find that the remote controller is no longer operating correctly. Remove the cover of the remote controller by pressing the symbol and pulling the cover space in the direction of the arrow.
-
Page 9: Menu Tree
Menu Tree Main Menu PICTURE CONTRAST BRIGHTNESS (TV/VIDEO mode) SHARPNESS COLOR TEMP (PC mode) (TV/VIDEO mode) COLOR TINT (TV/VIDEO mode, NTSC System) SOUND TREBLE BASS BALANCE S.MODE (PAL System) (NTSC System) GEOMETRY H-POSITION (PC mode) V-POSITION AUTO POSITION FUNCTION AUTO TRACKING TRACKING (PC mode) INFORMATION... -
Page 10: Connecting A Pc
Connecting a PC Turn off your computer and monitor. Connect a PC D-Sub cable between your PC and PC-VIDEO-IN of the monitor. And then fasten the screws of both sides of the cable. Connect a PC Audio Cable between the Sound Output jack of the sound card on a PC and the PC-AUDIO-IN of the monitor. -
Page 11: Viewing A Pc Screen
Viewing a PC screen Initial set PC mode Power on your monitor by pressing the POWER button on the main set or on the remote controller. Use the PC button on the remote controller to switch to the PC mode. Then the PC screen is automatically set. -
Page 12: Adjusting The Picture Settings
Viewing a PC screen Adjusting the Picture Settings Your monitor has several settings which allow you to control picture quality: CONTRAST, BRIGHTNESS, COLOUR TEMPERATURE Press the MENU button. Result : The PICTURE menu is displayed. Use the CH or CH buttons to select one of the following options: CONTRAST... -
Page 13: Adjusting The Sound Settings
Viewing a PC screen Adjusting the Sound Settings The sound settings can be adjusted to suit your personal preference: TREBLE, BASS, BALANCE, S.MODE Press the MENU button. Result: The PICTURE menu is displayed. Use the VOL or VOL buttons to move the SOUND menu. -
Page 14: Adjusting The Geometry Settings
Viewing a PC screen Adjusting the Geometry Settings The geometry settings can be adjusted to centre your viewing screen. Press the MENU button. Result: The PICTURE menu is displayed. Use the VOL , VOL buttons to move the GEOMETRY menu. Use the CH or CH buttons to select one of the... -
Page 15: Pc Stable Adjustment
Viewing a PC screen PC Stable Adjustment When the screen is unstable in PC settings, or to make your PC stable by adjusting the Clock and Phase, set the PC in the following sequence: Press the MENU button. Result : The PICTURE menu is displayed. Use the VOL , VOL buttons to move the... -
Page 16: Connecting To Watch Tv Or Vcr
Connecting to watch TV or VCR Connecting the Aerial or Cable Television Network To view television channels correctly, a signal must be received by the set from one of following sources: An outdoor aerial An indoor aerial (not recommendable) A cable television network 1. -
Page 17: Viewing A Tv/Vcr Screen
Viewing a TV/VCR screen Adjusting the Picture Settings 1 Your TV have several settings which allow you to control picture quality: CONTRAST, BRIGHTNESS, SHARPNESS, COLOUR, TINT Press the MENU button. Result: The PICTURE menu is displayed. Use the CH or CH buttons to select one of the following options: CONTRAST... - Page 18 Adjusting the Picture Settings 2 By pressing the P.STD button on the remote control, you can sequentially select any one of the four possible preferred analogue picture presets. Whenever this button is pressed, the mode will be changed as follows. CUSTOM STANDARD STRONG...
-
Page 19: Adjusting The Sound Settings 1,2
Viewing a TV/VCR screen Adjusting the Sound Settings 1 The sound settings can be adjusted to suit your personal preference: TREBLE, BASS, BALANCE, S.MODE / MTS Press the MENU button. Result: The PICTURE menu is displayed. Use the VOL ,VOL buttons to move the SOUND menu. - Page 20 Adjusting the Sound Settings 2 By pressing the S.STD button on the remote control, You may get more best sound and change the sound of a suit with a video source. Whenever this button is pressed, the mode will be changed as follows. CUSTOM STANDARD MUSIC...
-
Page 21: Channel Memory (Pal System)
Channel Memory (PAL System) Storing the Channels Automatically You can scan the frequency ranges available on your television in your country and store all the channels found automatically. The channels are stored in the order in which they appear in the frequency bands. It is possible that the automatically allocated numbers may not correspond to those by which you wish to identify the channels. -
Page 22: Storing The Channel Manually
Channel Memory (PAL System) Storing the Channel Manually When storing channels manually, you can choose: whether or not store each of the channels found. The number by which you wish to identify each stored channel. Press the MENU button. Result: The picture menu is displayed. Use the VOL or VOL buttons to move the... - Page 23 Channel Memory (PAL System) To assign a program number to the channel, press the VOL or VOL button until you find the correct number. Press the CH button to move the SEARCH. Press the VOL or VOL button to start the search.
-
Page 24: Fine Tuning Channel Reception
Channel Memory (PAL System) Fine Tuning Channel Reception If the reception is clear, you do not fine-tune the channel, as this is done automatically during the search and store operation. If however the signal is weak or distorted, you may have to fine-tune the channel manually. Press the MENU button. -
Page 25: Skipping Unwanted Channels
Channel Memory (PAL System) Skipping Unwanted Channels You can exclude the channels of your choice from the channel scan operation. When you scan through the stored channels, those you have chosen to skip are not displayed. Press the MENU button. Use the VOL or VOL buttons to move the... -
Page 26: Teletext Teletext Decoder
Teletext Teletext Decoder Most television channels carry "teletext", pages of written information that provide information such as : Television program tables News bulletins Weather forecasts Sports results Subtitles for the hard of hearing The teletext pages are organised according to six categories: Part contents Selected page number. -
Page 27: Displaying Teletext Information
Teletext Teletext Decoder Press the numeric buttons on the remote controller to enter the page number directly: Enter the three-digit page number listed in the contents by pressing the corresponding numeric buttons. Result: The current page counter is incremented and the page is then displayed. If the selected page is linked with several secondary pages, the secondary pages are displayed in sequence. -
Page 28: Other Functions
Other Functions SLEEP You don’t have to remember to switch the set turn off before you go to sleep. The sleep timer automatically switches the set to stand-by after the preset time elapses. For selecting you desired number of minutes, press the SLEEP button several times or Continuously. -
Page 29: Troubleshooting
APPENDIX B: Troubleshooting If you have a problem setting up or using your LCD monitor, you may be able to solve it yourself. Before contacting customer service, try the suggested actions that are appropriate to your problem. Reference What you see... Suggested Actions Connecting a PC, Ensure that the power cord is firmly... - Page 30 APPENDIX B: Troubleshooting Suggested Actions Reference Problem Ensure that the audio cable is firmly Connecting a PC, TV or VCR, connected to both the audio-in jack on page 13, 19. your monitor and the audio-out jack on No sound your sound card. Check the volume level Adjusting the Sound settings, page 16, 21.
-
Page 31: Specification
APPENDIX C: Specification MONITOR TV (PAL System) TV (NTSC System) FUNCTION Type 20.1" (48cm) TFT LCD Display Area 408 mm x 306 mm Display Colour 16,777,216 (8-bit) Pixel Pitch 0.6375 mm x 0.6375 mm Max. Resolution VGA 640 x 480 (@75Hz) Interface LCD Panel Viewing Angle... -
Page 32: Display Modes
APPENDIX D: Display Modes If the signal from the system equals to the standard signal mode, the screen is adjusted automatically. If the signal from the system doesn’t equal to the standard signal mode, adjust the mode with referring to the Video card user guide because the screen might not display or only the power LED might be on. - Page 33 PALSONIC CORPORATION PTY LTD 1 JOYNTON AVENUE WATERLOO NSW 2017 AUSTRALIA TEL: (02) 9313 7111 FAX: (02) 9313 7555 www.palsonic.com.au PALSONIC CUSTOMER SERVICE TELEPHONE AUSTRALIA: 1300 657 888 KGTIT202Z6...
Need help?
Do you have a question about the TFTV201 and is the answer not in the manual?
Questions and answers