Advertisement
Quick Links
TDG8000BXE
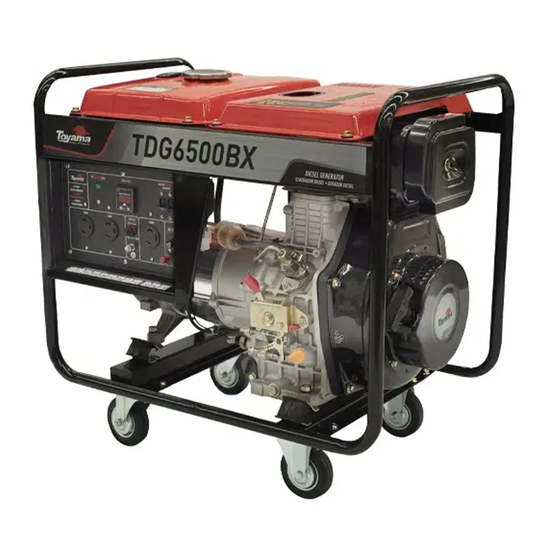
TDG6500BX
TDG4000BX
TDG2500BX
DIESEL ENGINE GENERATOR 4S
GENERADOR A DIESEL 4T
GERADOR A DIESEL 4T
PLEASE READ THIS MANUAL CAREFULLY. IT CONTAINS INFORMATION FOR YOUR SAFETY.
POR FAVOR, LEA ATENTAMENTE ESTE MANUAL. CONTIENE INFORMACIÓN PARA SU SEGURIDAD.
POR FAVOR, LEIA ATENTAMENTE ESTE MANUAL. ELE CONTÉM INFORMAÇÕES PARA SUA SEGURANÇA.
OWNER'S MANUAL
GUÍA DEL PROPIETARIO • MANUAL DO PROPRIETÁRIO
Advertisement

Related Manuals for Toyama TDG4000BX


Summarization of Contents
Safety Symbols
READ MANUAL
Instructions to read the manual for safety precautions.
WEAR EAR PROTECTORS
Requirement to wear hearing protection.
WEAR RESPIRATORY PROTECTION
Requirement to wear respiratory protection.
SAFETY GLOVES MUST BE WORN
Requirement to wear safety gloves.
WEAR PROTECTIVE FOOTWEAR
Requirement to wear protective footwear.
WEAR EAR, EYE AND HEAD PROTECTION
Requirement to wear eye, ear, and head protection.
GENERAL WARNING
General warning symbol indicating caution or alert.
ELECTRICAL HAZARD WARNING
Symbol indicating electrical hazard or risk of shock.
TUMBLE HAZARD
Symbol indicating a tip-over or falling hazard.
BURN HAZARD WARNING
Symbol indicating a burn hazard from hot surfaces or components.
HOT SURFACE WARNING
Symbol indicating a hot surface or high temperature.
HIGH TEMPERATURE WARNING
Symbol indicating high temperature.
ROTATING PARTS HAZARD
Symbol indicating rotating parts that pose a hazard.
FLAMMABLE MATERIAL WARNING
Symbol indicating flammable material.
SLIPPING HAZARD WARNING
Symbol indicating a risk of slipping.
TOXIC AIR WARNING
Symbol indicating toxic air or harmful fumes.
KICKBACK HAZARD
Symbol indicating a kickback hazard.
GENERAL INJURY RISK
Symbol indicating a general risk of injury.
Generator Parts Position
STARTING HANDLE
The handle used to start the engine manually.
FUEL COCK
Valve to control fuel flow to the engine.
FUEL TANK
Container for storing fuel.
FUEL TANK CAP
Cap for the fuel tank.
FUEL LEVEL INDICATOR
Indicator for the fuel level in the tank.
OIL LEVEL DIPSTICK
Tool for checking the engine oil level.
CRANKCASE OIL DRAIN POINT
Point for draining oil from the engine crankcase.
AIR FILTER COMPONENT
Component that filters air entering the engine.
DECOMPRESSION LEVER
Lever to reduce compression for easier starting.
DIGITAL CONTROL PANEL
Display panel showing generator status and controls.
POWER OUTLET PLUG
Output sockets for connecting electrical loads.
ENGINE OIL FILTER
Filter for the engine oil.
GROUNDING TERMINAL
Terminal for connecting the generator to ground.
CIRCUIT BREAKER LEVER
Lever for the circuit breaker.
ELECTRIC START SWITCH
Switch for electric start function.
OVERLOAD PROTECTOR DEVICE
Device to protect against electrical overload.
VOLTAGE SELECTOR KEY
Key to select generator output voltage.
MUFFLER COMPONENT
Component to reduce engine noise.
Cares When Operating Your Generator - I
EXHAUST GAS HAZARD
Warning about operating in poorly ventilated areas or indoors due to toxic exhaust.
VENTILATION REQUIREMENTS
Instruction to maintain at least 1m of free space for ventilation.
OPERATION IN WET AREAS
Warning against operating the generator in wet or moist areas.
ENGINE BREAK-IN PROCEDURE
Guideline for breaking in new or serviced engines: no load, low speed for 2 hours.
FUEL QUALITY RECOMMENDATION
Recommendation to use high-quality fuel for optimal performance.
FLUID LEVEL MANAGEMENT
Instruction to maintain correct oil and fuel levels.
Cares When Operating Your Generator - II
ELECTRIC SHOCK HAZARD
Warning about the risk of electric shock from the generator.
GRID CONNECTION PROHIBITION
Prohibition of connecting to internal grids without an approved project.
MANUAL ACCESSIBILITY ADVICE
Advice to keep the manual accessible for future reference.
MANUAL TRANSFER GUIDELINE
Instruction to include the manual when transferring ownership.
UNAUTHORIZED USER RESTRICTION
Prohibition of use by untrained children or users.
DECAL INTEGRITY WARNING
Warning against removing safety decals from the product.
Cares When Operating Your Generator - III
PRODUCT MODIFICATION VOIDS WARRANTY
Warning that product modification voids the warranty.
CABLE MANAGEMENT SAFETY
Caution against leaving cables on the generator to prevent short circuits.
LOAD LIMIT ADHERENCE MANDATE
Instruction not to exceed the generator's load capacity.
OPERATIONAL FAMILIARIZATION REQUIREMENT
Recommendation to familiarize with controls and output before operation.
Inspection Before Operating
CHECK FUEL LEVEL
Procedure to check the fuel level before operation.
CHECK ENGINE OIL LEVEL
Procedure to check the engine oil level before operation.
CHECK FOR FLUID LEAKS
Inspection for oil or fuel leaks around the equipment.
CHECK FOR DEBRIS
Check for dirt or debris around the muffler and starting handle.
CHECK AIR FILTER CLEANLINESS
Check the cleanliness of the air filter.
Grounding Procedure
USE ADEQUATE POWER CORD
Instruction to use a power cord with adequate capacity.
CONNECT WIRE TO GENERATOR GROUND TERMINAL
Procedure to connect the grounding wire to the generator.
CONNECT WIRE TO METAL PART ON GROUND
Procedure to connect the other end of the grounding wire to a metal part on the ground.
Installing the Wheels
SUPPORT WHEEL AND ALIGN DRILLINGS
Procedure to support the wheel and align drillings.
FIT THE SHAFT
Step to fit the shaft into the wheel assembly.
INSERT WASHER AND PIN LOCK
Procedure to insert washer and nuts or pin lock.
Installing the Handle Support
CENTERING LEVER BORE
Procedure to center the lever bore with the generator base drilling.
INSTALL AND TIGHTEN SCREWS OR PIN LOCK
Procedure to install and tighten screws or pin lock.
Installing the Base Bracket
CENTER RUBBER CUSHION
Procedure to center the rubber cushion in the generator base.
INSERT AND TIGHTEN BOLT AND NUT
Procedure to insert and tighten the bolt and nut.
Checking the Oil Engine Level - I
PLACE EQUIPMENT ON LEVEL SURFACE
Instruction to place the equipment on a flat and level surface.
REMOVE AND CLEAN DIPSTICK
Procedure to remove and clean the oil dipstick.
INSERT DIPSTICK TO CHECK LEVEL
Procedure to insert and remove dipstick to check oil level.
Checking the Oil Engine Level - II
COMPLETE WITH OIL IF BELOW LIMIT
Procedure to add oil if level is below the lower limit.
REINSTALL OIL DIPSTICK
Procedure to reinstall the oil dipstick.
Fueling the Generator
REMOVE TANK CAP
Step to remove the fuel tank cap.
FILL WITH FUEL TO MAXIMUM LEVEL
Procedure to fill the fuel tank without exceeding the maximum level.
ATTACH TANK CAP SECURELY
Step to securely attach the fuel tank cap.
Starting the Engine with Manual Starter - I
PLACE FUEL REGISTER IN OPEN POSITION
Step to place the fuel register in the open position.
SET THROTTLE LEVER TO RUN POSITION
Step to set the throttle lever to the run position.
HOLD HANDLE AND USE DECOMPRESSOR
Procedure for engaging decompressor and pulling starter handle.
Starting the Engine with Manual Starter - II
PULL HANDLE UNTIL ENGINE STARTS
Procedure to pull the starter handle until the engine starts.
REPEAT STARTING STEPS IF ENGINE FAILS
Instruction to repeat starting steps if the engine fails to start.
Battery Connection for Engines with Electric Starter
CONNECT POSITIVE BATTERY TERMINAL
Procedure to connect the positive battery terminal.
CONNECT NEGATIVE BATTERY TERMINAL
Procedure to connect the negative battery terminal.
Starting the Engine with Electric Starter
PLACE FUEL REGISTER IN OPEN POSITION
Step to place the fuel register in the open position.
SET THROTTLE LEVER TO RUN POSITION
Step to set the throttle lever to the run position.
HOLD DECOMPRESSOR AND TURN IGNITION KEY
Procedure for engaging decompressor and turning the ignition key.
REPEAT STARTING IF ENGINE FAILS
Instruction to repeat starting if the engine fails within 5 seconds.
Connecting Loads
SET LOAD CIRCUIT BREAKER TO OFF
Step to turn off the load circuit breaker before connecting.
SWITCH OFF APPLIANCE TO BE CONNECTED
Instruction to switch off the appliance before connecting.
CONNECT DEVICE TO POWER OUTLET
Procedure to connect the appliance to the generator's power outlet.
SET LOAD CIRCUIT BREAKER TO ON
Step to turn on the load circuit breaker after connecting.
CONNECT HIGHER POWER APPLIANCES FIRST
Guideline to connect appliances with higher power first.
Disconnecting Loads
DISCONNECT ALL APPLIANCES
Step to disconnect all connected appliances.
SET GENERATOR LOAD SWITCH TO OFF
Step to turn off the generator's load switch.
REMOVE POWER SOCKETS
Procedure to remove the power outlets.
ENGINE RUN WITHOUT LOAD BEFORE SHUTDOWN
Instruction to let the engine run without load before shutting down.
Stopping the Engine with Manual Starter
MOVE THROTTLE LEVER TO STOP POSITION
Step to move the throttle lever to the stop position.
PLACE FUEL REGISTER IN CLOSED POSITION
Step to place the fuel register in the closed position.
Stopping the Engine with Electric Starter
MOVE THROTTLE LEVER TO STOP POSITION
Step to move the throttle lever to the stop position.
PLACE FUEL REGISTER IN CLOSED POSITION
Step to place the fuel register in the closed position.
TURN IGNITION KEY COUNTER-CLOCKWISE
Procedure to turn the ignition key counter-clockwise to stop the engine.
Maintenance Schedule
INITIAL MAINTENANCE (20 HRS / 1 MO)
Initial maintenance tasks within the first 20 hours or 1 month.
100 HRS / 3 MONTHS MAINTENANCE
Maintenance tasks every 100 hours or 3 months.
500 HRS / 6 MONTHS MAINTENANCE
Maintenance tasks every 500 hours or 6 months.
1000 HRS / 12 MONTHS MAINTENANCE
Maintenance tasks every 1000 hours or 12 months.
Replacing the Engine Oil - I
PLACE ENGINE ON FLAT SURFACE
Instruction to place the engine on a flat and level surface.
REMOVE DIPSTICK AND DRAIN OIL
Procedure to remove dipstick and drain all engine oil.
REINSTALL AND TIGHTEN DRAIN BOLT
Procedure to reinstall and tighten the oil drain bolt.
Replacing the Engine Oil - II
FILL OIL RESERVOIR TO MAXIMUM LEVEL
Procedure to fill the oil reservoir to the recommended maximum level.
REINSTALL OIL DIPSTICK AND TIGHTEN
Procedure to reinstall and tighten the oil dipstick.
Removing Air from the Pipe - I
SET THROTTLE LEVER TO RUN POSITION
Step to set the throttle lever to the run position.
REMOVE CLAMP FROM FUEL PIPE
Procedure to remove the clamp from the fuel pipe.
DISCONNECT TUBE AND DRAIN FUEL
Procedure to disconnect the tube and drain fuel until no bubbles exist.
RECONNECT FUEL LINE
Step to reconnect the fuel line.
Removing Air from the Pipe - II
LOOSEN HIGH PRESSURE PIPE NUT
Procedure to loosen the nut of the high pressure pipe.
MANUAL START AIR REMOVAL
Procedure for manual start engines to remove air.
ELECTRIC START AIR REMOVAL
Procedure for electric start engines to remove air.
TIGHTEN PIPE NUT AND START ENGINE
Procedure to tighten the pipe nut and start the engine.
Air Filter Maintenance
REMOVE BUTTERFLY NUT
Step to remove the butterfly nut securing the air filter cover.
REMOVE AIR FILTER COVER
Step to remove the air filter cover.
REMOVE FILTER ELEMENT
Step to remove the filter element.
CLEAN ELEMENT WITH COMPRESSED AIR
Procedure to clean the filter element using compressed air.
REPLACE FILTER ELEMENT
Step to reinstall the filter element.
REPLACE COVER AND RETIGHTEN NUT
Step to replace the cover and retighten the butterfly nut.
Cleaning the Oil Filter of the Engine - I
ENSURE CRANKCASE IS EMPTY
Condition check: crankcase must be empty of oil.
REMOVE FIXATION SCREW AND CAP
Procedure to remove the fixation screw and cap of the oil filter.
REMOVE OIL FILTER
Step to remove the oil filter.
CLEAN FILTER WITH NON-FLAMMABLE SOLVENT
Procedure to clean the filter using a non-flammable solvent.
Cleaning the Oil Filter of the Engine - II
DRY THE FILTER COMPLETELY
Step to ensure the filter is completely dry.
CHECK CONDITION OF O-RING
Procedure to check the condition of the O-ring.
RETIGHTEN OIL CAP
Step to retighten the oil cap.
REPLACE AND RETIGHTEN SET SCREW
Procedure to replace and retighten the set screw.
Fuel Filter Maintenance - I
DRAIN FUEL FROM TANK
Procedure to drain all fuel from the tank into a container.
REMOVE FUEL TAPPET LOCKING NUTS
Step to remove the fuel tappet locking nuts.
REMOVE FUEL LOG AND GASKETS
Procedure to remove the fuel log and gaskets.
PULL FILTER USING FINE-NEEDLE PLIERS
Procedure to pull the filter using fine-needle nose pliers.
Fuel Filter Maintenance - II
REPLACE USED FILTER WITH NEW ONE
Procedure to replace the used fuel filter with a new one.
REPLACE FILTER THROUGH NOZZLE
Procedure to replace the filter through the fuel tank nozzle.
REPLACE GASKETS AND FUEL COCK
Procedure to replace gaskets and the fuel cock.
Removing Fuel From the Tank
PLACE FUEL REGISTER IN CLOSED POSITION
Step to place the fuel register in the closed position.
REMOVE FUEL DRAIN BOLT
Procedure to remove the fuel drain bolt.
REMOVE TANK FUEL CAP
Step to remove the fuel tank cap.
DRAIN ALL FUEL INTO CONTAINER
Procedure to drain all fuel into a suitable container.
REINSTALL DRAIN BOLT AND CAP
Procedure to reinstall the oil drain bolt and fuel tank cap.
Storage - I
REMOVE FUEL FROM TANK
Procedure to remove fuel from the tank before storage.
CLEAN AIR FILTER
Step to clean the air filter before storage.
ADD OIL TO CYLINDER FOR STORAGE
Procedure to add oil to the cylinder for storage.
DISTRIBUTE OIL AND POSITION HANDLE
Procedure to distribute oil and position handle for storage.
Storage - II
CLEAN METAL PARTS WITH NON-FLAMMABLE PRODUCT
Procedure to clean metal parts with a non-flammable product.
COVER ENGINE AND STORE IN DRY, VENTILATED PLACE
Instruction to cover the engine and store it in a dry, ventilated place.
RECHARGE ELECTRIC BATTERY MONTHLY
Guideline to recharge the electric starter battery monthly if stored.
Transport Procedures
WAIT FOR ENGINE COOLING
Instruction to wait for the engine to cool before transport.
PLACE FUEL REGISTER IN CLOSED POSITION
Step to place the fuel register in the closed position.
PLACE ENGINE ON FLAT SURFACES TO PREVENT SPILLS
Instruction to place the engine on flat surfaces to prevent spills.
Warranty Term
WARRANTY PERIOD AND COVERAGE
Details on the warranty period and what it covers.
WARRANTY EXCLUSIONS
List of conditions and uses that void the warranty.
IMPORTANT WARRANTY NOTES
Key information regarding warranty claims and documentation.
Need help?
Do you have a question about the TDG4000BX and is the answer not in the manual?
Questions and answers