Table of Contents
Advertisement
Quick Links
Advertisement
Table of Contents

Related Manuals for Schaller BMC

Summary of Contents for Schaller BMC
- Page 1 Operating Manual Test equipment for the device types BMA-2, BMC, FSG, FS2, FS3, FS4, BP1, FSA, SG1 78,0 °F | 6,16 % | 456 kg/m | -27,3 td | 0,64 aw | 51,9 %r.H. | 14,8 % abs | 100,4 g/m...
-
Page 2: Introduction
Schaller Messtechnik GmbH. In the following cases, Schaller Messtechnik GmbH does not assume any liability for damages and the warranty claims expire: •... -
Page 3: Symbols Used In This Manual
For technical advice, please contact our customer service department at: Schaller Messtechnik GmbH Max-Schaller-Straße 99 A - 8181 St.Ruprecht an der Raab Telephone: +43 (0)3178 28899 Fax: +43 (0)3178 28899 - 901 E-Mail: info@humimeter.com Internet: www.humimeter.com © Schaller Messtechnik GmbH 2023 Page 3... -
Page 4: Table Of Contents
Customer service ..................3 Test equipment for the humimeter BMC ...... 6 Verification process ................. 6 Test equipment for the humimeter BMA-2 ....8 Verification process ................. 8 Checking the calibration of the humimeter FSG ..10 Checking the scale ................10 Checking the device ................ - Page 5 8.1.1 Scale test ....................21 8.1.2 Infrared temperature ................22 Checking the calibration for the humimeter SG1 ..23 Verification process ................23 Page 5...
-
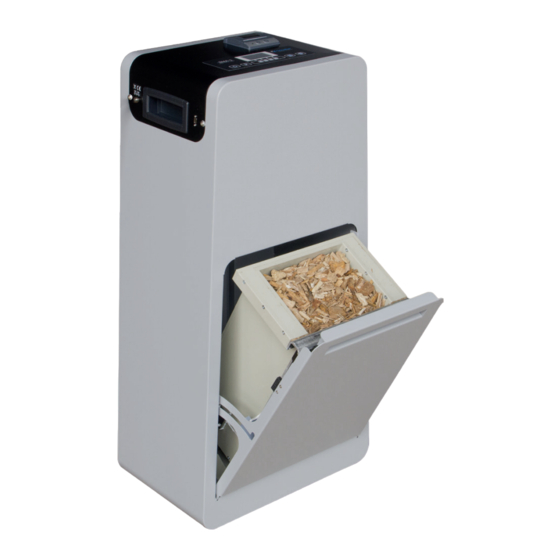
Page 6: Test Equipment For The Humimeter Bmc
Readings between indicate that the meter is correctly adjusted. » If the measured values are below 11.0 or above 13.0, then contact Schaller Messtechnik GmbH or your dealer! Pour the test medium back into the bucket. » Make sure that no residues collect in the measuring chamber. - Page 7 ATTENETION The test equipment must always be stored in a closed bucket to prevent mois- ture absorption. Page 7...
-
Page 8: Test Equipment For The Humimeter Bma-2
The round plug of the supplied power supply unit on the BMA must be connected (Figure 6). Now connect the power supply unit to an earthed socket. Now the humimeter BMA-2 switches on automa- tically. » IIf this is not the case, press the key for 3 seconds. - Page 9 (Figure 11). » If the measured values are below 10.5 or above 12.5, then contact Schaller Messtechnik GmbH or your dealer! 18. Open the drawer and carefully remove the measur- ing chamber. 19. Pour the test medium back into the bucket.
-
Page 10: Checking The Calibration Of The Humimeter Fsg
Operating manual testing equipment Checking the calibration of the humimeter FSG The calibration of the device should be checked every four weeks. Use the optionally available test equipment (Art.No. 11758) for checking. Checking the scale Switch on the scale. Place the test weight on the scale (Figure 12). The scale should now display a reading of 500 g (Figure 13). - Page 11 » If the measured values are below 13.0 or above 15.0, then contact Schaller Messtechnik GmbH or your dealer! HINWEIS The test equipment must always be stored in a closed bucket to prevent mois- ture absorption.
-
Page 12: Checking The Calibration Of The Humimeter Fs2
Operating manual testing equipment Checking the calibration of the humimeter FS2 The device’s calibration should be checked every four weeks. For the check, the option- ally available test equipment (article no. 11758) is required. Checking the scale Switch on the scale. Place the test weight on the scale (Figure 18). - Page 13 21.0 22.0 » Readings between indicate correct adjustment of the measuring instrument for 800 g glass beads (Figure 24). » If the measured values are below 21.0 or above 22.0, then contact Schaller Messtechnik GmbH or your dealer! Page 13...
-
Page 14: Checking The Calibration For The Humimeter Fs3
Operating manual testing equipment Checking the calibration for the humimeter FS3 The device’s calibration should be checked every four weeks. For the check, the option- ally available test equipment (article no. 11758) is required. Checking the scale Switch on the scale. Place the test weight on the scale (Figure 25). - Page 15 21.0 22.0 » Readings between indicate correct adjustment of the measuring instrument for 800 g glass beads (Figure 31). » If the measured values are below 21.0 or above 22.0, then contact Schaller Messtechnik GmbH or your dealer! Page 15...
-
Page 16: Checking The Calibration For The Humimeter Fs4
Operating manual testing equipment Checking the calibration for the humimeter FS4 The device’s calibration should be checked every four weeks. For the check, the option- ally available test equipment (article no. 11758) is required. Checking the scale Switch on the scale. Place the test weight on the scale (Figure 32). - Page 17 21.0 22.0 » Readings between indicate correct adjustment of the measuring instrument for 800 g glass beads (Figure 38). » If the measured values are below 21.0 or above 22.0, then contact Schaller Messtechnik GmbH or your dealer! Page 17...
-
Page 18: Checking The Calibration For The Humimeter Bp1
Operating manual testing equipment Checking the calibration for the humimeter BP1 The device’s calibration should be checked every four weeks. For the check, the option- ally available test equipment (article no. 11758) is required. Checking the scale Switch on the scale. Place the test weight on the scale (Figure 39). - Page 19 20.3 21.3 » Readings between indicate correct adjustment of the measuring instrument for 800 g glass beads (Figure 45). » If the measured values are below 20.3 or above 21.3, then contact Schaller Messtechnik GmbH or your dealer! Page 19...
-
Page 20: Checking The Calibration Of The Fsa
Operating manual testing equipment Checking the calibration of the FSA The device’s calibration should be checked regularly. To do so: Optionally available test medium required • Press the button Menu » The display will now show the main menu. • Press the button Settings »... -
Page 21: Scale Test
Confirm the test by pressing Ok » Now you are back in the device test menu. 8.1.1 Scale test Press the button Scale » The device now automatically determines the value without test weight (tare value) (Figure 49). » For the scale test two points are determined: the value without test weight and the value with the optionally available test weight of 500g. -
Page 22: Infrared Temperature
Operating manual testing equipment 8.1.2 Infrared temperature • Press the button IR Temperature • The display will show the currently measured infrared temperature in the measuring cham- ber of the device (Figure 53). • Confirm the test by pressing Ok »... -
Page 23: Checking The Calibration For The Humimeter Sg1
(Figure 56). » If the measured values are below 11.0 or above 13.0, then contact Schaller Messtechnik GmbH or your dealer! HINWEIS The test equipment must always be stored in a closed bucket to prevent mois- ture absorption. - Page 24 Schaller Messtechnik develops, produces and sells professional moisture meters and turnkey solutions. Schaller Messtechnik GmbH Max-Schaller-Straße 99, A - 8181 St. Ruprecht an der Raab Tel +43 (0)3178 - 28899 , Fax +43 (0)3178 - 28899 - 901 info@humimeter.com, www.humimeter.com...
Need help?
Do you have a question about the BMC and is the answer not in the manual?
Questions and answers