Table of Contents
Advertisement
Quick Links
Advertisement
Table of Contents

Related Manuals for Element EATDE2767CW


Summary of Contents for Element EATDE2767CW
- Page 1 6.7 cu. ft. 12-CYCLE ELECTRIC/ GAS DRYER...
-
Page 2: Table Of Contents
DRYER SAFETY .....................4 OPERATION REQUIREMENTS..............8 Important to Installer ................8 Basic Requirements................9 Location Requirements................. Ducting Requirements ................12 Exhausting Requirements ..............14 Gas Requirements .................. 14 Electric Requirements ................16 Grounding ....................18 PARTS AND FEATURES ................19 Replacement Parts and Accessories ..........19 INSTALLATION INSTRUCTIONS .............20 Removing From the Package ............ - Page 3 READ AND KEEP THESE INSTRUCTIONS FOR FUTURE REFERENCE This manual contains important information on the installation, use, and care of your appliance. Please read this manual carefully before i nstallation and operation of this machine to prevent injury and property damage.
-
Page 4: Dryer Safety
DRYER SAFETY YOUR SAFETY AND THE SAFETY OF OTHERS ARE VERY IMPORTANT To prevent injury to the user or other people and property damage, the instructions shown here must be followed. Incorrect operation due to ignoring of instructions may cause harm or damage, including death. The level of risk is shown by the following indications. - Page 5 WARNING What to do if you smell gas: • Do not try to light any appliance. • Do not touch any electrical switch; do not use any phones in your building. • Clear the room, building, or area of all occupants. •...
- Page 6 • Do not repair or replace any part of the appliance or attempt any servicing unless it is specifically recommended in the user- maintenance instructions or in published user-repair instructions that you understand and have the skills to carry out. •...
- Page 7 WARNING To reduce the risk of fire or explosion • Do not dry items that have been previously cleaned, washed, soaked, or spotted with gasoline, dry cleaning solvents, or other flammable or explosive substances. They emit vapors that could ignite or explode. Any material that has been in contact with a cleaning solvent or flammable liquids or solids should not be placed in the dryer until all traces of these flammable liquids or solids and their fumes have been...
-
Page 8: Operation Requirements
State of California Proposition 65 Warnings: WARNING: Cancer and Reproductive Harm -www.P65Warnings.ca.gov. SAVE THESE INSTRUCTIONS THIS APPLIANCE IS FOR HOUSEHOLD USE ONLY OPERATION REQUIREMENTS WARNING Fire Hazard • Clothes dryer installation must be performed by a qualified installer. • Install the clothes dryer according to the manufacturer’s instructions and local codes. -
Page 9: Basic Requirements
BASIC REQUIREMENTS Make sure you have everything necessary for the proper installation. • A GROUNDED ELECTRICAL OUTLET is required. Refer to the “Electric Requirements” section. • A POWER CORD electric dryer (except for Canada). • GAS LINES (if a gas dryer) must meet national and local codes. •... - Page 10 ALCOVE OR CLOSET OR WALL INSERT/RECESSED INSTALLATIONS WARNING • The dryer must be exhausted to the outside to reduce the risk of fire when installed any place inside the house. • No other fuel-burning appliance should be installed in the same closet as the dryer.
- Page 11 1 in. (25 mm) 24 in. (610 mm) 2 in. (51 mm) 5 in. (127 mm) 48 in. (31000 mm ) 3 in. (76 mm) 24 in. (15500 mm ) L 3 in. (76 mm) NOTE: The front of the closet must have two unobstructed air openings for a combined minimum total area of 72 sq.in.
-
Page 12: Ducting Requirements
DUCTING REQUIREMENTS Recommended Use only for short-run installation Weather Hood 4" DIA 4" DIA 4" DIA Type 2-1/2" 4" 4 inch. (10.2 cm) 2.5 inch. (6.4 cm) No. of 90° Rigid Metallic Rigid Metallic elbows 90 ft. (27.4 m) 60 ft. (18.3 m) 60 ft. - Page 13 WARNING The correct exhaust installation is YOUR RESPONSIBILITY. • Use a 4-inch (10.2cm) diameter rigid aluminum or rigid galvanized steel duct. • Do not use smaller diameter than recommended diameter duct. • Ducts larger than 4 inches (10.2cm) in diameter can result in increased accumulation of lint and changes in performance •...
-
Page 14: Exhausting Requirements
EXHAUSTING REQUIREMENTS WARNING • The dryer should not be exhausted into a chimney, wall, ceiling, attic, crawl space, or a concealed space of a building. • The dryer must be exhausted to the outside to reduce the risk of fire when installed in alcove or closet. - Page 15 "(0.3cm) N.P.T. (National Pipe Thread) plugged tapping, Additionally, a 1/8 accessible for test gauge connection, must be installed immediately upstream of your dryer's gas supply connection. Your dryer must be disconnected from the gas supply pipe system during any pressure testing of the system. This dryer must be connected to the gas supply piping with a listed flexible gas connector that complies with the standard for connectors for gas appliances, ANSI Z21.24 or CSA 6.10.
-
Page 16: Electric Requirements
ELECTRIC REQUIREMENTS The wiring diagram is located on the back board of the unit. WARNING • The improper connection of the equipment grounding conductor can result in the risk of electric shock. Check with a qualified electrician or serviceman if you are in doubt as to whether your dryer is properly grounded. - Page 17 WARNING Electrical Shock Hazard When local codes allow, the electrical supply of the dryer may be connected by means of a new power supply cord kit, marked for use with a dryer, that is UL listed and rated at a minimum of 120/240 volts, 30-ampere with three No. 10 copper wire conductors terminated with closed loop terminals, open-end spade lugs with turned up ends, or with tinned leads...
-
Page 18: Grounding
GROUNDING This dryer must be grounded. In the event of a malfunction or breakdown, the grounding the product will reduce the risk of electrical shock by providing a path of least resistance for the electrical current. WARNING Gas and Electric models •... -
Page 19: Parts And Features
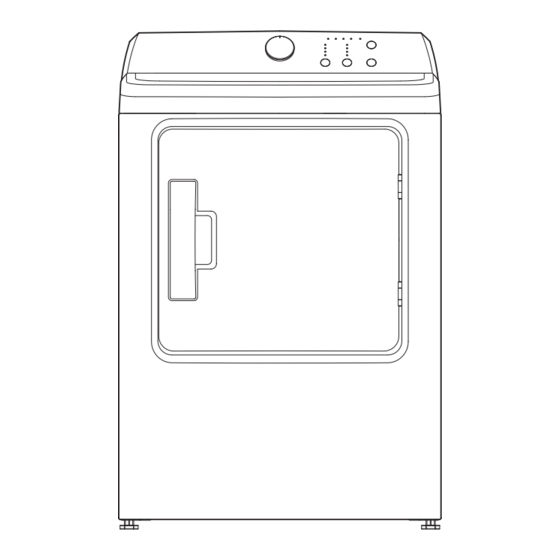
PARTS AND FEATURES Control panel Cabinet Door Filter Left venting hole (for option) Adjustable leg (Four legs) Power cord For gas dryer only Back venting hole Wiring box Gas inlet For electric dryer only Electric dryer Gas dryer... -
Page 20: Installation Instructions
INSTALLATION INSTRUCTIONS For the proper installation, we recommend that you hire a qualified installer. REMOVING FROM THE PACKAGE • Unpack your dryer and inspect it for shipping damage. Make sure you have received all the items shown below. • To prevent personal injury or strain, wear protective gloves whenever lifting or carrying the unit. -
Page 21: Choose The Proper Location
CHOOSE THE PROPER LOCATION 1. Move your dryer to an appropriate location for the installation. Consider installing the dryer and washer side-by-side, to allow access to the gas, electrical, and exhaust connections. Place two of the carton cushion-tops on the floor. Tip your dryer on its side so it lies across both cushion-tops. - Page 22 WARNING Dryer Make sure your Wall Use a 4" (10.2 cm) Tape dryer is installed Duct diameter rigid metal 4" exhaust properly so it duct. Tape all joints, exhausts air including at the dryer. easily. Never use lint-trapping Duct screws. Keep ducts as Clean all old ducts straight as...
-
Page 23: Connect The Gas Line (For Gas Models)
CONNECT THE GAS LINE (FOR GAS MODELS) • Review the “Gas Requirements” section on page 14. Remove the pipe thread protective cap. • Apply a pipe joint compound or about 11/2" wraps of teflon tape over all threaded connections. • The pipe joint compound must be resistant to the actions of any liquefied petroleum gas. -
Page 24: Connect The Electrical Wiring
CONNECT THE ELECTRICAL WIRING Review the “Electric Requirements” section on page 16. BEFORE OPERATING OR TESTING, follow the grounding instructions in the “ ” section on page 18. Grounding THREE WIRE OUTLET Then choose a 3-wire power supply cord with ring or spade terminals and UL listed strain relief. - Page 25 FOUR WIRE OUTLET Then choose a 4-wire power supply cord with ring or spade terminals and UL listed strain relief. The 4-wire power supply cord, at least 4 ft. (1.22 m) long, must have 4 10-gauge solid copper wires and match a 4-wire receptacle of NEMA Type 14- 30 R.
- Page 26 WARNING Electrical Shock Hazard All U.S. models are produced for a 3-WIRE SYSTEM CONNECTION. The dryer frame is grounded to the neutral conductor at the terminal block. A 4-WIRE SYSTEM CONNECTION is required for new or remodeled construction, mobile homes, or if local codes do not permit grounding through neutral conductor.
-
Page 27: Level The Dryer
LEVEL THE DRYER To ensure that the dryer provides the optimal drying performance, it must be leveled. To minimize vibration, noise, and unwanted movement, the floor must be a perfectly level, solid surface. • Adjust the leveling feet only as much as necessary to level the dryer. Extending the leveling feet more than necessary can cause the dryer to vibrate. -
Page 28: Door Reversal Procedure
DOOR REVERSAL PROCEDURE 1 Make sure that the power cord is unplugged. 2 While supporting the door, remove the four hinge screws from the door, then lift the door to remove it and set the door aside . Remove the two screws Remove the two screws 3 Remove the screws for the locker cover on the right side of the dryer and the screws for the locker cover on the left side of the dryer. - Page 29 5 Remove the 12 screws around the door. 6 Pull the inside door board from the outside door board. Outside door board Inside door board 7 Rotate the outside door board 180°, then reassemble it with the inside door board with the screws you removed previously. 8 Install the hinges onto the left side of the dryer.
-
Page 30: Change The Dryer Vent Location
CHANGE THE DRYER VENT LOCATION Your new dryer is shipped to vent to the rear. It can also be configured to vent to he bottom or left side (as seen from the front). An Adapter kits which are standard components can be purchased from any retailer. - Page 31 Preassemble a 4 inches (10.2cm) elbow to the next 4 inches (10.2cm) duct section, and secure all joints with aluminum tape. Be sure that the male end of the elbow faces AWAY from the dryer. Insert the elbow/duct assembly through the side opening and attach it onto the adapter duct.
- Page 32 Dimensions for installation Rear Venting (Default) BACK 12.1" 30.75cm Side Venting 1.5" 3.8cm 14.9" 5.3" 37.85cm 13.4cm Bottom Venting 12.1" 30.75cm...
-
Page 33: Dryer Use
DRYER USE CONTROL PANEL WARNING To reduce the risk of fire, electric shock, or injury to persons, read the IMPORTANT SAFETY INSTRUCTIONS before operating the appliance. Cycle selector Select your desired cycle for the type of load. The cycle you select determines the heat control for the cycle. The Normal, Heavy Duty, Towels, Casual, Delicates and Sanitize cycles are Sensor Dry cycles. - Page 34 START/PAUSE Press to start or pause the program. You can’t change any setting except add a garment. Dryness Press the button to select the dryness level. Different dryness level will result in different drying time. For clothes to be ironed manually, a lower dryness level should be selected.
-
Page 35: Drying A Load Of Laundry
DRYING A LOAD OF LAUNDRY 1. Power on your dryer. • Press this Power button to power your dryer on. • The “Clean Filter” light in the process bar will flash 10 times when your dryer is powered on • You should clean the filter before the dryer is loaded. - Page 36 Fabric type Dry Temp. WRINKLE Cycle Dryness Maximum CARE Amount Normal Very Dry Cotton High Under wear More Dry Linen Normal Damp Heavy Duty Jeans High Very Dry Corduroys More Dry Work clothes Normal Damp Towels High Very Dry Towels Heavy cottons More Dry Normal...
- Page 37 5. Unloading your laundry. • The dryer will beep 6 times after the cycle is done. FILTER CLEAN To prevent a risk of fire, make sure to clean the lint filter before or after every load. • To shorten drying time. •...
-
Page 38: Special Laundry Tips
SPECIAL LAUNDRY TIPS Please follow the care label or manufacturer's instructions for drying special items. If care label instructions are not available, use the following information as a guide. Items Drying guide • Bedspreads & Follow the care label instructions or dry in Heavy Comforters Duty cycle. -
Page 39: Dryer Care
DRYER CARE WARNING • Certain internal parts are intentionally not grounded and may present a risk of electric shock only during servicing. Service Personnel – Do not contact the following parts while the appliance is energized: inlet valve, control board and temperature-regulating thermistor (located on blower housing). -
Page 40: Troubleshooting
• After cleaning the exhaust hood, check that the flapper or louvers move freely. • Reassemble the exhaust duct and hood, checking that the joints are secure and sealed. • Operate the dryer and verify that the exhaust air is not obstructed in the vent and that there are no leaks in the system. - Page 41 Remove promptly. • It is normal to hear the dryer gas valve or heating element cycle on and off during the drying cycle. • Be sure the dryer is leveled properly as outlined in the installation instruction.
-
Page 42: Error Codes
ERROR CODES Solutions Possible Cause Error Warning The PCB failed. Call the service center for help do not use dryer. The “Drying”, “Cooling” and “Wrinkle Care ” (option) lights flicker The humidity The unit will complete the sensor failed. current operating cycle but garments could be The “Cooling”, “Wrinkle Care”(process) and over dried. -
Page 43: Appendix
APPENDIX FABRIC CARE CHART The following symbols provide garment care direction. The Clothing care labels include symbols for washing, bleaching, drying and ironing, or dry cleaning when necessary. The use of symbols ensures consistency among garment manufacturers of domestic and imported items. Follow care label directions to maximize garment life and reduce laundering problems.
Need help?
Do you have a question about the EATDE2767CW and is the answer not in the manual?
Questions and answers