Table of Contents
Advertisement
englISh
Ref. No. 40-8939-2101-02/1411
Ref. No. 40-8939-2001-02/1411
Operating Instructions
Luna X3, Chrono X3, XD X3, XD X2, HD X2
IRO AB Box 54 SE-523 22 Ulricehamn SWEDEN
Tel: (+46) 321 297 00 Fax: (+46) 321 298 00 info@iro.se www.iroab.com
ROJ Srl Via Vercellone 11
IT-13900 Biella
Tel: (+39) 015 84 80 111 Fax: (+39) 015 40 58 15 comm@roj.com www.roj.com
Advertisement
Table of Contents

Related Manuals for ROJ Chrono X3

Summary of Contents for ROJ Chrono X3
- Page 1 Luna X3, Chrono X3, XD X3, XD X2, HD X2 ROJ Srl Via Vercellone 11 IT-13900 Biella Tel: (+39) 015 84 80 111 Fax: (+39) 015 40 58 15 comm@roj.com www.roj.com IRO AB Box 54 SE-523 22 Ulricehamn SWEDEN Tel: (+46) 321 297 00 Fax: (+46) 321 298 00 info@iro.se www.iroab.com...
-
Page 2: Table Of Contents
Technical specifications ............4-5 Luna X3, Chrono X3, XDX3 ..........25 Mains connection..............6 Threading - manual Operating diagram Luna X3, Chrono X3, XD X3, XD X2....... 26 Luna-X3, Chrono-X3, XD-X3 ..........7 Threading - pneumatic Connections power supply/ interface XD X2................27 Luna-X3, Chrono-X3, XD-X3, HD-X2........ -
Page 3: Warnings
• To comply with C.e. Regulations only replacement parts fully assembled before the power supply is connected. approved by IRO AB may be used. ROJ Srl • The weft feeder On/OFF-switch does not cut off the • The feeder is an industrial product and therefore not main power supply. - Page 4 Conexión del circuito eléctrico luna X3 Chrono X3 XD X3 Max 1800 m/min Max 1800 m/min Max 1800 m/min 6.5 kg 8.6 kg 8.6 kg Min 5° C - Max 40° C Min 5° C - Max 40° C Min 5° C - Max 40° C...
-
Page 5: Technical Specifications
Technical specifications XD X2 700 W hD X2 Max 1600 m/min 1400 m/min (Stand alone) 1600 m/min (CAN) 11 kg 12.3 kg Min 5° C - Max 40° C Min 10° C - Max 40° C RH max 85 % RH max 95 % 83 dB <... -
Page 6: Mains Connection
Mains connection nOTe Condensation can form on the weft feeder when it is moved from the cold environment of the warehouse to the warmer environment of the loom room. Make sure that the feeder is dry before switching it on. WARnIng! Turn off the main switch before any work is carried out on the electrical circuit. -
Page 7: Operating Diagram Luna-X3, Chrono-X3, Xd-X3
Operating diagram luna-X3, Chrono-X3, XD-X3 Motor Accessories Motor control unit Power Supply/ Extension Interface Interface Feeder 1- 8 Feeder 9-12 Accessories A-D Power Loom communication cable Ref. no.40-8939-2001-02/1411 Ref. no.40-8939-2101-02/1411... -
Page 8: Connections Power Supply/ Interface
Connections power supply/ interface luna-X3, Chrono-X3, XD-X3, hD-X2 Mains connection Power Supply/ Interface Min 4x1,5 mm CAn - InTeRFACe STAnD AlOne - InTeRFACe Fuses Fuses FB3= 3,15A slow Red= 6,3A slow FB2= 5A slow Blue= 1A slow Stop relay jumpers NO - normally open NC - normally closed Without stop relay signal... -
Page 9: Connections Interface Luna-X3, Chrono-X3, Xd-X3
Connections interface luna-X3, Chrono-X3, XD-X3, Interface Power supplied via loom CAn - InTeRFACe STAnD AlOne - InTeRFACe Fuses Fuses T 3,15 A T 3,15 A T 5 A T 5 A Stop relay jumpers Stop relay jumpers Open = Communication bus not terminated Open = Communication bus not terminated J1 + J2 J1 + J2... -
Page 10: Operating Diagram
Operating diagram XD-X2 Motor Motor control unit Accessories Terminal board Power Supply/ Extension Interface Interface Feeder 9-12 Feeder 1- 8 Accessories A-D Power Loom communication cable Ref. no.40-8939-2001-02/1411 Ref. no.40-8939-2101-02/1411... -
Page 11: Hd-X2
Operating diagram hD-X2 Connect the feeders’ cable to the voltage supply box by following the numeric correspondence to the color selector’s needles (feeder working with the weft threaded in the needle 1 must be connected to the position 1 of the voltage supply box;... - Page 12 Operating diagram hD-X2 hD POWeR SUPPly / CAn InTeRFACe HD Power Supply CAN Interface Feeder 1-4 Loom Fuse 1-4 communication cable F4-F6 F7-F9 24 V 290 V Transformer F1-F3 Main switch R S T hD POWeR SUPPly / STAnD AlOne InTeRFACe HD stand alone interface Feeder 1-8...
-
Page 13: Connections Heavy Duty Power Supply
Connections heavy duty power supply XD X2, hD X2 Mains connection heavy Duty Power Supply Stand Alone Min 4x1,5 mm STAnD AlOne - POWeR SUPPly STAnD AlOne - InTeRFACe Fuses Fuses Red= 6,3A slow Blue= 6,3 A slow F1 - F3 = 4 A / 500 V Stop relay jumpers NO - normally open NC - normally closed... -
Page 14: Connections Heavy Duty Power Supply Can
Connections heavy duty power supply CAn XD X2, hD X2 Mains connection Min 4x1,5 mm heavy Duty Power Supply CAn CAn - POWeR SUPPly CAn - InTeRFACe Fuses Fuses 6,3 A F1 - F6 = 10 A / 500 V F7 - F9 = 4 A / 500 V Blue= 6,3A slow F10 - F13 = 8 A / 500 V... -
Page 15: Connections Power Supply/ Interface
Connections power supply/ interface XD-X3 Mains connection Power Supply/ Interface Min 4x1,5 mm CAn - InTeRFACe STAnD AlOne - InTeRFACe Fuses Fuses FB3= 3,15A slow Red= 6,3A slow FB2= 5A slow Blue= 1A slow Stop relay jumpers NO - normally open NC - normally closed Without stop relay signal Opto coupler/ stop relay connection... -
Page 16: Xd-X2
45° within 45° of the horizontal plane. *Max 15° with low sensor spring force.(see page 19) 45° 45°* Ensure that the mount screws are correctly tightened. luna X3, Chrono X3, XD X3 XD X2, hD X2 Ref. no.40-8939-2001-02/1411 Ref. no.40-8939-2101-02/1411... -
Page 17: Jumpers
Jumpers luna-X3, Chrono-X3, XD-X3 The feeder is equipped with jumpers on the motor circuit board that adapt the feeders operation to the characteristics of the weaving process. (Weaving machine settings have priority over jumper settings). Opto sensors Mech. sensors Yarn break sensor filtering- Yarn store sensor sensitivity- LOW RIGID YARNS Yarn store sensor sensitivity- AUTO... -
Page 18: Xd X2, Hd X2
Jumpers XD X2, hD X2 The feeder is equipped with jumpers on the motor circuit board that adapt the feeders operation to the characteristics of the weaving process. (Weaving machine settings have priority over jumper settings). XD X2 700 W hD X2 Yarn store sensor sensitivity- LOW (Normal setting XD X2 700W) -
Page 19: Speed Settings - Feeders With Mechanical Sensors
1 since the feeder automatically calculates the speed according to yarn consumption. however, with very low speeds or wide looms, it could be helpful to reduce the maximum speed in order to avoid unnecessary acceleration luna X3 Chrono X3 XD X3... -
Page 20: Main Parts
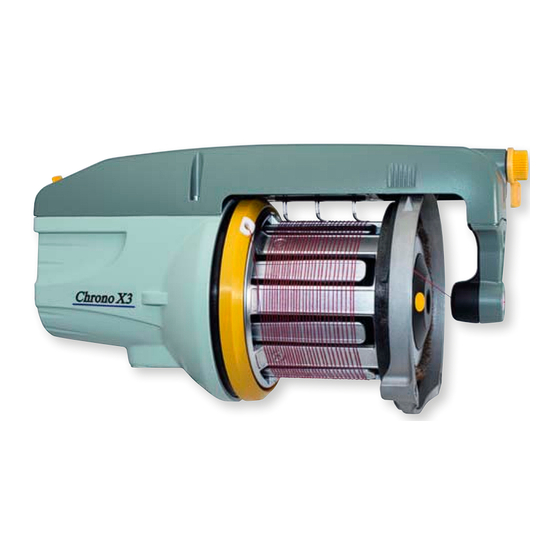
Main parts MAIn PARTS luna-X3, Chrono-X3, XD-X3 Opto. sensor Yarn store sensors Yarn break detector Winding disc Mech sensor Brush ring holder adjustment Tension ring quick-release Spool body Mount Adjustment Indicator ON/OFF Switch Max speed (Only Mech. sensor) Threading S/Z Switch Ref. -
Page 21: Xd X2
Main parts XD X2 Yarn store sensors Yarn break detector Winding disc Brush ring holder adjustment Tension ring quick-release Spool body Adjustment Indicator Max speed ON/OFF Switch Full threading S/Z Switch Not on one-way bearing Half threading Ref. no.40-8939-2001-02/1411 Ref. no.40-8939-2101-02/1411... -
Page 22: Hd X2
Main parts hD X2 Brush ring holder adjustment Yarn break detector Winding disc Yarn store sensors Tension ring quick-release COne Funnel Spool body Indicator BRUSh RIng Max speed ON/OFF Switch Threading S/Z Switch Ref. no.40-8939-2001-02/1411 Ref. no.40-8939-2101-02/1411... -
Page 23: S/Z Adjustment
S/Z Adjustment luna X3, Chrono X3, XDX3 Switch off the feeder. On feeders with S-flex, the S-flex must be detached for making the S/Z adjustment. See page 32 (Flex-brake mounting). Grip the winding disc and, whilst pressing the orange button on the front of the spool body, rotate the disc until the button is felt to locate. -
Page 24: Xd X2, Hd X2
S/Z Adjustment XD X2, hD X2 WITh STAnDARD BAll BeARIng Switch off the feeder. Grip the winding disc (1) and, whilst pressing the orange button on the front of the spool body (2), rotate the disc until the button is felt to locate. Aligning the mark on the winding disc with the line on the motor house gives the zero separation position. -
Page 25: Threading - Pneumatic Luna X3, Chrono X3, Xdx3
Threading - pneumatic luna X3, Chrono X3, XDX3 FUll ThReADIng, AUTOMATIC SlIDe ShIFT • Restart the feeder to automatically position the winding disc (empty spool body) • Insert the yarn into the eyelet and press both but- tons, whilst lightly holding the yarn. -
Page 26: Threading - Manual
Threading - manual luna X3, Chrono X3, XD X3, XD X2 WIThOUT CAT • Switch off the feeder. • Align the winding disc eyelet (1). • Open the brush holder (see page 32). • Thread the needle all the way through the feeder and output eyelet. -
Page 27: Threading - Pneumatic
Threading - pneumatic XD X2 Switch on the feeder. The winding disc will automatically position itself (empty spool body). FUll ThReADIng Insert the yarn into the eyelet and press the upper button, whilst lightly holding the yarn. hAlF ThReADIng Insert the yarn into the eyelet and press the lower button, whilst lightly holding the yarn. -
Page 28: Threading - Pneumatic And Manual
Threading - pneumatic and manual hD X2 Switch on the feeder. The winding disc will automatically position itself (empty spool body). PneUMATIC ThReADIng Insert the yarn into the eyelet and press the lower button, whilst lightly holding the yarn. MAnUAl ThReADIng Align the winding disc eyelet (1). -
Page 29: Sensor Adjustment
Sensor adjustment luna X3, Chrono X3, XD X3, XD X2 Optical sensors Certain yarn types may stick to, or leave deposits on, the sensor mirror. In such cases the clearance between the yarn and the mirror can be increased. Adjust the clearance by rotating the mirror 180 degrees. -
Page 30: Hd X2
Sensor adjustment hD X2 The mechanical sensors are placed on the fixed part of the spool body. The sensor (1) controls MAX reserve level, and the sen- sor (2) controls MIN reserve level. The force needed to press down the sensors is control- led by a spring, and it is adjustable with screw (3). -
Page 31: Assembly Instructions
Assembly instructions After disassembling, it is necessary to install the spool-body part by part to avoid damaging the parts. Secure the bellow properly with plastic straps (1). Be sure that the carrier pin fits into the keygroove in the motor shaft (2). Insert the two screws for the rubber bellows (3) and be sure they are properly tightened with the correct key. -
Page 32: Tensioners: Brush/ Flex Brake
Tensioners: Brush/ Flex Brake Alternative for luna X3, Chrono X3, XD X3 and XD X2 BRUSh MOUnTIng Rotating the slide shift lever (1) will detach the brush holder (2) from the spool body. Ensure that the brush ring is correctly positioned (3). -
Page 33: Tensioners: Balloon Adjustment
Tensioners: Balloon adjustment Alternative for luna X3, Chrono X3, XD X3 and XD X2 Balloon control adjustment. nOTe excessive brush tension will cause abnormal wear. nOSe POSITIOn 42° Mounting position of the nose: 42°or 30° 30° Ref. no.40-8939-2001-02/1411 Ref. no.40-8939-2101-02/1411... -
Page 34: Tensioners: Tec
Tensioners: TeC Alternative for luna X3, Chrono X3, XD X3 and XD X2 ThReADIng The TeC • Open the cover (1) • Insert a threading needle (2) • Pull on the yarn (3). The yarn will wrap itself around the needle •... -
Page 35: Tensioners: Cat
Tensioners: CAT Alternative for luna X3, Chrono X3, XD X3 and XD X2 InPUT TenSIOn Control input yarn tension to the CAT. nOTe The brush ring should only be used for balloon control. OUTPUT TenSIOn Adjustment of the output tension. -
Page 36: Tensioners: Brush/Flex Brake
Tensioners: Brush/Flex brake Alternative for hD X2 This brake is particularly suitable for rapier looms which require a constant braking tension during the weft inser- tion. It is also suggested with jute and monofilament. It is not recommended when flat yarns are woven. nOTe each brake is suitable for both yarn twist (S or Z). -
Page 37: Tensioners: Balloon Adjustment
Tensioners: Balloon adjustment Alternative for hD X2 Balloon control adjustment. nOTe excessive brush tension will cause abnormal wear. nOSe POSITIOn 55° 42° 30° Mounting position of the nose: 30°, 42° or 55° (55° = standard position) Ref. no.40-8939-2001-02/1411 Ref. no.40-8939-2101-02/1411... -
Page 38: Tensioners: Funnel
Tensioners: Funnel Alternative for hD X2 Suitable for heavy yarns which create large balloons. Sug- gested for polypropylene flat tape on projectile looms. nOTe There is no braking function on the yarn when the funnel is installed since it is used only to control the balloon effect during the yarn taking-off. -
Page 39: Maintenance
IRO/ ROJ TOOl kIT It is recommended to use an IRO tool kit, with special- ised tools, to ensure easy and correct disassembly/ assembly of IRO feeders during maintenance work. -
Page 40: Fault Finding
Fault finding luna X3, Chrono X3, XD X3 Check in the following order Fault Optical sensor Mechanical sensor Feeder will not start 1 - 2 - 3 - 4 - 6 - 7 - 8 - 24 - 25 - 26... -
Page 41: Xd X2
Fault finding XD X2 Check in the following order Fault Optical sensor Mechanical sensor Feeder will not start 1 - 2 - 3 - 4 - 6 - 7 - 8 - 24 - 25 - 26 1 - 2 - 3 - 5 - 6 - 7 - 8 - 24 - 25 - 26 Feeder will not stop 2 - 4 - 24 - 25 9 - 13 - 5 - 15 - 24 - 25... -
Page 42: Hd X2
Fault finding FAUlT FInDIng hD X2 Check in the following order Fault Optical sensor Mechanical sensor Feeder will not start 1 - 2 - 3 - 4 - 6 - 7 - 8 - 24 - 25 - 26 1 - 2 - 3 - 5 - 6 - 7 - 8 - 24 - 25 - 26 Feeder will not stop 2 - 4 - 24 - 25 9 - 13 - 5 - 15 - 24 - 25... -
Page 43: Declaration Of Conformity
IRO AB Box 54 SE-523 22 Ulricehamn Guarantee that machine type: Luna X3, Chrono X3, XD X3, XD X2 and HD X2 is manufactured in conformity with the provisions of the following EC directives and applicable amendments: Safety of machinery...
Need help?
Do you have a question about the Chrono X3 and is the answer not in the manual?
Questions and answers