
Related Manuals for Roberine R5


Summary of Contents for Roberine R5
- Page 1 User Manual Mower F5 and R5 roberine.com Translation of the original manual Version V1.3 Roberine 2021 ©...
- Page 2 Roberine. This also applies to the accompanying drawings and diagrams. Roberine reserves the right to alter components at any given time without giving the purchaser prior or immediate notification. The contents of this manual can also be updated without prior warning. Please contact your supplier’s Technical Service for information on adjustment, maintenance or repair which is not covered in this manual.
-
Page 3: Table Of Contents
3 Introduction........................14 3.1 Mowing..................................14 3.2 Type plate of your machine............................14 3.3 Engine..................................14 4 Description........................15 4.1 Equipment................................15 4.1.1 Description mower F5........................... 15 4.1.2 Description mower R5........................... 16 4.2 Engine compartment...............................16 4.3 Cabin..................................17 4.4 Seat..................................18 4.5 Driver's compartment..............................18 4.5.1 Command arm............................... - Page 4 6 Commissioning......................35 6.1 Before first use............................... 35 6.1.1 Adjusting the seat............................35 6.1.2 Adjusting the steering wheel......................... 35 6.1.3 Use the correct type of fuel (diesel)......................36 6.2 Testing the safety system............................37 6.2.1 Testing the mowing switch..........................37 6.2.2 Testing the parking brake (1)........................37 6.2.3 Testing the seat mechanism..........................37 6.2.4 Testing the parking brake (2)........................
- Page 5 8.13.1 Checking the mowing units......................... 57 8.13.2 Adjusting the cutting knife to the bed knife....................58 8.13.3 Adjusting the grass deflector and scraper....................58 8.13.4 Back lapping the cutting knives........................58 8.14 Maintaining the electrical system......................... 60 8.14.1 Battery................................60 8.14.1.1 Checking the battery.......................... 60 8.14.1.2 Replacing the battery.........................
-
Page 6: Preface
Preface This is the user manual for the mower F5 and R5. This publication explains how the machine is assembled, what it is intended for and how to use it optimally. This manual contains important information and instructions on safety, operation and maintenance. Please read all information and follow the instructions and guidelines in this manual carefully. -
Page 7: Guarantee And Liability
This manual should always be relocated with the mower. If Roberine is not involved in a recommissioning, then Roberine is not liable for any claims of third parties arising from that recommissioning. -
Page 8: Safety
Safety The mowers F5 and R5 have been carefully designed and expertly built for safe which is confirmed by the EG declaration. However, there will always be dangers and safety risks that cannot be excluded. These risks are inherent to operators and service engineers using the machine. -
Page 9: Avoid Roll Over
• Children who were given a ride on the machine in the past may suddenly appear in the mowing area for another ride and be knocked down or run over by the machine. • A child may be involved in a serious accident if the driver does not pay attention to the possible presence of children, particularly if a child approaches the machine from the rear. -
Page 10: Safety Signs
• Remember that there is no such thing as a safe incline. Pay close attention, particularly when driving on grass inclines. To avoid roll-over: > Do not suddenly stop or start driving when facing uphill or downhill. > Drive slowly on inclines. >... - Page 11 CAUTION! Avoid injury from rotating blades. Keep hands and feet away from rotating blades. Turn off the engine before servicing, lubricating or removing cutting units. Remember that the machine can keep moving after the engine has been turned off. Wait until everything has come to a complete stop.
-
Page 12: Safety Features
• The seat is part of the ROPS safety zone. Replace only with a seat approved by Roberine. • Never attempt to repair a damaged or altered ROPS. It must be replaced to maintain the manufacturer’s certification of the structure. -
Page 13: Parking Safely
Roberine manufactures articles in compliance with current revision of the REACH regulation, and is downstream-user of chemical substances. Roberine has the intention to fully comply to REACH regulation and has checked its suppliers to make sure they comply with REACH requirements for all materials and substances used in our products. -
Page 14: Introduction
The Roberine F5 and R5 have been specially designed to mow grass on sports grounds, parks and green public areas. The flail mower unit of the F5 has been developed in collaboration with Votex. Votex is especially known for its verge and ditch-side flail mowers. -
Page 15: Description
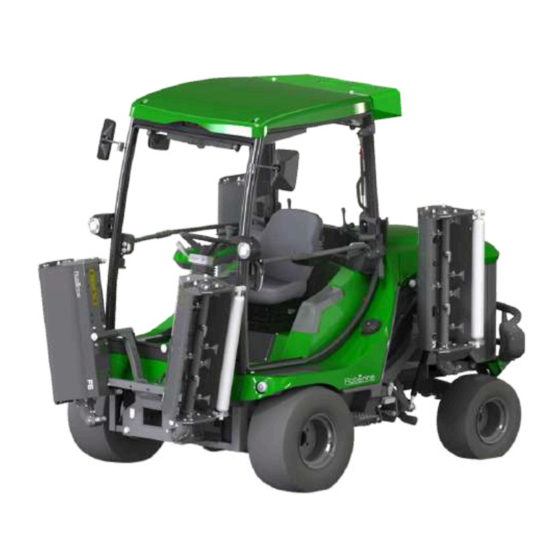
Description Your machine is the mower F5 or R5. Both models can be provided with either an ROPS or a cabin. 1. Mowing units. These are either flail units (F5) or reel units (R5) 2. Command arm: This is where all the operating buttons and the display are located. -
Page 16: Description Mower R5
5. Bed knife 6. Roller 7. Mower reel 8. Scraper Engine compartment NOTICE Press the Roberine logo to unlock the bonnet. 1. Air cleaner cap 2. Oil filling cap 3. Cooling fluid filling cap 4. Oil dipstick 5. Oil filling cap... -
Page 17: Cabin
Cabin 1. Windscreen wiper 2. Dashboard 3. Rear view mirror 4. Side mirror 5. Command arm 6. AC Cooler 7. Handle 8. Seat 9. Steering wheel 1. Step switch for radial blower speed 2. Controller for temperature (Thermostat) 3. Switch for air conditioner 4. -
Page 18: Seat
Seat 1. Back rest adjuster 2. Armrest adjuster 3. Lumbar support adjuster 4. Back rest angle adjuster 5. Seat belt fastener 6. Seat height adjuster 7. Horizontal shock absorber 8. Seat position adjuster Driver's compartment 1. Alarm light switch 2. Steering wheel 3. -
Page 19: Command Arm
1. Indicator left and right 2. Lights OFF 3. Parking lights 4. Horn 5. Headlights ON 6. Ignition 4.5.1 Command arm 1. Display with buttons 2. Parking brake / emergency switch 3. Beacon light (ROPS) 4. Cooler fan reverser 5. Weight transfer 6. -
Page 20: Display
Display Overview of the display functions. 1. Status bar 2. Screen 3. Button functions: • Home • Next screen • Alarms • Settings 4. Buttons NOTICE Enter a new screen or press a button to activate the button functions (3) bar. It disappears automatically after a few seconds. -
Page 21: Main Screens
4.6.2 Main screens Screen 1 1. Engine coolant temperature 2. Hydraulic oil temperature 3. Fuel level Screen 2 1. Vehicle speed 2. Engine rpm 3. Fuel level Description... -
Page 22: Alarms
Screen 3 1. Vehicle speed 2. Engine coolant temperature 3. Engine rpm 4. Hydraulic oil temperature 5. Fuel level 4.6.3 Alarms Pop-up messages NOTICE Alarm messages pop-up on the screen and disappear after a few seconds. Press one of the four buttons to let the message disappear instantly. - Page 23 Alarm screen This screen shows all the possible alarms and mow ECU (Electronic Control Unit) status. In normal operation the colour of a symbol is white. The alarm is active when a symbol changes colour. The Mow ECU status is indicated by a number, a complete list can be found in Error codes on page 78.
- Page 24 Tilt angle warning / alarm If the machine is driving on an incline, a low frequency buzzer will sound and a warning triangle is displayed with a slow flashing orange background. The maximum forward speed is limited from 12 to 6 km/h and the maximum reverse speed is limited from 6 to 3 km/h. Tilt angle warning when driving on small incline.
-
Page 25: Status And Setting Screens
4.6.4 Status and setting screens NOTICE Use the Page button to switch screens. Mower rpm (R5 only) / running hours On settings screen 1 the mowing units rpm (R5 only) can be adjusted if needed. Press - to decrease the rpm and + to increase the rpm. - Page 26 Service and status Settings screen 3 provides access to the more detailed service and status information. Press the engine button to go to the Diesel engine faults page. Press the display button to go to the Statistics. Service indicator Settings screen 4 displays when the next service is required. Description...
- Page 27 DPF regeneration On settings screen 5 the Diesel Particle Filter can be regenerated. See DPF Regeneration on page 30 for more information. Date and time On settings screen 6 the date and time can be adjusted. Press the edit to adjust time or date. Description...
- Page 28 Display settings On settings screen 7 the brightness of the display can be adjusted. Localisation On settings screen 8 the language, speed unit, time format and date format can be changed. • Language > English > Dutch > German > French •...
- Page 29 Service and status information These sub-screens that can be accessed from Service and status (screen 3). Diesel engine faults Diesel engine faults are shown on this screen, see the engine manual for an explanation of these faults. Statistics The Statistics screen displays important information for your machine and engine. Description...
-
Page 30: Dpf Regeneration
Inclination angles The mower is equipped with a tilt sensor. The inclination angles are displayed here. Status of DPF This screen displays the status of the DPF. 4.6.5 DPF Regeneration The diesel engine contains a DPF (Diesel Particle Filter). This filter collects and regenerates particles from the exhaust gasses. - Page 31 Reset regeneration The machine executes a Reset regeneration automatically. However, the operator is able to postpone this regeneration. The Reset regeneration can be executed during operation. 1. The message Automatic DPF regeneration requested appears on the display. • Press the button below the check mark to execute the regeneration. •...
- Page 32 Recovery regeneration When the regeneration processed has been postponed too often, the machine needs to execute a Recovery regeneration. A message shows on the display before a Recovery regeneration will be executed. The Recovery regeneration cannot be executed during operation. NOTICE It takes about 4 hours to complete the Recovery regeneration.
-
Page 33: Technical Specifications
Speed, low idling 1,150 rpm Cooling type Coolant Oil filter Replaceable element, see the Roberine spare parts manual. Air filter Cyclone filter and two dry air filters (primary and secondary) Maximum driving speed 25 km/h (15.6 mph) Maximum mowing speed 13 km/h (8.1 mph) - Page 34 310 cm units Total width 190 cm Kerb weight with mowing 1,960 kg units and ROPS Dry weight 896 kg Mowing units F5 Number of units Type Flail Diameter 25 cm Number of flails Total mowing width 345 cm Flail rotational speed...
-
Page 35: Commissioning
Commissioning Your mower has been assembled and adjusted with great care. Before first use Before you start using your mower, make sure that: • there are no transport damages; • there are no oil leakages; • the spare parts of your machine are present; •... -
Page 36: Use The Correct Type Of Fuel (Diesel)
Adjusting the tilting angle 1. Press the lever (1) downwards. 2. Adjust the position of the steering wheel 3. Release the lever to lock the steering wheel in the chosen position. Adjusting the height setting 1. Move the lever (1) upwards. 2. -
Page 37: Testing The Safety System
Use the following test procedures to check whether the machine works correctly. Do not use the machine if a fault is discovered during one of these procedures. Ask your authorised Roberine dealer for maintenance advice. -
Page 38: Testing The Parking Brake (2)
4. Stop the engine. The parking brake must ensure that the machine remains stationary. If the machine does not remain stationary, there is a problem with the safety circuit. Contact your Roberine dealer for repair. Daily checks before use Before every use, make sure that: •... -
Page 39: Operating
Operating In this chapter you will read how to operate the F5 and R5 mower. Starting the engine NOTICE Before you start the engine, make sure that all daily checks as described in Daily checks before use on page 38 have been done. -
Page 40: Cruise Control
3. Move backwards by pushing the right foot pedal forwards. 4. Stop the machine by slowly releasing the foot pedal. 7.2.1 Cruise control Use the cruise control to save a driving speed and keep driving without using the foot pedal. The cruise control has the following options: SET + ↑... -
Page 41: Raising The Mowing Units
Refer to Description on page 15 and Command arm on page 19 for the location of the levers and switches. 1. Unlock the front mowing units by rotating the locking lever anticlockwise (7). 2. Start the engine. 3. Put the parking switch (2) in the OFF position. 4. -
Page 42: Cooling Fan
Cooling fan The F5 and R5 are equipped with an automatic cooler fan. During mowing the fan turns every 4 minutes in order to blow away dirt and debris for 5 seconds. The fan blades are adjustable, their position depends on the measured cooling fluid and hydraulic fluid temperature. - Page 43 • With the free-wheeling tools installed, the machine will have unrestricted motion. If machine is on an incline it may free-wheel out of control after unlocking the wheel motors. Prevent machine from free-wheeling by mounting a rigid tow bar onto another machine. •...
-
Page 44: After Operating The Machine
After operating the machine When you are finished operating the machine, please make sure that you: • park in a safe and secure location. • turn off the engine and remove the ignition key. • clean the mowing units (see Cleaning the mowing units on page 55). •... -
Page 45: Maintenance
These are simple maintenance tasks, yet they are nevertheless important. It is therefore strongly recommended that the maintenance recommendations be strictly adhered to and carried out for you. Roberine has an excellent dealer network with trained service engineers who perform maintenance and repairs for you. -
Page 46: Every 50 Hours
Drive wheel bolts Inspect and adjust if necessary. ROPS Inspect the system for damage and wear. Maintenance may only be done by you Roberine dealer. Mowing units Inspect the mounting materials and adjust if necessary Bonnet Clean under the bonnet and check lock. -
Page 47: Every 1,000 Hours
Weather conditions The types of lubricants recommended by Roberine are suitable for an average temperature of between -29 °C and 135 °C. When using the machine in a temperature outside of this range, please contact your maintenance dealer for special types of lubricants. -
Page 48: Lubrication Points
8.2.2 Lubrication points The following points need to be lubricated regularly: Daily Weekly Twice a week Annually Maintenance... -
Page 49: Engine Oil
Engine oil Use oil with a suitable viscosity grade for the expected outdoor temperature in the period between oil changes. Preferably use one of the following types of oil specified by Yanmar: • API maintenance classification CF or higher. • ACEA E-3 or higher. -
Page 50: Changing The Engine Oil And Filter
8.3.2 Changing the engine oil and filter Change the oil more often if the vehicle is used in extreme conditions such as extreme dust, frequent slow or low-speed use or frequent short trips. Before you begin: Run engine to warm the oil and park it safely. 1. -
Page 51: Cleaning The Air Intake Grill And Engine Cooler
Cleaning the air intake grill and engine cooler It is important to keep the air intake grills and the engine’s other exterior surfaces (including the engine cooler) clean to allow adequate air intake. An obstructed air intake grill can cause engine damage due to overheating. CAUTION! Compressed air can cause debris to fly a long distance. -
Page 52: Cleaning The Dust Unloading Valve
4. Check the inside of the cyclone filter cap. 5. Clean primary filter. Cooling system Roberine recommends the following coolant: • Havoline AFC + B 50/50 (BL01) If the recommended coolant is not available, use a low silicate ethylene glycol base coolant concentrate in a 50% mixture of concentrate with quality water. -
Page 53: Fuel Filter And Fuel/Water Seperator
Fuel filter and fuel/water seperator Inspect the fuel/water seperator after the first 50 hours of use. Replace the fuel filter every 500 hours or once a year. Before you begin: Park the machine safely and let the engine cool down. Replacing the fuel filter OPMERKING Make sure the fuel level is low before you replace the fuel filter. -
Page 54: V-Belt
Check belt deflection (1) using thumb compare to specification. 3. Contact your Roberine dealer if the V- belt requires maintenance. 1. V-belt tension 2. V-belt adjuster screw 3. Alternator 4. -
Page 55: Transmission And Hydraulic Oil
8.10 Transmission and hydraulic oil Change the hydraulic oil every 500 hours or once a year. NOTICE Only use the recommended oil, seeTechnical specifications on page 33. Do not use engine oil or “Type F” automatic transmission oil. Check the hydraulic oil level Before you begin: Park the machine safely and let the engine cool down. -
Page 56: Checking And Replacing The Flails
8.12 Checking and replacing the flails If the flails are lost, damaged or worn too much, they must be replaced to prevent damage to the rotor shaft due to imbalance. Maximum flail wear Minimum value: 1. 8 mm 2. 4.5 mm 3. -
Page 57: Maintaining The Reels
8.13 Maintaining the reels 8.13.1 Checking the mowing units Check the mowing units regularly to ensure the cutting quality. CAUTION! • Always wear protective gloves when performing a service function on or near a mowing unit. Severe injury can result from contact with sharp cutting edges. •... -
Page 58: Adjusting The Cutting Knife To The Bed Knife
8.13.2 Adjusting the cutting knife to the bed knife Before you begin: Park the machine safely, lower the mowing units and turn off the engine. Make sure that the mowing units have come to complete stop. 1. Rotate bolt 1 to adjust the cutting clearance: •... - Page 59 CAUTION! • The operator must be on the operator's seat when raising or lowering a mowing unit. • Step off the machine before activating the Back lapping function to prevent injury in the case of a misstep. • Always wear protective gloves when performing a service function on or near a mowing unit. Severe injury can result from contact with sharp cutting edges.
-
Page 60: Maintaining The Electrical System
Back lapping the rear left mowing unit Back lapping the front and centre mowing units 1. Put Raising/lowering switch (4) in the ON position. 1. Unlock the front mowing units. 2. Press the cross-cut button. 2. Lower the front and centre mowing units. The rear left mowing unit starts turning backwards. -
Page 61: Replacing The Battery
8.14.1.2 Replacing the battery When replacing the battery, always replace it with one specified by Roberine. Contact your Roberine dealer. Before you begin: Park the machine safely and let the engine cool down. 1. Disconnect the negative (-) battery cable. - Page 62 1. Locate the headlights (1). 2. Remove wheel. 3. Remove the protection cap (2). 1. Remove the rubber cover (1). 2. Disconnect the plugs. 3. Unlock the retainer clip. 4. Replace the light bulb. 5. Connect the plugs and secure the bulb with the retainer clip.
-
Page 63: Replacing Fuses And Relays
8.14.3 Replacing fuses and relays When replacing fuses, make sure that they have the correct specifications. Refer to Electrical overview on page 80 for an overview of all the fuses and relays. Before you begin: Locate the right fuse box: •... - Page 64 • A3 Mow-ECU • FH3 Fuse holder • K7-K10 relays • P2 alarm buzzer Maintenance...
-
Page 65: Checking The Wheel Bolts
8.15 Checking the wheel bolts Re-tighten the wheel bolts after the first 5 hours and then every 50 hours. Tighten the wheel bolts and nuts to a torque of 140 Nm with a torque spanner. CAUTION! Loose wheel bolts may detach from the wheels, which may cause a serious accident resulting in a serious personal injury. -
Page 66: Refuelling
8.17 Refuelling WARNING Fuel vapours are flammable and can explode: • Turn off the engine before refuelling. • Do not smoke while working with fuel. • Keep fuel away from sparks and open flames. • Refuel outside or in a well-ventilated space. •... -
Page 67: Transport And Storage
Transport and storage Transport The mower can be transported on a trailer. NOTICE • The trailer’s load bearing capacity must be greater than the weight of the machine plus the weight of the mowing units (refer to Technical specifications on page 33). •... -
Page 68: Preparing The Machine For Storage
Preparing the machine for storage Before you store the machine make sure that: 1. the machine and mowing units are free of grass and dirt. 2. you repair or replace all the worn or damaged parts. 3. you tighten any loose mounting materials. 4. -
Page 69: Preparing The Fuel And Engine For Storage
Preparing the fuel and engine for storage Fuel: 1. Fill up the tank completely with fuel. NOTICE Filling the fuel tank reduces the volume of air in the tank, which slows down the deterioration of the fuel quality. 2. Park the machine in a safe, well-ventilated location. Engine: The storage procedure for the engine must be observed if the machine is not going to be used for more than 60 days. -
Page 70: Recommissioning
Recommissioning When taking the machine out of storage: 1. Check the engine oil level (see Checking the engine oil level on page 49). 2. Check the electrolyte level if the battery is not maintenance-free. If necessary, recharge the battery (see Checking the battery on page 60). -
Page 71: Troubleshooting
Turn off backlap switch to start The mowing switch is in the backlapping position. Turn off towing to start The ball valve is in the towing position. NOTICE Contact your Roberine dealer if there is a different problem. 11.2 Engine problems Problem... -
Page 72: Electrical Problems
Rinse the cooling system. The overflow tank cap is faulty. Replace the overflow tank cap. The thermostat is faulty. Contact your Roberine dealer. The water temperature indicator or Contact your Roberine dealer. transmitter is faulty. The engine oil level is too low. -
Page 73: Vehicle Problems
Put the parking brake in the ON position. position. The seat switch is faulty. Contact your Roberine dealer. The foot pedals are not in the neutral Place the foot pedals in neutral. position. The mowing switch is not in the Put the mowing switch in neutral. -
Page 74: Hydraulic Problems
See Technical specifications on page 33 for the correct type of oil. The parking brake is in the ON Put the parking brake in the OFF position. position. The hydraulic pump has internal Contact your Roberine dealer. damage. Troubleshooting... -
Page 75: Mowing Units Problems
55. There is air in the hydraulic system. Bleed the hydraulic system or contact your Roberine dealer. The parking brake is stuck. Contact your Roberine dealer. The engine speed is too low. Increase the engine speed. 11.8 Mowing units problems... -
Page 76: Warranty Conditions
Warranty conditions The warranty is granted by Roberine for a period of 24 months or 1500 hours whichever occurs first from the date of delivery of the machine. The warranty covers the repair and/or replacement of parts that become defective during the warranty period as a consequence of a hidden defect of the machine. -
Page 77: Appendices
F5 and R5 Serial number: See constructor's plate Designation: Tool carrier with flail mowing units (F5), resp. with reel mowing units (R5). to which this declaration corresponds, fulfils all the relevant provisions of the directives: Machinery Directive 2006/42/EU EMC-Directive 2014/30/EU... -
Page 78: Error Codes
13.2 Error codes Code Description ECU no error ECU battery supply voltage too high ECU battery supply voltage too low ECU voltage Vss1 supply ECU voltage Vss2 supply ECU voltage Vss3 supply ECU CAN1 ECU CAN2 ECU CAN3 ECU CAN4 ECU power on supply too low ECU power on sensor supply ECU power on monitor 1... - Page 79 Code Description Output mow pump #1, low side output Output mow pump #2, high side output Output mow pump #2, low side output Output lower left mowing unit Output lower centre mowing units Output lower right mowing unit Output raise mowing units Output left mow block circulate Output left mow block back lap Output left mow block left solenoid high side...
-
Page 80: Electrical Overview
13.3 Electrical overview Appendices... - Page 81 Goolkatenweg 65 7521 BE The Netherlands +31 (0)534 838383 roberine.com info@roberine.com...
Need help?
Do you have a question about the R5 and is the answer not in the manual?
Questions and answers