Table of Contents
Advertisement
User Manual
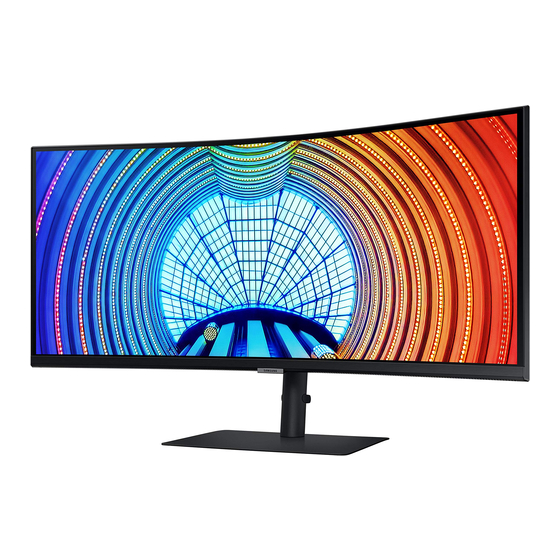
S34A65*
The color and the appearance may differ depending on the product, and the specifications are subject to
change without prior notice to improve the performance.
The contents of this manual are subject to change without notice to improve quality.
© Samsung
Samsung owns the copyright for this manual.
Use or reproduction of this manual in parts or entirety without the authorization of Samsung is
prohibited.
Trademarks other than that of Samsung are owned by their respective owners.
Advertisement
Table of Contents

Summarization of Contents
Chapter 01 Before Using the Product
Safety Precautions
Important safety information for using the product.
Electricity and Safety
Guidelines for safe use of electrical components.
Installation
Instructions for setting up the product.
Operation
Guidance on using the product features.
Cleaning
How to properly clean the monitor.
Correct Posture
Recommended posture for ergonomic use.
Chapter 02 Preparations
Attaching the Stand
Steps for assembling the monitor stand.
Precautions for moving the product
Guidelines for safely moving the monitor.
Checking the space around the product
Ensuring adequate ventilation space.
Adjusting the Product Tilt and Height
How to adjust the monitor's angle and height.
Anti-theft Lock
Instructions for using the anti-theft locking device.
Wall Mount Kit Specifications (VESA)
Details on VESA mounting compatibility and requirements.
Control Panel
Explanation of the monitor's control buttons and functions.
Direct Key Guide
Shortcut functions for monitor controls.
Chapter 03 Connecting and Using a Source Device
Ports
Overview of all available input/output ports.
Connecting and Using a PC
Methods for connecting your computer to the monitor.
Connecting to headphones or earphones
How to connect audio devices.
Connecting the Power
Steps for connecting the power cable.
Connecting the Product to a PC as a USB HUB
Using the monitor as a USB hub.
Tidying Up the Connected Cables
Organizing cables for a clean setup.
Setting Optimum Resolution
Ensuring the best display resolution.
List of graphic cards supporting HDR10
Compatible graphics cards for HDR10.
Chapter 04 Menu
Picture
Settings for picture quality and modes.
Brightness
Adjusting the screen's brightness level.
Contrast
Adjusting the contrast between light and dark.
Sharpness
Adjusting the clarity of image outlines.
Color
Adjusting color tones, saturation, and gamma.
Black Level
Adjusting black levels for image quality.
Response Time
Optimizing panel response for motion clarity.
Game Mode
Optimizing settings for gaming.
Screen Ratio
Changing the aspect ratio of the displayed image.
Screen Adjustment
Adjusting screen position and picture quality.
Eye Care
Features for eye comfort and relaxation.
PIP/PBP
Picture-in-Picture/Picture-by-Picture settings.
OnScreen Display
Transparency
Adjusting the transparency of menu windows.
Position
Adjusting the on-screen menu position.
Language
Setting the language for the on-screen menu.
Display Time
Setting how long the menu window stays visible.
Display Time Info
Showing remaining time for menu visibility.
Enlarge
Enlarging the size of the menu area.
Chapter 06 System
FreeSync
Technology to eliminate screen tearing and lag.
Volume
Adjusting the audio volume level.
Eco Saving Plus
Function to reduce power consumption.
Dynamic Brightness
Automatically adjusts brightness for contrast.
Off Timer Plus
Setting automatic power-off timers.
Eco Timer
Setting timers for eco-friendly power off.
PC/AV Mode
Switching between PC and AV input modes.
DisplayPort Ver.
Selecting the DisplayPort version.
Input Port Ver.
Selecting the HDMI input version.
Auto Source Switch
Automatically switches to the connected device.
Key Repeat Time
Configuring button response rate.
Power LED On
Configuring the power LED status.
Accessibility
Options for enhanced user accessibility.
USB-C Preference
Settings for USB-C high resolution/data transfer.
Setup Custom Key
Assigning functions to custom keys.
Eco Sensor Mode
Optimizes brightness based on lighting.
Max. Power Saving
Turns off Ethernet to save power.
Chapter 07 Support
Self Diagnosis
Performing diagnostic tests for monitor issues.
Software Update
Updating the monitor's firmware via USB.
Information
Viewing current software and hardware information.
Reset All
Restoring product settings to factory defaults.
Chapter 08 Installing the Software
Easy Setting Box
Installing software for screen partitioning.
Restrictions and Problems with the Installation
Potential issues during software installation.
System Requirements
Minimum OS and hardware for software.
Driver Installation
Installing product drivers for optimal performance.
Chapter 09 Troubleshooting Guide
Requirements Before Contacting Samsung Customer Service Center
Steps to take before contacting support.
Product diagnosis (Screen issue)
Running self-diagnosis for screen problems.
Checking the Resolution and Frequency
Verifying supported resolution and frequency.
Installation Issues
Troubleshooting common installation problems.
Screen issue
Troubleshooting common screen display problems.
Sound issue
Resolving no sound or low volume issues.
Source device issue
Troubleshooting beeping sounds from the source device.
Q & A
How can I change the frequency?
Steps to adjust the screen refresh rate.
How can I change the resolution?
Steps to change the screen resolution.
How do I set power-saving mode?
Configuring power-saving settings.
Chapter 10 Specifications
General
Basic specifications of the monitor.
Plug-and-Play
Information on Plug-and-Play compatibility.
Panel Dots (Pixels)
Details on pixel characteristics and manufacturing.
Standard Signal Mode Table
Supported resolutions, frequencies, and timings.
Chapter 11 Appendix
Responsibility for the Pay Service (Cost to Customers)
Conditions for charging service fees.
Not a product defect
Situations not considered product defects.
A Product damage caused by customer's fault
Damage caused by user mishandling or incorrect use.
Others
Other reasons for service charges.


Need help?
Do you have a question about the S34A654UBN and is the answer not in the manual?
Questions and answers