Table of Contents
Advertisement
Quick Links
Advertisement
Table of Contents

Related Manuals for ShareTech HiGuard X

Summary of Contents for ShareTech HiGuard X
- Page 1 QUICK INSTALLATION GUIDE...
-
Page 2: Table Of Contents
目錄 / Index English QIG (Quick Installation Guide)..........I. Hardware Installation............... 1. Appearance................. 2. Deployment................. II. System Setting................Easy system configuration steps............. 繁體版快速安裝指引................. 一、硬體安裝..................1. 硬體外觀說明................. 2. 硬體連接設定................. 二、系統設定..................簡易系統設定步驟.............. -
Page 3: English Qig (Quick Installation Guide)
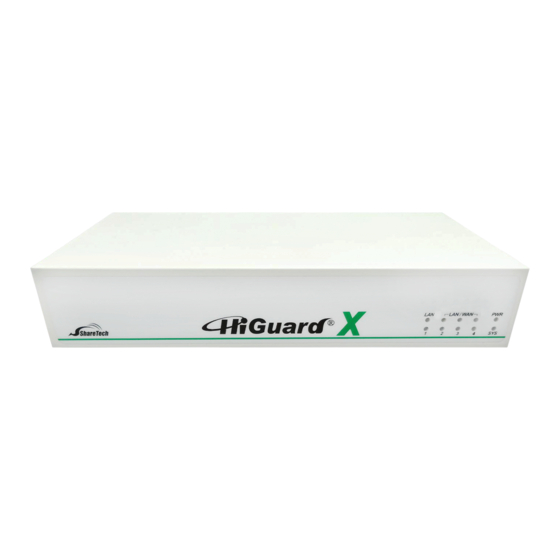
English QIG (Quick Install Guide) I. Hardware Installation (HiGuard X and V) 1. Appearance Front panel HiGuard X HiGuard V Rear panel Interfaces 1. Power Connection 100-240V AC, 50-60Hz adapter 2. Power Button In red color when power off; in blue color when power on. -
Page 4: Deployment
2. Deployment Connect LAN (RJ45), and Cat. 5e to the device LAN Ethernet Port. Configure a LAN with DHCP and you’ll obtain 192.168.1.x/24(IP segment) automatically. After getting the IP , ping 192.168.1.1 to ensure network connection. -
Page 5: System Setting
II. System Setting Easy system configuration steps STEP 1 Start Browser 。https://192.168.1.1 。Acct./PW :admin / admin 。Select a preferred language STEP 2 Setup Wizard 。Setup LAN 。Setup WAN 。URL Blacklist 。Security Setting 。Mail Management (available in HiGuard X) - Page 6 STEP 1. Start Browser (Chrome) https://192.168.1.1 1.1 Open the web browser and enter in the address bar. 1.2 Enter login Account / Password Chrome will pop up for authentication, please enter admin (account) /admin to log in. And select a preferred language for interf- (password) aces,currently available in English/ T raditional Chinese / Simplified Chinese.
- Page 7 1.3 Login completed. The wizard will automatically pop up to guide you through the configuration. NOTE: A step-by-step wizard will wipe all your data and settings before saving new settings. STEP2. Setup Wizard 2.1 Setup LAN Please enter your IP address and Subnet mask .
- Page 8 2.2 Setup WAN Administrators can click on the drop-down arrow to select preferred connection methods. One WAN port must be enabled to proceed. STATIC: IP address, subnet mask, and default gateway are required to configure WAN setting. The default gateway is 255.255.255.0 DHCP: A connection method that IP address is assigned by a router/switch in the perimeter.
- Page 9 2.3 Setup URL Blacklists URL Blacklist is switched off by default. Administrators can enable the function, select match level, enter blacklisted URL or IP , or select default categories. 2.4 Setup Security Settings Security settings are switched on by default. Administrators can select actions taken on detected anomalies.
- Page 10 2.5 Setup Mail Management (available in HiGuard X) Filtering log and anti-virus are switched on by default. Administrators can choose manually to switch off if it is not required. 2.6 Setup Completed T o save your configuration settings, click the Save button in the lower right corner.
-
Page 11: 繁體版快速安裝指引
繁體版 快速安裝指引 一、產品外觀 機器正面 HiGuard X HiGuard V 機器背面 1.電源連接埠 100-240V AC, 50-60Hz 變壓器。 2.電源鍵 當設備為關機狀態時亮紅色燈,為開機狀態時亮藍燈。 3.USB埠 當設備發生意外狀況導致無法正常運作,可透過USB裝置進行設定檔快 速復原。可外接無線3G/4G USB,提供有線/無線即時備援與負載平衡 機制。 4.Console埠 主要用途為查看系統內部網路介面設定。 5.LAN 埠 內部網路介面,將企業內部的網路連結在此網路面。 6.Port 2自定義埠 使用者可以自行定義 WAN或LAN。 7.Port 3自定義埠 使用者可以自行定義 WAN或LAN。 8.Port 4自定義埠 使用者可以自行定義 WAN或LAN。 9.RESET 利用小型的針狀物長按15秒按鈕後,設備會重開機。... -
Page 12: 硬體連接設定
2. 硬體連接設定 RJ45, Cat 5e, 連接設備 LAN 埠 電腦區域網路設定成 DHCP 模式,即可自動取得 192.168.1.x/24 同網段 IP。 IP 取得後,於設定電腦上 Ping 192.168.1.1... -
Page 13: 二、系統設定
二、系統設定 簡易系統設定步驟 STEP 1 開啟瀏覽器 。IP : 192.168.1.1 。帳號/密碼 : admin / admin 。選擇介面語系 STEP 2 設定安裝精靈 。LAN 設定 。WAN 設定 。URL 黑名單設定 。防護設定 。郵件管理 (HiGuard X有此功能) - Page 14 STEP 1. 開啟瀏覽器 (Chrome) 1.1 輸入遠端登入網址 https://192.168.1.1 打開Chrome 瀏覽器,於網址輸入 1.2 輸入登入帳號/密碼 admin admin 在彈出的Chrome視窗再次輸入 (帳號) / (密碼) 後 點選 「系統登入」。並選擇介面語系,目前支援英語、繁體中文、簡體 中文三種語系。...
- Page 15 1.3 登入管理者介面後,將自動開啟安裝精靈,引導管理者完成設定流程。 註: 注意安裝精靈會先清除目前資料,再儲存新設定。 STEP2. 設定安裝精靈 管理者請按下下方右鍵按鈕,進行下一個安裝精靈步驟。 2.1 LAN 設定 請輸入IP 位址與網路遮罩。...
- Page 16 2.2 WAN 設定 請按下箭頭選擇所需的連線模式,至少設定一個WAN才可繼續安裝精靈 流程。 【STATIC】 需自訂IP位址、網路遮罩和閘道,預設網路遮罩255.255.255.0 【DHCP】 由上端設備主動配發,不需要設定IP位址、網路遮罩和閘道。 【PPPOE撥接】 由電信業者主動配發,不需要設定IP位址、網路遮罩和閘道。如 果配發的是固定IP,也可先選STATIC。...
- Page 17 2.3 URL 黑名單設定 預設關閉,管理者可依照需求開啟此功能,選擇對比模式、輸入URL 或 IP黑名單,或勾選預設黑名單進行管理。 2.4 防護設定 預設開啟,管理者可依照需求對於異常IP進行紀錄、通知或阻擋。...
- Page 18 2.5 郵件管理設定 (HiGuard X 有此功能) 預設開啟,管理者可依照需求選擇是否關閉。 2.6 設定完成 最後顯示設定清單,確認後請按下儲存鍵,請稍後120秒,安裝精靈將 儲存此設定。...
Need help?
Do you have a question about the HiGuard X and is the answer not in the manual?
Questions and answers