
Related Manuals for ETS 24

Summary of Contents for ETS 24
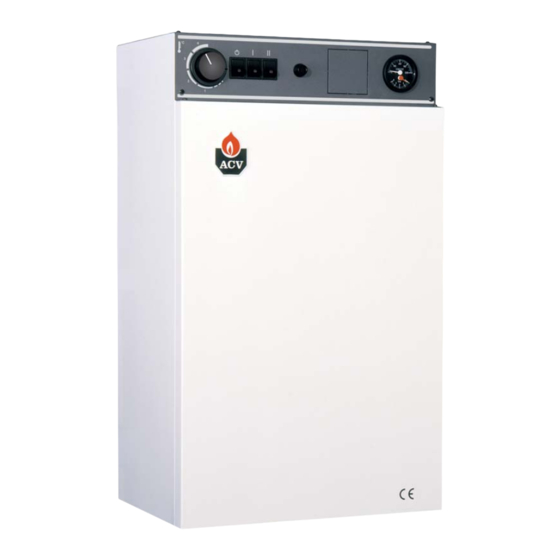
- Page 1 Electric boilers Installation, Operating and Servicing Instructions ETS 09 - 15 Single phase ETS 09 - 15 - 24 Tri phase excellence in hot water 66401300...
-
Page 2: Table Of Contents
INSTALLATION COMMISSIONING COMPONENT REPLACEMENT WIRING AND FAULT FINDING ETS 09-15 Single phase : Control Circuit ETS 09-15 Tri phase : Control Circuit ETS 24 Tri Phase : Control Circuit ETS 09-15 Single phase : Power Circuit ETS 09-15 Tri phase : Power Circuit... -
Page 3: Introduction
ETS Boiler. The ETS 09 and ETS 15 have 6 in total, and the ETS 24 has 10 (9 used with 1 spare). The boiler is suitable for connection to most heating... -
Page 4: Manual Handling Information
MANUAL HANDLING INFORMATION The weight of this We recommend that boiler is 36Kg, which the boiler be handled could present a risk of by two people until it is injury. securely fixed to a wall. The safest route from Care should be taken the vehicle to the point when loading and of installation should be... -
Page 5: User Instructions
USER INSTRUCTIONS User Data • The internal clock or external programmer can All user controls are situated on the front panel of the now be set to allow on/off periods as desired.The boiler, there are no user controls inside the boiler ON/OFF switch and 2 power level switches should casing. -
Page 6: Electrical Specification
ELECTRICAL SPECIFICATION Technical Data MODEL ETS 09 ETS 09 ETS 15 ETS 15 ETS 24 Single phase Tri phase Single phase Tri phase Tri phase Code 00608708 00608808 00608908 00609008 00609108 Gas Council N° EB 052 01 EB 052 01... -
Page 7: Pump Characteristics
PUMP CHARACTERISTICS WILO-STAR-RS 25/6 - 130 MM DESCRIPTION - Screwed end single head pump - Manual 3-speed control - Non-overloading single phase motor... -
Page 8: Installation
49Kg Connecting to the System Safety Valve Connection The ETS boiler is designed to operate on a sealed The boiler safety valve (set at 3 bar) must be piped system (ie. no open vent or feed and expansion to drain using metallic pipe (eg. copper) minimum cistern). - Page 9 INSTALLATION Mounting Boiler • The boiler must be fixed to a non flammable wall. • Observing the clearances shown below, drill 2 off 14mm x 100mm holes. • Fit the 2 bolts supplied and hang the wall bracket. • Fit washers and nuts •...
- Page 10 INSTALLATION Panel Removal To mount the boiler, first remove the front cover panel : - undo screws marked (A) - tilt panel towards you and lift clear. Then hang the boiler by positioning the hooks on the boiler over the wall bracket.Take care to ensure that the automatic air vent does not touch the bracket bolts.
- Page 11 INSTALLATION Pipework & System Connection HEATING ONLY Primary Return 3/4" female Primary Flow 3/4" female Suitable connection point for mains filling device Minimum size 15mm BOILER "S" PLAN Suitable connection point for mains filling device Minimum size 15mm "Y" PLAN...
- Page 12 INSTALLATION Electrical Connections 230V - 240V SP+N Installation 230-240 Volts This appliance must be Supply permanently connected to fixed wiring and must be earthed.The wiring must be carried out by a 2 Pole MCB competent person and be in Contact separation accordance with the current IEE 3mm min Wiring Regulations.
-
Page 13: Commissioning
COMMISSIONING Commissioning - Water 1.The system must be thoroughly cleansed prior to - Adjuster (B) is used to set the DELAY ON time of connection of the boiler.The system water should be the following stage contactors, the available settings treated to prevent general corrosion and deposition are in 1 minute increments if A is set to 1 to 10 of scale or sludge in the boiler, please refer to minutes. -
Page 14: Component Replacement
Control panel (no parts) 21477053 E75-015 Boiler casing front 21473052 E75-018 Automatic air vent 55445007 E75-014 Circulating pump 557A4009 E75-002 Element ETS 9 54428183 E75-012 Element ETS 15/24 54428182 E75-013 20A Contactors 54452082 E75-005 Stage delay on timers 54428189 E75-006... - Page 15 COMPONENT REMOVAL AND REPLACEMENT Part No 55445007 Part No 21475052 Part No Part No 54764014 54764009 Part No 21477053 Part No 54428116 Part No 54441008 Part N Part No 54452000 Part No 54428182 Part No 54428183 54426017 Part No 54766015 Part N 54452082 Part No...
- Page 16 COMPONENT REMOVAL AND REPLACEMENT Component Removal 2. Remove the capillary tube retaining clip from the (Not requiring boiler draining) thermostat pocket next to elements, carefully remove the thermostat bulb. 3. Undo the 14mm pressure gauge capillary nut on Control Thermostat the pressure safety valve.
- Page 17 COMPONENT REMOVAL AND REPLACEMENT Component Removal 4. Remove the discharge pipe from the valve body. (requiring boiler draining) 5. Remove the two 17mm nuts holding the electrical component mounting plate, and move the plate to the right just enough to enable the anti-clockwise removal of the pressure safety valve.
- Page 18 COMPONENT REMOVAL AND REPLACEMENT Heating Elements ETS 09 ACV Part No 54428183 GC No E75-012 ETS 15 and ETS 24 ACV Part No 54428182 GC No E75-013 Procedure For Element Removal on the element until the gasket is compressed and the element is tight in the boiler body.
-
Page 19: Ets 09-15 Single Phase : Control Circuit
WIRING DIAGRAMS - ETS 09-15 Single phase : Control Circuit... -
Page 20: Ets 09-15 Tri Phase : Control Circuit
WIRING DIAGRAMS - ETS 09-15 Tri phase : Control Circuit... -
Page 21: Ets 24 Tri Phase : Control Circuit
WIRING DIAGRAMS - ETS 24 Tri phase : Control circuit... -
Page 22: Ets 09-15 Single Phase : Power Circuit
WIRING DIAGRAMS - ETS 09-15 Single phase : Power circuit ETS 09-15 Single phase : Power Circuit To Boiler Body Stage 2 Stage 1 Stage 1 Power Power Power Relay 1 Relay 1 Relay 2 To Control Circuit MCB PLEASE NOTE: Due to the potential risk of ELECTRIC SHOCK this section of the manual is intended for... -
Page 23: Ets 09-15 Tri Phase : Power Circuit
WIRING DIAGRAMS - ETS 09-15 Tri phase : Power Circuit ETS 09-15 Tri phase : Power Circuit To Boiler Body Stage 1 Stage 2 Power Power Relay 1 Relay 1 To Control Circuit MCB PLEASE NOTE: Due to the potential risk of ELECTRIC SHOCK this section of the manual is intended for... -
Page 24: Ets 24 Tri Phase : Power Circuit
WIRING DIAGRAMS - ETS 24 Tri phase : Power Circuit ETS 24 Tri phase : Power Circuit To Boiler Body Stage 2 Stage 1 Stage 1 Power Power Power Relay 1 Relay 2 Relay 1 To Control Circuit MCB PLEASE NOTE: Due to the potential risk of ELECTRIC SHOCK this section of the manual is intended for... -
Page 25: Honeywell Sundial Wiring Diagrams
Stage 2 Power Delay Switch Relay 1 Timer Boiler Stat 1.1. 1.2. (78 - 53°C) Note: Illustrated model = ETS 09-15 Tri Phase CABLE COLOUR CODES bk- black br- brown r-red w-white Circulating y- yellow o - orange b - blue... - Page 26 Stage 2 Power Delay Switch Relay 1 Timer Boiler Stat 1.1. 1.2. (78 - 53°C) Note: Illustrated model = ETS 09-15 Tri Phase CABLE COLOUR CODES bk- black br- brown r-red w-white Circulating y- yellow o - orange b - blue...
-
Page 27: Ets 09-15 Fault Finding
FAULT FINDING ETS 09/15 Before carrying out any tests ensure voltage is present in the boiler and the timers calibration button B is set to minimum. 1) Is panel front control switch “ON” a: Check voltage at 60a terminal rail... -
Page 28: Ets 24 Fault Finding
FAULT FINDING ETS 24 Before carrying out any tests ensure voltage is present in the boiler and the timers calibration button B is set to minimum. a: Check voltage at 60a terminal rail Is panel front control switch “ON” (indicator lit) -
Page 29: Maintenance & Service Log
MAINTENANCE Maintenance 3. Check all push-on electrical connectors for For safety reasons it is recommended that the boiler tightness and good connection to the relative is serviced annually and that servicing is carried out components. by a qualified service engineer. 4. - Page 30 SERVICE LOG DATE COMPANY COMMENTS INITIALS...
- Page 31 SERVICE LOG DATE COMPANY COMMENTS INITIALS...
- Page 32 excellence in hot water INTERNATIONAL ESPAÑA PORTUGAL ACV international n.v ACV ESPAÑA BOILERNOX LDA KERKPLEIN, 39 C/DE LA TEIXIDORA, 76 RUA OUTEIRO DO POMAR B-1601 RUISBROEK - BELGIUM POL. IND. LES HORTES CASAL DO CEGO, FRACÇÃO C, TEL.: +32 2 334 82 20 E-08302 MATARÓ...
Need help?
Do you have a question about the 24 and is the answer not in the manual?
Questions and answers