
Related Manuals for Solo 200

Summarization of Contents
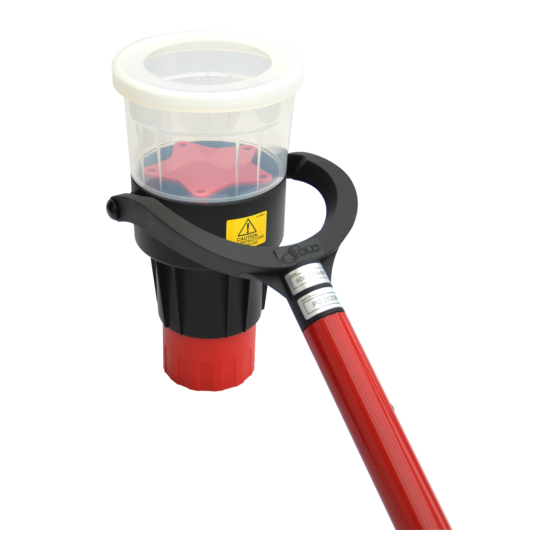
Solo 330/332 Aerosol Dispenser
Pre-Test Safety and Notification
Notify relevant personnel, ensure control panel is in 'Test Mode', and take precautions before testing.
Loading and Initial Release
Instructions for loading the aerosol can into the dispenser and initial release of aerosol.
Detector Testing and Smoke Burst
Attaching the dispenser to a pole, positioning the detector, and releasing a smoke burst.
Activation and Dispersal
Repeating the test, responding to alarm, and allowing particles to disperse.
Solo 460 Cordless Heat Detector Tester
Battery and Pole Assembly
Insert battery baton into unit and access pole, ensuring secure locking. Do not use battery as pole.
Angle Adjustment and Power Up
Adjust tester head angle with lever. Power on unit and position detector, aligning heat output duct.
Detector Activation and Standby
Hold unit until detector activates. Unit reverts to standby mode, cooling the heating element.
Solo 423/424 Heat Detector Tester
Safety Information and Assembly
Do not place hand in cup, touch metal grid, or block air vents. Attach power cable and secure clip.
Pole Attachment and Power Connection
Insert tester into access pole. Connect power cable to mains power.
Detector Testing Procedure
Press green button to power on. Hold unit over detector until activated.
Solo 200 Universal Removal Tool
Important Safety Information
Always wear protective equipment when working above head height and ensure area is clear.
Grip Adjustment and Pole Insertion
Adjust detector grips by lifting/rotating. Insert tool into access pole, locking buttons as needed.
Detector Removal and Installation
Locate detector, twist anti-clockwise to remove. Align and twist clockwise to install.
Need help?
Do you have a question about the 200 and is the answer not in the manual?
Questions and answers