
Related Manuals for nutricook GT806-M09


Summary of Contents for nutricook GT806-M09
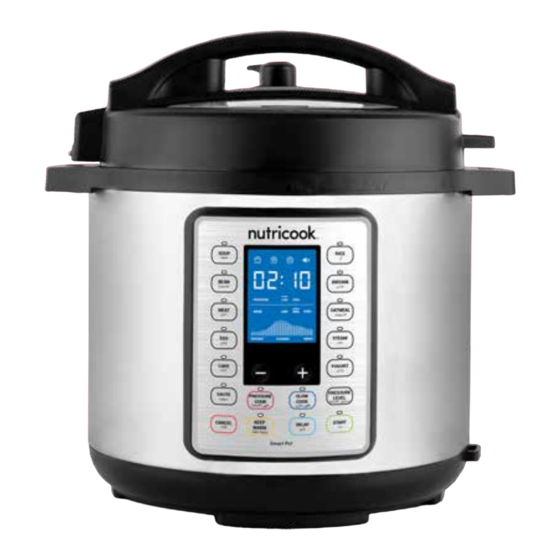
- Page 1 SMART POT PRIME User guide. Please make sure to read this User Guide prior to using your unit.
- Page 2 Contents. Welcome. Before you begin. Important safeguards & cautionary information. What's included. Cooker parts overview. Getting started. Open and close lid. Install and remove sealing ring. Install and remove pressure release valve. Install and remove float valve. Install and remove anti-block shield. Install condensation collector.
- Page 3 Welcome to team nutricook ® Life is complicated. Eating healthy doesn’t have to be. There’s really no easier way to streamline your healthy lifestyle than with this mighty appliance. We are constantly working to create recipes that are EASY. DELICIOUS. NUTRITIOUS.
- Page 4 Before you begin. • Remove all packaging materials from in and around the cooker and verify that all parts are accounted for. • Place the cooker on a stable, level surface, away from external heat sources. • Read all Important safeguards and cautionary information in this User guide.
- Page 5 Building a smoothie. Important safeguards & cautionary information. Warning! This appliance cooks with pressure. To avoid the risk of serious injury, carefully read all instructions before operating this appliance. When using any electrical appliance, basic safety precautions should always be observed, including the following critical information.
- Page 6 Only use accessories like pressure cooking lid, sealing rings and • CAUTION: The inner pot can be heavy when filled with food. inner pots authorized by nutricook to reduce the risk of any Extreme caution must be observed when taking out the inner pot ®...
- Page 7 ELECTRICAL SAFETY ELECTRICAL INFORMATION: CAUTION: To avoid risk of electric shock, never immerse the cord, plug, or cooker base in water or other liquids. For safety reasons, the cord length of this appliance was selected to reduce Safety Hazards that may occur with a long cord. Extension •...
- Page 8 GLASS LID • USER GUIDE Product Specification: MODEL CAPACITY POWER VOLTAGE WEIGHT DIMENSION SMART POT PRIME 220-240 V MODEL NO: GT606-M09 1000 watts 6 kg 33.8x33.8x37.35 cm 50/60 Hz ITEM CODE: NC-SPPR6 SMART POT PRIME 220-240 V MODEL NO: GT806-M09 1200 watts 7.5 kg...
- Page 9 Cooker parts overview. inner pot top of lid float valve stainless steel lid release button inner pot pressure release valve cooker base lid handle condensation lid fin collector cooker base rim lid rest lid marker cooker handle stainless steel locking pin body bottom of lid spoon rest...
-
Page 10: Getting Started
Getting started. Find delicious recipes online at: nutricookworld.com nutricookworld... - Page 11 *NOTE: It is recommended to have more than one sealing ring. The sealing ring is an integral part of product safety. Close: Grip handle and lower Only use authorized nutricook sealing ® remove down the lid to cooker base ring or Replace your sealing ring every rim.
- Page 12 Install and remove Install and remove pressure release valve. float valve. Install: Position pressure When pressure builds up inside your release valve on pressure cooker, the float valve pops up. This release hole and press down. indicates the cooker is pressurized and prevents you from opening the lid.
- Page 13 Install and remove Install condensation anti-block shield collector. Install: The anti-block shield safely prevents On back of cooker base , align grooves of the condensation food from entering the pressure collector over tabs and push condensation collector until it locks into release hole to avoid blockage and place.
-
Page 14: Venting Methods
(e.g. porridge, stews, sticky liquids, The inner pot is an integral part of product safety. Always use an soup, etc.). Food content may spatter authorized nutricook inner pot made for this model when cooking. out from the pressure release valve. -
Page 15: Control Panel Details
Control panel details. Natural Release (NR): Leave the pressure release valve in the Sealing position. The cooker dissipates heat so pressure releases naturally overtime. 3. Allow cooker to cool down naturally until t he float valve drops down. This may take 10 to 15 minutes or even longer, depending on the SOUP RICE ﺣﺴﺎء... -
Page 16: Lcd Screen Display
LCD screen display. Smart Cooking Programs. Pressure Cooking Programs Non-pressure Cooking Programs Soup Rice Sauté Bean Biryani Slow Cook Meat Oatmeal Yogurt Steam Cake Pressure Cook Pressure Level Button. Use to toggle between High Pressure. PRESSURE HIGH Cancel Button. Use to CANCEL any operation during program selection or during the cooking cycle. -
Page 17: Smart Features
Smart features. Auto keep warm. Sauté and Yogurt, the Keep During program selection except for Delay timer. Warm indicator light automatically illuminates. This indicates that the Auto Keep Warm cooking program will go to mode immediately after Delay button to set delay time before the cooking cycle begins. the cooking time is completed. - Page 18 LCD screen display Display message when cooker has reached maximum temperature for Sauté. messages. Smart Cooking Program Display message when the Keep Warm time is completed. Display message when the cooker is plugged in. Display message when the cooker detects overheating on the cooking chamber.
-
Page 19: Initial Test Run
Smart Cooking Programs Initial test run. Table. In order to familiarize yourself with the Smart Pot and start cooking with your favourite recipe, it is highly recommended for first time users to do a test run. This optional but recommended test run will complete in about 15 minutes. - Page 20 Sauté. turned off, screen displays and beeps 5 times. Note: If Auto Keep Warm is activated, the cooker goes to Keep • Warm mode immediately after the cycle and counts up from Sauté is a non-pressure cooking program which can be used in 00:00.
- Page 21 Pressure cooking 10. When cooking time has been completed, screen displays End. • Never leave the cooker unattended when using WARNING: Sauté as this program reaches high temperature which can programs. burn the food in the pot. These cooking programs use pressure for a time-efficient and energy-saving method of cooking EASY.
- Page 22 Remove the inner pot from the cooker base. Cooking Cooking Suggested Venting Notes 3. Add food including the liquid ingredients in the inner pot. Programs Modes Method Note: • For pressure cooking programs, do not fill the inner pot Moist cake Press Cake repeatedly to set the higher than the MAX line.
- Page 23 Slow cook. The Auto Keep Warm is not recommended for Rice and other • foods that may become overcooked when left in Keep Warm mode for too long. START Slow Cook 13. Press to begin cooking. program does not use pressure during the cooking Note: process.
- Page 24 Yogurt. Slow Cook Auto Keep Warm 11. When is selected, the function is automatically turned on which will be activated after the cooking Auto Keep time has been completed. If you wish to turn off the Warm Keep Warm function, press the button.
-
Page 25: Care And Maintenance
Care & maintenance. Yogurt button. Press again to select High. The screen 8. Press displays boil. Note: When Yogurt function is set to High mode, no time • adjustments can be made. START 9. Press button to begin cooking. Note: If START button is not pressed after program settings, the WARNING: •... -
Page 26: Troubleshooting
Troubleshooting. Cleaning Methods Issue Possible Cause Solution Part Cleaning Tip Dishwasher Hand Wash Wipe Clean The sealing ring is not properly Check the position of the sealing ring and ensure Safe (submerged) (damp cloth) installed it is properly installed in the sealing ring rack. Difficulty closing lid. -
Page 27: Warranty
EXCLUSIONS AND LIMITATIONS This Nutricook Two-Year Limited Warranty applies only to Nutricook products distributed by or for Nutricook that can be identified by the “Nutricook” trademark, trade name, logo and bar code. Nutricook’s Two-Year Limited Warranty does not apply to any other products that may appear to be authentic, but were not distributed/sold by Nutricook. - Page 28 Repair or replacement of the product (or, if repair or replacement is not feasible, a refund of the purchase price) is the exclusive remedy of the consumer under this limited warranty. Nutricook shall not be liable for any incidental or consequential damages for breach of this limited warranty or any implied warranty on this product.
- Page 29 SMART POT PRIME nutricook | www.nutricookworld.com | All rights reserved. ® Illustrations may differ from the actual product. We are constantly striving to improve our products, therefore the specifications contained herein are subject to change without notice. NC-SPPRIM...
Need help?
Do you have a question about the GT806-M09 and is the answer not in the manual?
Questions and answers