Advertisement
Table of Contents
- 1 Copyright & Notes
- 2 Product Description
- 3 General Safety Regulations
- 4 Installation
- 5 Transportation and Handling
- 6 Set up Operations
- 7 Preliminary Checks
- 8 Scrapping and Disposal
- 9 Operation
- 10 The Menu Tree
- 11 Alarms Memory
- 12 Alarm Codes
- 13 Download Procedure
- 14 Backup Battery
- 15 Routine Maintenance
- 16 Service and Troubleshooting
- Download this manual
Advertisement
Table of Contents

Related Manuals for FRIMED CL60B/PF

Summary of Contents for FRIMED CL60B/PF
- Page 1 USER PASSWORD = 555 M-7.3-16 Rev. 05 09/03/15 BLOOD BANK REFRIGERATORS AND PLASMA FREEZER Use and maintenance manual...
-
Page 2: Copyright & Notes
ITALY +39 011 9921161 Fax +39 011 9921160 e-mail: info@frimed.it website: www.frimed.it 0476 Manufacturer’s Responsibility The Manufacturer is responsible as to safety and correct use of these refrigerators only if: the operations of setting, change, and repair must be performed by authorised personnel. - Page 3 Index Products applicable to this manual Table of capacity and dimensions Technical data Standard and optional fitting Standards and general warnings Certification Testing and warranty Aim, contents and intended user of this manual Product description General safety regulations Client’s responsibilities Client service requests Ordering spare parts...
- Page 4 Routine maintenance Cleaning the refrigerator Cleaning the interior and exterior of the appliance Cleaning the condenser Precautionary measures for prolonged disuse Special maintenance and repairs Service & Troubleshooting Symbols used Annexes CE declaration of conformity Technical documentation 9.2.1 Electric wiring diagram 9.2.2 Safety test report M-7.3-16 Rev.
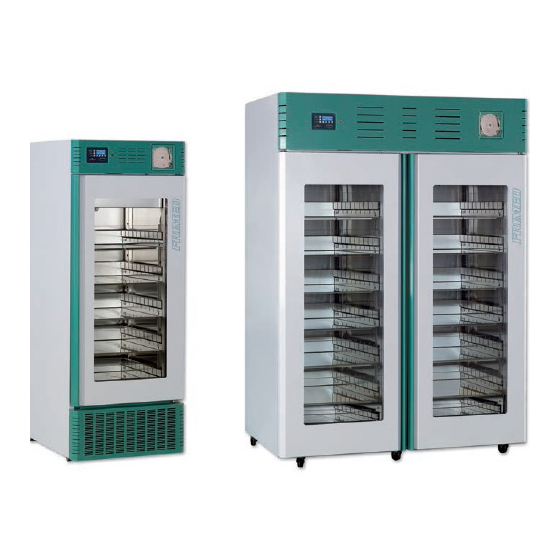
- Page 5 Blood Bank Refrigerators SB - FS - PN - AF MODELS Operating temperature: +2°C to +6°C Factory pre-set to: +4°C Models: SB10E, FS15E, FS20E, FS25E, FS30E, PN45E, PN52E, AF70E, AF140E Plasma Freezer CL60B/PF MODEL Operating temperature: -10°C to -42 °C Factory pre-set to: -40°C...
- Page 6 Table capacity and dimensions EXTERNAL DIMENSIONS AND DIMENSIONS OF PACKAGING UNIT NET WEIGHT AND SHIPPING WEIGHT CAPACITY MODEL WxDxH (mm) WxPxH (mm) (LT) SB10E 600X600X860 680x680x1040 FS15E 600x600x1360 680x680x1590 FS20E 600x600x1560 680x680x1790 FS25E 600x600x1760 680x680x2050 FS30E 600x600x1960 680x680x2150 PN45E 700x800x1840...
- Page 7 STANDARDS AND GENERAL WARNINGS 1.1 CERTIFICATION All Blood Bank refrigerators are produced in accordance with European Community Regulations applicable at the time of its appearance on the market and are certified as Medical Device in accordance with European Directive 93/42/EEC and following amendments and integrations. 1.2 TESTING AND WARRANTY The appliance is tested in our works in compliance with established regulations and then shipped ready for use.
-
Page 8: Product Description
STANDARDS AND GENERAL WARNINGS 1.3 PRODUCT DESCRIPTION The appliance comprises a single body with panelling in various materials and insulation in expanded polyurethane foam density. The appliance instruments are located on the front panel where the electrical wiring is housed. The motor unit and the condenser unit can be housed either on the top or on the bottom closed by a frontal panel and a rear grid. - Page 9 STANDARDS AND GENERAL WARNINGS 1.7 ORDERING OF SPARE PARTS Orders of spare parts must be done by consulting the part reference code and the serial number of your appliance. Consult your dealer. The user must consult the dealer or the manufacturer, as the case of medical device requires original spare parts, failing which product certification decades.
-
Page 10: Installation
INSTALLATION 2.1 TRANSPORTATION AND HANDLING The appliance must be transported and handled exclusively in upright position, in observance of the instructions printed on the packing. This precaution is necessary to avoid contamination of the refrigerant circuit with compressor lube oil with resulting valve and heat exchanger coil failure and problems starting the electric motor. The manufacturer cannot be considered responsible for any problems due to transport executed in conditions other than those specified herewith. -
Page 11: Set Up Operations
INSTALLATION Fig. 1 Fig 2 The refrigerators are equipped with double protection fuses 10A (CEI EN 61010-1, Classification 66-5) (fig. 2 – 3) Fig. 3 Fig. 4 2.4 SET UP OPERATIONS To avoid errors and accidents, perform a series of checks for possible damage sustained during transport, installation and hook-up operations before starting up the unit. -
Page 12: Scrapping And Disposal
CFC-free refrigeration gas Electrical and electronic equipment (WEEE) Frimed S.r.l. shall not be chargeable for any disposal of the apparatus at the end of its working life. In line with EU Directive 2012/19/UE for waste electrical and electronic equipment (WEEE), this electrical product must not be disposed of as unsorted municipal waste. -
Page 13: Operation
OPERATION 3.1 SAFETY AND ACCIDENT PREVENTION The appliance is designed to include several features to ensure the safety and the protection for the Operators and for the material stored in the cabinets. The following list describes the protections adopted against mechanical risks: ... - Page 14 SWITCH ON THE UNIT To start the appliance, it is necessary to press button ON on the display. The main screen will be displayed and message « FRIMED » will appear. Then you will be requested to enter the user password 555.
- Page 15 USER’S INSTRUCTIONS 4.3 CONTROL PANEL According to the model, all units are equipped with the same control panel (CPU control board) but with different settings depending on their configuration. LED DECODING – STATE OF ALARM Compressor Date Refr.mod. xxxx Clean 4.0 °C Battery 4.0°...
-
Page 16: The Menu Tree
USER’S INSTRUCTIONS 4.4 THE MENU TREE 1. Alarms 2. Info 3. Display 4. Password Scroll with arrow ↓ and ↑ to select the menu, then confirm with ENTER. Parameters are displayed. In order to modify any pre-set parameters, you always need to enter menu by selecting 4.PASSWORD and by entering the user password 555. - Page 17 USER’S INSTRUCTIONS 3- Display 3. DISPLAY = English = °C The mainboard can be set in the following languages: : Italian – English – French – Polish - Spanish To change the language press key “MENU” and by using arrow-keys select 4.PASSWORD, confirm with “ENTER”, select 4-1 USER, enter 555 and confirm with ENTER;...
-
Page 18: Alarm Codes
USER’S INSTRUCTIONS 4.5 ALARM CODES Temperature alarms are activated with a delay. Error Parameters = wrong parameters entered Type of Alarm on Description of alarm alarm Display Power Failure = when power is restored, a message is shown AL00 indicating length of time of power failure Faulty Temperature Probe (S1 probe damaged;... -
Page 19: Download Procedure
USER’S INSTRUCTIONS In case GSM Module and back-up battery are connected, alarm message is forwarded automatically to memorized mobile numbers. When alarm is no more present, a notification message of “standard” working will be forwarded. IMPORTANT NOTE - whenever an alarm is shown on display, you need to press any key so that the display is on and then select keys ALARM and MUTE to clear it. - Page 20 USER’S INSTRUCTIONS 3 - Data load – if parameters need to be modified or updated, please insert USB pen and by pressing « data load», the appliance will be automatically programmed with new data. 4.7 PROCEDURE TO DISABLE THE DATA LOGGER Press any key to activate the display Press MENU key By using the arrow keys go to point 4-PASSWORD+ENTER...
- Page 21 USER’S INSTRUCTIONS G. When the word “OFF” will show, take off the USB pen and switch on the appliance again. H. In some cases the word “PARAMETER ALARM” can show (depending on firmware release). In order to reset the alarm, press the key “ALL” (third from left side below display)+MUTE key. Repeat the operation until the alarm disappears.
-
Page 22: Backup Battery
USER’S INSTRUCTIONS IMPORTANT: To use GSM module (if included in the appliance), document will be sent containing password and instructions for GSM module use and loading/recording of mobile phone numbers 4.11 DRY CONTACT FOR REMOTE ALARM The refrigerator communicates its own state also by means of a dry contact placed in the rear upper side. - Page 23 USER’S INSTRUCTIONS In order to make the pen start operating on chart recorder paper: 1. Open the cover with the key 2. With one hand slightly lift the pen arm, with the other hand remove the protection of the pen 3.
- Page 24 USER’S INSTRUCTIONS HOW TO INSTALL A NEW BATTERY 1. Open the cover with the key (Fig. 6) 2. Lift up the pen (Fig. 9) 3. Lift up the chart disc (Fig. 10) 4. Remove the alkaline battery 1,5 V LR03 and put another new one taking care of polarity (Fig.
- Page 25 USER’S INSTRUCTIONS 4.14 DRAWER All blood bank refrigerators are standard fitted with drawers according to the scheme at page 6. Each drawer has a maximum capacity of 20kg. In case you need to remove the drawer for cleaning, follow the steps outlined below in the photos.
- Page 26 USER’S INSTRUCTIONS 4.15 DIVIDER FOR DRAWER AND ITS INSTALLATION Drawers can be equipped with Plexiglas dividers (optional accessory) that allow the creation of longitudinal compartments inside the drawer. In case you bought the kit of dividers for drawer, you can proceed with the installation of the same following the steps outlined below in the photos. The same procedure has to be followed in case of need to remove the partitions for thorough cleaning.
-
Page 27: Routine Maintenance
ROUTINE MAINTENANCE Basic safety regulations We summarise the elementary safety regulations to ensure that the user or maintenance technician can perform the work in conditions of total safety: do not touch the unit with wet hands and/or feet; do not use the appliance with bare feet;... - Page 28 ROUTINE MAINTENANCE According to the model, compressor can be placed on top or at the bottom of the appliance Compressor on top Use a convenient ladder to reach the condenser. Use an air jet or an aspirator with a soft dry brush if necessary (Fig.
- Page 29 ROUTINE MAINTENANCE Fig. 24 5.4 PRECAUTIONS FOR PROLONGED DISUSE If the refrigerator should remain unused for more than 15 days please proceed as follows: Switch off the appliance and disconnect the power cord, Clean the interior of the cabinet, shelves, trays, runners and supports, paying special attention to critical areas such as articulations and magnetic sealing strips, Leave doors slightly open to prevent accumulation of residual humidity M-7.3-16 Rev.
- Page 30 SPECIAL MAINTENANCE AND REPAIRS All maintenance work not described in the previous sections must be considered “Special Maintenance”. Special maintenance interventions and repairs are to be performed exclusively by specialised technicians authorised by the manufacturer. The manufacturer declines all liability in the case of work performed by the user or unauthorised persons, or if non-original spare parts are fitted to the appliance.
-
Page 31: Service And Troubleshooting
SERVICE & TROUBLESHOOTING Here below a list of possible faults that might occur with descriptions of possible causes and a short corresponding actions list to try: ACTION FAULT POSSIBLE CAUSE The appliance does not switch Power switch is OFF Move main switch ON Power failure Check the plug, socket, fuses, electrical line... - Page 32 SYMBOLS USED Remove the tension before removing the protection Warning symbol Earth symbol It is necessary to consult the Instruction Booklet before carrying out the operation Clean condenser regularly M-7.3-16 Rev. 05 09/03/15 BLOOD BANK REFRIGERATORS AND PLASMA FREEZER Use and maintenance manual...
- Page 33 ANNEXES The following documentation is enclosed: CE DECLARATION OF CONFORMITY TECHNICAL DOCUMENTATION 8.2.1 Electric diagram 8.2.2 Safety test report M-7.3-16 Rev. 05 09/03/15 BLOOD BANK REFRIGERATORS AND PLASMA FREEZER Use and maintenance manual...
- Page 34 FRI.MED. S.R.L. VIA RIVA 26/19 14021 BUTTIGLIERA D’ASTI (AT) - ITALY Tel. +39 011 9921161 – Fax +39 011 9921160 e-mail: info@frimed.it M-7.3-16 Rev. 05 09/03/15 BLOOD BANK REFRIGERATORS AND PLASMA FREEZER Use and maintenance manual...
Need help?
Do you have a question about the CL60B/PF and is the answer not in the manual?
Questions and answers