
Related Manuals for Niner JET 9 CARBON


Summary of Contents for Niner JET 9 CARBON
- Page 1 NINER ENCYCLOPEDIA >> SPECIFICATION & SETUP GUIDE Your one-stop reference for all Niner Bikes technical information, setup guides, warranty and related data.
- Page 2 Ha, just kidding. deserve extra attention. This is your complete guide to the Niner Bikes line of frames and bicycles. If you read this, you have bettered about 95% of the buying public. In fact, opening the first page and doing anything more than giving it a cursory glance means that you are way ahead of the curve.
-
Page 3: Table Of Contents
GEOMETRY & SPECIFICATIONS: M.C.R. 9 GEOMETRY & SPECIFICATIONS: O.N.E. 9 BEARING & TORQUE SPECS ABOUT CVA™ SUSPENSION SAG SET UP FOR NINER FULL SUSPENSION MODELS HEADSET SPECIFICATIONS ABOUT TAPERED HEADTUBES RUNNING YOUR S.I.R. 9 OR AIR 9 CARBON AS A GEARED BIKE... -
Page 4: Geometry Philosophy & Basic Info
So, how does Niner geometry fit into this “cake” theory? Because we only build 29ers, we are able to make bikes in every flavor while everyone else is still learning how to turn on the oven. -
Page 5: Frame Care & Maintenance - Steel
NINER ENCYCLOPEDIA >> SPECIFICATION & SETUP GUIDE FRAME CARE & MAINTENANCE - STEEL Niner Bikes STRONGLY recommends that you apply Frame Saver® to Out of Sight, Out of Mind - Rust Never Sleeps your new steel frame. Please follow the manufacture recommendations for application. -
Page 6: Frame Care & Maintenance - Alloy, Carbon & Full Suspension
SPECIFICATION & SETUP GUIDE FRAME CARE & MAINTENANCE - ALLOY, CARBON & FULL SUSPENSION Caring for your Carbon, Alloy (Aluminum) or Scandium Niner frame is a simple affair: use common sense as your guide. Keep your frame clean, check your frame and components in between rides for unusual wear and tear, and give it a nice shine every once in a while so that it knows you care. -
Page 7: Post-Crash Safety Inspection
Delamination is serious damage that can occur in composites such as carbon fiber. Composites are made from layers of fabric and delamination 3. Bring your bike to your Niner dealer for professional inspection. The entire bike must be inspected for damage - this may require disassembly, means the layers of fabric are no longer bonded together. -
Page 8: Niner Warranty & Crash Replacement
Niner Bikes. Owner must components before each ride. If you fall while riding, inspect yourself retain a copy of their receipt from an authorized Niner Dealer - in the event for injury first, then carefully inspect your bicycle for any damage that they do require warranty service, this proof of purchase will be requested may have occurred as a result of the crash. -
Page 9: Geometry Key, Frame Size Selection & Component Selection
• Wheel & tire selection & set up The best way to determine which size is for you is to test ride a Niner at one of our dealers or demo events. -
Page 10: Geometry & Specifications: W.f.o. 9
NINER ENCYCLOPEDIA >> SPECIFICATION & SETUP GUIDE GEOMETRY & SPECIFICATIONS: W.F.O. 9 FORK (MM)* 1141 1149 69.0 68.0 74.0 73.0 1158 1167 69.0 68.0 74.0 73.0 1178 1186 69.0 68.0 74.0 73.0 1198 1206 69.0 68.0 74.0 73.0 INCH 23.1 23.2... -
Page 11: Geometry & Specifications: R.i
NINER ENCYCLOPEDIA >> SPECIFICATION & SETUP GUIDE GEOMETRY & SPECIFICATIONS: R.I.P. 9 FORK (MM)* 1114 1122 70.5 69.5 73.5 72.5 1131 1140 70.5 69.5 73.5 72.5 1150 1156 70.5 69.5 73.5 72.5 1168 1175 70.5 69.5 73.5 72.5 INCH 23.1 23.3... -
Page 12: Geometry & Specifications: Jet 9 Rdo
NINER ENCYCLOPEDIA >> SPECIFICATION & SETUP GUIDE GEOMETRY & SPECIFICATIONS: JET 9 RDO FORK (MM)* 1086 1092 71.0 70.0 74.5 73.5 1105 1112 71.0 70.0 74.5 73.5 1116 1122 71.5 70.5 74.5 73.5 1141 1148 71.5 70.5 74.5 73.5 1161 1168 71.5... -
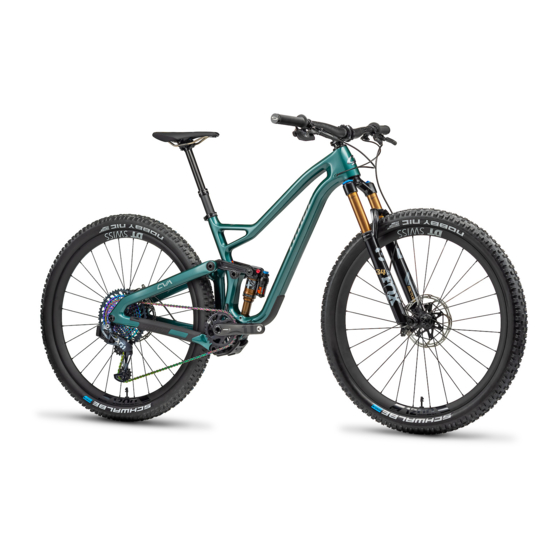
Page 13: Geometry & Specifications: Jet 9 Carbon
NINER ENCYCLOPEDIA >> SPECIFICATION & SETUP GUIDE GEOMETRY & SPECIFICATIONS: JET 9 CARBON FORK (MM)* 1086 1092 71.0 70.0 74.5 73.5 1105 1112 71.0 70.0 74.5 73.5 1116 1122 71.5 70.5 74.5 73.5 1141 1148 71.5 70.5 74.5 73.5 1161 1168 71.5... -
Page 14: Geometry & Specifications: Jet 9
NINER ENCYCLOPEDIA >> SPECIFICATION & SETUP GUIDE GEOMETRY & SPECIFICATIONS: JET 9 FORK (MM)* 1082 1089 72.0 71.0 73.5 72.5 1099 1107 72.0 71.0 73.5 72.5 1124 1132 72.0 71.0 73.5 72.5 1144 1152 72.0 71.0 74.0 72.5 INCH 22.7 22.9... -
Page 15: Geometry & Specifications: Air 9 Rdo
NINER ENCYCLOPEDIA >> SPECIFICATION & SETUP GUIDE GEOMETRY & SPECIFICATIONS: AIR 9 RDO FORK (MM)* 1071 1077 72.0 71.0 74.0 73.0 1087 1094 72.0 71.0 74.0 73.0 1107 1113 72.0 71.0 74.0 73.0 1127 1133 72.0 71.0 74.0 73.0 INCH 23.1... -
Page 16: Geometry & Specifications: Air 9 Carbon
AIR 9 CARBON SpECIFICATIONS & COMpATIBIlITy 73mm BB width (with inserts installed) CYA BB shell is compatible with Niner BioCentric EBB and CYA inserts for geared use BioCentric is compatible with external bearing cranksets only 31.6mm seat post size, 400mm length recommended 34.9mm front derailleur, high mount, bottom pull... -
Page 17: Geometry & Specifications: Air 9
NINER ENCYCLOPEDIA >> SPECIFICATION & SETUP GUIDE GEOMETRY & SPECIFICATIONS: AIR 9 FORK (MM)* 1082 1088 71.0 70.0 74.0 73.0 1088 1094 72.0 71.1 74.0 73.0 1107 1114 72.0 71.0 74.0 73.0 1127 1134 72.0 71.0 74.0 73.0 INCH 23.1 23.2... - Page 18 NINER ENCYCLOPEDIA >> SPECIFICATION & SETUP GUIDE GEOMETRY & SPECIFICATIONS: AIR 9 (SCANDIUM, discontinued) AIR 9 TT lENGTH SEAT TUBE CHAINSTAy FRONT WHEElBASE BB DROp HEAD TUBE HEAD TUBE SEAT TUBE STANDOvER 80/100* lENGTH lENGTH CENTER 80/100* 80/100* lENGTH ANGlE...
-
Page 19: Geometry & Specifications: E.m.d. 9
NINER ENCYCLOPEDIA >> SPECIFICATION & SETUP GUIDE GEOMETRY & SPECIFICATIONS: E.M.D. 9 FORK (MM)* 1066 1073 71.0 70.0 74.0 73.0 1082 1088 71.0 70.0 74.0 73.0 1088 1094 72.0 71.1 74.0 73.0 1107 1114 72.0 71.0 74.0 73.0 1127 1134 72.0... - Page 20 NINER ENCYCLOPEDIA >> SPECIFICATION & SETUP GUIDE GEOMETRY & SPECIFICATIONS: E.M.D. 9 (ROUND TUBES, discontinued) EMD 9 TT lENGTH SEAT TUBE CHAINSTAy FRONT WHEElBASE BB DROp HEAD TUBE HEAD TUBE SEAT TUBE STANDOvER 80/100* lENGTH lENGTH CENTER 80/100* 80/100* lENGTH...
-
Page 21: Geometry & Specifications: S.i.r. 9
NINER ENCYCLOPEDIA >> SPECIFICATION & SETUP GUIDE GEOMETRY & SPECIFICATIONS: S.I.R. 9 FORK (MM)* 1078 1085 70.8 69.8 73.3 72.3 1089 1096 71.3 70.3 73.3 72.3 1109 1115 71.3 70.3 73.3 72.3 1128 1135 71.3 70.3 73.3 72.3 INCH 23.2 23.3... - Page 22 NINER ENCYCLOPEDIA >> SPECIFICATION & SETUP GUIDE GEOMETRY & SPECIFICATIONS: S.I.R. 9 (traditional headtube/dropouts, discontinued) FORK (MM)* 1073 1083 71.5 70.5 74.0 73.0 1085 1091 72.0 71.0 74.0 73.0 1104 1111 72.0 71.0 74.0 73.0 1124 1130 72.0 71.0 74.0 73.0...
-
Page 23: Geometry & Specifications: M.c.r. 9
NINER ENCYCLOPEDIA >> SPECIFICATION & SETUP GUIDE GEOMETRY & SPECIFICATIONS: M.C.R. 9 FORK (MM)* 1073 1083 71.5 70.5 74.0 73.0 1085 1091 72.0 71.0 74.0 73.0 1104 1111 72.0 71.0 74.0 73.0 1124 1130 72.0 71.0 74.0 73.0 INCH 23.1 23.2... -
Page 24: Geometry & Specifications: O.n
NINER ENCYCLOPEDIA >> SPECIFICATION & SETUP GUIDE GEOMETRY & SPECIFICATIONS: ONE 9 FORK (MM)* 1082 1088 71.0 70.0 74.0 73.0 1088 1094 72.0 71.1 74.0 73.0 1107 1114 72.0 71.0 74.0 73.0 1127 1134 72.0 71.0 74.0 73.0 INCH 23.1 23.2... - Page 25 • Stainless Steel laser cut head badge • Can fit up to a 2.4” tire (tire size varies by brand, some tires may not fit) • The Niner EBB is designed for use with external bearing cranksets only. 25 : Updated: SEPT 5, 2012...
-
Page 26: Bearing & Torque Specs
Black Coated MAX Bearings. While we could easily save a few dollars on generic units, we feel that using the best bearings available is part of what makes a Niner a Niner. You can buy complete replacement bearing sets from your Niner dealer or individual bearings and bearing tools directly from Enduro® (www. endurobearings.com). -
Page 27: About Cva™ Suspension
Niner’s own Constantly Varying Arc, or CVA™, suspension design is not just CVA™ is an award-winning suspension design and now it is recognized with another version of the same old thing. It’s unique to Niner, designed in- a US Patent. - Page 28 NINER ENCYCLOPEDIA >> SPECIFICATION & SETUP GUIDE ABOUT CVA™ SUSPENSION - (U.S. PATENT NO. 7,934,739) This drawing shows the relationship between the bottom bracket and the center axle line. The red line represents equal 13.2” bottom bracket height on both 26” and 29”...
-
Page 29: Sag Set Up For Niner Full Suspension Models
NINER ENCYCLOPEDIA >> SPECIFICATION & SETUP GUIDE SAG SET UP FOR NINER FULL SUSPENSION MODELS Sag set up is critical to correct rear suspension function. Niner SHOCK recommends between 20-30% sag on all models. As travel MODEL STROKE 20% SAG... -
Page 30: Headset Specifications
NINER ENCYCLOPEDIA >> SPECIFICATION & SETUP GUIDE HEADSET SPECIFICATIONS MODEL YEAR HEADSET SPEC OPTIONS ANGLESET COMPATIBILITY ANGLESET OPTIONS HEADSET NOMENCLATURE Standard 1–1/8” ONE 9 2005-2011 EC34/28.6|EC34/30 threadless headset Integrated 1–1/8” upper ONE 9 2012-Present IS42/28.6|IS52/40 IS42/28.6|IS52/30** 1.5" lower Standard 1–1/8”... -
Page 31: About Tapered Headtubes
NINER ENCYCLOPEDIA >> SPECIFICATION & SETUP GUIDE ABOUT TAPERED HEADTUBES What’s with that weird head tube? Your new Niner frame was designed with a ta- INTEGRATED, TAPERED (IS STYLE) INTERNAL, TAPERED (ZS STYLE} pered head tube. What exactly does this mean? -
Page 32: Running Your S.i.r. 9 Or Air 9 Carbon As A Geared Bike
NINER ENCYCLOPEDIA >> SPECIFICATION & SETUP GUIDE RUNNING YOUR S.I.R. 9 OR AIR 9 CARBON AS A GEARED BIKE Your S.I.R. 9 or Air 9 Carbon frame came shipped to you with the rear SS insert piece installed in the right side drop out. This alloy piece is designed... -
Page 33: Air 9 Carbon Cable Routing
NINER ENCYCLOPEDIA >> SPECIFICATION & SETUP GUIDE AIR 9 CARBON CABLE ROUTING DIAGRAM OVERVIEW BOTTOM BRACKET CHUCK DETAIL FRONT & REAR 4 mm FRONT & REAR FOR HEADBADGE WITH HOUSING STOPS 4 mm FRONT & REAR FOR HEADBADGE WITHOUT STOPS... -
Page 34: Air 9 Carbon Cable Routing (Gore)
NINER ENCYCLOPEDIA >> SPECIFICATION & SETUP GUIDE AIR 9 CARBON CABLE ROUTING INSTRUCTIONS Required Parts: (2x) Shifter Cables (not included) New 4mm Cable Housing (enough to run from shifter to the head tube badge and from the rear derailleur to the BB shell) - Page 35 NINER ENCYCLOPEDIA >> SPECIFICATION & SETUP GUIDE AIR 9 CARBON CABLE ROUTING (GORE CABLES) DIAGRAM OVERVIEW (GORE CABLES) BOTTOM BRACKET CHUCK DETAIL FRONT & REAR 4 mm FRONT & REAR FOR HEADBADGE WITH HOUSING STOPS 4 mm FRONT & REAR...
- Page 36 NINER ENCYCLOPEDIA >> SPECIFICATION & SETUP GUIDE AIR 9 CARBON CABLE ROUTING (GORE CABLES) INSTRUCTIONS - GORE Required Parts: (1x) Air 9 Carbon specific GORE Cable Kit (1x) Old Shifter Cable to be used as a guide tool (not included)
- Page 37 NINER ENCYCLOPEDIA >> SPECIFICATION & SETUP GUIDE AIR 9 CARBON CABLE ROUTING (GORE CABLES, CONT.) INSTRUCTIONS - GORE Front Derailleur: 1) CREATE A CABLE GUIDE - Repeat the process used to install the rear liner by inserting a shift cable through the bottom bracket until it can be pulled out through the headbadge (F6).
-
Page 38: Jet 9 Rdo Cable Routing
NINER ENCYCLOPEDIA >> SPECIFICATION & SETUP GUIDE JET 9 RDO CABLE ROUTING DIAGRAM OVERVIEW FRONT & REAR 4 mm FRONT & REAR FOR HEADBADGE WITH HOUSING STOPS 4 mm FRONT & REAR FOR HEADBADGE WITHOUT STOPS 4 mm FRONT ONLY... - Page 39 Note: if your JET 9 RDO already has full cable housing from the BB to the THIS HEADBADGE REQUIRES TWO STANDARD 4MM THIS HEADBADGE REQUIRES TWO FRAME END STOP rear derailleur, contact NINER for a shift kit containing the necessary parts HOUSING FERRULES FERRULES...
-
Page 40: Air 9 Rdo Cable Routing
NINER ENCYCLOPEDIA >> SPECIFICATION & SETUP GUIDE AIR 9 RDO CABLE ROUTING DIAGRAM OVERVIEW FRONT & REAR 4 mm FRONT & REAR 4 mm FRONT ONLY 4 mm REAR ONLY 4 mm 40 : Updated: SEPT 5, 2012... - Page 41 NINER ENCYCLOPEDIA >> SPECIFICATION & SETUP GUIDE AIR 9 RDO CABLE ROUTING INSTRUCTIONS Required Parts: (2x) Shifter Cables (not included) (2x) Long sections of 4mm Cable Housing (enough for full-length internal routing from shifter to derailleur, not included) Old Shifter Cable to be used as a guide tool (not included)
- Page 42 NINER ENCYCLOPEDIA >> SPECIFICATION & SETUP GUIDE AIR 9 RDO CABLE ROUTING (CONT.) Air9 RDO cable routing guide Rear Derailleur: 1) GETTING READY - Insert a bare shift cable in the second (non- drive side) hole of the head tube badge (R1) until you can grab it through the bottom bracket shell.
-
Page 43: Bb30 And Pf30 Explained
SRAM PF30 (PRESS FIT 30) Niner’s Jet 9 RDO and new Air 9 frames use SRAM’s PF30 bottom bracket standard. This system is not only light and stiff, it is also very easy to install. -
Page 44: Cya Identification Guide
STANDARD THREADED BB SySTEMS (EXTERNAl) NOTE: Niner bikes does not recommend SRAM threaded GXP bottom brackets with the CYA system, they are not compatible. The BB92 insert is compatible with these cranksets, see above. ACCEPTS ANY 73MM WIDTH ENGLISH THREADED Call Niner Customer Service with any questions related to this recommendation. -
Page 45: Cya Installation
BEARING HEADSETS, SUCH AS PARK HHP-2 RECOMMENDED: • A NICE COLD BEER Step by step instructions for installing CYA inserts into a Niner frame with an EBB shell: For Air 9 Carbon frames, cable routing MUST be done before CYA inserts are press fit into the frame. -
Page 46: Biocentric Compatibility
SPECIFICATION & SETUP GUIDE BIOCENTRIC COMPATIBILITY The BioCentric is only designed to fit in Niner frames. It can sometimes be made to fit into other manufacturer’s frames but it will not work properly. The BioCentric clamps to the outside face of the EBB shell and because of that it requires that the EBB shell be precisely faced. -
Page 47: Biocentric Installation
BIOCENTRIC INSTALLATION INSTALLATION NOTES GETTING STARTED The Niner BioCentric is subject to unusual forces and BB shells are frequently exposed to water and mud, making proper bottom bracket instal- YOU WILL NEED: lation and maintenance particularly important. Regular grease or anti-seize •... -
Page 48: Singlespeed Gearing Information
As an example, if you have a 32t chainring and 17t cog on a 26” bike, you will want to run a 32t chainring and 19t cog on your new Niner in order to have a very similar gear ratio with 29” wheels. -
Page 49: Seatpost Installation
- Niner specifies three common sizes: 27.2mm, 30.9mm and 31.6mm. They are not interchangable. Check the specs for your Niner frame in the GEOMETRY & SPECIFICATIONS section of this document. When checking fit, don’t insert the post more than approximately two inches before removing it and following the FRAME PREP steps below. -
Page 50: Niner Carbon & Steel Fork Specifications
CARBON FORK SPECIFICATIONS & COMPATIBILITY: • Easton XC1 wheels, both geared and SS (since the front wheel is the same) do not fit the Niner carbon fork. This problem is limited to ONLY the XC1 wheelset. Easton’s Haven wheels DO fit. -
Page 51: Niner Carbon Fork Installation
SPECIFICATION & SETUP GUIDE NINER CARBON FORK INSTALLATION Thank you for your purchase of Niner’s Carbon rigid fork. We spent a lot Parts Included: of time on this fork, and are as excited as you are for you to get it on your NINER CARBON FORK bike and ride it. - Page 52 5.1 The compression adjustment plug provided with this product is an integral and necessary component of the Niner carbon fork and must Do not use tall crown races or place spacers under the crown race to be installed correctly to maintain the structural integrity of the Niner adjust head angle.
- Page 53 NINER ENCYCLOPEDIA >> SPECIFICATION & SETUP GUIDE NINER CARBON FORK INSTALLATION (CONTINUED) 7.1 Attach front wheel to fork. 5.1 Install the plug into the steerer tube ensuring that the upper flange of the plug is sitting tightly against the top of the steerer tube.
- Page 54 NINER ENCYCLOPEDIA >> SPECIFICATION & SETUP GUIDE RDO FORK - MAXLE THROUGH AXLE INSTALLATION The Maxle quick release thru axle system allows the use of a 15 mm x Dirt and debris can accumulate between the dropout openings. Always 100 mm thru-axle hub for enhanced stiffness. The axle threads into the check and clean this area when re-installing the wheel.
Need help?
Do you have a question about the JET 9 CARBON and is the answer not in the manual?
Questions and answers