Table of Contents
Advertisement
Quick Links
PLEASE READ CAREFULLY AND UNDERSTAND BEFORE USING THE
MIXER WITH VERTICAL BEATERS
FARMING RANGE – ROBOTISATION – MANURE SPREADERS
JEANTIL : Head Office
6 Rue de la Tertrais- Z.I. de la Hautière- CS 29007
35590 L'HERMITAGE
: +33(0)2 99 64 04 04 Fax : +33(0)2 99 64 19 56
SASU with a capital of 700 000 € - Intercommunity VAT n°: FR76 599200029
INSTRUCTION MANUAL
10/2007
EQUIPMENT
540revs/min
Website:
www.jeantil.com -
MVV 9
MVV 10
MVV 12
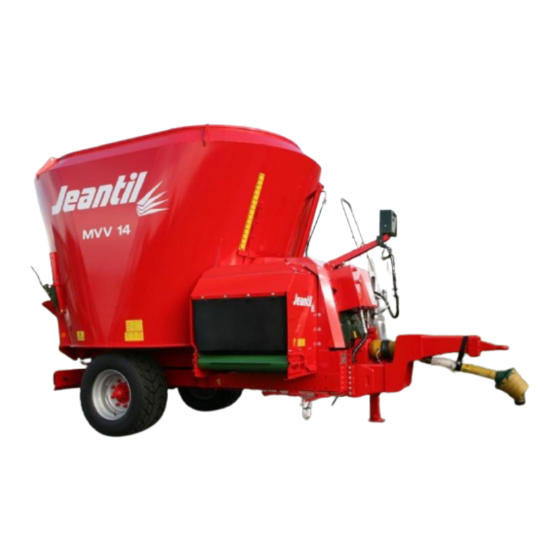
MVV 14
MVV 18
MVV 20
MVV 23
MVV 26
TRANSPORT RANGE – SLURRY TANKERS
JEANTIL : Establishment
Z.I des Charmilles
53390 SAINT AIGNAN SUR ROË
: +33(0)2 43 06 69 69 Fax : +33(0)2 43 06 69 08
Email:
jeantil@jeantil.com
N°9
ON AXLE
ON AXLE OR
TANDEM
ON TANDEM
1
Advertisement
Table of Contents

Related Manuals for JEANTIL MVV 20


Summary of Contents for JEANTIL MVV 20
- Page 1 MVV 23 ON TANDEM MVV 26 FARMING RANGE – ROBOTISATION – MANURE SPREADERS TRANSPORT RANGE – SLURRY TANKERS JEANTIL : Head Office JEANTIL : Establishment 6 Rue de la Tertrais- Z.I. de la Hautière- CS 29007 Z.I des Charmilles 35590 L’HERMITAGE 53390 SAINT AIGNAN SUR ROË...
- Page 2 Always keep this manual within easy reach or at your place of work (or operating site). Pass it on to any other user, including if you lend or sell the equipment. d) Contact details (customer service) JEANTIL : Head Office 6 rue de la Tertrais ZI de La Hautière 35590 L’HERMITAGE – France...
- Page 3 (Directive N°98/37/CE) and to any relevant transposition regulations The manufacturer: JEANTIL Rue de la Tertrais ZI de La Hautière 35590 L’HERMITAGE – France DECLARES THAT THE EQUIPMENT manufactured by JEANTIL as designated below: MVV 9 MVV 10 MVV 12 MVV 14...
-
Page 4: Table Of Contents
2. Contents 1. Aim of the instruction manual a. General b. Warning symbols c. Keeping the manual d. Contact details (customer service) e. Statement of compliance with the European ‘equipment’ directive Contents 3. Equipment identification 4. Standard operating conditions a. Applications of the equipment b. - Page 5 9. Adjustments and maintenance p.23 1 - Greasing p.23 2 – Reduction gear p.25 3 - Wheels p.25 4 - Braking p.25 5 - Hydraulic hoses p.26 6 - Hydraulic safety valve p.26 7 - Conveyors p.27 8 – Knives of beater p.27 9 - Stand p.27...
-
Page 6: Equipment Identification
3. Equipment identification 35590 L'HERMITAGE - FRANCE P .T .A .C . T y p e A nneau N ° d e M asses E ssieu 1 s érie m axim ales E ssieu 2 adm issibles A n n ée d e co n stru ctio n E ssieu 3 R écep tio n n é... -
Page 7: Standard Operating Conditions
4. Standard operating conditions a) Applications of the equipment: This equipment is intended exclusively for general agricultural purposes i.e.: Mixing and distributing products such as: silage, straw, hay, wrapped bales. Any other use falls outside normal usage and is therefore forbidden. For any other use, please contact the manufacturer. -
Page 8: Manufacturer's And User's Responsibilities
e) Manufacturer’s and user’s responsibilities: Follow all advice contained in this manual regarding levels of knowledge, installation procedures, operation, adjustment, maintenance and repair. Only use spare parts and accessories that comply with the manufacturer’s recommendations. Do not carry out any modifications yourself and do not allow others to modify your equipment and its accessories (mechanical, electrical, hydraulic or pneumatic characteristics) without requesting prior written approval from the manufacturer. -
Page 9: Technical Characteristics
5. Technical characteristics 1 Dimensions: MVV 9 D - 10 D – 12D – 14D MVV 9 C - 10 C – 12 C – 14 C Front or rear direct exit, right or left side Rear, side unloading with conveyor MVV 9 C - 10 C –... - Page 10 MVV 10 C MVV 12 C MVV 14 C MVV 9 C MVV 10 C MVV 12 C MVV 14 MVV 9 D MVV 10 D MVV 12 D MVV 14 D MVV 9 D MVV 10 D MVV 12 MVV 14...
- Page 11 2 Stowing diagram:...
-
Page 12: General Safety Rules
6. General safety rules 1) General 1. Never forget that knowledge, awareness and caution are the best way to ensure your safety. 2. Regulations and rules relating to accident prevention, health and safety at work, and the operation of vehicles on the public highway must be observed at all times. 3. -
Page 13: Warning / Pictograms
2) Warning / Pictograms 1. Warnings and pictograms placed on the equipment provide information about safety measures to be taken, that will contribute to avoid accidents. 2. Make sure that these warnings and pictograms remain clean and legible. If they are damaged, ask for new stickers from the manufacturer (or agent). - Page 14 Ref: 892 785 Placed on container, above wheels Ref: 892 401 Placed above the 2 front Ref: 892 229 tensioners of conveyor Placed on front casing Ref: 892 651 Ref: 892 653 Ref: 892 453 Placed on stand Placed on front Placed above the conveyor’s exit sheet- and back part of...
- Page 15 Ref: 892 719 Ref: 892 721 Ref: 892 652 Trapdoor opening indicator sticker Placed on oil Placed near the parts Stuck above the right slideway of which need greasing level reservoir See diagram trapdoor Ref: 892 227 Placed on front left side of container, near ladder Ref: 892 387 Placed at the back, near the spout...
- Page 16 892 71 7 - B : M V V Ref: 892 700 Placed at front of machine, on left side of drawbar on models MVV 9 to 14 Ref: 892 701 Placed at front of machine, on right side of drawbar on models...
-
Page 17: Coupling
3) Coupling 1. See chapter 5, Technical characteristics, page 9. 2. Hitching the machine to the tractor must only be carried out using the tractor’s rear coupling points provided for this purpose. 3. Check the compatibility of the machine with the tractor (minimum engine power, type of coupling, tractor PTO characteristics, etc.). -
Page 18: Failure (Or Jamming Of The Equipment)
5) Failure (or jamming of the equipment) 1. Stop the machine. 2. Disengage the tractor PTO. 3. Wait until all the moving parts are completely at a halt. 4. Stop the tractor engine and remove the starter key or disconnect battery (or electric connector). -
Page 19: B / Welding Operations
6. b / Welding operations: 1. When carrying out any welding operation on the equipment, disconnect the electric connector and the tractor battery. 2. Disconnect and protect any hoses (particularly rubber) and any electric cables to ensure that they are not damaged by incandescent particles that could cause oil loss or a short circuit. -
Page 20: Environmental Protection
7. When a rigid or flexible line is damaged, it must be replaced immediately. 8. Repairs affecting components under pressure or electrically powered require special tools and procedures. They must only be carried out by qualified staff. 7. Environmental protection Ground pollution: 1. -
Page 21: 3- Hydraulics
6. Fit the mixer’s primary drive shaft to the tractor’s rear PTO outlet, and adjust its length, retaining maximum engagement. Minimum engagement length is 250 mm. 7. Ensure that both jaws have engaged correctly. 8. The primary drive shaft must be connected to the 540 revs/min rear PTO of the tractor;... -
Page 22: 4- Electricity
connected to the tractor’s filter bowl; this is to avoid CAVITATION and pump unpriming (if you experience problems, contact your John Deere dealer). 4 - ELECTRICITY 1. See page 17 section 6: Maintenance and repair. 2. Read sticker page 13 ref: 892 640. 3. -
Page 23: Adjustments And Maintenance
9. Adjustments and maintenance 1 – GREASING 1. Whilst using the equipment, grease every day. 2. The various greasing points are arranged as follows: - 1 greaser on the two spiders of the drive shaft (not on diagram below). - 1 greaser on the four bearings of the side conveyor. - 1 greaser on the ball joint of the stand foot. - Page 24 Planetary gearbox greasing and oil change diagram Oil change: 1 per year Greasing: 1 per year or 250 hours Open air exit grease Grease Oil filling...
-
Page 25: Reduction Gear
2- REDUCTION GEAR The oil change of all gearboxes should be carried out at least once a year, depending on the frequency of use of the equipment: Type Boîtes d'engrenages / Gear boxes / Getriebekasten Huile Item Type Pos.n Typen N°... -
Page 26: Hydraulic Hoses
PNEUMATICS Charge par roue en Grosseur Pression de gonflage Dimensions Diamètre kg mini-maxi boudin en bars N° Dimensions Diameter Load per wheel in Roll Tyre pressure in bars Kgs min-max 30/11.5x14.5 842244 4000 6 holes 400/60X15.5 842231 3450 6 holes 842232 435/50X19.5 6075... -
Page 27: Conveyors
7 - CONVEYOR 1. Before each use, check the tension of the conveyor belt. A tension that is too high or too low could lead to damage. 2. The conveyor belt should not rub against the chassis. 3. To tighten the belt, follow the instructions below: 1- Loosen the two locknuts which are used for blocking the tensioner in translation. -
Page 28: Short Period Uses
11 – SHORT PERIOD USES If the equipment is not used during a long period, carry out the following operations: The equipment should be very thoroughly cleaned and placed in a clean and dry place. Entirely grease the parts described in the manual’s lubrication diagram. Coat the sensors and the connector bars of the electric system with grease so that they do not oxidize. -
Page 29: Mixing
3 – MIXING 1. After loading dry forages, such as hay, straw or wrapped bales, adjust the lower knives in order to reduce the size of the fibres depending on the consistency you want to obtain. 2. Then diminish the action of the lower knives and add the thinner products to finish the mixing. -
Page 30: Additional Equipment Information
11. Additional equipment information INDEPENDENT HYDRAULIC POWER UNIT (Price ref 8210) SAFETY As the pump is set in motion when the PTO is activated, do not forget to put the hydraulic component control distributors into neutral. FUNCTION Avoids using the tractor’s hydraulic circuit. 1. -
Page 31: Cleaning
12. Cleaning Cleaning method 1. Cover all parts that need protection from water penetration or from cleaning products. 2. Periodically wash the equipment with a hose. 3. If a high pressure water hose is used, do not hold it too close to the mixer; avoid directing the hose on electronic components, the engine or electric connections, hydraulic lines and hoses, seals, filler plug, etc. -
Page 32: List Of Technical Documents
906 021-1-B MVV 18 to 26D direct tractor 906 004-1-B MVV 9 to 14C rear conveyor option, direct tractor 906 024-1-B MVV 9 to 14D + rear left exit option, direct tractor 906 025-1-B MVV 18 to 26D + rear left exit option, direct tractor... - Page 33 906 051-1-A Planetary gearbox COMER 2 outputs 904 113-1-A Planetary gearbox GB 2 outputs 6. Axles: 904 070-1-A Axle MVV 9-12 Colaert 904 072-1-A Brake MVV 9-14 Monroc 904 071-1-A Brake MVV 20-26 tandem 904 068- 1-A Brake MVV 18-20 II.
-
Page 34: Possible Incidents And Solutions
14. Possible incidents and solutions INCIDENTS SOLUTIONS 1- Check the state of the key between the conveyor’s motor and the socket 2- Check bearings 1 - The side conveyor is not 3- Retighten the conveyor belt functioning 4- Look for any foreign matters 5- Check the connection of the hydraulic hoses to the motor 2 - Abnormal functioning of all...
Need help?
Do you have a question about the MVV 20 and is the answer not in the manual?
Questions and answers