Table of Contents
Advertisement
Quick Links
Installation and Service
Instructions
for use by heating contractor
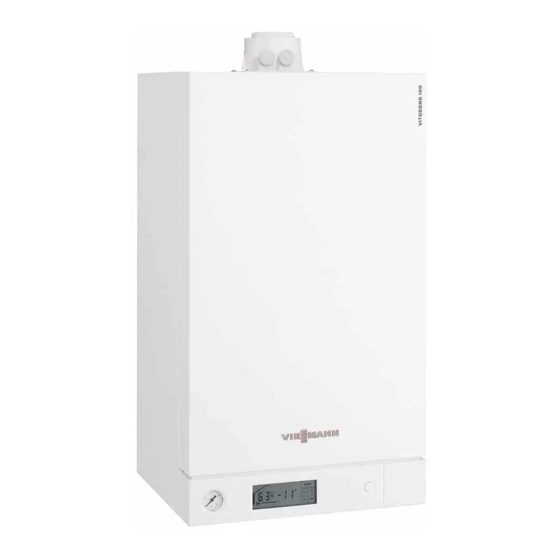
Vitodens 100-W B1HA/B1KA
Models 26 to 125
Wall-Mounted, gas-fired condensing boilers
On demand domestic hot water with Combi boiler
Heating input: 21 to 125 MBH
6.2 to 36.6 kW
VITODENS 100-W
5784 568 - 18
04/2020
H
IMPORTANT
Read and save these instructions
for future reference.
Please file in Service Binder
Advertisement
Table of Contents

Related Manuals for Viessmann Vitodens 100-W B1KA 125


Summary of Contents for Viessmann Vitodens 100-W B1KA 125
- Page 1 Installation and Service Instructions for use by heating contractor Vitodens 100-W B1HA/B1KA Models 26 to 125 Wall-Mounted, gas-fired condensing boilers On demand domestic hot water with Combi boiler Heating input: 21 to 125 MBH 6.2 to 36.6 kW VITODENS 100-W IMPORTANT Read and save these instructions for future reference.
-
Page 2: Safety, Installation And Warranty Requirements
For information pertaining to inhabitants and destructive to venting and chimney requirements, Viessmann equipment. please see section entitled “Venting Connection”. All products of For a listing of chemicals which combustion must be safely vented cannot be stored in or near the to the outdoors. -
Page 3: Table Of Contents
Power supply 120VAC, 60 Hz, 1PH ......37 Location of terminal block and temperature sensor.. connections ............37 Connecting Viessmann DHW tank temperature sensor on B1HA only ..........38 Connecting a field supplied tank temperature controller on B1HA only (e.g. Honeywell Aquastat or others) ..39 Room thermostat ..........40... - Page 4 Table of Contents Vitodens 100-W, B1HA/B1KA 26 to 125 Combi Installation/Service Page Start-up, Inspection and Maintenance Necessary Tools ............43 Testing/analysis equipment ........43 Overview of Controls and Indicators ......43 Control and display elements ........ 43 Check Power Supply Connection ........43 Setup Menu Overview ..........44 Filling and Bleeding the Heating System .....44 Select Appropriate Gas Type ........46 Converting Gas Type ..........46...
-
Page 5: Important Regulatory And Installation Requirements
CSD-1 Field Testing of High Limit Switches for Vitodens boilers – where required by law. VIESSMANN IS NOT RESPONSIBLE FOR ANY DAMAGES THAT THE FOLLOWING TEST PROCEDURE MAY RESULT IN BY OVERHEATING THE SYSTEM. The Vitodens 100/200 boilers are equipped with flow switches that when activated disable or enable the burner to operate. - Page 6 Safety Vitodens 100-W, B1HA/B1KA 26 to 125 Combi Installation/Service Important Regulatory and Installation Requirements (continued) For installations on the Commonwealth of Massachusetts, the following modifications to NFPA-54 chapter 10 apply: Excerpt from 248 CMR 5-08: 2(a) For all side-wall horizontally vented gas fueled equipment installed in every dwelling, building or structure used in whole or in part for residential purposes, including those owned or operated by the Commonwealth and where the side-wall exhaust vent termination is less than (7) feet above finished grade in the area of the venting, including but not limited to decks and porches, the following requirements shall be satisfied:...
-
Page 7: About These Installation Instructions
Leave all literature at the installation site and advise Technical literature the system operator/ultimate owner where the Literature for the Vitodens boiler: literature can be found. Contact Viessmann for - Technical Data Manual additional copies. - Installation and Service Instructions... -
Page 8: Applicability
General Information Vitodens 100-W, B1HA/B1KA 26 to 125 Combi Installation/Service Applicability IMPORTANT The boiler serial number must be provided when ordering replacement parts. Both the 16-digit serial number bar code label and the 12-digit ASME serial number correlate to each other. Providing either serial number is sufficient. Model No. -
Page 9: Mechanical Room
General Information Vitodens 100-W, B1HA/B1KA 26 to 125 Combi Installation/Service Mechanical Room During the early stages of new home design, we Installation area conditions recommend that proper consideration be given to Ensure ambient temperatures are higher than 32°F constructing a separate mechanical room dedicated to (0°C) and lower than 104°F (40°C). -
Page 10: Minimum Clearances
Dimensions Vitodens 100-W, B1HA/B1KA 26 to 125 Combi Installation/Service Minimum Clearances Recommended minimum boiler clearances to combustibles Recommended minimum boiler service clearances Note:The Vitodens 100-W boiler has passed the zero inches vent clearance to combustibles testing requirements dictated by the boiler Harmonized Side Standard ANSI Z21.13. -
Page 11: Boiler Dimensions
Dimensions Vitodens 100-W, B1HA/B1KA 26 to 125 Combi Installation/Service Boiler Dimensions Dimensions overview without bottom piping connections Front view Side view Top view Vitodens 100-W, B1HA series and B1KA combi Dimensions a in. (5 mm) - both sides of the boiler Legend 15¾... - Page 12 Dimensions Vitodens 100-W, B1HA/B1KA 26 to 125 Combi Installation/Service Boiler Dimensions (continued) Piping connections for Vitodens 100-W, B1HA series and B1KA Field supplied Legend - DHW tank heating supply for B1HA boilers Field supplied - DHW tank heating return for B1HA boilers - DHW for B1KA boiler Note: The B1HA DHW supply and return connections are - DCW for B1KA boiler...
-
Page 13: Boiler Mounting
Dimensions Vitodens 100-W, B1HA/B1KA 26 to 125 Combi Installation/Service Boiler Mounting Boiler installation Following are the installation instructions for the mounting The Vitodens 100-W boiler can be wall-mounted on: bracket on each material. Skip to the installation - a brick/concrete wall instructions applicable to your installation requirements. - Page 14 Installation Vitodens 100-W, B1HA/B1KA 26 to 125 Combi Installation/Service Boiler Mounting (continued) Boiler mounting bracket installation on wood studs Install mounting bracket on wood studs as per illustration. Drill in. pilot holes to insert mounting bolts. Ensure that holes are located in the center of each wood stud. Secure with bolts to wooden studs as shown.
- Page 15 Installation Vitodens 100-W, B1HA/B1KA 26 to 125 Combi Installation/Service Boiler Mounting (continued) Mounting the boiler to the wall Note: Prior to installing the boiler verify that the minimum mounting clearances are met. 1. Mount boiler onto the mounting bracket, ensure the boiler is level.
- Page 16 Installation Vitodens 100-W, B1HA/B1KA 26 to 125 Combi Installation/Service Boiler Mounting (continued) Boiler mounting frame dimensions The boiler stand is used for free-standing installation of a single boiler within the mechanical room. When using the boiler stand, ensure that the stand is securely fastened to the floor (recommended concrete expansion anchors are Hilti model KB-TZ e x 4 or equivalent.
-
Page 17: Boiler Connections
Connections Vitodens 100-W, B1HA/B1KA 26 to 125 Combi Installation/Service Boiler Connections Vent connections The Vitodens 100-W boiler comes with a preinstalled vent pipe adaptor (as shown). Run venting system, single-pipe, two-pipe or coaxial, through the side wall, roof or chimney, taking the shortest possible route and at a rising angle (min. -
Page 18: Proper Piping Practice
Connections Vitodens 100-W, B1HA/B1KA 26 to 125 Combi Installation/Service Boiler Connections (continued) Proper piping practice Support piping by proper suspension method. 2 imperfect threads Use moderate amount of dope Piping must not rest on or be supported by boiler. Leave 2 threads bare Gas connection and piping 1. -
Page 19: Gas Piping Pressure Test
Connections Vitodens 100-W, B1HA/B1KA 26 to 125 Combi Installation/Service Boiler Connections (continued) Gas connection and piping (continued) 1. Refer to current CAN/CSA B149.1 or 2 in Canada. In the United States, use the National Fuel Gas Code ANSI Z223.1/NFPA 54, as well as local codes for gas piping requirements and sizing. -
Page 20: Heating Water Connections
Connections Vitodens 100-W, B1HA/B1KA 26 to 125 Combi Installation/Service Boiler Connections (continued) Heating water connections 1. Thoroughly flush heating system (particularly before connecting the boiler to an existing system). 2. Connect boiler to the heating system. Note: Use an approved pipe sealant or teflon tape when connecting the installation fittings. -
Page 21: Condensate Connection
Connections Vitodens 100-W, B1HA/B1KA 26 to 125 Combi Installation/Service Boiler Connections (continued) Condensate connection The Vitodens 100-W boiler comes with a built-in condensate trap. An external trap is not required when connecting the field drain to flexible discharge tubing. Discharge tubing (field supplied) must be of 1 in. diameter. Use CPVC, PVC or other material approved by codes listed below. -
Page 22: Safety Connections
Connections Vitodens 100-W, B1HA/B1KA 26 to 125 Combi Installation/Service Safety Connections Installing safety devices on the boiler 1. Assemble the brass adaptor B, O-ring C, and retaining clip D to the boiler. 2. Apply sufficient amount of pipe sealant to adaptor B. 3. -
Page 23: Hot Water Temperature And System Pressure
Connections Vitodens 100-W, B1HA/B1KA 26 to 125 Combi Installation/Service Safety Connections (continued) Hot water temperature and system pressure See page 44 for fill procedure. The boiler water temperature reading is constantly displayed during operation. The boiler water pressure reading is displayed on an analog gauge. -
Page 24: Installation Examples
0” (refer to local gas codes). A low-loss header offers additional benefits not provided by a pair of closely spaced tees. Viessmann strongly recommends and prefers the use of a low-loss header CAUTION over closely spaced tees. -
Page 25: Waterside Flow
If system flow rate exceeds boiler maximum flow rate (as stated above), falls below the minimum flow rate or if system flow rate is unknown, Viessmann strongly recommends the installation of a low-loss header. An alternative method may be used, such as primary secondary piping using closely spaced tees. -
Page 26: Built-In Pump
Installation Examples (continued) Built-in pump Grundfos UPS15-78 three speed heating circuit/DHW production pump for Vitodens 100-W B1HA 26, 35, 94, 125 and B1KA 35, 125 boilers (in the factory setting, the pump speed is preset to ‘speed three’) Speed Three... -
Page 27: B1Ha With One Heating Circuit
Connections Vitodens 100-W, B1HA/B1KA 26 to 125 Combi Installation/Service Installation Examples (continued) Vitodens 100-W, B1HA 26, 35, 94, 125 with one heating circuit Legend Note: The use of a low-loss header is recommended if the Air vent water flow rate is less than 1.7 GPM (400 L/h) or PRV Pressure relief valve more than 6.2 GPM (1400 L/h). -
Page 28: B1Ha With One Heating Circuit, Dhw Tank And Llh
C Heating circuit DHW supply and return piping between boiler DHW D Heating circuit pump (field supplied) connections and the Viessmann DHW tank connections, E DHW storage tank shall be a minimum of 1 in. nominal pipe diameter F DHW tank temperature sensor (irrespective of the ¾... -
Page 29: B1Ha With One Heating Circuit And Dhw Tank
Heating circuit pump with room thermostat DHW supply and return piping between boiler DHW connection (field supplied) connections and the Viessmann DHW tank connections, DHW storage tank shall be a minimum of 1 in. nominal pipe diameter DHW tank temperature sensor (irrespective of the ¾... -
Page 30: B1Ka With One Heating Circuit
Connections Vitodens 100-W, B1HA/B1KA 26 to 125 Combi Installation/Service Installation Examples (continued) Vitodens 100-W, B1KA 35, 125 with one heating circuit Legend Note: The use of a low-loss header is recommended if the Air vent water flow rate is less than 1.7 GPM (400 L/h) or Pressure relief valve (boiler) more than 6.2 GPM (1400 L/h). -
Page 31: B1Ka With One Heating Circuit And Llh
Connections Vitodens 100-W, B1HA/B1KA 26 to 125 Combi Installation/Service Installation Examples (continued) Vitodens 100-W, B1KA 35, 125 with... low-loss header one heating circuit Legend Note: The use of a low-loss header is recommended if the Air vent water flow rate is less than 1.7 GPM (400 L/h) or Pressure relief valve (boiler) more than 6.2 GPM (1400 L/h). -
Page 32: B1Ka With One Heating Circuit Without Llh
* Requires low loss header or closely spaced tees. Outdoor temperature sensor (OTS) A low-loss header offers additional benefits not provided by a pair of closely spaced tees. Viessmann strongly recommends and prefers the use of a low-loss header over closely spaced tees. See page 35 for details. -
Page 33: Boiler In Heating/Cooling Application
A Heating/Cooling unit IMPORTANT B Spring-loaded flow check valve C Circulation pump Viessmann strongly suggests that the valves pictured D Expansion tank above be labelled “v1” and “v2”. E Water chiller The boiler, when used in connection with a refrigeration... -
Page 34: Boiler With Low Water Cut-Off (Remote Mounted, Field Supplied)
Connections Vitodens 100-W, B1HA/B1KA 26 to 125 Combi Installation/Service Installation Examples (continued) A low water cut-off may be required by local codes. Boiler with low water cut-off (remote-mounted, field supplied) Do not install an isolation valve between boiler and low water cut-off. -
Page 35: Neutralization Unit
A low-loss header offers additional benefits not provided The low-loss header is available in the following sizes. by a pair of closely spaced tees. Viessmann strongly Select the size based on the maximum system flow rate recommends and prefers the use of a low-loss header of your application. -
Page 36: Accessing Electrical Connections
Control Connections Vitodens 100-W, B1HA/B1KA 26 to 125 Combi Installation/Service Accessing Electrical Connections Removing the front cover 1. Loosen retaining screws, screws are captive and do not need to be fully removed. 2. Remove the front panel. Rotating the control unit and opening the power/pump module 1. -
Page 37: Power Supply 120Vac, 60 Hz, 1Ph
Location of terminal block and temperature sensor connections B1HA models only Legend - for Viessmann DHW tanks and tank temperature sensor: the two red connectors B labelled 5 are on the cable A Terminal block (factory installed) harness outside the control located left of the 3-way B Connection for Viessmann supplied DHW tank diverting valve in a wire bundle. -
Page 38: Connecting Viessmann Dhw Tank Temperature Sensor On B1Ha Only
Control Connections Vitodens 100-W, B1HA/B1KA 26 to 125 Combi Installation/Service Accessing Electrical Connections (continued) Connecting Viessmann DHW tank temperature sensor on B1HA only Legend Viessmann DHW tank temperature sensor (supplied) Viessmann DHW tank temperature sensor connections (factory installed) Legend % Viessmann DHW tank temperature sensor (supplied) Note: see wiring diagram on page 77. -
Page 39: Connecting A Field Supplied Tank Temperature Controller On B1Ha Only (E.g. Honeywell Aquastat Or Others)
Control Connections Vitodens 100-W, B1HA/B1KA 26 to 125 Combi Installation/Service Accessing Electrical Connections (continued) Connecting a field supplied tank temperature controller on B1HA only (e.g. Honeywell Aquastat or others) Legend 1. Cut off and discard the 2 red connectors labelled ‘5’. A Tank temperature controller (field supplied) See page 37 for location. -
Page 40: Room Thermostat
Control Connections Vitodens 100-W, B1HA/B1KA 26 to 125 Combi Installation/Service Accessing Electrical Connections (continued) Connecting a room thermostat (dry contacts) Factory Connect Room Thermostat installed terminal block (Dry Contact) Legend A Room thermostat dry contact (field supplied) Boiler control base Connecting a room thermostat 24VAC Factory installed... -
Page 41: Connecting The Outdoor Temperature Sensor
Control Connections Vitodens 100-W, B1HA/B1KA 26 to 125 Combi Installation/Service Accessing Electrical Connections (continued) Connecting the outdoor temperature sensor Factory installed Connection must be made on terminal block terminals 1 and 2 for one of the three options shown on page 40. -
Page 42: Closing The Control Unit
1. Set front panel on the guide rails and push in place. 2. Tighten screws at the bottom. IMPORTANT Read and follow, where applicable, the safety instructions of all labels and stickers attached to boiler surfaces. Do not remove any of these instructions. Contact Viessmann if any replacement labels are required. -
Page 43: Start-Up, Inspection And Maintenance
Start-up, Inspection and Maintenance Vitodens 100-W, B1HA/B1KA 26 to 125 Combi Installation/Service Necessary Tools Special items Testing/analysis equipment (use only calibrated equipment) Approved leak detection fluid for natural gas Multimeter to measure 0 - 12A, 120V and resistances Pipe joint sealant Flue gas analyzer to measure % CO or O... -
Page 44: Setup Menu Overview
Start-up, Inspection and Maintenance Vitodens 100-W, B1HA/B1KA 26 to 125 Combi Installation/Service Setup Menu Overview Item # Function Setting Options Description Default Setting Filling 0 - Fill mode OFF After pressing ‘OK’ the filling function is active. This 1 - Fill mode ON (see page 44) process will automatically terminate after 30 min. - Page 45 Start-up, Inspection and Maintenance Vitodens 100-W, B1HA/B1KA 26 to 125 Combi Installation/Service Filling and Bleeding the Heating System (continued) 1. Open system isolation valves (if installed). Note: Before filling the heating system with water, check that all necessary flow check valves are installed.
-
Page 46: Select Appropriate Gas Type
Start-up, Inspection and Maintenance Vitodens 100-W, B1HA/B1KA 26 to 125 Combi Installation/Service Select Appropriate Gas Type The Vitodens 100-W boiler is for use with gases whose characteristics fall within the following ranges. Do not use any other types of gas. Natural gas Liquid Propane gas Heating value (gross) - Page 47 Start-up, Inspection and Maintenance Vitodens 100-W, B1HA/B1KA 26 to 125 Combi Installation/Service Measure Static Pressure and Running Pressure (continued) 8. All measurements must be made under high-fire conditions. Note: Use suitable measuring instruments calibrated with a minimum resolution of 0.04 “w.c. for measuring the running pressure.
-
Page 48: Checking The Co 2 Content/Relay Tests
4. Use / to select the burner output; If the flue installation is OK, contact Viessmann to deter- Shown on the Display Burner output mine whether adjustments can be made to the gas valve or gas valve replacement is necessary. -
Page 49: High Altitude Setting
Start-up, Inspection and Maintenance Vitodens 100-W, B1HA/B1KA 26 to 125 Combi Installation/Service High Altitude Setting To match the burner output for high altitude setting. 1. Tap MODE. 2. Tap / until CONFI flashes. 3. Tap OK to confirm. "P" is displayed in left hand display area. The right hand display area flashes. -
Page 50: Configuring Dhw Tank Sensor Input
Start-up, Inspection and Maintenance Vitodens 100-W, B1HA/B1KA 26 to 125 Combi Installation/Service Configuring DHW Tank Sensor Input 1. Press the Mode. Tap / until flashes CONFI 2. Confirm with OK. In the left hand display P appears. 3. The right hand display flashes. Select / until 12 appears and confirm with OK. -
Page 51: Clock Natural Gas Meter
Start-up, Inspection and Maintenance Vitodens 100-W, B1HA/B1KA 26 to 125 Combi Installation/Service Clock Natural Gas Meter Clock natural gas meter to verify input IMPORTANT 1. Ensure all other gas equipment served by the meter is A boiler under fired by 5% is still acceptable. turned off during timing of gas input to the Vitodens Do not over fire the boiler. -
Page 52: Check Venting System For Leaks
Vitodens 100-W, B1HA/B1KA 26 to 125 Combi Installation/Service Check Venting System for Leaks (circular air gap measurement) For sealed combustion, coaxial vent only Viessmann strongly recommends that the heating contractor perform a simplified leak test during boiler start-up. For this purpose it is sufficient to measure the concentration of the combustion air in the coaxial gap of the air intake pipe. -
Page 53: Removing The Burner
Start-up, Inspection and Maintenance Vitodens 100-W, B1HA/B1KA 26 to 125 Combi Installation/Service Removing the Burner 1. Switch the burner OFF (shut off main service switch). 2. Shut off the gas supply. 3. Pull power cables from fan motor A, gas valve B and electrode block C. -
Page 54: Check And Adjust Ignition And Ionization Electrodes
Start-up, Inspection and Maintenance Vitodens 100-W, B1HA/B1KA 26 to 125 Combi Installation/Service Check and Adjust Ignition and Ionization Electrodes 1. Check ignition and ionization electrode block for wear, contamination, warping or cracked insulation. 2. Clean electrodes with a small brush or emery paper. 3. -
Page 55: Check Neutralization Unit
B. If the gaps between the heat exchanger coil windings are plugged, carefully remove debris without scratching the heat exchanger surface using the Viessmann tool specific for this purpose. Tool part number 7840112; Replacement blade part number 7840346. WARNING Flush the combustion chamber A with water until it runs clear through the condensate trap. -
Page 56: Check Diaphragm Expansion Tank And System Pressure
Start-up, Inspection and Maintenance Vitodens 100-W, B1HA/B1KA 26 to 125 Combi Installation/Service Check Diaphragm Expansion Tank and System Pressure Perform check on the system when cold. 1. Drain boiler/system and reduce pressure until the manometer reading is “0”. 2. If the nitrogen pressure of the pre-charged expansion tank is less than the static pressure of the system, inflate membrane pressure to slightly exceed pressure of system. -
Page 57: Install Burner
Start-up, Inspection and Maintenance Vitodens 100-W, B1HA/B1KA 26 to 125 Combi Installation/Service Reinstall Burner 1. Fit burner and tighten 4 T-30 screws A diagonally to a torque of 35 lb.in (4 Nm). 2. Insert new supplied gasket and tighten the fitting B on the gas connection pipe to a torque of 132 lb.in (15 Nm). - Page 58 Start-up, Inspection and Maintenance Vitodens 100-W, B1HA/B1KA 26 to 125 Combi Installation/Service Cleaning the DHW Heat Exchanger The brazed plate heat exchangers operate with high turbulence flow, even at low flow rates. This high turbulence keeps small particles in suspension minimizing fouling and scaling.
-
Page 59: Troubleshooting
Troubleshooting Vitodens 100-W, B1HA/B1KA 26 to 125 Combi Installation/Service Troubleshooting Steps 1. Establish fault message or diagnose behavior of system. Diagnosis 2. Look for corresponding cause of fault in the diagnostics table. 3. Find corrective measures in the table. 4. Perform corrective measures (page 59 to 62). Note: See page 43 for an overview of controls, indicators and system components. -
Page 60: Diagnosis
Troubleshooting Vitodens 100-W, B1HA/B1KA 26 to 125 Combi Installation/Service Diagnosis Sequence of operation and potential faults during each start-up cycle display action Increase set value and Control unit issues a heat ensure heat is drawn off demand Fan starts After approx. 1 min, fault 9 Check the fan, fan connecting cables, power at the fan and fan control... - Page 61 Troubleshooting Vitodens 100-W, B1HA/B1KA 26 to 125 Combi Installation/Service Diagnosis (continued) Diagnostics table: Faults with fault display on control unit Fault code in System Cause Corrective measures display window characteristics* Burner blocked CO limiter (if installed) has Check the heating system. Remove responded.
-
Page 62: Calling Up Fault History
Troubleshooting Vitodens 100-W, B1HA/B1KA 26 to 125 Combi Installation/Service Diagnosis (continued) Diagnostics table: Faults with fault display on control unit (continued) Fault code in System Cause Corrective measures display window characteristics* Burner in fault mode Fixed high limit tripped Check the heating system water level. Check the circulation pump. -
Page 63: Boiler Connection
Troubleshooting Vitodens 100-W, B1HA/B1KA 26 to 125 Combi Installation/Service Boiler Connection Remove front panel 1. Loosen retaining screws, screws are captive and do not need to be fully removed. 2. Remove the front panel. Start-up and Maintenance Check boiler temperature sensor 1. - Page 64 Troubleshooting Vitodens 100-W, B1HA/B1KA 26 to 125 Combi Installation/Service Boiler Connection (continued) Check outdoor temperature sensor 1. Disconnect cables from outdoor sensor. 2. Measure resistance of the outdoor sensor and compare with resistance / outdoor sensor curve shown below. 3. If the value measured differs significantly, replace the sensor.
- Page 65 Troubleshooting Vitodens 100-W, B1HA/B1KA 26 to 125 Combi Installation/Service Boiler Connection (continued) Setting the heating curve Frost protection function Heating curves illustrate the relationship between the out- The frost protection function requires an outside door temperature, the set room temperature and the boiler temperature sensor to be connected.
- Page 66 Troubleshooting Vitodens 100-W, B1HA/B1KA 26 to 125 Combi Installation/Service Boiler Connection (continued) Adjusting the heating curve set point Parameter default setting is 20 (or 68 if display is converted to °F). Setting the set point 1. Tap / . The set parameter flashes and r will be displayed. 2.
- Page 67 Troubleshooting Vitodens 100-W, B1HA/B1KA 26 to 125 Combi Installation/Service Boiler Connection (continued) Check fixed high limit If the burner control unit cannot be reset after a fault shutdown ( ), even though the boiler water temperature is below approx. 203°F (95°C), check the fixed high limit. 1.
- Page 68 2. Flip down control unit. 3. Remove cover A. 4. Check fuse F4 T 2.5A (slow blow). Replacements fuses are available from Viessmann. Check DHW outlet temperature sensor (B1KA only) 1. Pull the leads from outlet temperature sensor A. 2. Check the sensor resistance and compare it with the curve.
- Page 69 Troubleshooting Vitodens 100-W, B1HA/B1KA 26 to 125 Combi Installation/Service Boiler Connection (continued) Replacing the flow limiter (B1KA only) 1. Drain or isolate the DHW system and shut off DCW. 2. Undo screws A. 3. Remove the cap B. 4. Remove faulty flow limiter C. 5.
-
Page 70: Additional Information
(low-high modulation). Boiler reset module (0-10V controller) The Viessmann Input Module is designed to accept a 0-10(VDC) modulating input signal from a boiler reset module controller and send this signal to the Vitodens 100-W with OpenTherm communication. OT-Devices... -
Page 71: Technical Data
Additional Information Vitodens 100-W, B1HA/B1KA 26 to 125 Combi Installation/Service Technical Data Call for heat priority logic table The Vitodens 100-W, B1HA /B1KA boilers has several operating control options. The following table provides the priority levels of each of the different operating controllers. Priority Control operating Required signal * Pump output Pump off delay... - Page 72 Additional Information Vitodens 100-W, B1HA/B1KA 26 to 125 Combi Installation/Service Technical Data (continued) Standard heating boiler Boiler Model No. B1HA 26, 94 B1HA 35, 125 B1KA 35, 125 CSA input Natural gas (NG) 21-94 21-125 21-125 6.2-27.5 6.2-36.6 6.2-36.6 CSA input Liquid propane Gas (LPG) 31-94 31-125 31-125...
- Page 73 Additional Information Vitodens 100-W, B1HA/B1KA 26 to 125 Combi Installation/Service Technical Data (continued) Standard heating boiler (continued) Boiler Model No. B1HA 26, 94 B1HA 35, 125 B1KA 35, 125 NPTM (male) Gas supply connection c in. c in. c in. Flue gas Temperature at boiler return temperature of...
- Page 74 Additional Information Vitodens 100-W, B1HA/B1KA 26 to 125 Combi Installation/Service Technical Data (continued) B1KA on demand hot water operation Boiler Model No. B1KA 35, 125 Max. Input NG and LPG (DHW production only) 43.7 Max. boiler temperature (during DHW production) ºF (ºC) 176 (80) DHW supply temperature...
-
Page 75: Burner Program Sequence Of Operation
Additional Information Vitodens 100-W, B1HA/B1KA 26 to 125 Combi Installation/Service Burner Program Sequence of Operation Call for heat Fan control Fan required >1500 rpm >1500 rpm signal Ignition Combination gas valve Start-up and Maintenance Flame signal min. 4.2 s Sequence time max. - Page 76 Additional Information Vitodens 100-W, B1HA/B1KA 26 to 125 Combi Installation/Service Burner Program Sequence of Operation (continued) Phase 7: Forced low-fire Phase 0: Stand by The controller will go into low-fire until required Complete shutdown until the next call for heat. modulation signal (high-low) is processed (e.g.
-
Page 77: B1Ha 26, 35, 94, 125 Wiring Diagram
Additional Information Vitodens 100-W, B1HA/B1KA 26 to 125 Combi Installation/Service B1HA 26, 35, 94, 125 Wiring Diagram Legend A Ignition/ionization B Room thermostat (dry contact) or WARNING OpenTherm (OT) Interface input DISCONNECT POWER BEFORE SERVICING BOILER. C Outdoor Temperature Sensor (OTS) D Diverting valve stepping motor CAUTION E GDW input (not used) -
Page 78: B1Ka 35, 125 Wiring Diagram
Additional Information Vitodens 100-W, B1HA/B1KA 26 to 125 Combi Installation/Service B1KA 35, 125 Wiring Diagram Legend A Ignition/ionization WARNING B Room thermostat (dry contact) or OpenTherm (OT) Interface input DISCONNECT POWER BEFORE SERVICING BOILER. C Outdoor Temperature Sensor (OTS) CAUTION D Diverting valve stepping motor E GDW input (not used) Label all wires prior to disconnection when servicing... -
Page 79: Parts List
B1HA 35, 125 Boiler 7560854 Ordering Parts: Please provide Serial Number A when ordering replacement parts. Order replacement components from your Viessmann distributor. Overview of Assemblies A Serial Number *1 B Main Enclosure Assembly C Boiler and Burner Assembly D Control Assembly... - Page 80 B1KA 35, 125 Boiler 7560855 Ordering Parts: Please provide Serial Number A when ordering replacement parts. Order replacement components from your Viessmann distributor. Overview of Assemblies A Serial Number *1 B Main Enclosure Assembly C Boiler and Burner Assembly D Control Assembly...
- Page 81 7560854 B1KA 35, 125 Boiler 7560855 Parts for Main Enclosure Assembly 0001 Cover panel, boiler 0002 Profile gasket for cover panel 0003 Nameplate “Viessmann” 0004 Strain relief, top 0005 Base panel, air box 0006 Sealing grommet (set) 0007 Wall-mount bracket 0008 Nameplate “Vitodens 100”...
- Page 82 Additional Information Vitodens 100-W, B1HA/B1KA 26 to 125 Combi Installation/Service Parts List (continued) Model No. Serial No. B1HA 26, 94 Boiler 7560853 B1HA 35, 125 Boiler 7560854 B1KA 35, 125 Boiler 7560855 Parts for Boiler Assembly 0001 Gasket for flue gas, DN60 0002 Vent pipe adaptor, 60/100 0003...
- Page 83 Additional Information Vitodens 100-W, B1HA/B1KA 26 to 125 Combi Installation/Service Parts List (continued) Model No. Serial No. B1HA 26, 94 Boiler 7560853 B1HA 35, 125 Boiler 7560854 B1KA 35, 125 Boiler 7560855 Parts for Burner Assembly 0001 Burner gasket, 187x5.5 mm 0002 Insulating ring 0003...
- Page 84 Additional Information Vitodens 100-W, B1HA/B1KA 26 to 125 Combi Installation/Service Parts List (continued) Model No. Serial No. B1HA 26, 94 Boiler 7560853 B1HA 35, 125 Boiler 7560854 Parts for Hydraulic Assembly 0001 Connection pipe for heating return 0002 Clip, d=10 (set of 5) 0003 Clip, d=8 (set of 5) 0004...
- Page 85 Additional Information Vitodens 100-W, B1HA/B1KA 26 to 125 Combi Installation/Service Parts List (continued) Model No. Serial No. B1KA 35, 125 Boiler 7560855 Parts for Hydraulic Assembly 0001 Connection pipe for heating return 0002 Clip, d=10 (set of 5) 0003 Clip, d=8 (set of 5) 0004 O-ring set for heat exchanger, 21x3 mm 0005...
- Page 86 Additional Information Vitodens 100-W, B1HA/B1KA 26 to 125 Combi Installation/Service Parts List (continued) Model No. Serial No. B1HA 26, 94 Boiler 7560853 B1HA 35, 125 Boiler 7560854 Parts for Pumping Block Assembly 0001 Air vent 0002 O-ring, 34 x 3 mm (5 pieces) 0003 Circulation pump head, Grundfos UPS15-78 0004...
- Page 87 Additional Information Vitodens 100-W, B1HA/B1KA 26 to 125 Combi Installation/Service Parts List (continued) Model No. Serial No. B1KA 35, 125 Boiler 7560855 Parts for Combi Block Assembly 0001 Air vent 0002 O-ring 34x3 mm (5 pieces) 0003 O-ring 24.7x3.6 mm (5 pieces) 0004 Step motor (linear) 0005...
- Page 88 Additional Information Vitodens 100-W, B1HA/B1KA 26 to 125 Combi Installation/Service Parts List (continued) Model No. Serial No. B1HA 26, 94 Boiler 7560853 B1HA 35, 125 Boiler 7560854 B1KA 35, 125 Boiler 7560855 Parts for Control Assembly 0001 Control console cover 0002 Clip hinge (2 pieces) 0003...
- Page 89 Additional Information Vitodens 100-W, B1HA/B1KA 26 to 125 Combi Installation/Service Parts List (continued) Model No. Serial No. B1HA 26, 94 Boiler 7560853 B1HA 35, 125 Boiler 7560854 B1KA 35, 125 Boiler 7560855 Other Parts 0001 Touch-up spray paint “Vitowhite” 0002 Touch-up paint stick “Vitowhite”...
-
Page 90: Installation Fittings
B1HA 35, 125 Boiler 7560854 B1KA 35, 125 Boiler 7560855 Ordering Parts: Please provide Serial Number A when ordering replacement parts. Order replacement components from your Viessmann distributor. Parts 0101 Boiler pressure relief valve, 30 psi 0102 Adaptor for pressure relief valve 0103 Sediment faucet, ¾... -
Page 91: Maintenance Record
Additional Information Vitodens 100-W, B1HA/B1KA 26 to 125 Combi Installation/Service Maintenance Record... -
Page 92: Lighting And Operating Instructions
Additional Information Vitodens 100-W, B1HA/B1KA 26 to 125 Combi Installation/Service Lighting and Operating Instructions FOR YOUR SAFETY READ BEFORE OPERATING W A R N I N G: If you do not follow these instructions exactly, a fire or explosion may result causing property damage, personal injury or loss of life. A.
Need help?
Do you have a question about the Vitodens 100-W B1KA 125 and is the answer not in the manual?
Questions and answers