Table of Contents
Advertisement
Advertisement
Table of Contents

Related Manuals for FIOCCHETTI 170


Summary of Contents for FIOCCHETTI 170
- Page 1 Pag. 1 di 56...
- Page 3 In no event shall the manufacturer FIOCCHETTI be held responsible for any damage due to use of this manual. Provide all the information required regarding operation of the device being tested in order to request technical support from FIOCCHETTI.
-
Page 4: Table Of Contents
MNL004_EN rev. F TABLE OF CONTENTS GENERAL INFORMATION ............................6 CERTIFICATION ................................6 TESTING AND WARRANTY ............................6 PURPOSE, CONTENT AND RECIPIENTS OF THE MANUAL ..................6 ARRANGEMENTS PREPARED BY THE CUSTOMER ....................6 REQUEST FOR TECHNICAL SUPPORT ........................7 SAFETY .................................. - Page 5 MNL004_EN rev. F 4.3.3.9 How to remove SD card ............................... 37 4.3.3.10 How to modify the language ............................38 4.3.3.11 How to modify compartment functions (only for double temperature equipment) ........... 38 4.3.3.12 Special function: TEST ..............................39 4.3.4 Alarm and failure signals ............................ 40 4.3.4.1 Fault in progress warning ............................
-
Page 6: General Information
MNL004_EN rev. F GENERAL INFORMATION CERTIFICATION All Refrigerated cabinets are built in accordance with the relevant European Directives applicable at the time of its placing on the market. The Refrigerated cabinets are certified in accordance with Directives 2006/42/EC, 2014/30/EC, 2014/35/EC and subsequent integrations, built according to the safety requirements for electrical appliances for use in the laboratory (CEI EN 61010-1). -
Page 7: Request For Technical Support
REQUEST FOR TECHNICAL SUPPORT Provide all the information required regarding operation of the device being tested in order to request technical support from FIOCCHETTI. For this purpose, send the table in Annex 1 (pag. 53) “USER DATA FOR TECHNICAL SUPPORT REQUEST”... -
Page 8: Contraindications
MNL004_EN rev. F Electrical power: the machine has been designed, built and fitted with the aim of preventing risks of electric shock, in compliance with established safety regulations. Noise: the machine has been designed and built to minimise risks related to the emission of acoustic noise (always lower than 70 dB). -
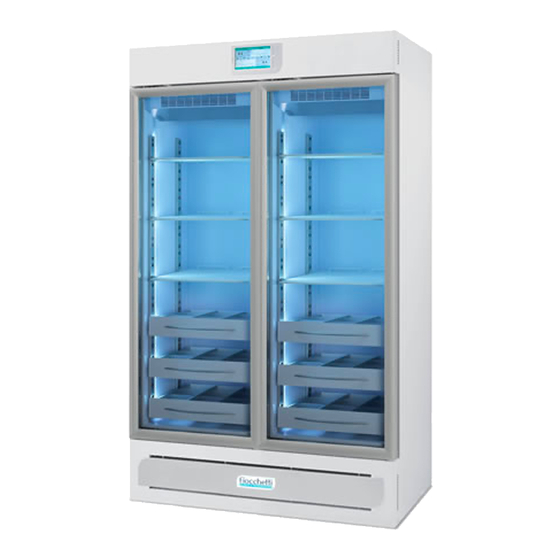
Page 9: Product Description
The maximum capacity of shelves and drawers load on all Fiocchetti models is 30 kg with weight uniformly distributed. All models are for indoor use and cannot be installed outdoors. Warranty will immediately expire, if equipment is installed improperly. -
Page 10: Medical Devices
MNL004_EN rev. F 3.2.2 MEDICAL DEVICES According to Directive 2007/47/CEE and Directive 93/42/CEE, class IIa medical devices are intended to: • Storage of blood, fluids or body tissues • Storage of correctly packaged drugs, vaccines, and reagents of any kind •... -
Page 11: Transport And Handling
MNL004_EN rev. F TRANSPORT AND HANDLING The machine must be transported and handled solely in a vertical position and following the instructions printed on the packaging. This precaution is necessary to avoid contamination of the compressor with oil which may cause the rupture of valves, of the cooling coils and problems with electric motor starting. -
Page 12: Cleaning
MNL004_EN rev. F CLEANING Equipment is shipped already cleaned. However, it is advised to carry out a further washing following the instructions below: Remove the protective PVC film from the external surfaces of the machine. Clean the inside of the chamber with a cloth dampened with alcohol in order to eliminate the protective oil. -
Page 13: Electrical Protections
3.6.1 ELECTRICAL PROTECTIONS Fiocchetti devices are equipped with 2 safety fuses (phase and neutral) with integral protection against electric shocks, short circuits and over-currents, and according to the standards for laboratory devices. The fuses can be accessed from the front: open the refrigerator door and the fuses will be found behind the front control unit panel. -
Page 14: Shelves Installation
MNL004_EN rev. F 3.8.1 SHELVES INSTALLATION Position the shelf supports on the rack at the desired position, inserting them into the special slots and turning them of 90° to block them. At this point, insert shelves (Figure 6 – shelves installation) Figure 6 –... -
Page 15: Placing Material Inside The Compartment
MNL004_EN rev. F 3.8.3 PLACING MATERIAL INSIDE THE COMPARTMENT Care must be taken when loading material, to avoid malfunctions and allow air flow to ensure temperature uniformity inside the refrigerated compartment. Observe the following instructions: Do not place material over the label indicating the maximum permitted loading level, if present. ✓... -
Page 16: Indication For Optimal Use
MNL004_EN rev. F Do not position material in contact with or near the temperature probes (Figure 14). ✓ Figure 14 – probes position Do not block air vents (Figure 15) and pressure equalising valve in SUPERARTIC models (Figure 16). ✓ Figure 15 –... -
Page 17: Ect-F Display Functioning
MNL004_EN rev. F ECT-F DISPLAY FUNCTIONING The device is equipped with a latest generation Electronic Controller, with a back-lit LCD alphanumeric display, to display temperature and working operations with an accuracy of 0·1°C. The controller gives maximum safety in case of alarms and fault conditions, signalling critical conditions and registering every event in order to help the service engineer to speed up the analysis and thus the fixing of any problems. - Page 18 MNL004_EN rev. F Table 1 – Keypad functions Alphanumeric LCD Display, back-lit. To confirm. ECT-F CONTROL To Enter and Esc from the menu. To increase values, scroll menu and for INFO DOCTOR VIEW special function. To decrease values, scroll menu. Switching on/switching off glass door LIGHT (timed for Medical Devices) Alphanumeric LCD Display, back-lit.
-
Page 19: Ect-F Control Operation
MNL004_EN rev. F ECT-F CONTROL OPERATION 4.2.1 SWITCHING ON To switch on the equipment for the first time follow these below instructions: 1. Connect the plug to the electric socket. STAND-BY The display will show “STAND-BY”, which indicates the presence of mains power. To switch on the equipment, press any button for two seconds. -
Page 20: How To Customise The Display
MNL004_EN rev. F 4.2.2 OW TO CUSTOMISE THE DISPLAY Pressing the button , the LCD display can be customized in four different modes. Figure 19 – display customization Mode 1 Mode 2 Mode 3 Humidity mode 56% Rh PAUSE +4,5°C S + 4.0°C +4,5°C 12:44... -
Page 21: Ect-F Menu Functions
MNL004_EN rev. F 4.2.3 ECT-F M UNCTIONS Use the button to access the list of available functions. Scroll the menu using the buttons Attention: to exit from different menus, press to go back to the set display. Table 3- User menu functions Function Description of the function To switch off the controller and stops temperature control... -
Page 22: Manual Defrost Function
4.2.3.3 Manual defrost function Fiocchetti cabinets are equipped with automatic, intelligent defrosting, or rather defrosting which only occurs if deemed necessary by the controller. The number of daily defrosts is therefore significantly reduced, resulting in considerable energy savings. -
Page 23: Language Selection
MNL004_EN rev. F Alarms are recorded as follow: Alarm description Alarm code HIGH TEMP HIGH TEMP DURING POWER FAILURE LOW TEMP Table 4 – Types of temperature alarm ALARMS LIST m6 Press the button , positioning yourself using the buttons on the string Confirm with the button . -
Page 24: Setting The User Password
MNL004_EN rev. F Use the arrows and confirm with to select the desired language from: LINGUA ITALIANA ENGLISH LANGUAGE LANGUE FRANCAISE IDIOMA ESPANOL DEUTSCHE SPRACHE 4.2.3.6 Setting the user password This menu lets you set a new user password which will be asked when switching on and off the controller and when setting the setpoint. -
Page 25: Doctor View Test Function
MNL004_EN rev. F 4.2.3.9 Doctor View test function Press for few seconds the button to activate DOCTOR-VIEW function. This TEST checks buzzer for 5 sec. (TEST BUZZER); then, it shows by sequence the SETPOINT, EVAPORATOR temperature, CONDENSER temperature, high and low set limits, alarm time delay, the maximum duration allowed when DOOR is open and battery tension (if battery is installed). -
Page 26: Dmlp Digital Monitor Operation
MNL004_EN rev. F DMLP DIGITAL MONITOR OPERATION The equipment can be supplied with DMLP Digital Monitor, completely independent from the ECT-F controller, to record the temperatures, temperature alarms and power failures (thanks to a backup battery supplied as standard, automatically re-charged. When the DMLP Digital Monitor is switched on (see par. -
Page 27: Dmlp Digital Monitor Switching On
MNL004_EN rev. F 4.3.1 DMLP D IGITAL ONITOR WITCHING To switch on the DMLP Digital monitor for the first time follow these instructions: 1. Connect the plug to the electric socket. STATUS OK The display will show “STAND-BY”, which indicates the presence of mains power. -
Page 28: Dmlp Digital Monitor Menu Functions
MNL004_EN rev. F 4.3.3 DMLP D IGITAL ONITOR UNCTIONS Use the button to access the list of available functions. Scroll the Menu using Table 6 – DMLP menu functions Function Description of the function TURN OFF To switch off the DMLP Digital Monitor. To display the recorded alarms. -
Page 29: Recorded Alarms Log
MNL004_EN rev. F 4.3.3.2 Recorded alarms log The controller signals three types of alarms and it records the last 12 events in the corresponding ALARMS LIST These are catalogued in Alarm description Alarm code HIGH TEMP MAINS FAILURE LOW TEMP Table 7 –... -
Page 30: How To Change Temperature Alarm Limits
MNL004_EN rev. F 4.3.3.3 How to change temperature alarm limits LIMITS Press the button , then use till the following string Confirm with the button . The pre-set temperature alarm limits will be visualized and the lower limit will be blinking too. -
Page 31: Setting The User Password
MNL004_EN rev. F DOOR 05/07/06 Confirm by pressing , then to select another day 4.3.3.5 Setting the user password This menu gives the possibility to set a user password to protect DMLP Digital Monitor switching on/off, setting of high and low temperature limit, date and time changing and accessing to MODE menu. DMLP Digital Monitor is factory set with password = 00. -
Page 32: Printer Menu
MNL004_EN rev. F 4.3.3.7 Printer menu PRINTER MENU Press the button , then use till the following string Confirm with button to access to the print-out customisation: How to customise the menu: It switches off the printer (“*” message will appear near STATUS PRINTER OFF STATUS It switches on the printer. - Page 33 MNL004_EN rev. F PRINT LIST: WEEKLY Press to enter in the Weekly print menu. Type the beginning date of the report. Start setting the day using ; then, confirm by pressing <<Confirm Esc>> Follow the same procedure to set the month and the year till visualizing .
- Page 34 MNL004_EN rev. F PRINT LIST: ALARMS <<Confirm Esc>> Press to enter in Alarms print menu. The following string appears in the display: To print use to cancel the operation Report example: Alarms list specifies: alarm code date and hour maximum temperature reached alarm duration...
- Page 35 MNL004_EN rev. F Automatic daily alarm report Every day, only when alarms are detected, a daily alarm report is printed. The report shows the type of alarm, the maximum temperature reached, and the duration of alarm. Daily alarm report example: PRINT LIST: FAILURES <<Confirm Esc>>...
-
Page 36: Service Menu
MNL004_EN rev. F PRINT LIST: PARAMETERS <<Confirm Esc>> Press to enter in Parameters print menu. The following string appears in the display: To print use to cancel the operation. Report example: Parameters list report: it prints DMLP Digital Monitor parameters PRINT LIST: DOOR OPENINGS Press to enter in Door openings print menu. -
Page 37: How To Remove Sd Card
MNL004_EN rev. F 4.3.3.9 How to remove SD card SD EXTRACTION Press the button , then use till the following string Confirm and remove the SD card within 60 seconds by pressing on it with a finger. Insert the SD card inside the supplied Card Reader and connect the device to the USB port of a PC. -
Page 38: How To Modify The Language
MNL004_EN rev. F 4.3.3.10 How to modify the language LANGUAGE m10 Press the button , then use till the following string Using these buttons select the desired language and confirm by pressing LINGUA ITALIANA ENGLISH LANGUAGE LANGUE FRANCAISE IDIOMA ESPANOL DEUTSCHE SPRACHE 4.3.3.11 How to modify compartment functions (only for double temperature equipment) -
Page 39: Special Function: Test
MNL004_EN rev. F 4.3.3.12 Special function: TEST Press for some seconds to activate the function TEST. This function checks the integrity of the alarm system, running a test of the following functions: Battery charge test Buzzer integrity (continuous sound for 4 sec.) Acoustic and visual simulation of the low temperature alarm (Probe a) Acoustic and visual simulation of the high temperature alarm (Probe a) Acoustic and visual simulation of the low temperature alarm (Probe b) (if installed) -
Page 40: Alarm And Failure Signals
MNL004_EN rev. F 4.3.4 LARM AND FAILURE SIGNALS 4.3.4.1 Fault in progress warning In the event of any system abnormality, an audible and visual warning is immediately signalled to the user by means of the flashing display and the sound of the buzzer. Then, the alarm is registered in ALARMS LIST. The DMLP Digital Monitor records the latest 16 alarms along with the following information: TYPE OF ALARM CRITICAL TEMPERATURE REACHED... -
Page 41: Routine And Special Maintenance
MNL004_EN rev. F ROUTINE AND SPECIAL MAINTENANCE The information in this chapter is addressed to both users (non-specialised personnel) and routine maintenance workers. PROHIBITION OF SAFETY DEVICE REMOVAL Do not remove safety protections without having switched off the refrigerator cabinet and disconnecting it from the electrical mains. - Page 42 Restore the electrical current and switch back on the device. CONDENSER Figure 24 - Condenser position in models 100-140-280 MODEL 130-170-200-250-300-600 2T-400-500 ( 1T and 2T ) PHASE 1 Use a Phillips head screwdriver to remove the guard (3 screws).
-
Page 43: Condensate Water Draining
MNL004_EN rev. F MODEL 700-1500 PHASE 1 In models with higher motors (700-1500 L), the condenser can be accessed directly from the outside using a ladder. PHASE 2 Use a vacuum cleaner, air jet, or a long bristle brush to remove any dust on the condenser fins. PHASE 3 Restore the electrical current and switch back on the device. -
Page 44: Demolition
MNL004_EN rev. F DEMOLITION This unit is marked in compliance with European Directive 2012/19/UE (WEEE). The symbols on the product means that it must not be considered as domestic waste but it must be given to the competent authority for the recycling of electric and electronic appliances. Before scrapping the machine, make it unusable by cutting the power cord, and removing the doors, shelves and drawers so that children cannot access the unit. -
Page 45: Labelling
MNL004_EN rev. F LABELLING MACHINE DATA PLATE Present only if equipment is a medical device Manufacturer name and address Model Year of production Code Ambient temperature Power voltage class * supply Power absorption refrigerant type refrigerant type Fuse Defrost Serial Light power heater power number... -
Page 46: Other Labelling
MNL004_EN rev. F 8.1.1 OTHER LABELLING Table 9 - Labels Cut off power before removing the guard. Periodic condenser cleaning Earthing symbol Attention: risk of fire (only when natural refrigerants are used) Glass door cleaning for Vision models Do not exceed the indicated level Substitute batteries (only with DMLP Digital Monitor) External dry contacts+RS485 label... -
Page 47: Consumable Materials
MNL004_EN rev. F CONSUMABLE MATERIALS Table 10 - Consumable materials Code Type/Characteristics Application Image BATTERIA ECT-F Control and DMLP BAT004 3V Lithium Coin Cell Battery Digital Monitor clock battery type CR 1220 DMLP Digital Monitor BAT001 12V 2.1 Ah Lead battery Battery BAT003 Lead battery 12V 1.2 Ah... -
Page 48: Troubleshooting
MNL004_EN rev. F TROUBLESHOOTING The table below lists information regarding the possible causes and actions to be taken for the most common faults, which do not need automatically technical servicing. Servicing on the electrical system must also be carried out by trusted electricians. PROBLEM POSSIBLE CAUSE SOLUTION... -
Page 49: Diagnostic
MNL004_EN rev. F PROBLEM POSSIBLE CAUSE SOLUTION • • Unit instability Eliminate the cause. The unit is noisy • Contact with objects (e.g. • Move and/or remove objects cardboards, polystyrene or other touching the equipment. materials) Repeated alarm or fault •... - Page 50 MNL004_EN rev. F VISUAL AND ACOUSTIC ALARM SOLUTION • Switch off the refrigerator from the keyboard -STAND BY (see par. 5.2.3.1). Then, disconnect the electrical plug, wait a few seconds and then re-connect the plug. Switch the refrigerator back on from the keyboard and, once the temperature is displayed, press "OK"...
- Page 51 MNL004_EN rev. F VISUAL AND ACOUSTIC ALARM SOLUTION • Air condition the environment. • Clean the condenser (see par. 6.3) • Check that installation has been properly performed (see par. 4.2) COMPRES WORK. • Switch-off the equipment from keypad (see par. 5.2.3.1) and then, switch it on again.
- Page 52 MNL004_EN rev. F VISUAL AND ACOUSTIC ALARM SOLUTION • Switch off the DMLP Digital Monitor on keypad (par.5.3.3.1) and remove the SD Card from its slot. Disconnect the equipment from the mains for some seconds and re-connect it using the keyboard. When “SD REMOVED”...
-
Page 53: Annexes
Notes: SIGNATURE: SENT ON: (legible) via e-mail to assistenza@fiocchetti.it Note: failure to submit a properly completed request (*required fields) will result in a failure to open servicing with a resulting delay in the resolution of issues. Pag. 53 di 56... -
Page 54: Annex 2
MNL004_EN rev. F Annex 2 SERVICE DATA FOR TECHNICAL SUPPORT ON ECT-F PLUS CONTROLLER SERVICE MENU Enter into the service section , confirm with and enter password 255. Enter into the “status data” menu with and scroll the items, noting the values in the table below. Item Value U.M. - Page 55 MNL004_EN rev. F Pag. 55 di 56...
- Page 56 MNL004_EN rev. F Via Panagulis, 48 Pag. 56 di 56 MNL004_ITA rev. F...
Need help?
Do you have a question about the 170 and is the answer not in the manual?
Questions and answers