Advertisement
Table of Contents
- 1 Important Safeguards
- 2 Before First Use / Preparation
- 3 Know Your Filter
- 4 Set up Instructions
- 5 Installation
- 6 Starting Your Filter
- 7 Cleaning Your Filter
- 8 Specifications
- 9 Important Safeguards
- 10 Set up Instructions
- 11 Installation
- 12 Starting Your Filter
- 13 Cleaning Your Filter
- 14 Troubleshooting
- Download this manual
Advertisement
Table of Contents

Related Manuals for aquamanta EFX 200


Summary of Contents for aquamanta EFX 200
- Page 1 aqua manta the experts in aquatic technology Instruction Manual year >600 guarantee Litres Coldwater Tropical Marine...
- Page 2 200/300/400 aqua manta the experts in aquatic technology Instruction Manual year >400 guarantee Litres Coldwater Tropical Marine...
-
Page 3: Important Safeguards
Important Safeguards This appliance is not intended for use by 5. Do not use the filter for reasons other than the persons (including children) with reduced intended use. The use of attachments that are not physical, sensory or mental capabilities, or lack recommended or sold by the filter manufacturer may of experience and knowledge, unless they have cause the product to be unsafe. - Page 4 Important Safeguards Australia, New Zealand and Hong Kong Connecting your appliance to the mains electricity supply - Country specific In Australia, New Zealand and Hong Kong all instructions. products are supplied with fitted plugs. This plug should NOT be tampered with in any way or United Kingdom removed.
-
Page 5: Before First Use / Preparation
Quick release hose in/out tap Replacement Parts & Filter Media Use Aquamanta Genuine Spare Parts Only. See your local Aquamanta Dealer and look for the number listed below for the spare part Impeller cover you require. Alternatively you will find these... - Page 6 Recomended Media Set Up EFX 600 Plastic Bio balls Activated Carbon Bag Sponge (Blue 15ppi) Ceramic Media Sponge (Black 35ppi) Phosphate Pad Wool...
-
Page 7: Set Up Instructions
Set Up Instructions NOTE: The O-ring needs to be put into position 6. Follow the filter media setup instructions on before the unit is set up. The o-ring is supplied in the previous page. Remember to remove all media from the plastic bags and rinse in tap a separate bag. - Page 8 Set Up Instructions Fig 6 O-ring Fig 8 11. Place the head unit back on top of the canister 9. Prior to installing the head unit, turn it over, body; ensure the power cord is not jammed remove the impeller cover extension pipe so you between filter head and the canister body.
-
Page 9: Installation
Installation 1. Remove all remaining components from the 6. Attach one to either hose tail on the quick plastic bags. release tap connector. Push the hose on as far as possible. Screw the collars antic lock wise to 2. Locate your quick release tap connections. lock the hoses into position. - Page 10 Installation 11. Refer to Figure 7 to assist you in assembling the intake. You will find that the Cap, (a) U Pipe, (b) Locking Nut (c) and Hose Tail (d) come as one piece from the factory. So to do the Surface Skimmer Adjuster, (e) Sleeve (f) and the Surface Skimmer.
-
Page 11: Starting Your Filter
Installation Fig 1 Fig 10 1. The Primer for your canister filter is located 17. Turn the Lock Nut anti-clock wise to lock the at the top of the head unit. Fig 2 hose into position. Hand tight will do, No tools are required. -
Page 12: Cleaning Your Filter
Fig 5 NOTE: If you require any further information Fig 1 about starting your filter please consult your Aquamanta retailer. 4. Fill a bucket with water from your aquarium and take it to the sink or wherever you intend to Notes clean your filter. - Page 13 Cleaning Your Filter 9. The sponges can also be rinsed in the bucket 21. Put the impeller back together and ensure of aquarium water (Providing the water is not that it rotates freely on the shaft. Then dirty. Replace if necessary) they will also require reassemble the head unit, ensure there is no replacement eventually as over time they clog water on the power cord, plug the head unit in...
- Page 14 Cleaning Your Filter Threaded elbow Grommet Impeller cover Rubber end cap Shaft Impeller Priming valve. Impeller chamber O-ring Head...
- Page 15 Trouble Shooting THE FILTER UNIT IS LEAKING HEAD UNIT STUCK CANISTER BODY 1. Check all O-rings are in place and that they are not damaged or soiled. 1. While pump is still plugged in and running, 2. Re-apply Silicon based aquarium safe remove the screw cap from the intake pipe.
-
Page 16: Specifications
Manufactured in China NOTE: To avoid having this problem in the Aquamanta is a trademark of Kong’s (UK) Limited. future maintain your filter regularly! Prior to refitting the head remove the o-ring and 220 - 240V ~ 50HZ lubricate it with an aquarium safe lubricant. - Page 17 200/300/400 aqua manta the experts in aquatic technology Instruction Manual year >400 guarantee Litres Coldwater Tropical Marine...
-
Page 18: Important Safeguards
Important Safeguards This appliance is not intended for use by 5. Do not use the filter for reasons other than the persons (including children) with reduced intended use. The use of attachments that are not physical, sensory or mental capabilities, or lack recommended or sold by the filter manufacturer may of experience and knowledge, unless they have cause the product to be unsafe. - Page 19 Important Safeguards Australia, New Zealand and Hong Kong Connecting your appliance to the mains electricity supply - Country specific In Australia, New Zealand and Hong Kong all instructions. products are supplied with fitted plugs. This plug should NOT be tampered with in any way or United Kingdom removed.
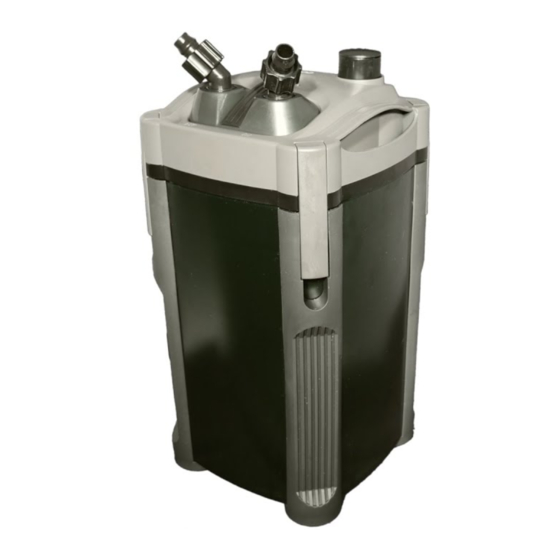
- Page 20 EFX 200/300/400 External Power Filter Replacement Parts & Filter Media Head Use Aquamanta Genuine Spare Parts Only. See your local Aqua Manta Dealer and look for the number listed below for the spare part you require. Media...
- Page 21 Recomended Media Set Up EFX 200/400 Wool Phosphate Pad Sponge (Black 35ppi) Ceramic Media Activated Carbon Bag Sponge (Blue 15ppi)
- Page 22 Recomended Media Set Up EFX 300 Wool Phosphate Pad Activated Carbon Bag Ceramic Media Sponge (Blue 15ppi) Plastic Bio balls in bottom of canister...
-
Page 23: Set Up Instructions
Set Up Instructions 1. Remove the 2 boxed accessory packs and 6. Follow the filter media setup instructions on the filter unit from the box. the previous page which apply to your filter. Remember to remove all media from the plastic 2. - Page 24 Set Up Instructions canister and the head unit. Do not force it together! If it feels tight do not apply any pressure to close it simply, remove the head unit and filter baskets and try again. Fig 8 12. Latch and secure the clips. The filter unit is now ready to be installed.
-
Page 25: Installation
Installation 1. Open the brown accessory boxes and outlet remove all components from there plastic bags. You will find a set of taps and two pieces of hose. Screw the collar on the taps all the way in. (Clockwise) 2. Push one end of the hose over the hose tail required number of spray bar (c) sections DO on the tap. -
Page 26: Starting Your Filter
Installation 12. Pull the hose from the inlet side of the filter up next to the inlet U pipe and line up. Fig 4 Fig 4 Outlet Inlet Fig 7 20. You are now ready to start your filter. 13. Measure a good 10cm more that what you Starting Your Filter need past the bottom of the U pipe. -
Page 27: Cleaning Your Filter
4-6 weeks. inlet tube and begins to fill the canister. Replacements are available from you local Aquamanta Dealer 4. Stop pumping and allow the canister to fill with water. 1. Turn the canister filter off at the socket and unplug. - Page 28 Cleaning Your Filter 9. The sponges can also be rinsed in the bucket of aquarium water (Providing the water is not dirty. Replace if necessary) they will also require Impeller chamber replacement eventually as over time they clog and prevent water from traveling through them easily.
-
Page 29: Troubleshooting
Cleaning Your Filter 19. Check your inlet, outlet tubes and hoses. If Low water flow residue has built up on the inside of them 1. As both previous tips. remove them from the aquarium. Take to the sink, run hot water through them to loosen the 2. - Page 30 Specifications Notes Canister Model: EFX 200 Number of Media Baskets: 3 Dimensions: 18.5 x 33 x 18.5cm Max Aquarium Volume: Up to 200L Maximum Flow Rate*: 800L\hr Max Head Height: 1.3M Filter Volume: 6.5 Litres Power Requirements: 220 ~ 240V Power Consumption: 9W Suitable: Cold water, Tropical, Marine Canister Model: EFX 300...
- Page 31 1. all express and implied warranties and conditions under statute or general law, are expressly excluded and Aquamanta, where permitted, will limit liability as follows and at Aquamanta’s option to: in regard to goods either a) the replacement of goods or supply of equivalent goods b) the repair of goods or the cost of replacing the goods or of acquiring equivalent goods OR in regard to services either c) the re-supply of services d) the cost to re-supply services.
- Page 32 Aquarium Log Book Test Carbonate Ammonia Nitrite Nitrate Date Hardness Instruction Version 06/01/2010...
Need help?
Do you have a question about the EFX 200 and is the answer not in the manual?
Questions and answers