Table of Contents
Advertisement
Quick Links
Advertisement
Table of Contents

Related Manuals for Biral BTD-350

Summary of Contents for Biral BTD-350
- Page 1 BTD-300 BTD-350 Biral Thunderstorm Detector USER MANUAL...
- Page 2 [INTENTIONALLY BLANK]...
- Page 3 User Manual for BTD BTD-300 BTD-350 This manual describes the installation and operation of the Biral Thunderstorm Detector models: BTD-300 and BTD-350. Where instructions apply to either, the Detector will be referred to as ‘BTD’.
- Page 4 The information contained within this manual (including all illustrations, drawings, schematics and parts list) is proprietary to Biral. It is provided for the sole purpose of aiding the buyer or user in the operation and maintenance of the instrument. This...
-
Page 5: Table Of Contents
User Manual for BTD TABLE OF CONTENTS SAFETY ..........................1 PRODUCT DESCRIPTION ................... 2 INSTALLATION ......................4 Site Selection .............................. 5 Tools Required for Assembly ........................9 Package Contents ............................9 Corona Spikes ............................10 Direction Finder angle offset ........................10 Power and Data Cables ........................... - Page 6 Figure 6: BTD-300 Assembly Instructions ................9 Figure 7: Insertion of a corona spike into one of the rain shields........10 Figure 8: BTD-300 and BTD-350 Enclosure box cable gland arrangement ....12 Figure 9: Terminal positions for power connection ............13 Figure 10: Location and numbering of the RS422 terminals on the main circuit board 14 Figure 11: Location of SW2 switch ..................
- Page 7 User Manual for BTD Table 3: Warning Flag Description ..................22 Table 4: Local Calibration Message ..................23 Table 5: Site Characterisation Message ................24 Table 6: Self-Test Message ..................... 24 Table 7: Status Flag Description ................... 25 Table 8: Second Status Flag Description ................25 Table 9: Sensitivity Level Message ..................
-
Page 8: Safety
User Manual for BTD SAFETY 1 SAFETY 1.1. Lightning Safety The BTD is a highly sensitive lightning detector, designed to inform the user of any lightning flash within 45 nautical miles (83 km) of the installation site within 2 seconds of its occurrence. This, combined with continuous monitoring of the electrical conditions present at the site prior to any lightning activity, offers a comprehensive local thunderstorm warning solution. -
Page 9: Product Description
1.2. Electrical Safety CE Certification - Safety All Biral’s Sensors comply with the requirements for UKCA and CE marking. Once installed, it is the user’s responsibility to ensure that all connections made to the sensor comply with all Local and National safety requirements. - Page 10 1nA to be detected during all weather conditions. Heaters are present inside all 5 (BTD-300) or 7 (BTD-350) insulators and each antenna has a gas discharge unit to ground to protect the amplifier from current surges associated with very close lightning, whilst retaining the sensor’s ability to detect them.
-
Page 11: Installation
User Manual for BTD INSTALLATION The function of the corona initiator spikes (BTD-300 only) are to produce rapid electric field changes detectable by the antennas in the presence of a strong electrostatic field, which is associated with overhead thunderstorm development. -
Page 12: Site Selection
User Manual for BTD INSTALLATION Site Selection It is very important for the successful operation of the BTD that it is installed at a suitable site. Please consider the following criteria for the physical site characteristics: Ideal site (allows optimal performance) •... -
Page 13: Figure 2: Site Suitability Considerations
Alternative mounting options such as exploiting existing mounting poles are possible. Please consult Biral prior to installation to discuss alternative mounting options. -
Page 14: Figure 3: Lowering Of Electronics Enclosure Box From Its Temporary Packaging Position
User Manual for BTD INSTALLATION The base plate dimensions and bolt hole locations are shown in Figure 4. There are no orientation requirements for mounting of the BTD without the direction finding module, except that the unit is intended to be mounted on a flat, horizontal surface so that the long support pole is vertical. -
Page 15: Figure 4: Btd Base Plate Dimensions
User Manual for BTD INSTALLATION Figure 4: BTD base plate dimensions Position Arrow To point NORTH Figure 5: NORTH pointing arrow Direction Finder is optional on the BTD-300 but always fitted to the BTD-350... -
Page 16: Tools Required For Assembly
6mm Allen key for the pole clamp bolts. 10mm spanner for the earth stud nuts. Package Contents Ensure that any packaging is removed from the unit and the bag of components for assembly (including corona spikes for BTD-300 only) is identified and not discarded with the packaging. -
Page 17: Corona Spikes
Corona Spikes are not fitted to the BTD-350. For the BTD-300, it is advised to insert the corona spikes at the end of the assembly process to reduce the chance of injury to the installers (the spikes are sharp), or damage to the spikes themselves. -
Page 18: Power And Data Cables
User Manual for BTD INSTALLATION Power and Data Cables 3.6.1 Power Connections In order for the mains version of any sensor to comply with the requirements of EN 61010- 1:2010, ‘Safety requirements for electrical equipment for measurement, control, and laboratory use’, the following should be observed: “A switch or circuit breaker must be included in the installation. -
Page 19: Figure 8: Btd-300 And Btd-350 Enclosure Box Cable Gland Arrangement
User Manual for BTD INSTALLATION Figure 8: BTD-300 and BTD-350 Enclosure box cable gland arrangement... -
Page 20: Figure 9: Terminal Positions For Power Connection
User Manual for BTD INSTALLATION Figure 9: Terminal positions for power connection 3.6.2 Ethernet Connections The Ethernet connector is located in the centre of the base (see Figure 8), so there is no need to open the enclosure to connect this data cable. The mating IP68 Ethernet connector, provided with the unit, should be used on the input Ethernet cable to retain the system’s weatherproof integrity. -
Page 21: Figure 10: Location And Numbering Of The Rs422 Terminals On The Main Circuit Board
User Manual for BTD INSTALLATION wire clamp and insert the prepared end of the wire into the adjacent hole. When the clamp is released, the wire will be held firmly in the terminal. Use tie wraps or equivalent to attach the cable to suitable internal fixing points to ensure there is no strain on the connections. -
Page 22: Rs422 Connection Options
User Manual for BTD INSTALLATION 3.6.4 Switching between Ethernet and RS422 communications To switch between Ethernet and RS422 communications, power down the sensor and locate the 4-way DIL switch labelled “SW2” on the processor board as shown in Figure Figure 11: Location of SW2 switch For Ethernet communications change switch 3 to the ‘Off’... -
Page 23: Relay Connections
User Manual for BTD INSTALLATION However, if a fast baud rate is used over a long transmission line, one or both of these may be required. 4-Way DIL switch Figure 12: Location of RS422 configuration switches Relay Connections The gland for the optional relay output cable is found adjacent to the power supply gland, closest to the support pole side of the box. -
Page 24: Electrical Grounding
User Manual for BTD INSTALLATION Earth Terminal Block Upper Relay Terminals (NC) Middle Relay Terminals (COM) Lower Relay Terminals (NO) Relay 1 (Warning) Relay 2 (Alert) Relay 3 (Severe Alert) Figure 13: Relay Connections Electrical Grounding Possible instrument failure can result from the damaging effects of over-voltage transients induced on the power line and the signal distribution lines. -
Page 25: Installation Completion
User Manual for BTD INSTALLATION • Connections: Use tight, corrosion-proof bare metal connections throughout the grounding system. 3.10 Installation Completion • Check that the power switch, near the centre of the DIN rail, is set to ‘ON’ • Fasten the lid of the thunderstorm Detector Electronics enclosure firmly back in place. •... - Page 26 Relay 2 (Alert) will also activate if the sensor detects the presence of a high electric field. 3.12.2 Relay Operation The operation of the relays can be modified by the user using an external PC running the Biral Control Software. See section 7 for commands to use if the Biral software is not available.
-
Page 27: Data Output
2 seconds. Up to four flashes can be detected and reported in any 2 second period. Data Interpretation The data can be fed into a self-contained PC, running the Biral Control software. This software, provided with each thunderstorm detector, will store the data, and process it to provide a real time display of any lightning occurrence within 45 Nautical Miles (83 km) of the site, and any potential local thunderstorm activity. -
Page 28: Table 2: Standard Data Message
User Manual for BTD DATA OUTPUT DATA:,ID,DDMMYY,HHMMSS,A,B,CC,DDDDD,DDMMYY,HHMMSS,CCC,XXXXX, XXX, DDMMYY,HHMMSS,CCC,XXXXX,XXX,DDMMYY,HHMMSS, CCC,XXXXX,XXX,DDMMYY,HHMMSS,CCC,XXXXX,XXX Field Description DATA:, Message Header Sensor Identification Number (value between 01-99) DDMMYY,HHMMSS, Current system date Number of flashes detected in the 2 second interval Warning Indicator – Integer representing warning state (details below, section 4.3.1) Warning Flags Integer representing state of each warning indicator (corona, strongly charged precipitation, lightning etc. -
Page 29: Table 3: Warning Flag Description
User Manual for BTD DATA OUTPUT Severe Alert - Overhead flash (default <5 Nautical Miles) If the “Warn on Second Distant Flash” option is checked in the Service Screen or through the command prompt (section 7.32), the warning indicator will only change to 1 if two flashes are detected within the warning hysteresis time (default 15 minutes), not just one. -
Page 30: Local Calibration Values
User Manual for BTD DATA OUTPUT Local Calibration Values The message is transmitted if the local calibration values have been automatically updated by the sensor. The message serves as a notice that a recalibration has occurred and provides details of the calibration values used for future reference. Note: This message will be automatically transmitted from the sensor. -
Page 31: Self-Test Message
User Manual for BTD DATA OUTPUT Table 5: Site Characterisation Message Self-Test Message This message is transmitted in response to the R? Command – see section 7.16: STATUS:,DDMMYY,HHMMSS,CCC,M,AAAA,BBBB,CCCC,±DDDD, EEEEE,FFFFF,GGGGG,HHHHH,IIIII,JJJJJ,KKK,LLLLL,MMMMM, NNN,OOOOO,PPPPP,QQQQQ Field Description Limits STATUS:, Message Header DDMMYY,HHMMSS, Current system date and time CCC, Current centi-second internal data counter Operating Mode (0=idle,1=sampling) -
Page 32: Sensitivity Level Message
User Manual for BTD DATA OUTPUT Secondary Antenna Saturation Tertiary Antenna Saturation 1024 PIC Health Error 2048 FPGA Health Error 4096 EEPROM Checksum Error 8192 Sensor Reset since last R? 16384 Direction Finder Error 32768 Unused Table 7: Status Flag Description The antenna leakage fault is activated if the system suspects a leakage current, which diverts the signal past the amplification stage. -
Page 33: Distance Limit Message
User Manual for BTD DATA OUTPUT Electric Field Sensitivity Level (0-10) Direction Finder Amplitude sensitivity Level (0-10) Table 9: Sensitivity Level Message Distance Limit Message This message is transmitted in response to the DIST? Command – see section 7.1 DIST:,AAAAA,BBBBB,CCCCC,DDDDD Field Description #Bytes... -
Page 34: Hysteresis Time Message
User Manual for BTD DATA OUTPUT Table 12: Real Time Clock Message 4.11 Hysteresis Time Message This message is transmitted in response to the HYST? Command – see section 7.10 HYSTERESIS:,AAAAA, BBBBB Field Description #Bytes HYSTERESIS:, Message Header AAAAA, Relay On Hysteresis Time (Seconds) BBBBB Warning Hysteresis Time (Seconds) Table 13: Hysteresis Time Message... -
Page 35: Calibration
User Manual for BTD CALIBRATION 5 CALIBRATION Site Characterisation When the BTD is installed at a site it is necessary for it to determine the background variability of electric field changes present at the site in order to identify anomalies associated with thunderstorm activity. -
Page 36: Lightning Range Calibration
User Manual for BTD CALIBRATION (midway) position is considered optimal for most purposes, so should not normally be changed. More information on the flash detection and ranging process can be found in section 9.1 of the appendix. Lightning Range Calibration The range calibration cannot be automatically configured so needs to be checked by the user. -
Page 37: Maintenance
Alteration of any sensitivity threshold should only be attempted by users competent in the operation of the detector, since inappropriate levels will degrade performance. If in doubt please contact Biral for advice on the most appropriate sensitivity levels for your requirements. 6 MAINTENANCE The BTD is designed to withstand harsh weather conditions and requires very little maintenance. -
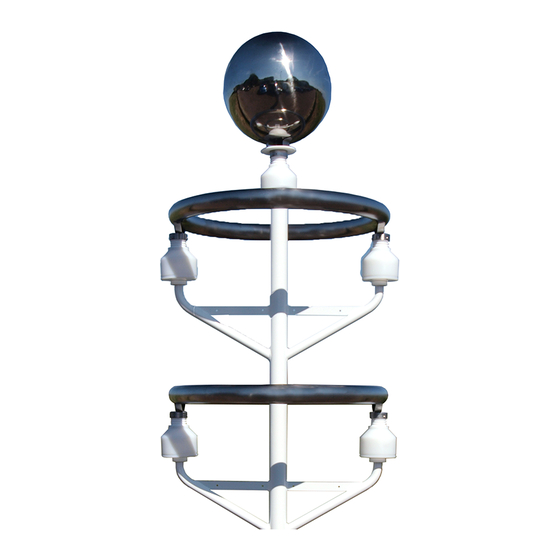
Page 38: Figure 14: Antenna Insulator Unit (Btd-300 Shown)
5.3. Figure 14: Antenna insulator unit (BTD-300 shown) Showing the location of the unheated outer rain shield and inner heated grooved insulator block. -
Page 39: Command Line Interface
User Manual for BTD COMMAND LINE INTERFACE 7 COMMAND LINE INTERFACE These commands are used to change parameters of a more technical nature or in the absence of the BTD control software. If an invalid command is detected it will be rejected and the sensor will respond with "BAD CMD". -
Page 40: Dfstat? - Get Direction Finder Status
User Manual for BTD COMMAND LINE INTERFACE DFSTAT? – Get Direction Finder Status Return the Direction Finder Status. This command is only allowed when the sensor is idle, if the sensor is in sampling mode the sensor will respond with “COMMAND NOT ALLOWED”. DF-OFFSET? –... -
Page 41: Level? - Get Sensitivity Levels
User Manual for BTD COMMAND LINE INTERFACE The time can be set to a value between 2 and 1800 seconds. Attempting to set the time outside these limits will result in a "BAD CMD" and the entry will be discarded. If the command is acceptable, the sensor will respond with “OK”... -
Page 42: Relay? - Get Relay Information
User Manual for BTD COMMAND LINE INTERFACE 7.17 RELAY? – Get Relay Information When a “RELAY?” command is received the sensors transmits the Relay Parameters Message. Details of the message are in section 4.9. 7.18 RHOxxx – Relay On Hysteresis Time This command is used to set the Relay On Hysteresis time in seconds. -
Page 43: Rtctimehh,Mm,Ss - Set Real Time Clock Time
User Manual for BTD COMMAND LINE INTERFACE where: - is the day of the week (1..7) with Sunday being 7. - is the date (01..31). - is the month (01..12). - is the year (00..99). The sensor will respond with 'OK'. 7.24 RTCTIMEHH,MM,SS –... -
Page 44: Sn? - Query Serial Number
User Manual for BTD COMMAND LINE INTERFACE 7.28 SN? – Query Serial Number When an "SN?" command is received the sensor transmits the sensor serial number– this is a 12 character string. 7.29 SITE? – Get Site Characteristics When a "SITE?" command is received the sensor transmits the Site Characteristics Message. -
Page 45: Specifications
User Manual for BTD SPECIFICATIONS 8 SPECIFICATIONS Specification for the Basic BTD Instrument Biral BTD Specification Maximum reporting range 83 km (45 nautical miles), reported to nearest 0.01 km Customisable lightning Yes, four proximity alert ranges can be chosen between 2-45 proximity alerts? nautical miles (3.70-83.3 km) (FAA regulations as default) - Page 46 User Manual for BTD SPECIFICATIONS Interface Computer, with option for additional relay outputs (x3) Visualisation software Included for use on PC computer systems Approx. Weight 25 Kg Installation site Outdoors only, no overhead obstructions...
-
Page 47: Dimensions Of The Btd-300 And Btd-350
User Manual for BTD SPECIFICATIONS Dimensions of the BTD-300 and BTD-350 BTD-300 BTD-350 (all dimensions are approximate) Figure 15: BTD Dimensions... -
Page 48: Specification For The Optional Relay Contacts
User Manual for BTD SPECIFICATIONS Specification for the Optional Relay Contacts Biral BTD Relay Specification Maximum Switching Voltage 250 Vac, 220Vdc Maximum Switching Current Maximum Carrying Current Maximum Switching Power 60W, 125VA... -
Page 49: Appendix
The BTD separates lightning flash signals from non-lightning sources by a unique method developed by Biral which compares the signal characteristics on the three antennas. Due to the special geometry of the detector and antennas, only lightning produces the correct combination of relative signal amplitudes compared with local, non-lightning sources of electric field change. -
Page 50: Use Of The Corona Initiator Spikes (Btd-300 Only)
The ability to warn of strong overhead electric fields is a key feature of the BTD-300 compared with conventional lightning detectors. Whilst the corona spikes are designed to provide a source of local corona, in practise nearly all sites will have sufficient objects in the vicinity to produce sufficient amounts of corona ions and high frequency variability of the electric field. -
Page 51: Btd Fault Detection And Appropriate Response
User Manual for BTD APPENDIX BTD fault detection and appropriate response 9.5.1 Fault flags during normal operation If the BTD detects a fault, the fault status in the DATA message is changed to indicate the type of fault(s) it has detected (see section 4.3.3). If a fault is reported, the following actions are recommended: Antenna Leak The antenna(s) on the BTD are registering extremely low variability but are unsaturated, so a... -
Page 52: Table 15: Site Characterisation Warnings
Please update the display by pressing the “Update Status” button. Direction Finder Module Fault Exists A fault has occurred with the Direction Finder Module (optional on BTD-300), such as a failure to communicate with it. Check that the Direction Finder Module is installed and connected to its communication and power cable, which is in turn connected to the appropriate terminals in the main electronic enclosure box. - Page 53 User Manual for BTD APPENDIX 0x00: Site characterisation successful. No action required. BTD antenna offset warnings An unexpectedly high DC current is being registered from the antenna(s). Check that the BTD is properly grounded and there is no precipitation or object in contact with the antenna, including vegetation or spider’s webs, which can transmit a current to the antenna.
-
Page 54: Performance Faqs
User Manual for BTD APPENDIX Direction Finder Module offset out of range An unexpectedly high near DC current is being registered from the direction finder radio antenna(s). Check there are no suspected sources of VLF/LF radio interference at the site (e.g. local thunderstorms, nearby sparking/faulty electrical equipment, fluorescent/dimmed lights, powerful switch-mode power supplies, VLF transmitters etc.) and wait for thunderstorms to clear and re-locate the BTD/interfering equipment if nearby strong artificial sources are... - Page 55 User Manual for BTD APPENDIX strong lightning flashes can sometimes be detected at ranges exceeding the maximum warning range (45 NM / 83 km), these events will not activate any warning and should not be used for the purpose of thunderstorm monitoring due to their increased ambiguity compared to events detected within the maximum operating range.
- Page 56 (level 5). It is important to be aware however that lowering any threshold from the default (level 5) setting has the potential to increase false alarms. If in doubt, please contact Biral for advice on the most suitable sensitivity levels for your requirements.
- Page 57 User Manual for BTD APPENDIX - There will sometimes be lightning flashes which do not generate sufficient low frequency radio signals for the direction finder module to be confident of their bearing, despite producing sufficient quasi-electrostatic field change for the main unit to provide a range. Typically these flashes are weak intra-cloud and distant from the detector.
Need help?
Do you have a question about the BTD-350 and is the answer not in the manual?
Questions and answers