Advertisement
Quick Links
Advertisement

Related Manuals for Hobbico SUPERSTAR 40


Summary of Contents for Hobbico SUPERSTAR 40
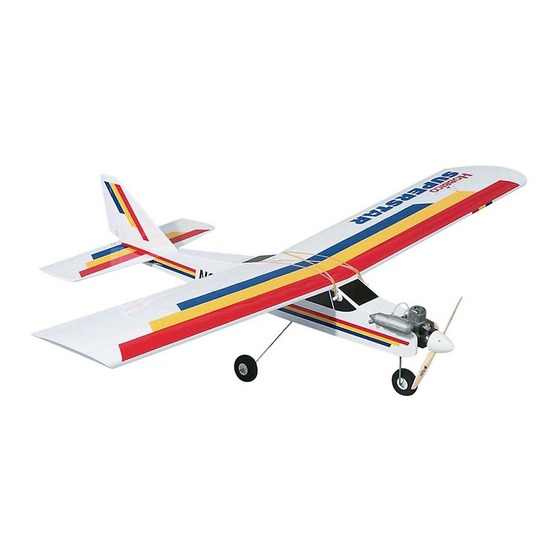
- Page 1 Easy as 1,2,3 © Copyright 1998 V1.3...
- Page 2 Part # Quantity Horizontal Stab and elevator ..1 modelers, Hobbico’s SuperStar 40 offers nearly all the Vertical fin and rudder....1 excitement of piloting a real airplane...and develops Hinges ..........11 skills that will take you anywhere you want in your new *Clevises..........5...
- Page 3 Servo tray .......1 Plywood stab base ....1 (217) 398-8970 Spinner........1 or e-mail us at Servo tray support ....1 productsupport@hobbico.com See more of our products at www.hobbico.com Parts shown smaller than actual size (out of proportion).
- Page 4 Getting Ready for Flight Your Hobbico SuperStar 40 trainer is ready for takeoff in as little as 15-20 hours. Your hobby dealer or flying instructor (see next page) can help you decide what accessories you’ll need for flight. Most are one-time only purchases—and your instructor will probably allow you to use his field box...
- Page 5 1. ALWAYS return your entire system, including airplane defects in parts or workmanship within 90 days of and radio. purchase, Hobbico will repair or replace it—at the option 2. Disconnect the receiver battery switch harness and of our authorized U.S. repair facility, Hobby Services—...
- Page 6 What you'll need – Assembling the Wing Parts in this kit • Rubbing alcohol • 3 Plywood wing joiner pieces • Felt-tip pen • Left and right wing halves • Ruler • Wing center section tape • Sand paper • 6 Brass hinges •...
- Page 7 clothespins to clamp the wing joiners together firmly. The Sanding the joiner excess epoxy must be removed before it dries-see Step Removing the excess epoxy ❑ 7. If the wing joiner will not fit in the cavity, lightly sand the excess epoxy and uneven surface joints from the joiner edges and sides.
- Page 8 Marking the wing cavity Taping the wing halves together Bottom of wing Masking tape ❑ 10. Lay the wing halves on the work surface with the white, flat side facing up. Place a mark at the trailing edge of the wing cavity, where the wing joiner will be inserted, on each wing half.
- Page 9 Removing the covering Assembling the servo tray Aileron servo tray Covering removal template Masking tape Bottom of wing ❑ 15. Tape the “covering removal template” to the ❑ 17. Apply thick CA+ to the flat side of the balsa bottom of the wing, directly above the aileron servo servo tray mounting block.
- Page 10 Checking the hinges Servo wire harness notch If necessary, apply thin CA to both sides Bottom of wing of the hinge. ❑ 19. Mix 1/8oz. (3.5ml) of 6-minute epoxy to glue the servo tray to the bottom side of the wing. Apply equal amounts of epoxy to the mounting blocks on both ends of the servo tray.
- Page 11 Installing the aileron control horns Installing the pushrods Clevis Aileron Control Horn (2) Actual Size Aileron torque rod Aileron control horn Bottom of wing ❑ 24. Attach the aileron control rods to the aileron torque rods using the plastic clevises. Pry the fork of the clevis apart and insert the pin of the clevis through the hole in the aileron control horn.
- Page 12 What you'll need - Fuselage Assembly Parts in this kit ...Plus, these general items: • Scrap plywood • Paper towels • 2 Foam wheels • 6-minute epoxy • 4-4mm Wheel collars • 30-minute epoxy • 4-2 x 5mm screws • Silicone sealant •...
- Page 13 ❑ 5. The wing dowel holes are predrilled. Locate the Installing the servo tray four round holes, two on each side of the fuselage, and remove the covering over each hole. Caution: Do not cut-out the rectangular switch holes in the side of the fuselage.
- Page 14 Installing the plywood stab mount Vertical stabilizer slot covering Vertical stabilizer slot ❑ 8. Locate the 1/8" (3mm) triangular plywood stabilizer mount and test fit the mount into the bottom of the horizontal stabilizer slot. Lightly sand the mount if necessary to obtain a proper fit. ❑...
- Page 15 ❑ 15. Attach a piece of string with a pin to the center Tracing the fuselage outline line as shown. The string should be a minimum of 31-1/2" (800mm) in length. Stretch the string to the corner of the horizontal stabilizer. The distance from the pin to the horizontal stabilizer must be the same on both sides.
- Page 16 Installing the vertical stabilizer location. If any of them seem loose, reglue them as described on page 10. Rudder and elevator move freely ❑ 19. Mix 1/4oz. (7.5ml) of 30-minute epoxy to glue the vertical stabilizer in place. Using a mixing stick, apply epoxy to the top of the horizontal stabilizer through the vertical stabilizer slot.
- Page 17 Attaching the rudder control horns Installing the elevator horn ❑ 25. Locate the elevator nylon control horn on the Control Horn plastic parts tree. Place the control horn on the bottom side of the elevator 8-7/8" (225mm) from the end of the elevator (opposite side of the rudder control horn) and mark the two holes with a felt-tip pen.
- Page 18 Installing the landing gear Drilling the fuselage ❑ 31. Drill the four holes using a 1/16" (1.6 mm) drill bit. Mounting the struts ❑ 29. On the bottom of the fuselage, 12-1/2" (318mm) from the engine compartment, there is a channel 3x15mm Screws(4) located under the covering.
- Page 19 Assembling the front steering Steering pushrod exit hole Nose Gear Control Horn(1) Flat area Actual Size ❑ 34. There is a flat area on the stem of the steering ❑ 36 Using a felt-tip pen, place a mark 5/16" (8mm) gear for the front wheel.
- Page 20 Installing the pushrod Fuel tank assembly ❑ 41. Locate the three aluminum tubes that are used ❑ 38. Locate the 17-3/4" (450mm) wire control rod in the fuel tank. The longest one will be used as the and make a 1/4" (6mm) Z-bend on one end of the pressure line.
- Page 21 Final fuel tank assembly Installing the tank Fuel tank Fuel line pick-up weight ❑ 44. Locate the metal fuel pick-up weight and the medium silicone fuel tubing. Insert the fuel pick-up weight (often referred to as the “clunk weight”)into ❑ 46. Insert the fuel tank into the fuselage as shown the fuel tubing.
- Page 22 What you'll need – Engine Installation Parts in this kit ...Plus, these general items: • Fuel line • Standard screwdriver • Spinner • Phillips screwdriver • 2-2 x 12mm S/T screws • Needle nose pliers • 2 Engine mounting brackets • Thread locking compound Mounting the engine •...
- Page 23 Connecting the throttle Mounting the propeller and spinner Spinner backplate Pushrod Connector ❑ 6 Remove the 5.5mm nut and washer from the ❑ 5. Slide the throttle control rod into the plastic drive shaft of the engine. Locate the plastic spinner guide tube.
- Page 24 What you’ll need – Radio Installation Parts in this kit • Elevator pushrod • Foam rubber • Rudder pushrod • Wing saddle tape ...Plus, these general items: • Pushrod connector • CA+ glue • Hobby knife • Needle nose pliers •...
- Page 25 Receiver and battery installation Securing the antenna Antenna tab Antenna tab ❑ 7. Use a medium T-pin to attach a 64 rubber band ❑ 5. Wrap the receiver and battery pack in foam to the top portion of the vertical stabilizer. Tie the rubber using rubber bands or masking tape to hold antenna to the rubber band using tension to keep the the foam in place.
- Page 26 Throttle servo linkage 40° The throttle servo 40° horn should move forward to about 40Þ. ❑ 9. Locate the round servo horn and install the pushrod connector in the hole 3/8" (9.5mm) from the center of the servo horn following the procedure The carburetor described in Step 5, engine installation.
- Page 27 Decreasing throttle movement The carburetor should be open only 1/16" (1.5mm). Engine shut-off ❑ 11. If the throttle control rod moves too far it will To stop the engine, bend slightly and the servo will make a noise of some move the throttle type.
- Page 28 Preparing the pushrods Install the pushrod ❑ 16. Insert the elevator pushrod through the fuselage and out the elevator exit hole. Find a nylon clevis on the plastic parts tree and thread the clevis onto the pushrod until the pushrod is visible on the inside of the clevis.
- Page 29 Neutral elevator Rear Cut-out the control surface gauge and The servo horn glue it to a piece of should move towards scrap cardboard. For the rear. level flight, center the elevator stick. The elevator will The elevator servo move up as shown 90°...
- Page 30 Tape the rudder The elevator will move down as shown on the control surface gauge. ❑ 19. Use masking tape to hold the rudder in the neutral position while installing the pushrod and connecting the servo linkage. The rudder pushrod Elevator movement adjustment 1/2"...
- Page 31 Neutral Rudder Left turn With the rudder stick To turn the plane centered, the plane left, move the rudder will fly straight. stick to the left. The rudder servo The servo horn horn should rotate should be 90Þ to counter clockwise. the servo.
- Page 32 Right turn Taping the ailerons To turn the plane right, move the rudder stick to the right. ❑ 22. Use masking tape to hold the ailerons in the neutral position while connecting the servo linkages. Installing the aileron servo The rudder servo horn should rotate clockwise.
- Page 33 Mounting the wing The ailerons should be at neutral. Left roll ❑ 25. Connect the aileron servo to the receiver by To roll the plane to using an aileron extension, usually provided with the the left, move the radio system. aileron stick to the left.
- Page 34 Right roll Adjusting amount of aileron throw To roll the plane to the right, move the aileron stick to the right. The aileron servo horn should rotate counter clockwise. The left aileron ❑ 26. If the ailerons do not move far enough, move should move down as shown on the the aileron control rods farther out on the servo horn...
- Page 35 Glossary of Terms Ailerons – Hinged control surfaces airplane balances fore to aft. This voltage between flights. It is located on the trailing edge of the point is critical in regards to how advisable to mount the charge wing, one on each side, which the airplane reacts in the air.
- Page 36 Computer Radio – A radio control Elevator – Hinged control surface Flight Pack (or Airborne pack) – unit in which the transmitter has located at the trailing edge of the All of the radio equipment several advanced functions which horizontal stabilizer, which installed in the airplane, i.e., can be programmed completely to provides control of the airplane...
- Page 37 to follow the fuel with changes in splashed onto the glow element. engine’s ability to idle low and aircraft attitude. This is the line Too much raw fuel will cool the improves high speed performance. through which the tank is filled. plug and prevent it from igniting Ideal nitro content varies from the fuel/air mixture.
- Page 38 transmitter signal and relays the Slop – Unwanted, excessive free at the trailing edge of the control control to the servos. This is movement in a control system. surface. somewhat similar to the radio you Often caused by a hole in a servo have your family...
- Page 39 Washout – An intentional twist in calculated as follows: If you know Yaw Axis – The airplane axis the wing, causing the wing tips to the square inches of the wing, controlled by the rudder. Yaw is have a lower angle of attack than simply divide by 144 to obtain illustrated by hanging the airplane the wing root.
Need help?
Do you have a question about the SUPERSTAR 40 and is the answer not in the manual?
Questions and answers