
Related Manuals for SPEC MIX PA4000


Summary of Contents for SPEC MIX PA4000
- Page 1 POWER AUGER MIXING SYSTEMS OPERATIONS & SAFETY MANUAL ENGLISH EDITION KEEP GOING. KEEP MOVING. KEEP WORKING. PA1000 · PA4000...
- Page 2 Assembling PA Systems ................6-7 Starting Up & Inspecting PA Systems ............8-9 Loading PA Systems ................10-11 Operating PA Systems ................12 Relocating PA Systems ................ 13-14 Maintenance for PA Systems ..............15 © SPEC MIX Inc. 2013 ®...
- Page 3 Since safety is everyone’s responsibility, we ask that you become familiar with these procedures yourself, and make sure that everyone operating or having any contact with SPEC MIX PA systems and bulk bags be familiar with and implement, the following procedures as well.
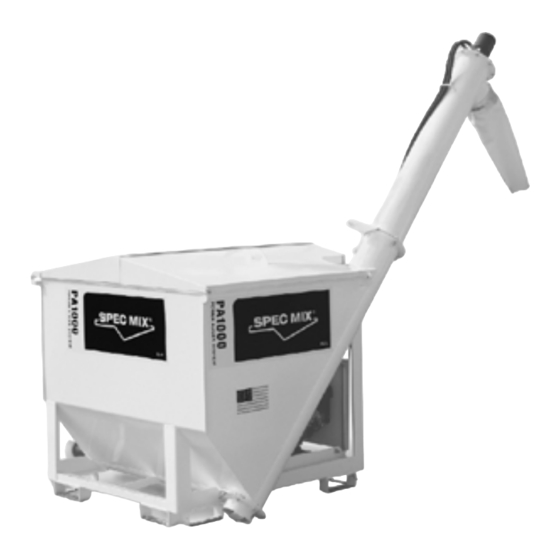
- Page 4 PA SYSTEMS SPECIFICATIONS PA1000 FOOTPRINT 4 ft X 5 ft HYDRAULIC POWER PACK 2.8K7V CAPACITY MOTOR OPTIONS 40 cubic feet 14 hp GAS MOTOR WEIGHT EMPTY 1,100 lb 7.5 hp ELECTRIC MOTOR (220V, 30AMP, SINGLE PHASE) WEIGHT FULL UP TO 4,100 lb...
- Page 5 TRANSPORTING SPEC MIX PA SYSTEMS ON ROADWAYS ® 1. Inspect SPEC MIX PA system to make sure that it has been emptied. WARNING: Do not enter the interior of the PA system hopper for any inspection or maintenance. If absolutely necessary, turn off the PA system and perform lockout procedures.
- Page 6 ASSEMBLING SPEC MIX PA SYSTEMS ® 1. Select a position on the jobsite where the ground is dry, compacted, level and stable. NOTE: To ensure the stability of the PA system, dry, compacted, level ground MUST be available for set up, or the unit should NOT be erected or used.
- Page 7 ASSEMBLING SPEC MIX PA SYSTEMS ® 8. Raise tower to desired height until holes in PA system leg match holes in receiver tube assembly. 9. Secure PA system by inserting all four leg pins at the desired height, then insert the safety hitch pins in the holes of the four leg pins to lock the leg pins in place.
- Page 8 ® NOTE: It is very important to follow the proper start-up and inspection procedures for the SPEC MIX PA systems to ensure safe, reliable and efficient operation. With the PA system turned off and locked out, check material flow basket and both augers for positioning, obstructions or defects.
- Page 9 STARTING UP & INSPECTING SPEC MIX PA SYSTEMS ® Greasing Auger Zerts: There are two grease zerts on each PA unit. One is at the lower bearing of the discharge auger opposite the hydraulic motor and the other is on the end of the bottom auger opposite the hydraulic motor.
- Page 10 LOADING SPEC MIX PA SYSTEMS ® 1. While standing on the ground, slide the outer plastic cover down to the pallet level of the material bulk bag. At this time, inspect the overall condition of the bulk bag giving special attention to the bag’s lifting loops.
- Page 11 This will open the protective outer flap encompassing the bag’s discharge chute. 10. With the same SPEC MIX hook, pull the tagline on the inner chute tie downward allowing it to unravel into the open PA hatch and dispense material down into the unit.
- Page 12 NOTE: Do not leave the switch unattended while charging the mixer. 6. Adjust mix as needed by adding either more water or SPEC MIX in order to obtain a workable or optimal consistency. 7. Mixing times are 4-5 minutes per batch unless otherwise specified in the Product Data Sheet’s...
- Page 13 Empty PA system as much as feasible or as much as possible. (Material may be re-loaded into an empty bag if necessary.) Cleaning Out the SPEC MIX PA systems: Run the PA system until material stops flowing from the discharge auger and the interior of the PA system appears to be reasonably free of material.
- Page 14 Slowly transport PA system to new location. Follow same guidelines for initial erection of PA system paying note to soil conditions as before. Re-charge PA system following the instructions for Loading SPEC MIX Power Auger Systems.
- Page 15 Check Motor oil on gas power pack for proper level. Adjust as needed. d. Check grease zerts weekly and add grease as necessary. 4. Upon return to Distributor or SPEC MIX Licensee, check the following and correct or replace as needed. a. All signs are clean and visible.
- Page 16 1-888-SPECMIX 1230 EAGAN INDUSTRIAL RD., STE 160, EAGAN, MN 55121 FAX 651-454-5315 WWW.SPECMIX.COM © 2021 SPEC MIX, INC.
Need help?
Do you have a question about the PA4000 and is the answer not in the manual?
Questions and answers