Table of Contents
Advertisement
Quick Links
Advertisement
Table of Contents

Related Manuals for Esty AEF6603B02


Summary of Contents for Esty AEF6603B02
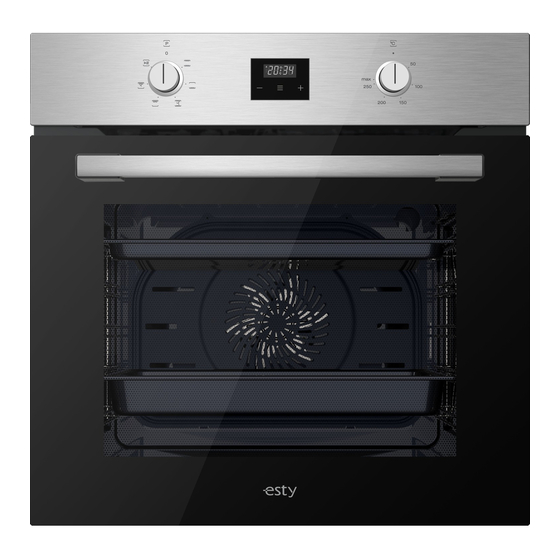
- Page 1 OVEN USER GUIDE MODELS AEF6603X02 AEF6603W02 AEF6603B02 www.esty.com.tr...
- Page 2 18.01.2021...
-
Page 3: Table Of Contents
Table of contents PREFACE..................4 IMPORTANT INFORMATION REGARDING SAFETY....5 SPECIFICATIONS OF THE OVEN..........11 INSTALLATION OF APPLIANCE..........13 INSTALLATION OF THE OVEN TO THE CABINET..... 15 POWER CONNECTION..............17 6.1 Energy Efficiency of the Oven..........22 INTRODUCTION OF APPLIANCE..........23 7.1 Accessories of the Oven............ -
Page 4: Preface
PREFACE DEAR COSTUMER We sincerely thank you for pur- chasing our product. This product has been manufac- tured at modern facilities respectful to the environment without harming nature. Please read all instructions and warnings in this user manual care- fully. This manual includes impor- tant information for safe installa- tion, use and maintenance of your product and necessary warnings to... -
Page 5: Important Information Regarding Safety
IMPORTANT INFORMATION REGARDING SAFETY Operating voltage of your oven Avoid contacting the heating is 220 to 240 Volts. elements inside the oven as it shall overheat during opera- Connect your oven to a fuse tion. Be careful as the oven with a rating of 16A. - Page 6 Do not open the door of the Cleaning and maintenance of appliance if smoke is coming the appliance shall not be car- out of it. Turn off the appliance, ried out by children without unplug it or switch off the cir- supervision.
- Page 7 In case of a damaged power This appliance has been cord, it shall be replaced with a designed for cooking at home specific cord or a cord that is kitchens only. It is not suitable approved by the manufacturer for industrial or laboratory or the authorized service.
- Page 8 Ensure you remove all pack- In case of negligence, the oven aging material before you use door may hurt your hands if it your product. is removed from its hinge. This appliance shall not be In case of failure or improper used for a purpose other than operation of the oven, turn it off cooking.
- Page 9 If a power failure occurs, the Keep the original package of product stops cooking. the appliance. Depending on model of the Use the original packaging to product, you may continue to transport the appliance, follow cook when power is restored the handling signs on the or you may need to adjust the package.
- Page 10 Do not place heavy loads on and environment before scrap- the appliance. ping and disposing of this appliance. Otherwise, the During transporting, place your appliance will be an unsuitable appliance parallel to the waste. ground (with the upper side facing up). This symbol on the product aims the appliance to be con- Packaging...
-
Page 11: Specifications Of The Oven
SPECIFICATIONS OF THE OVEN These appliances are designed to operate with a single phase supply voltage of 220-240V at 50-60 Hz. Fig. 1 18.01.2021... - Page 12 AEF6603X02 - AEF6603W02 - AEF6603B02 Function Oven Lamp 15 W Product Dimensions (Width) 595 mm Product Dimensions (Depth) 547 mm Product Dimensions (Height) 595 mm Product Installation Cabinet 560 mm Dimensions (Width) Product Installation Cabinet 550 mm Dimensions (Depth) Product Installation Cabinet...
-
Page 13: Installation Of Appliance
INSTALLATION OF APPLIANCE Installation of the appliance shall Use protective gloves to prevent be performed by Authorized injuries. Service. Our company shall not be You shall provide the clearances held responsible for damages that shown in the drawings for ventila- may occur on people, surround- tion and cooling inside the cabinet ings or other materials due to... - Page 14 We recommended you to provide a minimum clearance of 70 mm from the rear of the kitchen unit where the appliance is installed. We do not recommend installation of the appliance near a refrigerator or deep freezer. Otherwise, the performance of such appliances shall be affected adversely due to the dissipated heat.
-
Page 15: Installation Of The Oven To The Cabinet
INSTALLATION OF THE OVEN TO THE CABINET (m!n 577 max 594) Fig. 3 18.01.2021... - Page 16 Visuals in the manual are for reference Fig. 4 Place the appliance by centering it inside the built-in appliance cab- inet. Open the door of the appliance and drill holes by aligning with the holes on the body of the oven using a drill with a screw diameter of 3.9x22, and install the screw.
-
Page 17: Power Connection
POWER CONNECTION The appliance shall be connected to the main electrical installation as per the current rules and legislation and by an authorized service only. Ensure that the power received from the mains meet the power speci- fied in the nameplate placed on the bottom front of the appliance. If the current value of the switch in your house is less than 16A, have a qualified electrician install an 16A fuse switch. - Page 18 Electrical safety of the appliance is guaranteed when it is correctly connected to a suitable source with proper grounding as per the applicable rules only. Our company shall not be held responsible for damages that may occur on people, animals or objects due to improper grounding of the appliance.
- Page 19 turuncu (1x1.50 mm gr (1x1.50 mm DİJİTAL BESLEME TIMER OT2100 kırmızı (1x1.50 mm gr (1x1.50 mm mav (1x1.50 mm mav (1x1.50 mm turuncu kahvereng (1x1.50 mm (1x1.50 mm s yah (1x1.00 mm sarı-yeş l (1x1.50 mm LIMIT NC 110°C ŞALTER THER MOSTAT beyaz (1x0.50 mm...
- Page 20 orange (1x1.50 mm grey (1x1.50 mm DIGITAL TIMER SUPPLY OT2100 red (1x1.50 mm grey (1x1.50 mm blue (1x1.50 mm blue (1x1.50 mm orange brown (1x1.50 mm (1x1.50 mm black (1x1.00 mm yellow-green (1x1.50 mm LIMIT 110°C ROTARY SWITCH THER MOSTAT wh te (1x0.50 mm red (1x0.50 mm brown (1x1.50 mm...
- Page 21 At this time, a smell and smoke caused by the insulation materials and heating elements may occur for once. In such a case, wait until the smell and smoke wears off before putting any food inside the oven. Clean the inside of the oven using a soft cloth slightly dampened with soapy water.
-
Page 22: Energy Efficiency Of The Oven
6.1 Energy Efficiency of the Oven Ovens with high efficiency of power and with heat insulation shall be preferred. Opening the oven door fre- quently during cooking allows the cold air enter inside the oven each time, thus it causes loss of energy. -
Page 23: Introduction Of Appliance
INTRODUCTION OF APPLIANCE Fig. 9 Function Selection Button Touchscreen Timer 10- Oven Grill Oven Temperature Setting 11- Deep Tray (Option) Knob 12- Lower Resistance (Concealed) Warning Lamp 13- Internal Glass Upper Resistance 14- Oven Door Lamp 15- Door Top Plastic Shallow Tray (Option) 16- Oven Handle Wire Rack... -
Page 24: Accessories Of The Oven
7.1 Accessories of the Deep Tray Oven Clean the accessories of the oven before first operation. After cleaning and washing with a sponge, wipe them dry. Fig. 12 Remove any accessories you do Universal pan For cakes, soft not need from the cooking com- cakes, frozen food and meat partment. -
Page 25: Before First Use
BEFORE FIRST USE You shall make some settings first before using your new appliance. Cleaning of the cooking com- partment and the accessories Clean the cooking compartment and the accessories first before cooking a meal for the first time. Cleaning of the cooking com- partment Heat the cooking compartment while it is empty and closed to... -
Page 26: Specifications And Operation Of The Appliance
SPECIFICATIONS AND OPERATION OF THE APPLIANCE 9.1 Specifications of the Oven Fig. 13 1- Auto Cooking Symbol 5- Key Lock Symbol 2- Cooking Symbol 6- Plus Button 3- Dot Symbol 7- Setting Button 4- Alarm Timer 8- Minus Button Clock Setting ‘00.00’... - Page 27 NOTICE! You cannot use the functions of the oven without making the clock setting. Changing the Alarm Sound Press the ‘+’ / ‘-’ buttons on the screen simultaneously for 2 or 3 seconds (until you hear a beeping sound). Then, the current sound, tone 1 is displayed on the screen by pressing the setting key 1 time.
- Page 28 Press the ‘+’ / ‘-’ buttons on the screen simultaneously for 2 or 3 sec- onds to enter the menu. Press key 1 and proceed until “Loc” is dis- played on the screen. Activate the key lock by pressing the plus '+' key. Key Lock symbol ( ) shall be displayed on the screen.
- Page 29 When the cooking operation is complete shall flash on the screen and an alarm signal is heard. Alarm signal sounds for about 7 minutes. Press any button to stop the alarm sound. Alarm shall be turned off, and automatic cooking symbol shall disappear and the time of the day shall be displayed on the screen when the setting key is pressed for 1 second.
- Page 30 Oven functions may be used manually if semi-automatic or fully automatic cooking functions are not set. 18.01.2021...
-
Page 31: The Use Of The Device
THE USE OF THE DEVICE 10.1 Temperature Set- ting of the Appli- ance Fig. 14: Pop out off Fig. 16 Your appliance starts heating just a few seconds later when you set Fig. 15: Pop out on the temperature. The buttons of your oven are the Turn off the appliance by bringing type of pop-out buttons that pop the function selection switch to... -
Page 32: Cleaning And Maintenance Of The Appliance
CLEANING AND MAINTENANCE OF THE APPLIANCE General Cleaning Do not clean your oven using steam cleaners. Always allow the appliance to Do not try to remove the but- cool after operating it. Ensure tons from the control panel as that no residues are left on the these are not removable in door at this time. - Page 33 Bring the function selection Remove the trays and the grill. switch to bottom heater Clean the interior by wiping position. with a cloth dampened with warm, soapy water. Then, wipe Set the oven temperature to once more with a damp cloth 70 °C, and operate the oven and dry.
- Page 34 Remove the serrated screw inside the oven by rotating it counter- clockwise to clean the wire rack inside the oven (Fig. 18). Fig. 17 Remove the trays and the grill respectively (1-2-3 / Fig. 17). Fig. 19 Pull the wire rack towards the inside of the oven and remove the legs of the wire rack from their seats.
- Page 35 Then, bring the hinge lock to the Remove the hinges from the hinge widest angle as shown in housing by holding the door with (Fig. 20/A). Bring both hinges that both hands to remove the oven connect the oven door to the oven door (Fig.
- Page 36 Push on the left and r�ght-hand Remove the �nternal glass of s�des of the door top plast�c the appl�ance to clean �t (F�g. 23). (F�g. 25). W�pe the glass cover w�th soft sponges and clothes clean�ng and dry�ng. Do not use harsh abras�ve ...
- Page 37 Oven Door Gasket Condensat�on may occur �ns�de the front door and on the door gasket when the oven �s operated for a long per�od. Remove the poss�ble conden- sat�on us�ng a dry cloth or sponge. İnspect the cond�t�on of th�s ...
-
Page 38: Replacement Of The Lamp
REPLACEMENT OF THE LAMP The bulb used in this product is not suitable for illumination of house- holds. The purpose of this lamp is Disconnect power supply to help the user to see the food. and wait for the oven to cool down to eliminate the risk of electrocution before replacing the oven lamp. - Page 39 Remove and replace the oven lamp by rotating it counter-clock- wise (Fig. 28). Reverse the procedure provided in (Fig. 27) for the installation of the lamp cover. 18.01.2021...
-
Page 40: Explanation Of Main Functions
Explanation of Main Functions Function Explanation of function No program is selected in your appliance. Upper and lower heaters are on. Food is heated from the bottom and top simultaneously. This is suitable for cakes, patties or cakes and stews cooked in pans. Cook using a single tray. - Page 41 Hot air heated with the bigger grill is distributed rapidly inside the oven thanks to the fan. This is suit- able grilling more meat. Place the large or medium sized portions on the correct rack position under the grill heater to grill. Set the tempera- ture to maximum level.
-
Page 42: Cooking Chart
COOKING CHART To operate the oven, select the cooking mode and the desired tem- perature and time settings. Place your food in the oven. Select the operation mode and the temperature. The oven is heated up to the pre-set temperature and preserves this tem- perature until the end of selected cooking time. - Page 43 Food Oper- Tray to Rack Tempera- Cooking ating be Used Position ture (˚C) time Function (min.)app rox. Cake in Single 25...30 tray level Cake in Single 40...50 level Cake in Single 25...30 sheet level Sponge Single 5...10 cake level Cookie Single 25...30 level...
- Page 44 Roasted Single 55...65 chicken level minutes 250, then 180...190 Turkey Single 150...210 (5.5 kg) level minutes 250, then 180...190 Fish Single 20...30 level Bread Single Pre- Making level heating for 10 minutes, cooking for 20 minutes Place the deep tray on the upper rack and the shallow tray on the lower rack while cooking with 2 trays.
- Page 45 Hints for pastry If the pastry is too dry, increase the temperature about 10 ˚C and decrease the cooking time. Dampen the sheets of dough with a sauce made of milk, butter, egg and yoghurt. If the cooking time of your pastry is too long, ensure that the thickness of the pastry does not exceed the tray.
-
Page 46: What To Do Before Calling For Authorized Service
WHAT TO DO BEFORE CALLING FOR AUTHORIZED SERVICE If the oven does not heat, Your appliance may not be connected to a grounded outlet, fuse may be blown, or time may not be set for models with clock. If the oven does not operate, Is function selection button set to the desired function on multi-system ovens? -
Page 47: Customer Services And Warranty
CUSTOMER SERVICES AND WAR- RANTY Warranty duration starts from During the guarantee period the date the product is deliv- of the product, if the product ered and is 2 years. has a failure because of the material and labour and also Whole product, including all because of the assembly of its parts, is under the guar-... - Page 48 Fails again during warranty When the serial number of the period, product on the Warranty Certif- icate is tampered, If the maximum term neces- sary to repair is exceeded, Malfunctions that occur due to repair or modification opera- Is impossible to repair and this tions performed by people case is documented by the other than SILVERLINE...
- Page 49 Malfunctions that may be warranty. Consumables that caused by transportation and are specified to be replaced placement that may have within time and as per usage taken place after the product is amount in the operation delivered (fall, extreme vibra- manual are not covered under tion, impacts etc.) warranty.
- Page 50 The malfunctions occurring To terminate the contract by due to the product being used stating that he is ready to against the conditions speci- return the sold good, fied in the user manual. To request a discount on the The usage life of the product is sale price proportional to the 10 years.
- Page 51 Fails again during warranty against human health and environ- period, ment before scrapping and dis- posing of this appliance. In order to If the maximum term neces- dispose and destroy all pollutants sary to repair is exceeded, and recycle and recover all mate- Is impossible to repair and this rials, WEEE is recommended to be case is documented by the...
- Page 52 COMPLIES WITH WEEE REGU- LATION Fig. 29 Embedded Product Help Line Fig. 30 18.01.2021...
-
Page 53: Service List
SERVICE LIST Revizyon Tarihi: 29.02.2019 YETKİLİ SERVİS LİSTESİ L İ L İ E Ç S İ Ü L İ K İ İ Ş İ Ş I İ S D İ Ğ Ü N İ A Ş Ü . Ü 322 515 08 85 ADANA MERKEZ PRESTİJ TEKNİK... - Page 54 L İ L İ E Ç S İ Ü L İ K İ İ Ş İ Ş I İ S P İ S İ Ç L E Ş Ğ İRMİÇEM MAH ABDULLAH ÇOLAKOĞLU GAZİANTEP İ H İ K İ Ö S İ...
- Page 55 L İ L İ E Ç S İ Ü L İ K İ İ Ş İ Ş I İ S NEVŞEHİR MERKEZ EREN SOĞUTMA FATİH OLGUN 350 EVLER MAH PARK CD. NO NİĞDE MERKEZ DEHA TİCARET HALİL ERTAŞ ŞAH SÜLEYMAN MH. SUAT BAYKAL Ç...
-
Page 56: Warranty Conditions
WARRANTY CONDITIONS Fig. 31 18.01.2021... -
Page 57: Warranty Certificate
WARRANTY CERTIFICATE FIRIN ESTY Fig. 32 18.01.2021... - Page 60 SILVERLINE EV GEREÇLERI SATIŞ VE PAZARLAMA A.Ş. Orta Mah.Topkapı-Maltepe Cad. No:6 Silkar Plaza Kat:3 Bayrampaşa / Istanbul 0212 484 48 00 (pbx) 0212.481 40/08...
Need help?
Do you have a question about the AEF6603B02 and is the answer not in the manual?
Questions and answers