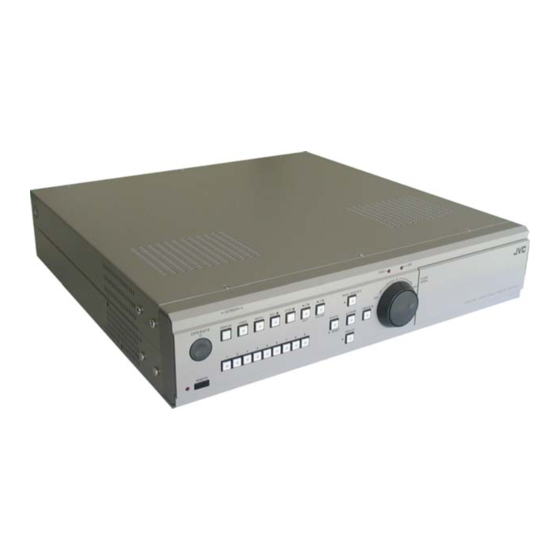
JVC VR-609U - 9 Channel Digital Video Recorder Instructions Manual
Client software
Hide thumbs
Also See for VR-609U - 9 Channel Digital Video Recorder:
- Instructions manual (102 pages)
Table of Contents
Advertisement
Quick Links
Advertisement
Table of Contents

Related Manuals for JVC VR-609U - 9 Channel Digital Video Recorder


Summary of Contents for JVC VR-609U - 9 Channel Digital Video Recorder
- Page 1 DIGITAL VIDEO RECORDER VR-609 Client Software INSTRUCTIONS...
-
Page 2: Table Of Contents
Contents Contents 1. Overview ..................4 1.1 In This Manual ...............4 1.2 CD-ROM Content .................4 1.3 Operating Environment ............4 1.4 Overview ..................4 2. Installation .................5 2.1 Installation Procedures ............5 2.2 Running Procedure ..............8 3. Client Live Mode (VR-609 Client-SW-(M) ) ......9 3.1 Functions ................9 3.2 Descriptions ................10 (1) Minimize / Exit ................10... - Page 3 4. Client Search Mode (VR-609 Client-SW-(S) ) ......15 4.1 Functions ................15 4.2 Descriptions ................16 (1) Minimize / Exit ................16 (2) Connect / Disconnect ...............16 (3) Time/Date Search ..............17 (4) Event Search ................18 (5) Play Button ................19 (6) Download (Remote Backup) ..........21 (7) Play (9CH Player) ..............23 1).
-
Page 4: Overview
1. Overview 1.1 In This Manual This manual describes the features, installation, and how to use of 9ch Embeded DVR (Digital Video Recorder) Client Software (Client SW) to remotely view, search, and download an image. * All Product names stated in this manual are trademarks or registered trademarks of their respective companies. -
Page 5: Installation
2. Installation 2.1 Installation Procedures Please insert Client_SW CD to your PC and will be opened installation files. Double Click Setup Icon and select a language you want to install to start installation. Click Yes button and Installation will be proceeded shown as below. - Page 6 Click Next button to continue it. Select a setup type to install. Typical : Standard (Please usually choose this item.) Compact : Minimum Custom : For advanced users...
- Page 7 Setup status will be proceeded. Setup has finished and click Finish button to exit installation.
-
Page 8: Running Procedure
2.2 Running Procedure CLIENT SW Icon will be displayed on your desk top VR-609 Client-SW-(M) Press the Icon to run DVR Client Live Mode... -
Page 9: Client Live Mode (Vr-609 Client-Sw-(M) )
3. Client Live Mode (VR-609 Client-SW-(M) ) 3.1 Functions (1) Minimize, Exit Button (2) Title/Boarder Display Buttons (3) Search Button (4) Connect Button (5) Display Mode Buttons (6) Zoom/Focus Control Buttons (7) PTZ Channel Selection Button (8) Pan Tilt Control Button (9) Channel Selection Buttons... -
Page 10: Descriptions
3.2 Descriptions (1) Minimize/Exit Minimize program, exit the Client Live mode program. (2) Title/Boarder Display Buttons Title: Display channel name, recording status(red circle), date, and time Boarder: Display boarder among each channel. <Title/Boarder On> <Title/Boarder Off> (3) Search Click Search Button to open Search program mode in another windows. -
Page 11: Connect
(4) Connect Click Connect button to connect to the DVR Client Live mode. Add a list to connect. - Type Server Name what you be named. - Type IP Address and Port Number of the DVR. (Default setting : 80) - Please input the PORT Number into the "Server"... -
Page 12: Display Mode
(5) Display Mode Client SW displays 1,4,9ch mode. 1ch Mode 4ch Mode 9ch Mode... -
Page 13: Zoom/Focus Control
(6) Zoom/Focus Control + : Zoom In - : Zoom Out + : Focus In - : Focus Out * It only works one time at each press. (7) PTZ Channel Selection Select ch#1 for Pan Tilt Zoom control Select ch#9 for Pan Tilt Zoom control (8) Pan Tilt Control Up Button Down Button... - Page 14 (9) Channel Select Select a channel to be displayed Ex) Select ch#9 : Ch#9 will be displayed on top left side of 9ch mode...
-
Page 15: Channel Selection
4. Client Search Mode ( VR-609 Client-SW-(S) ) * In the case to move to Search mode from Live mode, it automatically moves to the site the current Live mode has. * Only one user can access to the Search Mode displaying the following message “Server is preoccupied. -
Page 16: Descriptions
4.2 Descriptions (1) Minimize / Exit Minimize program, exit the Client Search mode program (2-1) Connect Click Connect button to connect to the DVR Client Search mode. Add a list to connect - Type Server Name what you be named. - Type IP Address and Port Number of the DVR. -
Page 17: Time/Date Search
(2-2) Disconnect Disconnect the current connection to the DVR. Message ‘Please wait a 10 second…” will be displayed. (3) Time/Date Search Click the Time/Date Search button to search a specific time and date. * How to use Time/Date Remote Search - Set up the time you want to search, and click the OK button. -
Page 18: Event Search
(4) Event Search Click the Event Search button to search specific event lists of DVR. * How to use Event Remote Search - Click OK button after you select the time and event type you want to search. - Click OK button after you select the time and list you want to search in the Event List. -
Page 19: Play Button
- You can select the both of play or reverse play as you wish. Play Button, Backward Play Button, Pause Button ) - You can select the channel you want to playback. (5) Play Click Play button after searching a specific date & time. Play Button The playback speed will be increased as the button is clicked. - Page 20 Caution! While a user is retrieving the image through Web browser like MS Internet Explorer and when another user connects to the same server and tries to retrieve the image through Client S/W at the same time, the Web browser user might meet the program locked-up.
-
Page 21: Download (Remote Backup)
(6) Download (Remote Backup) Click Download button for remote backup. - Message ‘Please wait a 10 second…” will be displayed. - Type IP address of DVR what you want to backup Live or Playback data. - Choose a channel what you want. - Select type hour(s) and minute(s) to be backed up (Playback only). - Page 22 - The data will be backed up to the specific folder you choose. * Caution! If by chance the user selects a channel of which the image is not transmitted or hidden as a covert channel by the server(VR-609) and tries to download the images, then the downloading animation might not be ended, an keep showing the animation.
-
Page 23: Play (9Ch Player)
(7) PLAY (9CH Player) Click PLAY button to play downloaded data from the DVR. (10) (11) (1) Exit Button : Exit 9CH Player (2) Open Button (3) Play Button (4) Backward Play Button (5) Pause Button (6) Stop Button (7) Play Speed Selection Button : Select 5 various speed mode to play downloaded data. -
Page 24: Open
1). Open - Open a downloaded data of the DVR and click O.K button to be played. - 9channel DVR files : file_name.601 or 602 ! Will be converted to AVI format clicking (5).Create AVI Button 2). Play - Click Open, and select and playback the file you want. 3). -
Page 25: Printer Setup
4). Printer Setup - Click Printer Setup Button to select Page Setup or print a image. - Type a number of Copies, Width, and Height. Page Setup: You can select printer, paper size, and all about Printer configuration same way as Windows Printer Configuration. 5). -
Page 26: Channel Selection
- Save as AVI file name you want and click Save button. - File will be converting to AVI format and displayed on Windows Media Player. (8) Channel Selection Select a channel to be played. Ex) Select ch#1 : The recorded data of Ch#1 will be played. -
Page 27: Channel Dvr
5. 9Channel DVR The 9Channel DVR program is used to 1. The still picture recorded on FDD or Flash Memory can be displayed. 2. The both of “Remote Backup” and “9CH Player” function can be used. * For "Remote Backup", please refer to 21 page. For "9CH Player", please refer to 23 page.
Need help?
Do you have a question about the VR-609U - 9 Channel Digital Video Recorder and is the answer not in the manual?
Questions and answers