Advertisement
Quick Links
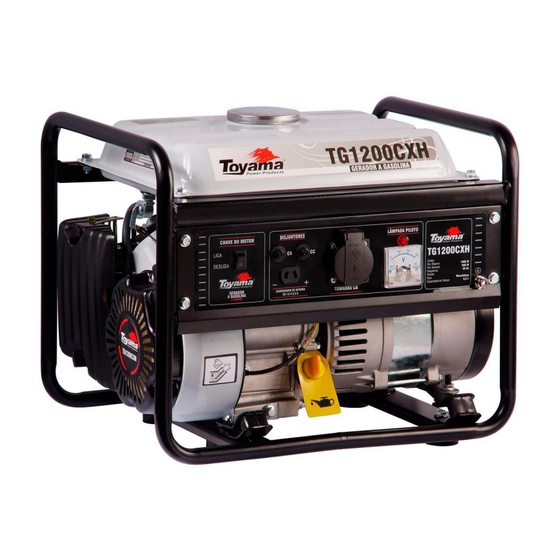
TG1200
TG1300
TG2500
GASOLINE ENGINE GENERATOR 4T
GENERADOR A GASOLINA 4T
GERADOR À GASOLINA 4T
OWNER'S MANUAL
PLEASE READ THIS MANUAL CAREFULLY. IT CONTAINS INFORMATION FOR YOUR SAFETY.
POR FAVOR, LEA ATENTAMENTE ESTE MANUAL. CONTIENE INFORMACIÓN PARA SU SEGURIDAD.
GUÍA DEL PROPIETARIO • MANUAL DO PROPRIETÁRIO
POR FAVOR, LEIA ATENTAMENTE ESTE MANUAL. ELE CONTÉM INFORMAÇÕES PARA SUA SEGURANÇA.
Advertisement

Related Manuals for Toyama TG2500


Summarization of Contents
Cares When Operating Your Generator - I
Exhaust Gas Hazards
Warns about harmful exhaust gases and the need for ventilation.
Ventilation Requirements
Specifies minimum free space around the equipment for adequate ventilation.
Avoid Wet Areas
Prohibits operating the generator in wet or moist locations.
Engine Break-in Procedure
Outlines break-in period for new/serviced engines: no load, low speed for 2 hours.
Fuel Quality
Advises using only good quality fuel for optimal performance.
Fluid Level Management
Emphasizes respecting maximum and minimum oil and fuel levels.
Cares When Operating Your Generator - II
Electric Shock Hazard
Warns that the generator produces energy sufficient to cause electric shock.
Grid Connection Warning
Prohibits connecting generator to internal power grids without approved project.
Manual Accessibility
Stresses keeping the manual accessible for future consultation.
Manual Transfer Policy
Requires including the manual when selling, lending, or transferring ownership.
Unauthorized User Prohibition
Prohibits children or unqualified users from operating the generator.
Decal Integrity
Advises against removing product decals.
Cares When Operating Your Generator - III
Product Modification Warning
States that product modification results in loss of warranty.
Cable Management
Warns against leaving cables on the generator to prevent short circuits.
Overload Prevention
Instructs users not to exceed the generator's load limit.
Pre-Operation Familiarization
Advises familiarizing with all controls and generator output before operation.
Inspection Before Operating
Fuel Level Check
Instructions to check the fuel level before starting the engine.
Engine Oil Level Check
Instructions to check the engine oil level before starting the engine.
Leak Inspection
Check for oil or fuel leaks around and under the machine.
Muffler and Handle Inspection
Check for dirt or debris around the muffler and starting handle.
Air Filter Check
Check the cleaning condition of the air filter.
Inspection Before Operating
Malfunction Signs Check
Check for any signs of malfunction or damage on the generator.
Fastener Tightness Check
Verify the tightness of all nuts and bolts on the unit.
Component Fit Check
Ensure correct fit of covers and other generator components.
Grounding
Power Cord Requirements
Use a power cord with adequate capacity for safe operation.
Ground Terminal Connection
Connect the ground wire to the generator's ground terminal.
Grounding Point Connection
Connect the other end of the ground wire to a metal part on the ground.
Installing the Wheels
Wheel Support and Alignment
Support and align the wheel with the generator base drilling.
Shaft Installation
Instructions for fitting the shaft into the wheel assembly.
Washer and Pin Lock Installation
Install washer and pin lock to ensure correct shaft locking.
Installing the Handle Support
Lever Bore Alignment
Align the lever bore with the generator base drilling.
Fastener Tightening
Install and tighten screws, nuts, or pin lock securely.
Installing the Damping Bracket
Rubber Cushion Alignment
Align the rubber cushion on the metal base and tighten the locking nut.
Base Hole Alignment
Center the bracket base hole with the generator base hole.
Bolt and Nut Installation
Insert and securely tighten the bolts and nuts.
Checking the Engine Oil Level - I
Equipment Placement
Place the generator on a flat and level surface for accurate measurement.
Dipstick Removal and Cleaning
Remove and clean the oil dipstick before checking the level.
Oil Level Measurement
Insert dipstick without threading to check the engine oil level.
Checking the Engine Oil Level - II
Oil Refilling Procedure
Add oil if below lower limit, not exceeding upper limit.
Dipstick Reinstallation
Reinstall the oil dipstick by tightening it properly.
Fueling the Tank
Tank Cap Removal
Remove the fuel tank cap before fueling.
Fuel Filling Procedure
Fill with fuel, avoiding exceeding the maximum level.
Tank Cap Reinstallation
Securely attach and tighten the fuel tank cap.
Starting the Engine with Manual Starter - I
Disconnect Loads
Disconnect all electrical loads before starting the engine.
Fuel Register Position
Place the fuel register in the open position.
Cold Engine Choke Setting
Close the choke when the engine is cold.
Warm Engine Throttle Setting
Keep the throttle open when the engine is warm.
Starting the Engine with Manual Starter - II
Set Switch to ON
Set the power switch to the ON position.
Starter Handle Operation
Pull starter handle until resistance, then pull firmly.
Starter Handle Return
Slowly return the starter handle to its original position.
Troubleshooting Start Issues
Repeat steps if the engine does not start.
Adjust Choke After Starting
Return choke lever to open position after engine runs.
Battery Connection for Electric Starter
Connect Positive Battery Terminal
Connect the positive (+) battery lead to the positive (+) terminal.
Connect Negative Battery Terminal
Connect the negative (-) battery cable to the negative (-) terminal.
Starting the Engine with Electric Starter - I
Disconnect Loads
Disconnect all electrical loads before starting the engine.
Fuel Register Position
Place the fuel register in the open position.
Cold Engine Choke Setting
Close the choke when the engine is cold.
Starting the Engine with Electric Starter - II
Warm Engine Throttle Setting
Keep the throttle open when the engine is warm.
Start Key/Button Operation
Turn key or press button to start position for max 5 seconds.
Troubleshooting Start Issues
Wait 10 seconds and repeat step if engine does not start.
Connecting Loads
Set Load Breaker to Off
Set load circuit breaker to OFF if equipped.
Switch Off Appliance
Switch off the appliance to be connected.
Connect Device to Outlet
Connect the device to the corresponding power outlet.
Set Load Breaker to On
Set load circuit breaker to ON and turn on the device.
Connect Appliances by Power
Connect higher power appliances first, then lower power ones.
Disconnecting Loads
Disconnect All Appliances
Disconnect all appliances connected to the generator.
Set Load Switch to Off
Set the generator load switch to the OFF position.
Remove Sockets
Remove the power sockets from the generator.
Idle Engine Before Shutdown
Let the engine run unloaded for 1-2 minutes before unplugging.
Stopping the Engine with Manual Starter
Disconnect Generator Load
Disconnect any load connected to the generator.
Idle Engine for Cooling
Let the engine idle for 2 minutes to cool down.
Turn Switch to Off
Turn the main switch to the OFF position.
Place Fuel Register to Closed
Place the fuel register in the closed position.
Stopping the Engine with Electric Starter
Disconnect Generator Load
Disconnect any load connected to the generator.
Idle Engine for Cooling
Let the engine idle for 2 minutes to cool down.
Turn Key/Button to Off
Turn the key or button to the OFF position.
Place Fuel Register to Closed
Place the fuel register in the closed position.
Replacing the Engine Oil - I
Engine Placement
Place the engine on a flat and level surface for oil replacement.
Drain Engine Oil
Remove dipstick and drain bolt, then drain all oil into a container.
Reinstall Drain Bolt
Reinstall and tighten the oil drain bolt after draining.
Replacing the Engine Oil - II
Fill Oil Reservoir
Fill the oil reservoir to the recommended maximum level.
Reinstall Dipstick
Put the oil dipstick back and tighten it securely.
Cleaning the Spark Plug - I
Cool Engine
Turn off the engine and allow it to cool down before cleaning.
Disconnect Spark Plug Protection
Disconnect the spark plug protection (cap/wire).
Clean Around Spark Plug
Remove any dirt or debris around the spark plug.
Remove Spark Plug
Use an appropriate wrench to remove the spark plug.
Clean Electrode
Clean dirt from the spark plug electrode with a steel brush.
Cleaning the Spark Plug - II
Check Spark Plug Gap
Check and adjust electrode spacing to 0.6-0.7 mm.
Reinstall Spark Plug Manually
Reinstall the spark plug manually, threading carefully.
Tighten Spark Plug
Tighten the spark plug with a wrench (1/8 to 1/4 turn).
Reinstall Spark Plug Protection
Reinstall the spark plug protection.
Changing the Spark Plug - I
Cool Engine
Turn off the engine and allow it to cool down before changing.
Disconnect Spark Plug Protection
Disconnect the spark plug protection (cap/wire).
Clean Around Spark Plug
Remove any dirt or debris around the spark plug.
Remove Spark Plug
Use an appropriate wrench to remove the spark plug.
Reinstall New Spark Plug
Reinstall the new spark plug manually, threading carefully.
Changing the Spark Plug - II
Tighten Spark Plug
Tighten the spark plug with a wrench (approx. 1/4 turn).
Reinstall Spark Plug Protection
Reinstall the spark plug protection.
Cleaning the Carburetor Cup
Remove Fixation Bolt
Remove the fixation bolt of the carburetor cup with the fuel tank empty.
Remove Cup and O-ring
Remove the threaded cup and its O-ring.
Wash with Solvent
Wash the cup and O-ring using a non-flammable solvent.
Dry Components
Ensure all components are completely dry.
Reinstall Cup and O-ring
Reinstall the O-ring, thread the cup, and tighten the fixation bolt.
Air Filter Maintenance
Remove Cover
Remove the air filter cover.
Wash Foam Element
Wash the foam element with warm water and mild soap or solvent.
Squeeze and Dry Element
Squeeze the element dry with a clean cloth, do not twist.
Clean Housing
Clean any internal dirt from the air filter housing with a damp cloth.
Replace Filter Element and Cap
Replace the filter element and reinstall the cap.
Cleaning the Fuel Tank's Strainer
Remove Fuel Tank Cap
Remove the fuel tank cap.
Remove Strainer
Remove the strainer from the mouth of the fuel tank.
Clean Strainer with Solvent
Soak strainer in non-flammable solvent, clean with brush if needed, and dry.
Reinstall Strainer
Reinstall the strainer back into the fuel tank.
Reinstall Tank Cap
Securely tighten the fuel tank cap.
Removing Fuel From the Tank
Remove Hose and Clip
Remove the hose clip and the fuel hose.
Remove Fuel Tank Cap
Remove the fuel tank cap.
Drain Fuel Tank
Drain all fuel from the tank into a suitable container.
Reinstall Fuel System Components
Replace the tank cap, hose, and clip.
Storage - I
Remove Fuel from Tank
Remove all fuel from the tank for long-term storage.
Drain Remaining Fuel
Drain remaining fuel via the carburetor drain bolt.
Clean Air Filter
Clean the air filter before storing the engine.
Add Oil to Cylinder
Remove spark plug and add approx. 5ml oil to the cylinder.
Storage - II
Distribute Oil with Rope
Pull starting rope 2-3 times to distribute oil in the cylinder.
Reinstall Spark Plug
Reinstall the spark plug after adding oil.
Position Engine with Rope
Slowly pull rope until resistance, then release to return engine to position.
Clean Engine Metal Parts
Clean metal parts of the engine with a damp cloth and non-flammable product.
Store in Dry, Ventilated Place
Cover engine and store in a dry, well-ventilated location.
Transport
Cool Engine Before Transport
Wait at least 15 minutes for cooling if the engine was running.
Set Fuel Register to Closed
Place the fuel register in the closed position.
Transport on Flat Surfaces
Place engine on flat, level surfaces to prevent spills.
Need help?
Do you have a question about the TG2500 and is the answer not in the manual?
Questions and answers