Advertisement
Quick Links
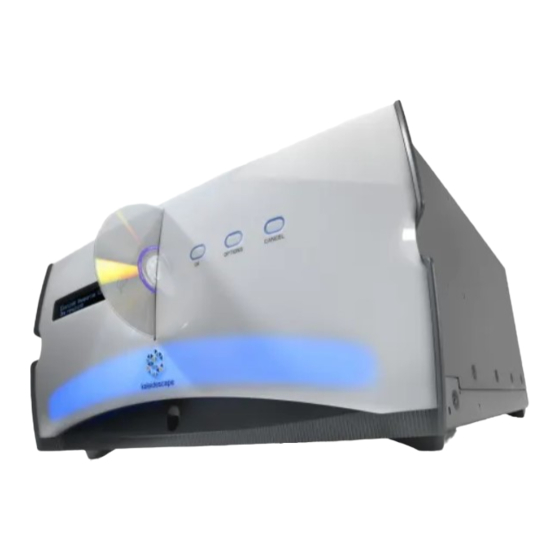
Kaleidescape, Inc.
Instructions for M700 and DV700 Optical Disk Drive (ODD)
Replacement
Title
Time to Complete
Service Kit Parts
Tools Required
Overview
KVault Optical Disc Drive Replacement
30 minutes
•
Slim Optical Disc Drive
•
Spare 1.5mm hex screws and washers for ODD
•
Tie-wrap
•
4mm hex screwdriver or Allen Key
•
2.5mm hex screwdriver or Allen Key
•
2mm hex screwdriver or Allen Key
•
1.5mm hex screwdriver or Allen Key
•
Phillips screwdriver
•
Container for collecting screws as they are removed
•
Disc storage for safely collecting removed discs
•
Fine-tip felt marker (required for A-Frame Only)
Follow this procedure to replace the optical disc drive in a Kaleidescape
Vault. There are two optical drive bracket configurations that were used with
the vaults: the original and new A-Frame ODD mounting bracket that was
updated in June 2016. Identifying the version and replacement procedures
for both are covered by this document.
The steps to follow are:
Prepare and Open the Vault
Identify the Vault
Eject All Discs
Power Off and Disconnect
Expose the Optical Disc Drive
Original Bracket Procedure
Remove Old Optical Drive
Transfer Mounting Brackets to New Optical Disc Drive
Install New Optical Disc Drive
Calibrate the Optical Disc Drive Position
New A-Frame Bracket Procedure
Mark the Locations of the Bracket
Remove Old Optical Disc Drive
Install New Optical Disc Drive
December, 2020
Advertisement

Related Manuals for Kaleidescape DV700

Summary of Contents for Kaleidescape DV700
- Page 1 Fine-tip felt marker (required for A-Frame Only) Overview Follow this procedure to replace the optical disc drive in a Kaleidescape Vault. There are two optical drive bracket configurations that were used with the vaults: the original and new A-Frame ODD mounting bracket that was updated in June 2016.
- Page 2 1. Front panel buttons – use the Option button to select Eject All. 2. Browser interface – Connect to the Premiere Browser Interface. See https://support.kaleidescape.com/article/Accessing-the- Browser-Interface Navigate to Settings -> Components -> Find the disc vault in the list ->...
- Page 3 KVAULT ODD Replacement December 2020 4. If options 1-3 above are unsuccessful, discs may be removed manually as described in step 10. This method will require an additional 40 minutes upon start up for the Vault to self calibrate before discs can be inserted. Power Off and Disconnect Disconnect the power cord, Ethernet, and audio/video cables from the back of the disc vault.
- Page 4 KVAULT ODD Replacement December 2020 3. Take off the rack ears using a 2.5 mm hex screwdriver to remove the 7 screws that hold them on each side of the chassis. See Figure 2. Figure 2 4. Remove 6 screws from the back using the 2.5 mm hex screwdriver. See Figure 3.
- Page 5 5. Cut the warranty sticker with a box knife. Note: Cutting the warranty sticker will not void the warranty if Kaleidescape Support has already issued an RMA for the M700 Disc Vault or DV700 Disc Vault and sent this document to you.
- Page 6 KVAULT ODD Replacement December 2020 8. Remove the casing by sliding it back towards the rear of the vault, then lift it off. See Figure 6 and Figure 7. Figure 6 Figure 7 9. Remove the Disc Retention Funnel. Remove the 4 screws with washers using a 2mm hex screwdriver.
- Page 7 Note: We recommend that the rollers be cleaned. You can proceed to Step 9 of the “Exposing the Rollers” section in the “M700 and DV700 Roller Cleaning Procedure” document https://support.kaleidescape.com/article/M700-and- DV700-Roller-Cleaning-Procedure 11.
- Page 8 KVAULT ODD Replacement December 2020 12. If your bracket is the If your bracket is the newer original mount, A-Frame version, jump to page 14. proceed below. Figure 10 Original Bracket Procedure Remove Old Optical Drive 1. Remove the red SATA cable from the back of the disc drive by pinching both sides and pulling straight back.
- Page 9 KVAULT ODD Replacement December 2020 3. On the other side of the drive, use the Philips screwdriver to remove the 2 self-retaining mounting screws. See Figure 12. Figure 12 4. Remove the disc drive and attached mounting brackets from the unit. Mark the drive as defective, to avoid accidental reuse.
- Page 10 KVAULT ODD Replacement December 2020 Figure 13 4. On the removed optical disc drive, note the orientation of the top bracket to the optical drive. 5. Remove the two screws and washers from the top bracket and recover the bracket. 6.
- Page 11 KVAULT ODD Replacement December 2020 Figure 14 Install New Optical Disc Drive 1. Place the new disc drive with attached mounting brackets into the mounting location. Be sure to align the guide pins. See Figure 15. Figure 15 2. Loosely install the two 2.5mm hex screws into the back of the disc drive.
- Page 12 KVAULT ODD Replacement December 2020 Figure 16 3. Using the Philips screwdriver, loosely fasten the 2 self-retaining screws on the bottom mounting plate. See Figure 17. Figure 17 Calibrate the Optical Disc Drive Position 1. To calibrate the optical drive to the pinch rollers, carefully insert a disc between the pinch rollers and push it in just less than halfway.
- Page 13 KVAULT ODD Replacement December 2020 Figure 18 2. With the disc in the drive, tighten up the loose screws in the assembly. Avoid applying any pressure to the brackets. Tighten the screws in the following order: 1) Base Philips screws x 2. See Figure 17. 2) Back 2.5mm hex screws.
- Page 14 KVAULT ODD Replacement December 2020 New A-Frame Bracket Procedure Mark the Locations of the Bracket The vault is calibrated at the factory to allow for chassis tolerances. Keeping the brackets aligned to the current positions will help ensure proper operation. 1.
- Page 15 KVAULT ODD Replacement December 2020 4. Using the 2.5mm hex screwdriver, remove the 4 mounting screws on the front of the ODD assembly. Figure 22 5. Using the 2.5mm hex screwdriver, remove the 4 mounting screws from the bottom of the optical disc drive bracket. See Figure 23. Figure 23 101-0269-00 Rev 2 Page 15 of 24...
- Page 16 KVAULT ODD Replacement December 2020 6. When removing the rear ODD bracket, it is important not to move the roller bracket or knock the sensor board. To do this carefully: 1) lift the rear ODD assembly straight up slightly 2) shift the assembly to the rear 3) tip back the top of the assembly a few degrees 4) lift the assembly See Figure 24.
- Page 17 KVAULT ODD Replacement December 2020 8. Turn the bracket over and, using a 1.5mm hex screwdriver, remove the bottom two screws. These do not have washers. Figure 26 9. Grasp the drive by the front black bezel. Slide the defective drive from the front of the bracket.
- Page 18 KVAULT ODD Replacement December 2020 Install New Optical Disc Drive 1. Insert the new drive into the front of the drive bracket which is still upside-down. Note the orientation of the label on the drive. Align the drive mounting holes with the bracket holes. Figure 28 2.
- Page 19 KVAULT ODD Replacement December 2020 Figure 29 4. Turn the bracket and drive over. 5. Loosely install the top 1.5mm hex screws with washers through the bracket and into the drive. Leave these screws loose for now. The drive should have a bit of play to the sides. The washers are important to avoid internal damage to the drive mechanism.
- Page 20 KVAULT ODD Replacement December 2020 Figure 31 7. Make sure the cables are not caught under the bracket. 8. Loosely install the 2.5mm hex screws into the ODD bracket base. Use washers on the right three screws. The left screw is a round head screw.
- Page 21 KVAULT ODD Replacement December 2020 9. Loosely install the front four 2.5mm hex screws. The rear bracket should still have some movement. Figure 33 Calibrate the Optical Disc Drive Position 1. To calibrate the optical drive to the pinch rollers, carefully insert a disc between the pinch rollers and push it in just less than halfway.
- Page 22 KVAULT ODD Replacement December 2020 2. With the disc in the drive, tighten up the loose screws in the assembly. Avoid applying any pressure to the brackets. Tighten the screws in the following order: 1) Front 2.5mm hex screws x4 (Verify alignment markings made earlier are close to their marked positions.) See Figure 3324.
- Page 23 If this network is not accessible at this time, either add fewer cover screws in the Put the Vault Back Together section below and test later, before rack mounting, or connect to another local Kaleidescape device network with a server and add the vault to the local network temporarily. See https://support.kaleidescape.com/article/How-to-add-components-...
- Page 24 Kaleidescape Support Get the Kaleidescape Installation Guide at www.kaleidescape.com/install See www.kaleidescape.com/support for the latest manuals and guides, Knowledge Base, and more technical and customer support resources. For additional information, contact Kaleidescape Support. Send an email message to support@kaleidescape.com. Call the support line at +1 650-625-6160.
Need help?
Do you have a question about the DV700 and is the answer not in the manual?
Questions and answers