Table of Contents
Advertisement
目录
CONTENTS /
เนื ้ อ หา
MỤC LỤC /
SAFETY INSTRUCTIONS ....................................... 2
安全指引
INSTALLATION CAUTIONS ................................ 3~4
安装注意事项
INSTALLATION REQUIREMENTS .......................... 5
安装要求
ข อ กำหนดในการติ ด ตั ้ ง
SUPPLIED ACCESSORIES ..................................... 6
包装附件清单
PARTS NAME AND DIMENSIONS .......................... 6
部件名称及尺寸
ชื ่ อ และขนาดของชิ ้ น ส ว น
Thank you for purchasing this Panasonic product.
Please read these instruction carefully before attempting to install, operate or service the Panasonic product.
Please carefully read the "INSTALLATION CAUTIONS" (P.3~4) of this manual before installation.
Failure to comply with instructions could result in personal injury or property damage.
Please explain to users how to operate and maintain the product after installation, and this booklet should be presented to users.
Please retain this booklet for future reference.
Cảm ơn bạn đã mua sản phẩm này của Panasonic.
Vui lòng đọc kỹ các hướng dẫn này trước khi lắp đặt, vận hành hoặc bảo trì sản phẩm của Panasonic.
Vui lòng đọc kỹ mục "CẨN TRỌNG KHI LẮP ĐẶT" (Tr.3~4) của tài liệu này trước khi lắp đặt.
Bạn có thể gây ra thương tích hoặc làm hư hại tài sản nếu không tuân thủ theo hướng dẫn.
Vui lòng giải thích cho người dùng biết cách vận hành và bảo dưỡng sản phẩm sau khi lắp đặt,
và bạn nên đưa cuốn hướng dẫn nhỏ này cho người dùng. Vui lòng giữ lại cuốn hướng dẫn nhỏ này để tham khảo về sau.
感谢您选用Panasonic产品。
安装、使用和维修产品前、请仔细阅读本安装使用说明书。
安装前、请务必先阅读"安装注意事项"(第3~4页)。
不遵照次说明书进行操作有可能导致人员受伤或财产损失。
安装完成后,请向顾客说明如何使用和维修此产品,并将此说明书
交给顾客保管。请妥善保管好此说明书以备日后参考。
ขอขอบคุ ณ สำหรั บ การเลื อ กซื ้ อ ผลิ ต ภั ณ ฑ ข องพานาโซนิ ค
กรุ ณ าอ า นคู ม ื อ นี ้ ใ ห ล ะเอี ย ดก อ นการติ ด ตั ้ ง ใช ง าน หรื อ ซ อ มบำรุ ง ผลิ ต ภั ณ ฑ ข องพานาโซนิ ค
กรุ ณ าอ า น "ข อ ควรระวั ง ในการติ ด ตั ้ ง " (หน า 3~4) ของคู ม ื อ นี ้ ใ ห ล ะเอี ย ดก อ นติ ด ตั ้ ง
การไม ป ฏิ บ ั ต ิ ต ามคู ม ื อ อาจทำให ไ ด ร ั บ บาดเจ็ บ หรื อ เกิ ด ความเสี ย หายต อ ทรั พ ย ส ิ น ได
กรุ ณ าอธิ บ ายวิ ธ ี ก ารใช ง านและการบำรุ ง รั ก ษาผลิ ต ภั ณ ฑ ให ก ั บ ผู ใ ช ห ลั ง จากการติ ด ตั ้ ง และมอบคู ม ื อ นี ้ ใ ห ก ั บ ผู ใช
กรุ ณ าเก็ บ คู ม ื อ นี ้ ไ ว เ พื ่ อ ใช อ า งอิ ง ในอนาคต
Installation and Operating Instructions
Hướng dẫn Lắp đặt và Vận hành
型号
Model No. /
Mã sản phẩm /
หมายเลขรุ น
HOW TO INSTALL .............................................. 7~11
安装方法
วิ ธ ี ก ารติ ด ตั ้ ง
TEST RUN .............................................................. 11
试运转
การทดสอบการทำงาน
MAINTENANCE ................................................ 12~13
日常使用及维修
WIRING DIAGRAM ................................................. 14
电器原理图
SPECIFICATIONS .................................................. 15
规格
ข อ มู ล จำเพาะ
安装使用说明书
คู ม ื อ การติ ด ตั ้ ง และการใช ง าน
Ventilating Fan
Quạt thông gió
พั ด ลมระบายอากาศ
FV-17CU8
FV-17CUT5
FV-24CU8
FV-17CHT5
FV-24CH8
FV-24CDT5
换气扇
Advertisement
Table of Contents

Related Manuals for Panasonic FV-17CUT5


Summarization of Contents
Safety Instructions
Warning Precautions
Must be treated seriously, may result in death or serious injury.
Caution Precautions
Must be treated seriously, may result in injury or physical damage.
Prohibited Actions
Symbol indicates items that are prohibited to do.
Mandatory Actions
Symbol indicates items that must be followed without failure.
Installation Cautions
Electrical Safety and Wiring Precautions
Ensure proper grounding, voltage compliance, wiring, and switches.
Installation Location Safety
Avoid installing in bathrooms or outdoors.
Installation Method & Structural Safety
Use approved methods, professional installation, and firm mounting.
Mounting Stability and Component Security
Ensure strong ceiling, tight components, and use of special parts.
Environmental and Usage Risk Prevention
Prevent gas backflow and product modification.
Minimum Installation Height Requirements
Maintain minimum height of 2.3m (2.5m for Malaysia) from floor.
Electrical Grounding in Ceiling
Prevent metal contact in ceiling to avoid fire hazards.
Installation Requirements
Steam Installation Prohibition
Do not install where there is steam to prevent aging/breakdown.
Inspection Hole Size
Set a square inspection hole of at least 45 cm for maintenance.
High Temperature Installation Prohibition
Do not install in high temperature places to prevent aging/breakdown.
Oil Fume Exposure Prohibition
Do not install where exposed to oil fumes to prevent aging/breakdown.
Air Intake Opening
Provide appropriate opening for air intake for proper function.
Slanting Ceiling Installation Prohibition
Do not install on slanting ceiling.
Condensate Water Prevention
Prevent condensed water from flowing back into the body.
Dusty Environment Prohibition
Do not install in dusty places to prevent aging/breakdown.
Required Accessories
Purchase separate all-pole and leakage protection switches.
Supplied Accessories
Self-Tapping Screws
Screws for fixing frame and adaptor assembly.
Louver
The cover for the ventilation outlet.
Installation and Operating Manual
Manual for installation and operation.
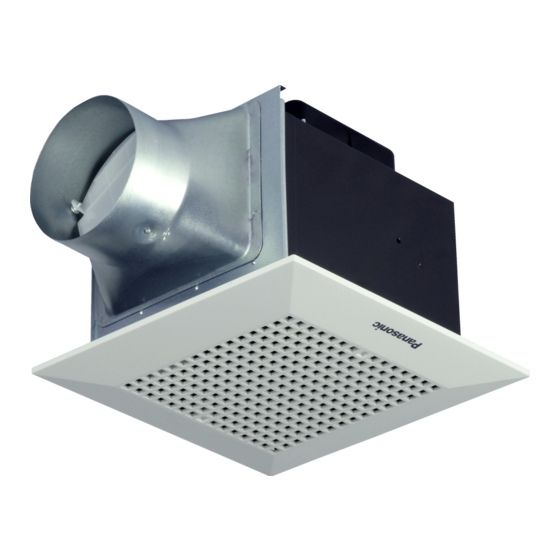
Parts Name and Dimensions
Fan Body
The main unit of the ventilation fan.
Motor
The power unit driving the fan.
Condenser Box / Junction Box
Electrical connection point.
Blade
The rotating part of the fan.
Adaptor Assembly
Connects duct to fan body.
How to Install
Method 1: Install with Wooden Joist
Step-by-step guide for installing fan body with wooden joist.
Construct Wooden Frame
Build and attach wooden frame horizontally to joist.
Remove Adaptor Assembly
Remove adaptor assembly by unscrewing hexagon screw.
Attach Adaptor Assembly to Frame
Secure adaptor assembly to wooden frame using self-tapping screws.
Power Connection Steps
Connect power cord, ensure firm wiring, use correct terminals.
Mounting Fan Body
Route cord, mount body, ensure sufficient cord length, avoid pinching.
Secure Fan Body to Frame
Firmly fix fan body to frame with 4 self-tapping screws.
Secure Adaptor and Fan Body
Firmly secure adaptor assembly and fan body with hexagon screw.
Confirm Firm Installation
Confirm fan body and adaptor assembly are installed firmly after installation.
Connect Duct
Connect the duct to the unit.
Install Ceiling Board
Install ceiling board, maintaining a 2-3mm gap between flange and board.
Install Louver Assembly
Install louver assembly by inserting spring into groove.
Method 2: Install with Anchor Bolt
Step-by-step guide for installing fan body with anchor bolt.
Secure Suspension Bracket
Secure suspension bracket with screws.
Mount Fan Body on Anchor Bolt
Install fan body onto anchor bolt, checking ceiling clearance.
Connect Power Cord (Method 2)
Connect power cord as per diagram (referencing page 8).
Install Louver Assembly (Method 2)
Install louver assembly by inserting spring into groove.
Connect Duct (Method 2)
Connect duct to adaptor, securing with tape.
Secure Duct Connection
Insert duct into adaptor and secure tightly with adhesive tape.
Install Outer Wall Accessories
Install pipe hood or vent cap on the outer wall.
Test Run
Perform Test Run Checks
Check for anomalies after connecting power.
Blade Operation Check
Check if the fan blades operate properly.
Blade Rotation Direction Check
Verify fan blades rotate clockwise.
Blade Vibration and Noise Check
Check for abnormal vibration or noise from fan blades.
Troubleshoot Installation Issues
Check installation if anomalies occur.
Maintenance
General Maintenance Safety
Precautions for cleaning, flammable gas, water, and power disconnection.
User & Location Guidelines
Guidelines for suitable locations, unused product removal, and user capabilities.
Cleaning Safety Rules
Rules for water temperature, cleaning agents, and avoiding immersion.
Cleaning Procedures
Steps for removing, cleaning, and reinstalling parts like louvers and blades.
Wiring Diagram
Wiring Diagrams
Electrical connection diagrams for various fan models.
Specifications
Product Specifications
Technical details including voltage, power, air delivery, noise, and weight.
Need help?
Do you have a question about the FV-17CUT5 and is the answer not in the manual?
Questions and answers