
Related Manuals for Travel Vision TVA 80


Summary of Contents for Travel Vision TVA 80
- Page 1 USER MANUAL Travel Vision TVA 65/80 (Premium) ® Version 2.3 August 2017 (Eutelsat 9 for Hispasat) All from 2016 www.travel-vision.com...
- Page 2 Travel Vision TVA 65/80 (Premium) ® is a registered trade mark of TravelVision BV. Please first read this user manual before putting your Travel Vision TVA 65/80 (Premium) ® into operation. Follow all instructions and carefully observe the directions presented in this manual.
-
Page 3: Table Of Contents
Tips before going on vacation ....................4 Packaging Travel Vision TVA 65/80 (PREMIUM) ® ..............5 Shipment check list Travel Vision TVA 65/80 (PREMIUM) ® ............ 5 Antenna outdoor unit Travel Vision TVA 65/80 (PREMIUM) ® ..........5 Parts Travel Vision TVA 65/80 (PREMIUM) ® ................6 Determine installation position .................... -
Page 4: Safety Instructions And Warnings
Carefully read this user manual before using the device. Scope of use Your Travel Vision TVA 65/80 premium ® has been developed to automatically search and find a satellite signal on a parked vehicle. This device is only intended for use by consumers and outdoors. -
Page 5: Packaging Travel Vision Tva 65/80 (Premium)
Packaging Travel Vision TVA 65/80 (PREMIUM) ® The Travel Vision TVA 65/80 (PREMIUM) ® is packed in a wooden box, the system is fixed by means of 4 screws. Before opening the box, check the box may not be deformed and may not have serious and obvious signs of damage such as cracks or dents resulting from impact. -
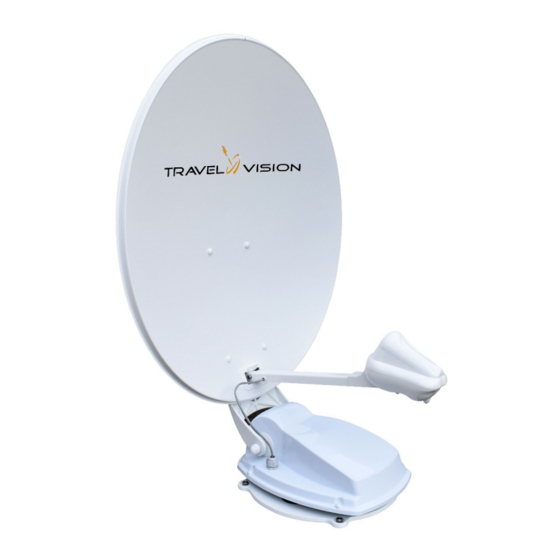
Page 6: Parts Travel Vision Tva 65/80 (Premium)
Parts Travel Vision TVA 65/80 (PREMIUM) ® 5 m Coaxialcable 5 m Controle cable 1,5 m Coaxialcable Controlpanel Controlebox Mounting controlbox Support Bracket Junctionbox Page... -
Page 7: Determine Installation Position
Determine installation position By determine the antenna installation position you should check: • Before installing the system, make sure that the surface is flat, dry and clean, on which the antenna will be mounted. • The equipment must only be installed on hard vehicle roofs which are sufficiently strong and inherently stable. -
Page 8: Determine The Cable Wiring Through Interior
Determine the cable wiring through interior Determine the cable wiring through interior and position of the control box, advised the control box close to the TV and receiver. Electric diagram Travel Vision TVA 65/80 (PREMIUM) ® Page... -
Page 9: Installating
Installating Before installing the system, make sure that the place is dry and clean, on which the antenna will be mounted. It is important that the closing direction of the antenna should be towards back of the vehicle. In this position, the wind effect is at the minimum level during the driving of the vehicle when the antenna is closed. - Page 10 Run the cables from roof through the interior to the control box Connect the motor control cable to motor control (4) control box Connect the 5-m coaxial cable to antenna Input (1) control box Optional with Twin LNB, connect 2 coaxial cable on 2 receiver Connect the 1,5-m coaxial cable from Loop Out (2) control box to receiver...
-
Page 11: Function Control Panel And Control Box
Function control panel and control box Control box: Steering The built-in electronics provides as system operator. Monitoring Display of the system status Updating updating software. On/Off (Power supply on/off) Power light Red Con light green USB port Controlbox front Controlepanel: Control Giving instructions to the control box e.g. -
Page 12: Lnb And Skew
Twin LNB to connect a second independent receiver. The TVA 65 with single LNB, suitable for connection of 1 receiver The TVA 80 (Premium) with a twin LNB, which allows connection of two receivers that can operate independently. - Page 13 Manual setting skew The LNB is provided in a white plastic cover, which can be opened to unscrew the two screws on the bottom of this cover. When the cover is opened, the LNB with a degree distribution becomes visible. Positive degree Skew LNB is clockwise rotation (Viewing from the LNB into the mirror) negative degree in counter clockwise direction.
-
Page 14: Use, Search For Satellite
(13). The elevation (height) also starts at the position that the satellite was previously located. Once the TVA 65 has located the satellite, it will optimally align with small steps after checking. To indicate that the satellite has been located the chosen satellite LED (13) flashes quickly. -
Page 15: Select Satellite
Select satellite: At the initial commissioning the system is pre-selected for the Astra 3 satellite. From this point, the system will display the last selected satellite on the control panel during start-up. If the system is not in operation press the stand-by button (12.) on the control panel to start the search process. -
Page 16: Update
Travel Vision BV, but they are subject to change. When these frequencies change, Travel Vision BV will release new software so that the system can use the new frequencies. This software is freely available for download at the website www.travel-vision.com... - Page 17 9.3 check Firmware version Checking the currently installed firmware is possible by making a log file from the control box and checking on a Logfile TVA controle box: Power off the antenna with control box, button (6) Insert an empty USB flash drive in slot (9) of control box Power On the antenna with control box, button RED led (7) turns on and green led (8) flashes 4 times and then continuously.
-
Page 18: Troubleshooting
You are possibly outside the broadcast area of the desired satellite. Check footprint in section 11. If you are sure that the above does not apply: Check if the latest Travel Vision TVA ® software version has been installed for any possibly changed satellite frequencies. See www.travel-vision.com or consult your dealer. -
Page 19: Explanation Of Error Codes In The Control Panel
We will answer your question as soon as possible. It is important that your question also indicates what type of system and control box is installed: System: Controlebox: TVA 65 MTC-3710 (front controlbox) TVA 80 MTC-3811 (front controlbox) TVA 80... -
Page 20: Footprint Tva Systems
Foorprint TVA systems: Page 20... -
Page 21: Technical Specifications
Operating relative humidity range : 0 ~ 98 % Warranty conditions Warranty is only applicable when the Travel Vision system is set up properly and when it is used in accordance with the procedures as described in this user manual.
Need help?
Do you have a question about the TVA 80 and is the answer not in the manual?
Questions and answers